Epson ELPAP08 Bedienungsanleitung
Quick wireless connection usb key
Inhaltsverzeichnis
Verfügbare Sprachen
Verfügbare Sprachen
Quicklinks
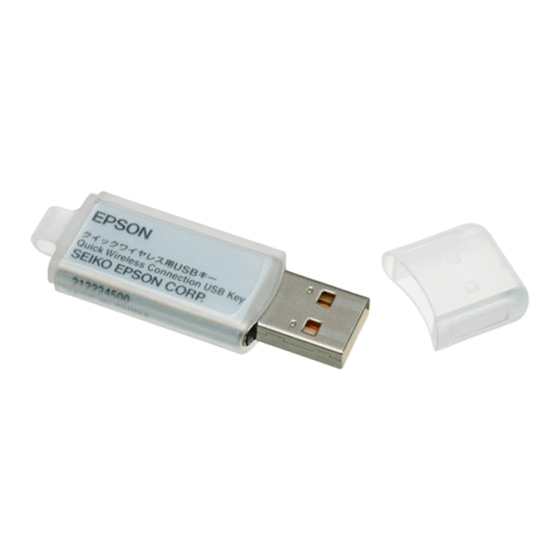
Quick Wireless Connection USB Key
取扱説明書 ......................................2
User's Guide............................. 10
Guide de l'utilisateur ............. 18
Bedienungsanleitung ............ 28
Manuale dell'utente................ 38
Manual de usuario.................. 48
Manual do Utilizador.............. 58
使用说明书 ................................... 68
使用說明書 ................................... 76
Inhaltsverzeichnis

Verwandte Anleitungen für Epson ELPAP08

Inhaltszusammenfassung für Epson ELPAP08
- Seite 1 Quick Wireless Connection USB Key 取扱説明書 ........2 User's Guide......10 Guide de l'utilisateur ..... 18 Bedienungsanleitung .... 28 Manuale dell'utente....38 Manual de usuario....48 Manual do Utilizador....58 使用说明书 ........68 使用說明書 ........76...
-
Seite 28: Vor Der Verwendung
Vor der Verwendung Wir bedanken uns bei Ihnen für den Kauf dieses Produkts. Lesen Sie für eine sichere und korrekte Verwendung des Gerätes diese Anleitung sorgfältig durch. Bewahren Sie bitte diese Anleitung zur Lösung eventuell auftretender Probleme sorgfältig auf. * In dieser Anleitung nicht enthaltene detailliertere Informationen finden Sie in der mit dem Projektor gelieferten „Benutzerhandbuch“. - Seite 29 Warnung • Kontrollieren Sie bei der Handhabung des Gerätes, ob alle Stecker richtig angeschlossen sind. Bei falschen Steckeranschlüssen kann an den Steckern Rauch austreten, was zu einem Brand führen kann. • Bewahren Sie dieses Gerät stets außerhalb der Reichweite von Kleinkindern auf.
-
Seite 30: Hinweise Zur Verwendung Und Lagerung
Hinweise zur Verwendung und Lagerung • Lassen Sie das Gerät nicht fallen und setzen Sie es keinen starken Stößen aus. • Zwischen -10 und 60 °C lagern. * Beim Auftreten von Störungen oder anderen Problemen darf das Gerät nicht mehr verwendet werden. Wenden Sie sich an Ihren Händler oder an den nächstgelegenen Service. -
Seite 31: Funktionsweise Des Schlüssels Für Quick Wireless Connection
Funktionsweise des Schlüssels für Quick Wireless Connection Mit dem Quick Wireless Connection USB Key (nachfolgend bezeichnet als „USB-Schlüssel“) können ein Computer und ein Projektor im Netzwerk einfach miteinander verbunden werden. Wenn die Netzwerkinformationen des Projektors auf dem USB-Schlüssel gespeichert sind und der USB-Schlüssel in einen Computer eingesteckt wird, kann der Computer ohne Aufrufen besonderer Anwendungen mit dem Projektor verbunden werden. -
Seite 32: Projizieren Von Bildern
Projizieren von Bildern 1. Anschluss des USB-Schlüssels an den Projektor Vorgehen A Schalten Sie den Projektor ein und öffnen Sie den Einblendschieber. B Schließen Sie den USB-Schlüssel an den USB-Anschluss des Projektors an. Die Netzwerkinformationen des Projektors werden an den USB-Anschluss übertragen und auf dem Schlüssel gespeichert. - Seite 33 2. Anschluss des USB-Schlüssels an den Computer Vorgehen A Schalten Sie den Computer ein und schließen Sie den USB- Schlüssel an den USB-Anschluss des Computers an. Führen Sie folgende Schritte aus, wenn Sie den USB-Schlüssel zum ersten Mal einstecken. • Die Meldung „Willkommen zum Quick Wireless Connection Installationsassistenten“...
- Seite 34 Während dieser Zeit darf weder der USB-Schlüssel entfernt noch der Projektor ausgeschaltet werden. • Wenn die Bilder nicht projiziert werden, klicken Sie auf „Start“ - „Alle Programme“ - „EPSON Projector“ - „Quick Wireless Connection“ - „Quick Wireless Connection Vx.x“. •...
- Seite 35 3. Beenden der Projektion Wenn Sie die Projektion von Bildern beenden möchten, führen Sie den Befehl „Externes Gerät entfernen“ über das entsprechende Taskleisten- Symbol aus und entfernen Sie dann den USB-Schlüssel. Das Symbol „Hardware sicher entfernen“ wird unter Windows 2000 nicht in der Taskleiste angezeigt.
-
Seite 36: Optionseinstellungen
Optionseinstellungen Klicken Sie zum Einstellen der Optionen für Quick Wireless Connection auf „Start“ - „Alle Programme“ - „EPSON Projector“ - „Quick Wireless Connection“ - „Einstellungen für Quick Wireless Connection Vx.x“. Registerkarte Allgemeine Einstellungen Kommunikation Legen Sie fest, ob die Daten verschlüsselt verschlüsseln... -
Seite 37: Probleme Beim Projizieren Mit Quick Wireless Connection
Connection • Zu Informationen über die Fehlersuche klicken Sie auf „Start“ - „Alle Programme“ - „EPSON Projector“ - „Quick Wireless Connection“ - „Quick Wireless Connection Vx.x Problemlösung“. Der Bildschirm zu Quick Wireless Connection Problemlösung kann auch durch Klicken auf die Schaltfläche [Problemlösung] in der Fehlermeldung aufgerufen werden.