Cisco Webex Room 70 Dual Installationshandbuch

Verwandte Anleitungen für Cisco Webex Room 70 Dual


Inhaltszusammenfassung für Cisco Webex Room 70 Dual
- Seite 1 Cisco Webex Room 70 Dual Installation Guide: Floor Stand Guide d’installation : fixation au sol Guía de instalación: soporte para suelo Manual de Instalação: suporte de Chão Guida per l’installazione: cavalletto Installationshandbuch: Bodenständer...
- Seite 3 We recommend 4 people working together to mount this system. The same set of screws and tools comes with several mounting options. There Follow local regulations. may be more screws and tools than you need. The system is tall, so you may need a stepladder to complete the Le même ensemble de vis et d’outils est utilisé...
- Seite 4 The box label that is referred in the mounting steps. L’étiquette de la boîte mentionnée dans les étapes d’assemblage. La etiqueta de la caja a la que se hace referencia en los pasos de montaje. O rótulo da caixa que é mencionado nos passos da montagem.
- Seite 5 Choose between two floor stand options Option A: Free standing floor stand. • Mount the feet in step 4. Option B: Floor stand secured to the wall. • Mount the wall stand brackets in step 4. All other mounting steps apply to both options, even though the illustrations show a free standing floor stand.
- Seite 6 Option B: Floor stand secured to the wall Option B : support au sol fixé au mur / Opción B: soporte de suelo sujeto a la pared / Opção B: Suporte de chão de montagem na parede / Opzione B: montaggio a pavimento con fissaggio a parete / Option B: Bodenstativ mit Wandbefestigung Due to the size and mass of this product, it is important that Due to the variety of wall constructions, the installer have to bring the the wall-secured system is safely installed according to these...
- Seite 7 The covers will be put back in step 19. Les caches seront remis en place à l’étape 19. Se volverán a colocar las cubiertas en el paso 19. As coberturas voltarão a ser colocadas no passo 19. Le coperture verranno reinserite nel passaggio 19. Die Abdeckungen werden in Schritt 19 wieder angebracht.
- Seite 8 10 × M6x12 Hex, 4 mm 8 × M6x12 Hex, 4 mm...
- Seite 9 2 × M6x12 Hex, 4 mm...
- Seite 10 Option A: Free standing floor stand Option B: Floor stand secured to the wall Option A : support au sol autonome / Option B : support au sol fixé au mur / Opción A: soporte de suelo independiente / Opción B: soporte de suelo sujeto a la pared / Opção A: Suporte de chão livre / Opção B: Suporte de chão de montagem na parede / Opzione A: montaggio libero a pavimento /...
- Seite 11 The wall stand must rest on the floor because the brackets alone are not designed to carry the weight of the product. The wall stand brackets must be securely fixed to the wall by qualified personnel to prevent serious hazard due to the system falling forward.
- Seite 12 188 lb 85 kg Use the lifting handles to avoid trapping your fingers. Utilisez les poignées de levage pour ne pas vous coincer les doigts. Utilice las asas de elevación para evitar pillarse los dedos. Four people must work together to mount the screen. At least two people Utilize as pegas de elevação para evitar lesões nos dedos.
- Seite 13 The wing nut screws must enter the center slot on both sides. Les vis à ailettes doivent s’insérer dans le logement central des deux côtés. Los tornillos de palomilla deben entrar en las ranuras centrales de ambos laterales. Os parafusos das porcas de orelha devem ser introduzidos na ranhura central, em ambos os lados.
- Seite 14 4 × M6x12 Hex, 4 mm 4 × M6x90 Hex, 4 mm...
- Seite 15 A power cable is attached to the right side of the screen. Connect it to the nearby connector. Let the other end hang freely. It will be connected to the second screen in step 10. Un câble d’alimentation est connecté au côté droit de l’écran.
- Seite 16 188 lb 85 kg Use the lifting handles to avoid trapping your fingers. Utilisez les poignées de levage pour ne pas vous coincer les doigts. Utilice las asas de elevación para evitar pillarse los dedos. Four people must work together to mount the screen. At least two people Utilize as pegas de elevação para evitar lesões nos dedos.
- Seite 17 The wing nut screws must enter the center slot on both sides. Les vis à ailettes doivent s’insérer dans le logement central des deux côtés. Los tornillos de palomilla deben entrar en las ranuras centrales de ambos laterales. Os parafusos das porcas de orelha devem ser introduzidos na ranhura central, em ambos os lados.
- Seite 18 4 × M6x12 Hex, 4 mm 4 × M6x90 Hex, 4 mm...
- Seite 19 Connect the power cable from step 7 to the nearby socket on the second screen. If the system is close to the wall, connect the cable from below. Branchez le câble d’alimentation de l’étape 7 sur le connecteur du deuxième écran. Si le système est près du mur, connectez le câble par en dessous.
-
Seite 20: Tighten The Screws
5 × M6x12 Hex, 4 mm 4 × M6x12 Finger tight only at this point Serrez légèrement les vis / En este punto, apriételos solo con los dedos / Aperte com os dedos apenas neste ponto / In questa fase stringere solo a mano / An dieser Stelle nur handfest ziehen 1 ×... - Seite 21 G, H, I Step is mandatory for a free standing system, and optional for a wall-secured system. L’étape 1 est obligatoire si le système est monté sur le support au sol autonome et facultative si le système est fixé au mur. El paso 1 es obligatorio para los sistemas de soporte independientes y...
- Seite 22 COLOR HDMI DO NOT CALIBRATION REMOVE...
- Seite 24 Check that the cables are not pinched when you tilt the camera back into normal position. Vérifiez que les câbles ne sont pas coincés lorsque vous inclinez la caméra dans sa position normale. Compruebe que los cables no quedan atrapados cuando incline la cámara de nuevo a su posición normal.
- Seite 25 1 × PT4x10 Torx T20...
- Seite 26 F, K 4 m / 12.5 m [13.1 ft / 41.0 ft] (0 - 2) (1 - 3)
- Seite 29 Wear gloves to prevent staining the fabric. Portez des gants pour éviter de tacher le tissu. Use guantes para evitar manchar el tejido. Utilize luvas para evitar manchar o tecido. Indossare dei guanti per evitare di macchiare il tessuto. Tragen Sie Handschuhe, um ein Verschmutzen des Gewebes zu vermeiden.
- Seite 30 Follow the instructions on the Touch 10 user interface. Suivez les instructions sur le panneau tactile Touch 10. Siga las instrucciones de la interfaz del usuario Touch 10. Siga as instruções apresentadas na interface do utilizador Touch 10. Seguire le istruzioni sull’interfaccia utente Touch 10. Befolgen Sie die Anweisungen auf der Touch 10-Benutzeroberfläche.
- Seite 31 Power (100-240 VAC, 5.5-2.5 A, 50/60 Hz) Network connectivity: Use either Ethernet LAN, as shown in the illustrations, or Wi-Fi. Non-radio devices, which have the letters • Always use the provided power cable. ‘NR’ in their product identifier (PID), don’t support Wi-Fi. •...
- Seite 32 How to release the camera Comment enlever la caméra Cómo extraer la cámara Como soltar a câmara Come rilasciare la telecamera So lösen Sie die Kamera...
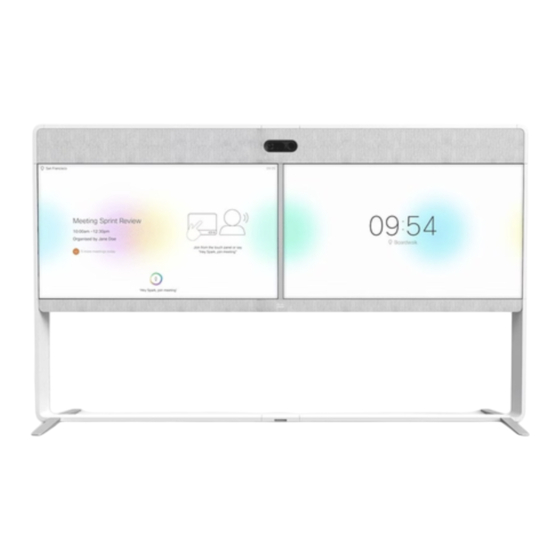
- Seite 34 Room 70 Dual 1. Camera 1. Camera Caméra / Cámara / Câmara / 2. Loudspeakers Videocamera / Kamera 2. Loudspeakers Haut-parleurs / Altavoces / Altifalantes / Altoparlanti / Lautsprecher 3. Codec and connector panel (behind 3. Codec and side cover) connector panel Codec et panneau de connexion (behind side...
- Seite 35 A. Factory reset A. Factory reset Rétablissement des paramètres d’usine / Restablecimiento de los parámetros de fábrica / Reposição de predefinições de fábrica / Ripristino dei valori predefiniti / Zurücksetzen auf Werkseinstellungen B. Touch panel B. Touch panel (user interface) Écran tactile (interface utilisateur) / Panel táctil (interfaz del usuario) / Painel tátil (interface de utilizador) / Pannello touch (interfaccia utente) / Bedienfeld (Benutzeroberfläche) C.
- Seite 36 Room 70 Dual 3169 mm [124.8 in.] 1920 mm [75.6 in.] 214 kg [472 lb] 920 mm [36.3 in.]...
- Seite 37 92 mm [3.6 in.] 3169 mm [124.8 in.] 215 mm 156 mm / 215 mm [8.5 in.] [6.2 in. / 8.5 in.] 33 mm [1.3 in.] 1920 mm [75.6 in.] 214 kg [472 lb] 156 mm [6.2 in.]...
- Seite 38 Use the first link if your device is registered to Consultez le portail Cisco Project Workplace pour trouver des conseils et the Cisco Webex service and the second link if the device is registered to recommendations lorsque vous préparez votre bureau ou votre salle de another service.
- Seite 40 Cisco e qualquer outra empresa. (1110R) Cisco e il logo Cisco sono marchi o marchi registrati di Cisco e/o dei relativi affiliati negli Stati Uniti e in altri paesi. Per visualizzare l’elenco di marchi Cisco, visitare il sito Web all’indirizzo: www.cisco.