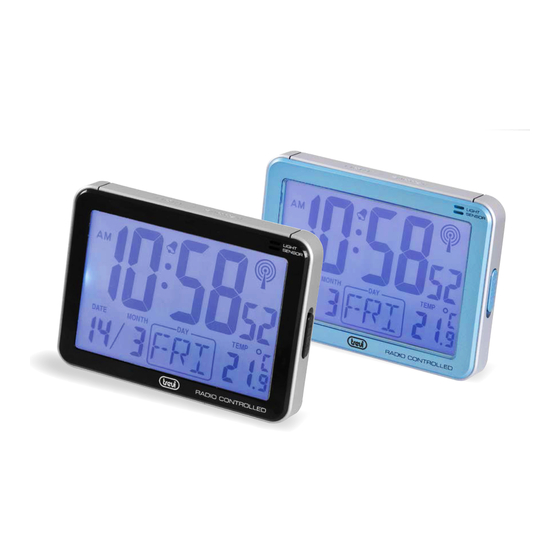
Trevi SLD 3101 Bedienungsanleitung
Quicklinks
ITALIANO
FUNZIONE RADIO CONTROLLATA
1.
Togliere il coperchio della batteria.(1)
Seguire le indicazioni di polarità e
installare 2 batterie AA 1,5 V.
Chiudere il coperchio.
Una volta installate le batterie l'orologio
2.
riceverà automaticamente il segnale Radio
Controllato. La durata della ricezione del
segnale è di circa 2-8 minuti.
3.
Il tempo di ricezione normale è 03:00 ,
04:00 , 05:00 , 06:00 . Questo è il simbolo
del segnale Radio Controllato
apparirà sul display.
4.
Premere il tasto UP ( 3) in qualsiasi
momento si voglia ricevere il segnale
Radio Controllato.
Note: Non in tutte le zone d'Italia può essere
possibile ricevere il segnale Radio Controllato. In
questo caso sarà necessario impostare l'ora
manualmente.
IMPOSTAZIONE MANUALE ORA &
CALENDARIO
1.
Premere il tasto TM SET (2) per alcuni
secondi . Le cifre lampeggeranno.
Premere il tasto UP (3) o DOWN (4) per
impostare l'anno corretto ( massimo ANNO
: 2099 ) .
2.
Premere il tasto TM SET (2) per passare
all'impostazione successiva (Mese - >
Data - > Calendario Lingua - Display > 12
o 24 ore - > Orario >Temperatura C o
display F.
3.
Quando la cifra lampeggerà, premere UP
(3) o DOWN (4). impostare la
visualizzazione corretta . Tenere premuto il
tasto UP( 3) o DOWN (4) per l'
avanzamento rapido.
4.
Per terminare l'impostazione , premere il
tasto TM SET (2) .
LINGUE CALENDARIO
Le lingue disponibili per il calendario sono 5: ENG =
Inglese , DEU = tedesco , FRA = francese , ITA =
italiano , ESP = spagnolo .
TEMPERATURA
Temperatura: -9 ° C a +50 ° C ( -15 ° F a 122 ° F )
SENSORE LUCE
Far scorrere l' interruttore SENSOR "ON / OFF " alla
posizione " ON" , la luce si attiverà automaticamente al
buio. Per disattivare la funzione di luce SENSOR , far
scorrere l' interruttore del sensore su " OFF" .
IMPOSTAZIONE ALLARME
1.
Premere il tasto ALM SET (5) per alcuni
secondi .
La cifra delle ore lampeggerà . Premere
UP (3) o DOWN (4) per impostare l'ora
corretta .
2.
Premere il tasto ALM SET (5) per passare
all'impostazione successiva .
Le cifre dei minuti lampeggeranno.
Premere UP (3) o DOWN (4) per impostare
i minuti .
Tenere premuto il pulsante UP (3) o
DOWN(4) per l'avanzamento rapido.
Portare l'interruttore (6) ON / OFF su ON
3.
per avviare la funzione di allarme.
4.
Per terminare l' impostazione, premere
ALM SET (5) e TM SET (2) tasto per
uscire .
LUCE / SNOOZE
1.
Premere LIGHT / SNOOZE (7) per
accendere la luce .
2.
Quando il suono dell'allarme si avvia,
premere LUCE / SNOOZE (7) per fermare
l'allarme l'allarme si ripeterà dopo 5 minuti.
Portare l'interruttore (6) ON / OFF allarme
3.
in posizione OFF per arrestare la funzione
di allarme.
ENGLISH
RADIO CONTROLLED FUNCTION
1.
Remove the battery cover.(1) Follow the
polarity direction and install 2 pcs. AA size
1.5V batteries into the battery
compartment. Close the battery cover.
2.
After the battery put into the clock, it will
receive the Radio Controlled Signal
automatically. Duration for system power
on receiving or coercive receiving is about
che
2-8 minutes.
3.
The normal receiving time is 3.00 am, 4:00
am, 5:00 am,6:00 am. The Radio
Controlled Signal
4.
Press the UP button(3) any time to
manual receive the Radio Controlled
Signal.
MANUAL SETTING TIME & CALENDAR
1.
Press TM SET button(2) for few seconds.
The digits will flash. Press the UP button(3)
or DOWN button(4) to set the correct
Year(maximum YEAR:2099).
2.
Press TM SET button(2) to move the next
setting(Month -> Date -> Calendar
Language -> 12 or 24 hour display ->
Temperature C or F display. When the digit
flash, press UP(3) or DOWN(4) button to
set ore select the correct display. Hold the
UP(3) or DOWN(4) button to rapid
advance.
3.
To finish the setting, press TM SET
button(2).
CALENDAR LANGUAGES
Select different languages calendar display the DAY :
ENG =English, DEU=German ,FRA=French,
ITA=Italian, ESP= Spanish.
TEMPERATURE
Temperature range: -9°C to +50°C(-15°F to 122°F)
LIGHT SENSOR
Slide the SENSOR "ON/OFF" switch to "ON" position,
the light will be automatically on the dark and OFF
when light is detected. To turn off the SENSOR light
function, slide the SENSOR switch to "OFF".
SETTING ALARM
1.
Press the ALM SET button(5) for few
seconds.
The hour digit will flash. Press UP(3) or
DOWN(4) button to set the correct hour.
2.
Press ALM SET button(5) to move the next
setting.
The minute digit will flash. Press UP(3) or
DOWN(4) button to set the correct minute.
Hold the UP(3) or DOWN(4) button to rapid
advance.
3.
Push the ON/OFF(6) alarm button to ON
position to start the alarm function.
4.
To finish the setting, press TM SET(2)
button to exit.
LIGHT /SNOOZE
1.
Press LIGHT/SNOOZE(7) button to turn on
the light.
2.
When the alarm sound starts, press
LIGHT/SNOOZE(7) button to stop the
alarm sound and repeat alarm after 5
minutes.
3.
Push the ON/OFF(6) alarm button to OFF
position to stop the alarm function.
FRANÇAIS
FONCTION RADIOCOMMANDE
1.
Retirez le couvercle de la batterie.(1)
Suivre la direction de polarité et installer 2
pièces type AA 1.5V dans le compartiment
de la batterie . Fermez le couvercle de la
batterie .
2.
Après la batterie mis dans l'horloge , il
recevra automatiquement le signal radio
commandé . Durée de l'alimentation du
système sur réception ou la réception
coercitif est d'environ 2-8 minutes .
3.
Le temps de réception normale est 03h00 ,
04h00 , 05h00 , 06h00 . Le signal radio
commandé apparaîtra sur l'affichage .
4.
Appuyez sur le bouton UP(3) tout moment
manuel recevoir le signal radio commandé
.
HEURE ET CALENDRIER de réglage
will show on display.
MANUEL
1.
Appuyez bouton TM SET(2) pendant
quelques secondes. Les chiffres clignotent
. Appuyez sur le bouton UP(3) ou
DOWN(4) pour régler l'année ( AN
maximale : 2099 ) .
2.
Appuyez sur le bouton TM SET(2) pour
passer au réglage suivant ( Mois - > Date -
> Calendrier Langue - affichage > 12 ou 24
heures - . > Température C ou affichage F
Lorsque le flash de chiffres , appuyez sur
le bouton UP(3) ou DOWN(4) pour régler
sélectionner l'affichage correct . Maintenez
le bouton UP(3) ou DOWN(4) pour
l'avance rapide .
3.
Pour terminer appuyez bouton TM SET(2).
LANGUES DE CALENDRIER
Choisissez différents calendrier des langues afficher le
jour : ENG = Anglais , DEU = allemand , FRA =
français , ITA = italien , ESP = espagnol .
TEMPÉRATURE
Plage de température: -9 ° C à +50 ° C ( -15 ° F à 122
° F)
SENSOR DE Lumière
Faites glisser le SENSOR " ON / OFF" à la position
"ON" , la lumière sera automatiquement sur le sombre
et éteint quand la lumière est détectée . Pour
désactiver la fonction de capteur de lumière , faites
glisser le commutateur SENSOR sur "OFF".
Réglage DE L'ALARME
1.
Appuyez sur la touche ALM SET(5) pendant
quelques secondes.
Le chiffre des heures clignote . Appuyez
sur le bouton UP(3) ou DOWN(4) pour
régler l'heure correcte .
2.
Appuyez sur le bouton SET ALM(5) pour
déplacer le réglage suivant.
Le chiffre des minutes clignote . Appuyez
sur le bouton UP(3) ou DOWN(4) pour
régler les minutes .
3.
Maintenez le bouton UP(3) ou DOWN(4) pour
l'avance rapide .
4.
Appuyez sur le bouton ON / OFF(6) de
l'alarme à la position ON pour activer la
fonction d'alarme .
5.
Pour terminer appuyez SUR , bouton TM
SET(2) , sur de réglage pour quitter.
LIGHT / SNOOZE
1.
Appuyez sur le bouton LIGHT / SNOOZE(7)
pour allumer la lumière .
2.
Lorsque le son de l'alarme commence ,
appuyez sur le bouton LIGHT / SNOOZE(7)
Pour arrêter l'alarme sonore et répétition de
l'alarme après 5 minutes .
3.
Appuyez sur le bouton ON / OFF(6) de
l'alarme à la position OFF pour arrêter la
fonction d'alarme .
DEUTSCH

Verwandte Anleitungen für Trevi SLD 3101


Inhaltszusammenfassung für Trevi SLD 3101
- Seite 1 Portare l’interruttore (6) ON / OFF allarme ITALIANO FONCTION RADIOCOMMANDE in posizione OFF per arrestare la funzione Retirez le couvercle de la batterie.(1) di allarme. Suivre la direction de polarité et installer 2 FUNZIONE RADIO CONTROLLATA pièces type AA 1.5V dans le compartiment ENGLISH de la batterie .
- Seite 2 MANUAL DE AJUSTE DE LA HORA Y FUNK FUNKTION CALENDARIO 1 . Entfernen Sie die Batterieabdeckung(1). Folgen Sie Pulse el botón SET TM ( 2 ) durante unos der Polarität Richtung und installieren 2 Stck. AA 1,5 segundos. Los dígitos parpadearán. Pulse V-Batterien in das Batteriefach .