Herunterladen Inhalt Inhalt Diese Seite drucken

Werbung

Verfügbare Sprachen
  • DE

Verfügbare Sprachen

  • DEUTSCH, seite 24
DO219SV
Handleiding
Mode d'emploi
Gebrauchsanleitung
Instruction booklet
Manual de instrucciones
Návod k použití
Návod na použitie
Steelstofzuiger
Aspirateur-balai
Handstaubsauger
Stick vacuum cleaner
Aspirador escoba
Tyčový vysavač
Tyčový vysávač
PRODUCT OF

Werbung

Inhaltsverzeichnis
loading

Inhaltszusammenfassung für Linea DOMO DO219SV

  • Seite 1 DO219SV Handleiding Steelstofzuiger Mode d’emploi Aspirateur-balai Gebrauchsanleitung Handstaubsauger Instruction booklet Stick vacuum cleaner Manual de instrucciones Aspirador escoba Návod k použití Tyčový vysavač Návod na použitie Tyčový vysávač PRODUCT OF...
  • Seite 2 Lees aandachtig alle instructies - bewaar deze handleiding voor latere raadpleging. Lisez attentivement les instructions - gardez le mode d’emploi pour utilisation ultérieur. Lesen Sie genau die Anweisungen - bewahren Sie die Gebrauchsanleitung für spätere heranziehung. Read all instructions carefully - save this instruction manual for future reference. Lea detenidamente todas las instrucciones - Conserve este manual para futura referencia.
  • Seite 3: Garantie

    GARANTIE Geachte klant, Al onze producten ondergaan steeds een strenge kwaliteitscontrole, alvorens ze aan je worden aangeboden. Mocht je desondanks toch nog problemen hebben met jouw toestel, dan betreuren wij dit ten zeerste. In dat geval verzoeken wij je contact op te nemen met onze klantendienst. Onze medewerkers zullen je met plezier verder helpen.
  • Seite 4: Veiligheidsvoorschriften

    VEILIGHEIDSVOORSCHRIFTEN · Lees alle instructies voor gebruik. · Dit toestel mag gebruikt worden door kinderen vanaf 16 jaar en ouder, en door personen met een fysieke of sensoriële beperking of mensen met een beperkte mentale capaciteit of gebrek aan ervaring of kennis, op voorwaarde dat deze personen toezicht krijgen of instructies hebben gekregen over het gebruik van het toestel op een veilige manier en dat ze ook de gevaren kennen bij het gebruik van het toestel.
  • Seite 5 voor ongelukken die een gevolg zijn van verkeerd gebruik van het toestel, of het niet naleven van de regels zoals ze vermeld zijn in deze handleiding. · Dompel het toestel, het elektrisch snoer of de stekker nooit onder in water of een andere vloeistof.
  • Seite 6 ONDERDELEN Aan-uitknop Snelheidsregelaar Indicator batterijniveau Stofreservoir Motorgedeelte Ontgrendelknop steel Ontgrendelknop stofreservoir Ontgrendelknop batterij Steel 10. Vloerzuigmond met roterende vloerborstel 11. Ontgrendeling vloerzuigmond 12. Adapter 13. Stofborsteltje 14. Klepje filters in het motorgedeelte 15. Kierenzuiger 16. Muurbevestiging DO219SV...
  • Seite 7: Montage

    MONTAGE DE HANDSTOFZUIGER Klik de vloerborstel, het stofborsteltje of de kierenzuiger vast in de opening vooraan het toestel. CLICK Schuif de batterij onderaan in het motorgedeelte. Duw totdat ze vastklikt in het motorgedeelte. CLICK DE STEELSTOFZUIGER Klik de steel vast in de zuigopening vooraan het toestel. Klik de vloerborstel, het stofborsteltje of de kierenzuiger vast in de steel.
  • Seite 8 OPLADEN · Laad het toestel voor het eerste gebruik 24 uur op om zo de volledige capaciteit van de batterij te kunnen benutten. · Koppel de adapter eerst aan het toestel en steek de adapter vervolgens in het stopcontact. · De indicator van het batterijniveau zal nu oplichten en geeft aan wanneer het toestel volledig opgeladen is.
  • Seite 9: Reiniging En Onderhoud

    OPBERGEN STAAND OPBERGEN · Plaats de vloerzuigmond op de steel. Maak de motoreenheid los van de steel. · De steel met vloerzuigmond kan rechtop blijven staan. Je kan de motoreenheid op de bevestiging aan de steel schuiven. MUURBEVESTIGING · Hou de muurbevestiging in verticale positie tegen de muur. ·...
  • Seite 10 DE FILTERS IN HET STOFRESERVOIR In het stofreservoir bevinden zich 2 filters : de plastic grofvuilfilter (A) en de hepafilter (B). Verwijder het stofreservoir van het motorgedeelte door deze te draaien in wijzerzin. Zorg ervoor dat het streepje op de motoreenheid overeen komt met het open slot-symbool. Trek de filters uit het stofreservoir.
  • Seite 11 Verwijder de 2 stoffilters. Blaas de filters proper met perslucht. Je kan de filters ook reinigen onder stromend water. Let hierbij wel goed op dat deze volledig droog zijn alvorens het toestel terug te gebruiken. Plaats de filters terug in het motorgedeelte. Zorg ervoor dat de zwarte filter bovenaan zit.
  • Seite 12: Probleem En Oplossing

    HET TOESTEL PROPER MAKEN Maak het toestel schoon met een vochtige doek. Droog nadien het toestel goed af. Dompel het toestel nooit onder in water. PROBLEEM EN OPLOSSING Probleem Oplossing Het toestel start niet. · De batterij is leeg. Laad het toestel op. ·...
  • Seite 13: Milieurichtlijnen

    MILIEURICHTLIJNEN Dit symbool op het product of op de verpakking wijst erop dat dit product niet als huishoudafval mag worden behandeld. Het moet naar een plaats worden gebracht waar elektrische en elektronische apparatuur wordt gerecycleerd. Als je ervoor zorgt dat dit product op de correcte manier wordt verwijderd, voorkom je mogelijk voor mens en milieu negatieve gevolgen die zich zouden kunnen voordoen in geval van verkeerde afvalbehandeling.
  • Seite 14 GARANTIE Cher client, Tous nos produits sont soumis à des contrôles qualité stricts avant d’être proposés à la vente. Si vous deviez toutefois rencontrer un problème avec votre appareil, nous le déplorons vivement. Dans ce cas, nous vous invitons à prendre contact avec notre service à la clientèle. Nos collaboratrices se feront un plaisir de vous aider ! +32 14 21 71 91 info@linea2000.be...
  • Seite 15: Consignes De Sécurité

    CONSIGNES DE SÉCURITÉ · Veuillez lire toutes les instructions avant d’utiliser l’appareil. · Cet appareil peut être utilisé par des enfants âgés d’au moins 16 ans et par des personnes ayant des capacités physiques, sensorielles ou mentales réduites ou dénuées d’expérience ou de connaissance, s’ils (si elles) sont correctement surveillé(e)s ou si des instructions relatives à...
  • Seite 16 autre milieu liquide. · Tenez le cordon éloigné de rebords tranchants et de pièces brûlantes ou d’autres sources de chaleur. · Avant la première utilisation, enlevez tous les éléments d’emballage et les éventuels autocollants promotionnels. · N’utilisez pas l’aspirateur pour aspirer des détergents, liquides, aiguilles, allumettes et autres liquides, objets tranchants ou inflammables.
  • Seite 17 PARTIES Bouton marche/arrêt Régulateur de vitesse Indicateur de batterie Réservoir de poussière Bloc moteur Bouton de déverrouillage du manche Bouton de déverrouillage du réservoir de poussière Bouton de déverrouillage de la batterie Manche 10. Suceur pour sols avec brosse de sols rotative 11.
  • Seite 18 MONTAGE L’ASPIRATEUR À MAIN Encliquetez la brosse de sol motorisée, la petite brosse à poussières ou le suceur plat dans l’ouverture située sur l’avant de l’appareil. CLICK Glissez la batterie dans le bas du bloc moteur. Enfoncez-la jusqu’à ce qu’elle encliquète dans le bloc moteur.
  • Seite 19 CHARGE · Chargez l’appareil pendant 24 heures avant la première utilisation, afin de pouvoir utiliser l’entière capacité de la batterie. · Raccordez en premier lieu le chargeur à l’appareil et branchez ensuite le chargeur. · L’indicateur de batterie s’allume et vous permet de savoir quand l’appareil est totalement chargé.
  • Seite 20: Nettoyage Et Entretien

    RANGEMENT RANGEMENT À LA VERTICALE · Placez le suceur pour sols sur le manche. Détachez le bloc moteur du manche. · Vous pouvez placer le manche avec suceur à la verticale, et glisser le bloc moteur sur l’attache du manche. FIXATION MURALE ·...
  • Seite 21 LES FILTRES DU RÉSERVOIR À POUSSIÈRE Le réservoir à poussière comprend 2 filtres : le filtre grossier en plastique (A) et le filtre HEPA. Retirez le réservoir à poussière du bloc-moteur en le faisant tourner dans le sens des aiguilles d’une montre. Assurez-vous que le trait présent sur le bloc moteur soit bien placé...
  • Seite 22 Retirez les 2 filtres à poussière. Nettoyez-les à l’air comprimé ou sous l’eau courante. Prenez toutefois garde à ce qu’ils soient bien secs avant de réutiliser l’appareil. Remettez les filtres dans le bloc moteur. Attention : le filtre noir doit se trouver sur le dessus.
  • Seite 23: Problèmes Et Solutions

    PROBLÈMES ET SOLUTIONS Problème Solution L’appareil ne démarre pas. · La batterie est déchargée. Rechargez l’appareil. · La batterie n’a pas été placée correctement. Glissez la batterie dans son logement jusqu’à ce qu’elle s’encliquète. L’appareil n’aspire pas. · Les filtres sont sales/le réservoir de poussière est plein. ·...
  • Seite 24 GARANTIE Sehr geehrter Kunde, Sämtliche unserer Produkte unterliegen einer strengen Qualitätskontrolle, bevor Sie Ihnen angeboten werden. Sollten dennoch Probleme mit Ihrem Gerät auftreten, bedauern wir dies zutiefst. Wir möchten Sie in diesem Fall bitten, unseren Kundenservice zu kontaktieren. Unsere Mitarbeiter helfen Ihnen gern weiter! +32 14 21 71 91 info@linea2000.be Montag –...
  • Seite 25: Sicherheitsvorkehrungen

    SICHERHEITSVORKEHRUNGEN · Bitte alle Anweisungen vor dem Gebrauch durchlesen. · Dieses Gerät darf von Kindern ab 16 Jahren oder älter gebraucht werden. Ebenso dürfen Personen mit körperlicher bzw. leichter geistiger Behinderung sowie Personen mit eingeschränkter Erfahrung das Gerät betätigen. Dies unter der Voraussetzung, dass diese Personen ausreichende Anweisungen sowohl zum Gebrauch des Gerätes, als auch zu den hiermit verbundenen Gefahren erhalten haben.
  • Seite 26 Nichtbefolgen der in dieser Anleitung aufgeführten Regeln entstehen. · Das Gerät, das Kabel oder den Stecker niemals in Wasser oder in andere Flüssigkeiten tauchen. · Netzkabel vor scharfen Kanten, heißen Gegen-ständen oder anderen Wärmequellen schützen. · Beim ersten Gebrauch Verpackungsmaterial und mögliche Werbeaufkleber komplett entfernen.
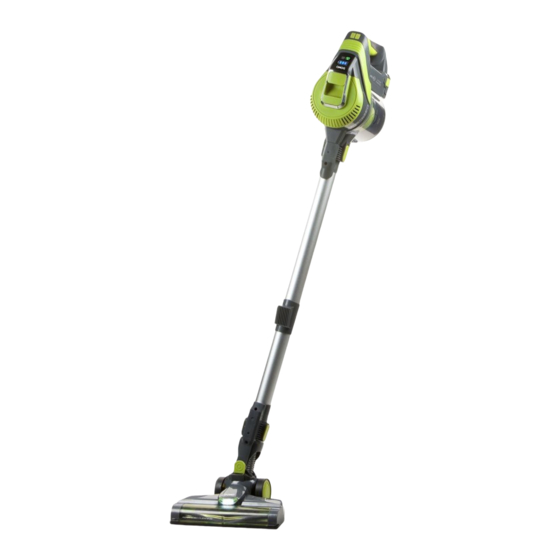
  • Seite 27 TEILE An-/Ausschalter Geschwindigkeitsstufenschalter Akkustandsanzeige Staubbehälter Motorteil Entriegelungsknopf für den Stiel Entriegelungsknopf für den Staubbehälter Entriegelungsknopf für den Akku Stiel 10. Bodendüse mit rotierender Bodenbürste 11. Entriegelungsknopf Bodendüse 12. Netzteil 13. Staubbürste 14. Die Klappenfilter im Motorteil 15. Fugendüse 16. Wandbefestigung www.domo-elektro.be DO219SV...
  • Seite 28 MONTAGE DER HANDSTAUBSAUGER Lassen Sie die motorisierte Bodenbürste, die Staubbürste oder die Fugendüse in der Öffnung unterhalb der Bürste einrasten. CLICK Schieben Sie die Batterie unten in das Motorteil. Schieben Sie, solange bis sie im Motorteil einrastet. CLICK DER STAUBSAUGER Lassen Sie den Stiel in der Öffnung vorn im Gerät einrasten.
  • Seite 29 AUFLADEN · Laden Sie das Gerät vor dem ersten Gebrauch für 24 Stunden auf, um die volle Kapazität der Batterie nutzen zu können. · Verbinden Sie das Ladegerät zunächst mit dem Gerät und stecken Sie das Ladegerät anschließend in die Steckdose. ·...
  • Seite 30: Reinigung Und Wartung

    AUFBEWAHRUNG STEHEND AUFBEWAHREN · Bodendüse auf das Saugrohr stecken. Motoreinheit vom Saugrohr lösen. · Das Saugrohr bleibt auf der Bodendüse senkrecht stehen. Die Motoreinheit kann auf die Befestigung am Saugrohr geschoben werden. WANDBEFESTIGUNG · Wandhalterung senkrecht an die Wand halten. ·...
  • Seite 31 DIE FILTER IM STAUBBEHÄLTER Im Staubbehälter befinden sich 2 Filter: der Grobstaubfilter aus Plastik (A) und der Hepafilter (B). Staubbehälter durch Drehen im Uhrzeigersinn vom Motorteil abnehmen. Die Strichmarkierung auf der Motoreinheit muss hierzu auf das Symbol mit dem geöffneten Schloss zeigen.
  • Seite 32 Die beiden Staubfilter herausnehmen. Beide Filter mit Pressluft reinigen. Die Filter können auch unter fließendem Wasser gereinigt werden. Es ist hierbei darauf zu achten, dass sie vollständig trocken sind, bevor sie wieder ins Gerät eingesetzt werden. Die Filter wieder in die Motoreinheit einsetzen. Es ist darauf zu achten, dass sich der schwarze Filter oben befindet.
  • Seite 33: Probleme Und Lösungen

    REINIGUNG DES GERÄTS Reinigen Sie das Gerät mit einem feuchten Tuch. Trocken Sie das Gerät anschließend gut ab. Tauchen Sie das Gerät auf keinen Fall in Wasser ein. PROBLEME UND LÖSUNGEN Problem Lösung Das Gerät startet nicht. · Der Akku ist leer. Laden Sie das Gerät auf. ·...
  • Seite 34 ENTSORGEN Dieses Symbol auf dem Produkt oder seiner Verpackung weist darauf hin, dass dieses Produkt nicht als normaler Haushaltsabfall zu behandeln ist, sondern an einem Sammelpunkt für das Recyling von elektrischen und elektronischen Geräten abgegeben werden muss. Durch Ihren Beitrag zum korrekten Entsorgen dieses Produkts schützen Sie die Umwelt und die Gesundheit Ihrer Mitmenschen.
  • Seite 35: Warranty

    WARRANTY Dear client , All of our products are always submitted to a strict quality control before they are sold to you. Should you nevertheless experience problems with your device, we sincerely regret this. In that case, we kindly request you to contact our customer service. Our staff will gladly assist you.
  • Seite 36: Safety Instructions

    SAFETY INSTRUCTIONS · Read all instructions before use. · This appliance may be used by children from the age of 16 and up, and also by persons with a physical or sensorly limitation, as well as mentally limited persons or persons with a lack of experience and knowledge.
  • Seite 37 · Keep the cord away from sharp edges and hot parts or other heat sources. · Before use, remove all packaging materials and any promotional stickers. · Do not use the vacuum cleaner to vacuum up detergents, liquids, needles, matches and other similar liquids, sharp objects or flammable objects.
  • Seite 38 PARTS On-off button Speed control Battery charge indicator Dust reservoir Motor compartment Handle release button Unlock button for dust reservoir Battery release button Tube 10. Floor nozzle with rotating floor brush 11. Release button floor nozzle 12. Adapter 13. Dust brush 14.
  • Seite 39 MONTAGE THE HAND VACUUM CLEANER Click the floor brush, dust brush or crevice tool securely into place in the opening on the front of the appliance. CLICK Insert the batteries at the bottom of the motor compartment. Push until it clicks into place in the motor compartment.
  • Seite 40 CHARGING · Prior to first use, charge the machine for 24 hours in order to be able to utilize the full capacity of the battery. · First connect the adapter to the machine and put the adapter in the outlet. ·...
  • Seite 41: Cleaning And Maintenance

    WALL FIXING · Hold the wall fixing in a vertical position against the wall. · Mark the holes with a pencil. · Drill the holes in the wall and insert the plugs supplied. · Use the screws to secure the wall fixing. ·...
  • Seite 42 Return the HEPA filter to the course dirt filter. Return both filters to the dust container. Ensure that the notch in the filter is lined up with the raised part of the container. Return the dust container to the motor compartment by rotating it anti-clockwise. Make sure that the mark on the motor unit is aligned with the lock symbol.
  • Seite 43: Problem And Solution

    Remove the rotating floor brush from the floor nozzle. Remove hairs and other dirt that have wrapped around the floor brush. If you do not clean the floor brush regularly, it will become damaged and your machine will become unusable. Then place the rotating brush back in the floor brush.
  • Seite 44 ENVIRONMENTAL GUIDELINES This symbol on the product or on its packaging indicates that this product may not be treated as household waste. Instead it must be brought to the applicable collection point for recycling of electrical and electronic equipment. By ensuring this product is disposed of correctly, you will help prevent potential negative consequences for the environment and human health, which could otherwise be caused by...
  • Seite 45 GARANTIA Este aparato tiene un periodo de garantía de 2 años a partir de la fecha de compra. Durante el periodo de garantía, el distribuidor será completamente responsable de los defectos directamente asignables a errores del material y fabricación. Cuando se detecten este tipo de errores, y siempre que se estime necesario, el aparato se sustituirá...
  • Seite 46: Instrucciones De Seguridad

    INSTRUCCIONES DE SEGURIDAD · Lea todas las instrucciones antes del uso. · Este aparato está diseñado para ser utilizado por niños a partir de 16 años de edad y por personas con discapacidades físicas, sensoriales o mentales, o por personas que no dispongan de suficiente experiencia y conocimientos, a no ser que sean supervisados o instruidos inicialmente en la utilización segura del aparato y los posibles peligros.
  • Seite 47 establecidas en este manual. · No sumerja nunca el aparato, el cable o el enchufe en agua o cualquier otro líquido. · Mantenga el cable alejado de bordes afilados y piezas calientes u otras fuentes de calor. · Antes del primer uso retire todos los materiales de embalaje y etiquetas de promoción. ·...
  • Seite 48 PIEZAS Botón de encendido/apagado Control de velocidad Indicador del nivel de batería Depósito de polvo La parte del motor Mango del botón de desbloqueo Botón de desbloqueo del depósito de polvo Botón de desbloqueo de la batería Mango 10. Boca de aspiración del suelo con cepillo giratorio 11.
  • Seite 49 ENSAMBLAJE LA ASPIRADORA DE MANO Encaje el cepillo para suelos, el cepillo para polvo o el accesorio para hendiduras en la abertura que se encuentra en la parte delantera del aparato. CLICK Introduzca la batería en la parte inferior, en la parte del motor. Empújela hasta que encaje en la parte del motor.
  • Seite 50 CARGAR · Antes de utilizarlo por primera vez, cargue el aparato durante 24 horas, para poder aprovechar la capacidad completa de la batería. · En primer lugar, conecte el adaptador al aparato y, a continuación, introduzca el adaptador en la toma de corriente.
  • Seite 51: Limpieza Y Mantenimiento

    ALMACENAMIENTO ALMACENAMIENTO EN VERTICAL · Coloque la boca de aspiración para suelos en el mango. Separe la unidad del motor del mango. · El mango con la boca de aspiración para suelos puede permanecer recto. Puede deslizar la unidad del motor en la fijación que se encuentra en el mango.
  • Seite 52 LOS FILTROS EN EL DEPÓSITO DE POLVO En el depósito de polvo hay presentes 2 filtros: el filtro de plástico para la suciedad gruesa (A) y el filtro Hepa (B). Retire el depósito de polvo de la unidad del motor girándolo hacia la derecha. Asegúrese de que la marca en la unidad del motor se corresponde con el símbolo del candado abierto.
  • Seite 53 Retire los 2 filtros de polvo. Limpie los filtros con aire comprimido. También puede limpiarlos con agua corriente. Asegúrese de que están completamente secos antes de volver a utilizar el aparato. Vuelva a colocar ambos filtros en la parte del motor. Asegúrese de que el filtro negro se encuentra en la parte superior.
  • Seite 54: Problemas Y Soluciones

    PROBLEMAS Y SOLUCIONES Problema Posibles causas El aparato no arranca. · La batería está vacía. Cargue el aparato. · La batería está mal colocada. Deslice la batería en su lugar hasta que encaje correctamente. El aparato no aspira. · The filters are dirty/the dust reservoir is full. ·...
  • Seite 55 ZÁRUKA Pro záruku začínající dnem prodeje spotřebiče platí na území ČR tyto podmínky: 1. trvání záruky: 2 roky 2. poskytování záruky: a) záruční opravu provedeme podle našeho zvážení opravou nebo výměnou vadných dílů, jestliže tyto závady vznikly prokazatelně vadou materiálu nebo chybou při výrobě b) záruční...
  • Seite 56: Bezpečnostní Pokyny

    BEZPEČNOSTNÍ POKYNY Tento spotřebič mohou používat děti ve věku 16 let a výše a také lidé s fyzickým nebo smyslových omezením, jakož i psychicky omezené osoby nebo osoby s nedostatkem zkušeností a znalostí. Ale pouze za podmínky, že tyto osoby obdržely nezbytné instrukce, jak používat tento spotřebič...
  • Seite 57 popsanými v tomto návodu. · Všechny opravy by měly být prováděny výrobcem, jeho smluvním nebo autorizovaným servisem. · Nikdy neponořujte spotřebič, kabel ani zástrčku do vody nebo jiné kapaliny. · Děti se nesmí dotýkat zástrčky, přívodního kabelu ani přístroje. · Udržujte kabel daleko od ostrých hran a horkých částí nebo jiných zdrojů tepla. ·...
  • Seite 58 ČÁSTI Hlavní spínač on/off Regulace výkonu Kontrolka stavu baterie Zásobník na prach Motorová část Uvolnění rukojeti Tlačítko pro uvolnění zásobníku Tlačítko pro uvolnění baterie Trubice 10. Podlahová hubice s rotačním kartáčem 11. Tlačítko pro uvolnění podlahové hubice 12. Dobíjecí baterie 13.
  • Seite 59 SESTAVENÍ RUČNÍ VYSAVAČ Vezměte štěrbinovou nebo podlahovou hubici a nasaďte ji pevně na vysavač. CLICK Zespodu vysavače vložte baterie. Baterii zatlačte do vysavače dokud se nezacvakne. CLICK KLASICKÝ TYČOVÝ VYSAVAČ Trubici pevně nasaďte a zajistěte do otvoru na vysavači. Na trubici můžete nasadit klasickou podlahovou, štěrbinovou hubici nebo prachový kartáč.
  • Seite 60 DOBÍJENÍ · Při prvním dobíjení dbejte na to, aby se baterie nabíjela celých 24 hodin. Jedině takto se správně „zformátuje“. · Při nabíjení nejdříve vložte baterii do přístroje, a až poté zapojte do el. sítě. · Světelná kontrolka bude svítit a informovat Vás o stavu plného nabití.
  • Seite 61: Čištění A Údržba

    USKLADNĚNÍ USKLADNĚNÍ VE STOJE · Na trubici nasaďte podlahovou hubici, sundejte motorovou část a můžete takto postavit do rohu. · Motorovou část můžete stlačit a zavěsit na spodní část trubice. USKLADNĚNÍ ZAVĚŠENÍM NA ZEĎ · Závěsný držák přidržte na vybraném místě na zdi. ·...
  • Seite 62 FILTRY UVNITŘ ZÁSOBNÍKU NA PRACH Uvnitř zásobníku jsou 2 různé filtry: plastový filtr na hrubé nečistoty (A) a HEPA filtr (B). Zásobník vyjměte z motorově části (otáčením ve směru hodinových ručiček). Značka na zásobníku musí být souběžně s ikonou odemčeného zámku. Zásobník otevřete a vyjměte z něj filtry.
  • Seite 63 Filtry vraťte do motorové části (černý filtr musí být nahoře). Přikryjte víkem. Horní víko nejdříve zahákněte přední stranou a poté zacvakněte druhou část víka. ROTAČNÍ KARTÁČ PODLAHOVÉ HUBICE Podlahovou hubici musíte nejdříve sundat z trubice (nejdříve stiskněte tlačítko na zadní straně...
  • Seite 64 Akční čas vysávání se velmi · Baterie nebyla plně nabita, zkuste ji nabít na plnou zkracuje kapacitu. · Baterie je stará nebo porouchaná. Je potřeba baterii vyměnit. · Na kartáč se nabalují vlasy a brzdí otáčení. Světelná kontrolka během · Konektor není řádně připojen. dobíjení...
  • Seite 65 ZÁRUKA Pre záruku začínajúcich dňom predaja spotrebiča platí na území SR tieto podmienky: 1. trvania záruky: 2 roky 2. poskytovanie záruky: a) záručnú opravu vykonáme podľa nášho zvážení opravou alebo výmenou chybných dielov, ak tieto závady vznikli preukázateľne chybou materiálu alebo chybou pri výrobe b) záručná...
  • Seite 66: Bezpečnostné Pokyny

    BEZPEČNOSTNÉ POKYNY Tento spotrebič môžu používať deti vo veku 16 rokov a vyššie a tiež ľudia s fyzickým alebo zmyslových obmedzením, ako aj psychicky obmedzené osoby alebo osoby s nedostatkom skúseností a znalostí. Ale len za podmienky, že tieto osoby dostali potrebné pokyny, ako používať...
  • Seite 67 nehody, ktoré vyplývajú z nesprávneho použitia spotrebiča alebo nie sú v súlade s pokynmi popísanými v tomto návode. · Všetky opravy by mali byť vykonávané výrobcom, jeho zmluvným alebo autorizovaným servisom. · Nikdy neponárajte spotrebič, kábel ani zástrčku do vody alebo inej kvapaliny. ·...
  • Seite 68 ČASTI Hlavný vypínač on / off Regulácia výkonu Indikátor batérie Zásobník na prach Motorová časť Uvoľnenie rukoväte Tlačidlo pre uvoľnenie zásobníka Tlačidlo pre uvoľnenie batérie Trubice 10. Podlahová hubica s rotačnou kefou 11. Tlačidlo pre uvoľnenie podlahovej hubice 12. Dobíjacie batérie 13.
  • Seite 69 ZOSTAVENIE RUČNÝ VYSÁVAČ Vezmite štrbinovou alebo podlahovú hubicu a nasaďte ju pevne na vysávač. CLICK Zospodu vysávača vložte batérie. Batériu zatlačte do vysávača kým sa nezacvakne. CLICK KLASICKÝ TYČOVÝ VYSÁVAČ Trubicu pevne nasaďte a zaistite do otvoru na vysávači. Na trubicu môžete nasadiť klasickú podlahovú, štrbinovú hubicu alebo prachová kefa. CLICK CLICK Zospodu vysávača vložte batériu.
  • Seite 70 DOBÍJANIE · Pri prvom dobíjanie dbajte na to, aby sa batéria nabíjala celých 24 hodín. Jedine takto sa správne “sformátuje”. · Pri nabíjaní najskôr vložte batériu do prístroja, a až potom zapojte do el. siete. · Svetelná kontrolka bude svietiť a informovať Vás o stave plného nabitia.
  • Seite 71: Čistenie A Údržba

    USKLADNENIE USKLADNENIE V STOJI · Na trubicu nasaďte podlahovú hubicu, zložte motorovú časť a môžete takto postaviť do rohu. · Motorovú časť môžete stlačiť a zavesiť na spodnú časť trubice. USKLADNENIE ZAVESENÍM NA STENU · Závesný držiak pridržte na vybranom mieste na stene. ·...
  • Seite 72 FILTRE VNÚTRI ZÁSOBNÍKA NA PRACH Vnútri zásobníka sú 2 rôzne filtre: plastový filter na hrubé nečistoty (A) a HEPA filter (B). Zásobník vyberte z motorovo časti (otáčaním v smere hodinových ručičiek). Značka na zásobníka musí byť súbežne s ikonou odomknutého zámku. Zásobník otvorte a vyberte z neho filtre.
  • Seite 73 Zvnútra vyberte 2 prachové filtre. Tie môžete prefúknuť kompresorom alebo umyť pod tečúcou vodou. Pred opätovným vložením musia byť filtre úplne suché. Filtre vráťte do motorovej časti (čierny filter musí byť hore). Prikryte vekom. Horné veko najskôr zahákujte prednou stranou a potom zacvaknite druhú časť veka. ROTAČNÁ...
  • Seite 74 PROBLÉMY A ICH MOŽNÉ RIEŠENIA Problém Oplossing Prístroj sa nerozbehne · Batéria je vybitá, skúste ju nabiť · Batéria nie je správne vložená v prístroji. Vyberte ju a skúste znova nasadiť kým sa nezacvakne. Vysávač nevysáva · Zásobník je plný, filtre sú zanesený. ·...
  • Seite 75 OHĽAD NA ŽIVOTNÉ PROSTREDIE Symbol na prístroji alebo na jeho obale znamená, že s týmto výrobkom nie je možné nakladať ako s domovým odpadom, ale musí byť odovzdaný na miestach určených na zber a likvidáciu elektrických a elektronických zariadení. Dodržaním tohto odporúčania chránite životné prostredie a zdravie spoluobčanov.
  • Seite 76 über: webshop.domo-elektro.be or scan here: oder hier scannen: of scan hier: ou scannez ici: LINEA 2000 bvba - Dompel 9 - 2200 Herentals - Belgium - Tel: +32 14 21 71 91 - Fax: +32 14 21 54 63...

Inhaltsverzeichnis