Herunterladen Inhalt Inhalt Diese Seite drucken
Inhaltsverzeichnis

Werbung

Verfügbare Sprachen
  • DE

Verfügbare Sprachen

NIGHT&DAY .6
NIGHT&DAY .8
Barriera automatica
Automatic barrier
Barrière automatique
Automatische Schranke
Barrera automática
Istruzioni per installazione uso e manutenzione
IT
Instructions for installation, use and maintenance
EN
Instructions d'installation et d'entretien
FR
Installations, Gebrauchs und Wartungsanleitungen
DE
Instrucciones para la instalación, el uso y el mantenimiento
ES
UNAC
ASSOCIAZIONE COSTRUTTORI
DI INFISSI MOTORIZZATI E AUTOMATISMI
PER SERRAMENTI IN GENERE

Werbung

Inhaltsverzeichnis
loading

Inhaltszusammenfassung für o&o NIGHT&DAY.6

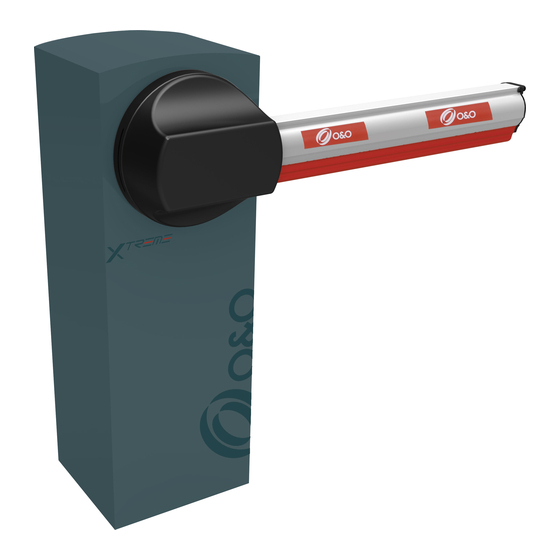
  • Seite 1 UNAC ASSOCIAZIONE COSTRUTTORI DI INFISSI MOTORIZZATI E AUTOMATISMI PER SERRAMENTI IN GENERE NIGHT&DAY .6 NIGHT&DAY .8 Istruzioni per installazione uso e manutenzione Barriera automatica Automatic barrier Instructions for installation, use and maintenance Barrière automatique Instructions d’installation et d’entretien Automatische Schranke Installations, Gebrauchs und Wartungsanleitungen Barrera automática Instrucciones para la instalación, el uso y el mantenimiento...
  • Seite 2 O&O S.r.l. Via Europa, 2 - 42015 Correggio (RE) Italy Tel. +39 0522 740111 - Fax +39 0522 631290 Internet: www.oeo.it - E-mail: oeo@oeo.it AZIENDA CERTIFICATA UNI EN ISO 9001:2008 COMPANY WITH QUALITY SYSTEM CERTIFIED UNI EN ISO 9001:2008 Società soggetta ad attività di direzione e coordinamento di BFT S.p.A. Company subject to management and coordination activities by BFT S.p.A. DICHIARAZIONE “CE” DI CONFORMITA’ “CE” DECLARATION OF CONFORMITY Il costruttore: O&O Srl The manufacter: Indirizzo: Via Europa 2 - 42015 Correggio (RE)
  • Seite 3: Inhaltsverzeichnis

    Indice 1. Informazioni generali Introduzione ..........pag. 4 Allineamento barra ........pag. 6 Sicurezza generale ........pag. 4 Manovra manuale ........pag. 6 Generalità ........... pag. 4 Optionals ............ pag. 6 Dati tecnici ..........pag. 4 Equilibratura barra ........pag. 7 Dimensioni di ingombro ......
  • Seite 4: Informazioni Generali

    1. Informazioni generali 1.1 INTRODUZIONE Leggere attentamente il libretto prima di installare il prodotto, utilizzarlo e prima di eseguire manutenzione ordinaria o straordinaria. Le indicazioni precedute da questo simbolo contengono informazioni di particolare importanza, il loro mancato rispetto può comportare la perdita della garanzia contrattuale. LE OPERAZIONI CHE EFFETTUATE IN MODO NON CORRETTO POSSONO PRESENTARE RISCHI SONO INDICATE CON I SIMBOLI: FOLGORAZIONE SCHIACCIAMENTO...
  • Seite 5: Installazione

    2. Installazione 2.1 NOTA CAVI 1) Linea Monofase 2 x 1,5 + T 2) Fotocellula Trasmittente 2 x 0,5 3) Fotocellula Ricevente 4 x 0,5 4) Lampeggiante 2 x 0,5 5) Selettore a chiave 3 x 0,5 6) Ricevente 4 x 0,5 6) Antenna RG58 7) Spirale magnetica...
  • Seite 6: Allineamento Barra

    2. Installazione 2.4 ALLINEAMENTO BARRA • Collegare elettricamente la centralina CSB-BR • Infilare un pezzo di barra di circa 1 metro nel portabarra • Dare il comando “START” per posizionare il portabarra “START” in posizione orizzontale • Tirare la barra verso il basso per aiutare il riduttore a vincere la forza della molla pretarata •...
  • Seite 7: Equilibratura Della Barra

    2. Installazione 2.7 EQUILIBRATURA DELLA BARRA NIGHT&DAY 6 NIGHT&DAY 8 NIGHT&DAY 8 + KIT DOUBLE Taratura molle 4000 4500 5000 5500 6000 6500 7000 7500 8000 6500 7000 7500 8000 KIT-LIGHT Molla BL-LARGE A (mm) Molla BL-LARGE + PP A (mm) Molla KIT-GOM BL-LARGE...
  • Seite 8: Uso E Manutenzione 3.1 Sicurezza Generale

    3. Uso e manutenzione 3.1 SICUREZZA GENERALE • La barriera e’ ad uso esclusivamente veicolare, segnalare e delimitare tramite apposito cartello eventuali passaggi pedonali. • Tenere bambini, persone e cose fuori dal raggio d’azione dell’automazione, in particolare durante il funzionamento. •...
  • Seite 9: General Information

    1. General information 1.1 INTRODUCTION Please read it carefully before installing the appliance, before using it and before routine or extraordinary maintenance work. The notices preceded by this symbol provide important information, the non-compliance with such instructions voids the manufacturer’s guarantee. OPERATIONS THAT, IF NOT CARRIED OUT CORRECTLY, CAN BE RISKY, ARE INDICATED WITH THE FOLLOWING SYMBOLS ELECTROCUTION CRUSHING...
  • Seite 10: Installation

    2. Installation 2.1 CABLE NOTE 1) Single-phase line 2 x 1,5 + E 2) Transmitter photocell 2 x 0,5 3) Receiver photocell 4 x 0,5 4) Flashing light 2 x 0,5 5) Key selector 3 x 0,5 6) Receiver 4 x 0,5 6) Antenna RG58 7) Magnetic coil...
  • Seite 11: Align The Arm

    2. Installation 2.4 ALIGN THE ARM • Electrically connect the control unit • Insert about 1 metre of the arm in the holder • Give the “START” command to position the arm holder horizontally “START” • Pull the arm down to help the reducer counteract the force of the pre-calibrated spring •...
  • Seite 12: Balancing The Arm

    2. Installation 2.7 BALANCING THE ARM NIGHT&DAY 6 NIGHT&DAY 8 NIGHT&DAY 8 + KIT DOUBLE Springs calibration 4000 4500 5000 5500 6000 6500 7000 7500 8000 6500 7000 7500 8000 KIT-LIGHT Spring BL-LARGE A (mm) Spring BL-LARGE + PP A (mm) KIT-GOM Spring BL-LARGE...
  • Seite 13: Use And Maintenance 3.1 General Safety

    3. Use and maintenance 3.1 GENERAL SAFETY • The barrier is designed exclusively for vehicles traffic; report and delimit any walkways through a special sign. • Keep adults, children and property out of range of the automated system, especially while it is operating. •...
  • Seite 14: Informtion Generales

    1. Informations generales 1.1 AVANT-PROPOS Lisez attentivement cette notice, avant d’installer l’automatisme, de l’utiliser et avant de procéder à son entretien ordinaire ou extraordinaire. Les indications précédées de ce symbole contiennent des informations importantes, le non-respect de ces indications peut invalider la garantie du constructeur.
  • Seite 15: Installations

    2. Installation 2.1 CONNEXION CABLES 1) Ligne monophasée 2 x 1,5 + T 2) Photocellule émettrice 2 x 0,5 3) Photocellule réceptrice 4 x 0,5 4) Clignotant 2 x 0,5 5) Sélecteur à clé 3 x 0,5 6) Récepteur 4 x 0,5 6) Antenne RG58 7) Spirale magnétique...
  • Seite 16: Alignement De La Lisse

    2. Installation 2.4 ALIGNEMENT DE LA LISSE • Branchez le groupe CSB-BR à l’alimentation électrique • Enfilez une longueur de lisse de 1 mètre environ dans le support de lisse • Actionnez la commande “START” pour placer le support de lisse en position horizontale “START”...
  • Seite 17: Equilibrage De La Lisse

    2. Installation 2.7 EQUILIBRAGE DE LA LISSE NIGHT&DAY 6 NIGHT&DAY 8 NIGHT&DAY 8 + KIT DOUBLE Ressort tarage 4000 4500 5000 5500 6000 6500 7000 7500 8000 6500 7000 7500 8000 KIT-LIGHT Ressort BL-LARGE A (mm) Ressort BL-LARGE + PP A (mm) KIT-GOM Ressort...
  • Seite 18: Utilisation Et Maintenance 3.1 Sécurité Générale

    3. Utilisation et maintenance 3.1 SÉCURITÉ GÉNÉRALE • La barrière est conçu exclusivement pour les véhicules; signaler et délimiter par un signe spécial les allées piétonnes. • Tenez les enfants, les personnes et les objets à l’écart du rayon d’action de l’automatisation, en particulier pendant son fonctionnement. •...
  • Seite 19: Allgemeine Informationen

    1. Allgemeine informationen 1.1 EINLEITUNG Das Handbuch ist vor der Installation des Produkts sowie vor der ordentlichen und außerordentlichen Wartung sorgfältig zu lesen. Die Angaben, denen dieses Symbol vorangestellt ist, enthalten Informationen zu allen möglichen Themen von bes onderer Bedeutung, ihre Nichtbeachtung kann zum Verlust der vertraglichen Garantie führen. WENN DIE DURCH FOLGENDE SYMBOLE GEKENNZEICHNETEN EINGRIFFE NICHT KORREKT DURCHGEFÜHRT WERDEN, KANN ES ZU GEFAHRSITUATIONEN KOMMEN: STROMSCHLAG QUETSCHUNG...
  • Seite 20: Installation

    2. Installation 2.1 BEMERKUNG ZU DEN KABEL ANSCHLÜSSEN 1) Einphasenleitung 2 x 1,5 + E 2) Senderfotozelle 2 x 0,5 3) Empfängerfotozelle 4 x 0,5 4) Blinkleuchte 2 x 0,5 5) Schlüsselschalter 3 x 0,5 6) Empfänger 4 x 0,5 6) Antenne RG58 7) Magnetspirale...
  • Seite 21: Die Schranke Ausrichten

    2. Installation 2.4 DIE SCHRANKE AUSRICHTEN • Die Steuereinheit elektrisch anschließen • Die Schranke mit einer Länge von ca. 1 m in die Schrankenhalte- rung einschieben. “START” • Den Befehl „START“ eingeben, um Die Schrankenhalterung in die waagrechte Position bringen •...
  • Seite 22: Ausbilancierung Des Baumes

    2. Installation 2.7 AUSBILANCIERUNG DES BAUMES NIGHT&DAY 6 NIGHT&DAY 8 NIGHT&DAY 8 + KIT DOUBLE Federn Kalibrierung 4000 4500 5000 5500 6000 6500 7000 7500 8000 6500 7000 7500 8000 KIT-LIGHT Federn BL-LARGE A (mm) Federn BL-LARGE + PP A (mm) KIT-GOM Federn BL-LARGE...
  • Seite 23: Gebrauchs Und Wartungsanleitungen

    3. Gebrauchs und Wartungsanleitungen 3.1 ALLGEMEINE SICHERHEIT • Die Schranke ist ausschließlich für den Fahrzeugverkehr vorgesehen; ein eventueller Fußgängerverkehr ist durch ein geeignetes Schild auszuweisen bzw. einzuschränken. • Halten Sie Kinder, Personen und Sachen aus dem Wirkungsbereich der Automatisierung fern, vor allem während des Betriebs •...
  • Seite 24: Informaciones Generales 1.1 Introducción

    1. Informaciones generales 1.1 INTRODUCCIÓN Leer detenidamente el folleto antes de instalar el producto, utilizarlo y efectuar el mantenimiento ordinario o extraordinario. Las indicaciones precedidas por este símbolo contienen informaciones sobre cualquier asunto de importancia particular, no respetarlas puede comportar la perdida de la garantía contractual. LAS OPERACIONES QUE, SI NO SON EFECTUADAS CORRECTAMENTE, PUEDEN CONLLEVAR RIESGOS, VIENEN INDICADAS CON LOS SÍMBOLOS: ELECTROCUCIÓN APLASTAMIENTO...
  • Seite 25: Instalación 2.1 Nota Cables

    2. Instalación 2.1 NOTA CABLES 1) Línea monofásica 2 x 1,5 + T 2) Fotocélula transmisor 2 x 0,5 3) Fotocélula receptor 4 x 0,5 4) Indicador intermitente 2 x 0,5 5) Selector de llave 3 x 0,5 6) Receptor 4 x 0,5 6) Antena RG58...
  • Seite 26: Alinear La Barra

    2. Instalación 2.4 ALINEAR LA BARRA • Conectar eléctricamente la centralita CSB-BR • Insertar un trozo de barra de aproximadamente 1 metro en el portabarra • Dar el comando “START” para colocar el portabarra en “START” posición horizontal • Tirar de la barra hacia abajo para ayudar al reductor a vencer la fuerza del muelle calibrado de antemano •...
  • Seite 27: Equilibrado De La Barra

    2. Instalación 2.7 EQUILIBRADO DE LA BARRA NIGHT&DAY 6 NIGHT&DAY 8 NIGHT&DAY 8 + KIT DOUBLE Resorte calibración 4000 4500 5000 5500 6000 6500 7000 7500 8000 6500 7000 7500 8000 KIT-LIGHT Resorte BL-LARGE A (mm) Resorte BL-LARGE + PP A (mm) KIT-GOM Resorte...
  • Seite 28: Seguridad General

    2. Uso y mantenimiento 3.1 SEGURIDAD GENERAL • La barrera está diseñada exclusivamente para el passaje vehicular, informar y delimitar el pasaje peatonal a través de una señal especial. • Mantener a niños, personas y cosas fuera del radio de acción de la automatización, especialmente durante su funcionamiento. •...

Diese Anleitung auch für:

Night&day.8

Inhaltsverzeichnis