Werbung
Quicklinks
English / Italian
CHECK THE CONTENTS INSIDE THE PACKAGE BOX
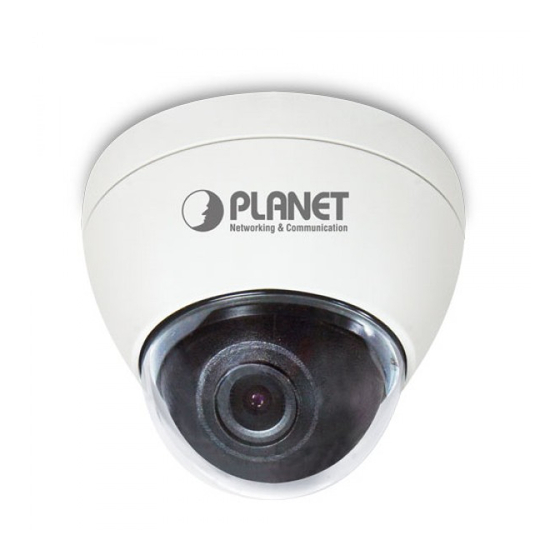
The package should contain the items (shown below) plus ICA-5250. If any item is missing or damaged,
please contact the vendor immediately.
CONTROLLARE IL CONTENUTO DELLA DELLA CONFEZIONE
la confezione dovrebbe contenere i seguenti componenti. se uno dei componenti è mancante o danneggiato,
contattare il rivenditore immediatamente
● Quick Guide
● CD-ROM
● Camera Stand
● Mounting Guide Label
● RJ45 Connector
● Guida Rapida
● CD-ROM
● Kit Staffa
● Etichetta Per Guida Al Montaggio
● Connettore Rj45 Femmina/Femmina
Step 1 : Hardware Installation
Passo 1 : Posizionamento della Videocamera IP
Install camera with screws
1. Open the screw kit and use three screws to lock the base
of camera on the ceiling or the wall.
2. Put back the cover by turning it tightly so as to prevent
water from getting into it.
Install camera w/stand with screws
1. Open the stand kit, which includes a conversion ring and
two sets of screws.
2. Use three screws to lock the conversion ring on the ceiling
or the wall.
3. Use three screws to combine the base of camera with the
conversion ring. The cable can pass through the hole on
the side of conversion ring.
4. Put back the cover by turning it tightly so as to prevent
water from getting into it.
Note : The package has a mounting guide label for hardware
installation.
Installazione con viti
1. Aprire il kit viti ed usarle per bloccare la base della telecamera a soffitto oppure a muro.
2. Rimettere la copertura della telecamera girando con accortenza per chiuderla ermeticamente.
Installazione con viti e staffa
1. Aprire il kit della staffa che include adattatore e due set di vitise three screws to lock the conversion ring
on the ceiling or the wall.
2. Usare le 3 viti per bloccare l'adattatore a soffito oppure a parete.
3. Usare le altre viti per installare la videocamera sull'adattatore. Il cavo può passare attraverso il buco
posto a lato dell'adattatore.
4. Rimettere la copertura della telecamera girando con accortenza per chiuderla ermeticamente.
Nota : nella confezione è inserita una etichetta guida per posizionare le viti correttamente.
● Power Adapter
● Screw Kit
● Alimentatore
● Kit Viti
Ceiling-/wall-mount
Ceiling-/wall-mount camera w/
camera with Screws
stand with screws
Ceiling-/wall-mount
Ceiling-/wall-mount camera w/
camera with screws
stand with screws
Step 2 : Connecting Network and AC Adapter Power
Passo 2 : Connessione alla rete LAN ed elettrica
Note : ICA-5250 also supports IEEE802.3af. Be
reminded to power either from AC adapter
or PoE switch.
Nota : la ICA-5250 supporta lo standard
PoE IEEE802.3af. Non alimentare
contemporaneamente dallo switch PoE e
dalla presa di corrente.
Step 3 : Utility Installs and Runs to Locate the IP Camera (optional)
Passo 3 : Programma per installare e localizzare la Videocamera IP (opzionale)
Please insert the CD-ROM supplied in the product package
‹
and the CD will automatically run the installation; if not,
please click the Utility Hyperlink to install.
The IP Installer Utility description.
‹
After the camera utility is launched, all cameras found in
‹
your local area network will be displayed.
You will connect to IP Camera via web browser automatically;
‹
the IP Camera will prompt for a username and password.
Please enter admin as the default username and password.
Inserire il cd-rom presente nella confezione nel lettore ed attendere che l'istallazione si avvii, se questo
‹
non accade premere sul link per iniziare l'installazione.
Descrizione del programma IP installer.
‹
All'avvio del programma verranno visualizzate tutte le videocamere presenti nella rete.
‹
‹
Potrai connettere la videocamera direttamente dal browser, e quando viene richiesto username e
password digitare admin in entrambi i campi.
Further Configuration
For detailed configuration, please check user's manual on the bundled CD.
If you have any other question, please contact the dealer where you purchased this product or you can
contact PLANET directly at the following email address: support_ica@planet.com.tw
Ulteriori informazioni
Per informazioni dettagliate utilizzare il manuale presente sul cd-rom.
Se le informazioni non sono sufficienti, contattare il rivenditore dove avete acquistato il prodotto oppure
contattare la planet direttamente al seguente indirizzo email: support_ica@planet.com.tw
DC
Ethernet Switch
User PC
(192.168.0.X)
Power Line (DC)
DC
100Base-TX UTP
1000Base-T UTP
Werbung

Inhaltszusammenfassung für Planet ICA-5250
- Seite 1 CHECK THE CONTENTS INSIDE THE PACKAGE BOX Passo 2 : Connessione alla rete LAN ed elettrica The package should contain the items (shown below) plus ICA-5250. If any item is missing or damaged, please contact the vendor immediately. Note : ICA-5250 also supports IEEE802.3af. Be...
- Seite 2 VERIFIQUE O CONTEÚDO DENTRO DA CAIXA DA EMBALAGEM Hinweis : Die ICA-5250 unterstützt auch IEEE802.3af; achten Sie darauf, das A embalagem deve conter os itens (exibidos abaixo) mais ICA-5250. Se qualquer item estiver faltando ou Gerät entweder per Netzteil oder per Ethernet Switch...
- Seite 3 VÉRIFIEZ LE CONTENU À L'INTÉRIEUR DE LA BOÎTE Paso 2 : Conexión de la red y adaptador de alimentación de CA L'emballage doit contenir les éléments (indiqués ci-dessous) ainsi que l' ICA-5250. Si l'un des éléments manque ou est endommagé, veuillez contacter immédiatement le revendeur.
- Seite 4 ПРОВЕРЬТЕ СОДЕРЖИМОЕ УПАКОВКИ Krok 2 : Podłączanie sieci i zasilacza Комплект поставки должен включать в себя следующие элементы (показаны ниже) и изделие ICA-5250. В случае отсутствия или повреждения любого из компонентов немедленно обратитесь к поставщику оборудования. Примечание : ICA-5250 также поддерживает...

