Herunterladen Inhalt Inhalt Diese Seite drucken
ZyXEL DMA-1000W Schnellstartanleitung

ZyXEL DMA-1000W Schnellstartanleitung

802.11 wireless digital media adaptor

Werbung

Verfügbare Sprachen
  • DE

Verfügbare Sprachen

  • DEUTSCH, seite 20
DMA-1000W
802.11 Wireless Digital Media Adaptor
Quick Start Guide
Version 1.00
3/2007
Edition 1
CONTENTS
Copyright © 2007. All rights reserved.
2
20
42
62
82
102

Werbung

Inhaltsverzeichnis
loading

Inhaltszusammenfassung für ZyXEL DMA-1000W

  • Seite 1: Inhaltsverzeichnis

    DMA-1000W 802.11 Wireless Digital Media Adaptor Quick Start Guide CONTENTS ENGLISH Version 1.00 3/2007 DEUTSCH Edition 1 ESPAÑOL FRANÇAIS ITALIANO РУССКИЙ Copyright © 2007. All rights reserved.
  • Seite 2: English

    ENGLISH ENGLISH Use your DMA-1000W to play audio, video and photo files on your TV instead of your computer monitor. The files can be on computers or a USB memory stick or hard drive. The following figure shows the DMA-1000W connected to an Ethernet switch (S) and a TV.
  • Seite 3 1 Install the Media Server Software You must install the media server software on each computer that you will use to share files with the DMA-1000W. You can only install the media server software on a Windows XP computer. Requirements for more details.
  • Seite 4 ENGLISH 2 The installation wizard appears. Follow the directions to install the software. See the requirements section if you have trouble installing or using the media server. 3 Enter your information in this screen. Enter a user name (up to 64 ASCII characters recommended).
  • Seite 5 4 Select a destination for the software (or just leave the default). 5 You can specify a name for the media server that the DMA-1000W displays on your TV. It is helpful to use unique names if you install the media server on multiple computers.
  • Seite 6 6 If you see a screen asking about configuring the Windows XP firewall, click Yes. This allows the DMA-1000W to access the files on your computer that you share. Refer to the User’s Guide if your computer has another software firewall (like ZoneAlarm for example) that you need to configure.
  • Seite 7 ENGLISH • To remove a folder from the list, click it and then click Cancel Publication.
  • Seite 8 ENGLISH 2 Connect Your DMA-1000W Turn off your TV before you connect the DMA-1000W. 1 If your TV has a HDMI connector, use an HDMI cable to connect the DMA-1000W’s HDMI connector (shown) to the TV.
  • Seite 9 ENGLISH 2 If your TV does not have an HDMI connector: A Use an S-video cable to connect the DMA-1000W’s S-VIDEO connector (shown) to the TV. B If your TV or audio system has a C If your TV or audio system does not...
  • Seite 10 4 If you want to play files from a USB memory stick, connect it to the DMA-1000W’s USB port. This is optional if you use the wired or wireless connection to connect to your computer.
  • Seite 11 ENGLISH 3 Configure Wireless Settings Use this section to configure the DMA-1000W’s wireless settings if you want to use a wireless connection, otherwise skip to Section 4. Use the remote control to navigate and configure the menus (see page for a figure of the remote control).
  • Seite 12 Windows® Connect Now (see section 3.2). In this example, you select the scan option and then 5 The DMA-1000W scans and displays a list of available wireless networks. Select the network to which you want to connect.
  • Seite 13 Windows® Connect Now to save your computer’s wireless settings to a USB memory stick which you connect to the DMA-1000W to configure the DMA-1000W’s wireless settings. You do not need to connect the USB stick to the computer yet, you will be prompted to do so later.
  • Seite 14 • Follow the directions in section 3.1. • After the DMA-1000W’s wireless settings are configured, remove the USB stick from the DMA-1000W and insert it back into your computer’s USB port and click Next. 9 This screen displays when you have successfully set up a secure wireless network.
  • Seite 15 IP address. If your computer is also set to get an IP address automatically, the computer and the DMA-1000W will be able to communicate. See the User’s Guide if you need to configure the DMA-1000W with a static IP address. Click anywhere in this window.
  • Seite 16 Video). Remember to change it when you want to use other input. 1 Look at your TV. The DMA-1000W automatically sorts the files on the server into the MUSIC, VIDEO and PHOTO menus. Files on a USB stick are in the USB menu.
  • Seite 17 SHUFFLE plays your video files to play. playlist (favorites) files in MUSIC opens a menu of random order. music files to play. OPTION opens the menu USB opens a menu of files where you configure the on your USB device. DMA-1000W’s settings.
  • Seite 18 ENGLISH Example of Playing Video Files 1 Press the remote’s VIDEO button to enter the VIDEO menu. 2 The video files are arranged in folders. The number of the item currently selected followed by the total number of items in the menu. Navigation instructions for the menu.
  • Seite 19 ENGLISH The DMA-1000W supports the following file formats. See the User’s Guide for more details. Audio Dolby Digital, DVD-Audio, MPEG-1 and MPEG-2 Layers I, II and III(MP3), MPEG- 2 BC multi-channel Layers I, II and III, MPEG-2 and MPEG-4 AAC-LC, WMA9.
  • Seite 20: Deutsch

    DEUTSCH DEUTSCH Verwenden Sie den DMA-1000W für die Wiedergabe von Audio-, Video und Fotodateien auf einem Fernsehgerät anstelle eines Computers. Die Dateien können sich entweder auf einem Computer, auf einem USB-Stick oder einer Festplatte befinden. In dieser Abbildung lässt der DMA-1000W auf dem Fernsehgerät Dateien wiedergeben, die auf den Wireless-Clients A und B gespeichert sind.
  • Seite 21: Wiedergeben Von Dateien Eines Computers

    DEUTSCH Wiedergeben von Dateien Wiedergeben von Dateien eines eines USB-Sticks Computers Anschließen des DMA-1000W Installieren der Mediaserver-Software Abspielen der Dateien Anschließen des DMA-1000W Konfigurieren der Drahtloseinstellungen Gemeinsamer Zugriff auf Dateien Abspielen der Dateien 1 Installieren der Mediaserver-Software Die Mediaserver-Software muss auf allen Computern installiert werden, die mit dem DMA- 1000W gemeinsam auf Dateien zugreifen sollen.
  • Seite 22 DEUTSCH Wenn dieses Fenster nicht erscheinen sollte, navigieren Sie auf der CD zur Datei setup.exe und klicken Sie doppelt darauf. 2 Auf dem Bildschirm wird der Installationsassistent angezeigt. Führen Sie die Anweisungen aus, um die Software zu installieren. Wenn Sie Probleme bei der Installation oder Benutzung des Medienservers haben, lesen Sie im Abschnitt Systemvoraussetzungen nach.
  • Seite 23 Einfügenfunktion im abgebildeten Fenster in das Feld Serial Number (Seriennummer) ein. 4 Wählen Sie das Zielverzeichnis für die Software (oder belassen Sie das Standardzielverzeichnis). 5 Sie können dem Mediaserver einen Namen geben, den der DMA-1000W auf dem Fernsehgerät anzeigt. Wenn Sie den Medienserver auf mehreren Computern...
  • Seite 24 34 ASCII-Zeichen, alle druckbaren Zeichen inklusive Sonderzeichen, bestehen. 6 Wenn Sie zum Konfigurieren der Windows XP-Firewall aufgefordert werden, klicken Sie auf Yes (Ja). Dadurch erhält der DMA-1000W die Möglichkeit, auf die Dateien des Computers zuzugreifen, die gemeinsam benutzt werden. Wenn auf Ihrem Computer eine andere Firewall-Software (z. B.
  • Seite 25 Symbol, um die Fenster für die Serverkonfiguration aufzurufen. 8 In der Published Folder List (Liste freigegebener Ordner) werden die Ordner der Dateien aufgelistet, die der Computer mit dem DMA-1000W gemeinsam verwendet. • Standardmäßig sind die Ordner Eigene Musik, Eigene Bilder und Eigene Videos enthalten.
  • Seite 26 DEUTSCH • Um einen Ordner aus der Liste zu entfernen, klicken Sie darauf und dann auf Can- cel Publication (Freigabe abbrechen).
  • Seite 27: Anschließen Des Dma-1000W

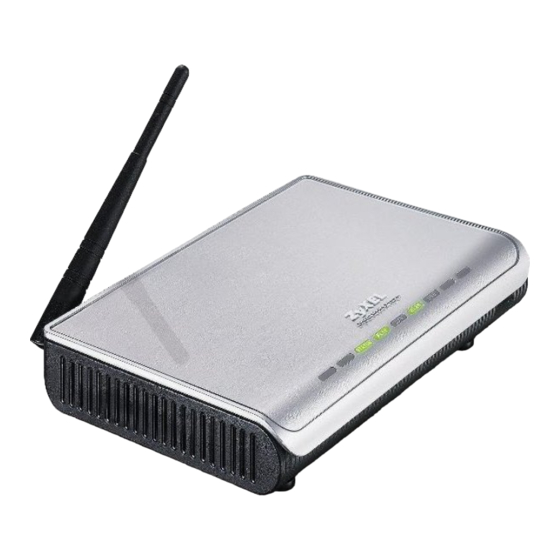
    DEUTSCH 2 Anschließen des DMA-1000W Schalten Sie das Fernsehgerät aus, und schließen Sie dann den DMA-1000W an. 1 Wenn das Fernsehgerät über einen HDMI-Anschluss verfügt, können Sie den HDMI- Anschluss des DMA-1000W (siehe Abbildung) mit einem HDMI-Kabel an das Fernsehgerät anschließen.
  • Seite 28 DEUTSCH 2 Wenn das Fernsehgerät keinen HDMI-Anschluss hat: A Verbinden Sie den S-VIDEO-Anschluss des DMA-1000W mit einem S-Video-Kabel an das Fernsehgerät an. B Wenn das Fernsehgerät oder C Wenn das Fernsehgerät oder Audiosystem einen S/PDIF- Audiosystem keinen S/PDIF- Koaxialanschluss hat, können Sie Koaxialanschluss hat, schließen Sie...
  • Seite 29: Die Bedeutung Der Led-Anzeigen

    (zum Zeitpunkt der Drucklegung rot). 4 Wenn Sie Dateien von einem USB-Stick abspielen möchten, wird dieser an den USB- Anschluss des DMA-1000W angeschlossen. Dieses ist optional, wenn Sie das Gerät mit einem Kabel oder drahtlos mit dem Computer verbinden möchten.
  • Seite 30: Konfigurieren Der Drahtloseinstellungen

    Einstellungen vornehmen (eine Abbildung der Fernbedienung finden Sie auf Seite 37). Um die Drahtlosfunktion zu konfigurieren, müssen Sie einen der folgenden Schritte ausführen. 1 Lassen Sie den DMA-1000W nach dem Drahtlosnetzwerk suchen (siehe Abschnitt 3.1). 2 Konfigurieren Sie manuell die Drahtloseinstellungen (lesen Sie dazu im Benutzerhandbuch nach).
  • Seite 31 3 Wählen Sie Wireless LAN Settings (Wireless-LAN- Einstellungen) und dann OK. 4 Legen Sie fest, ob der DMA-1000W nach den verfügbaren Netzwerken suchen soll, ob Sie die Netzwerkeinstellungen manuell eingeben möchten oder ob Sie dazu Windows Connect Now verwenden möchten (siehe Abschnitt 3.2).
  • Seite 32: Einrichten Des Wireless-Lan Mit Windows Connect Now

    Windows Connect Now ist im Service Pack 2 (SP2) von Windows XP enthalten. Führen Sie diese Schritte aus, um mit Windows Connect Now die Drahtloseinstellungen des Computers auf einem USB-Memory-Stick zu speichern, den Sie dann an den DMA-1000W anschließen, um die Drahtloseinstellungen des DMA-1000W zu konfigurieren. Den USB- Stick müssen Sie erst später, wenn Sie dazu aufgefordert werden, an den Computer...
  • Seite 33 DEUTSCH 1 Klicken Sie auf Start > Systemsteuerung, und klicken Sie doppelt auf Drahtlosnetzwerkinstallations-Assistent. 2 Das erste Fenster des Assistenten erscheint. Klicken Sie im folgenden Fenster zum Fortfahren auf Next (Weiter). 3 Um ein neues Drahtlosnetzwerk zu konfigurieren, wählen Sie Set up a new wireless network (Ein neues Drahtlosnetzwerk einrichten).
  • Seite 34: Gemeinsamer Zugriff Auf Dateien

    Wenn auch der Computer so eingestellt ist, dass er automatisch eine IP-Adresse bezieht, können der Computer und der DMA-1000W miteinander kommunizieren. Im Benutzerhandbuch finden Sie eine Anleitung, wie der DMA-1000W mit einer statischen IP-Adresse konfiguriert wird. Klicken Sie auf eine beliebige Stelle dieses Fensters.
  • Seite 35: Abspielen Der Dateien

    DEUTSCH 2 Wählen Sie Allow Connection (Verbindung zulassen), und klicken Sie auf OK. 3 Klicken Sie auf Yes (Ja), um dem DMA-1000W den Zugriff auf die von Ihnen (für die gemeinsame Verwendung) freigegebenen Dateien zu gewähren. 5 Abspielen der Dateien Stimmen Sie den TV-Eingang auf den Anschluss des DMA-1000W ab (entweder HDMI oder S-Video).
  • Seite 36 DEUTSCH 1 Sehen Sie auf Ihr Fernsehgerät. Der DMA-1000W sortiert die Dateien des Servers automatisch in die Menüs MUSIC (Musik), VIDEO (Video) und PHOTO (Foto). Die Dateien eines USB-Sticks befinden sich im Menü USB. Anzahl der Medienserver, die der DMA-1000W erkannt hat.
  • Seite 37 Mit SHUFFLE werden die Videodateien. Dateien der Wiedergabeliste MUSIC (Musik) öffnet ein Menü (Favoriten) in zufälliger von Musikdateien. Reihenfolge abgespielt. USB zeigt die Dateien, die sich OPTION öffnet das Menü, in auf dem USB-Gerät befinden. dem die Einstellungen des DMA-1000W konfiguriert werden.
  • Seite 38: Beispiel Für Die Wiedergabe Von Videodateien

    DEUTSCH Beispiel für die Wiedergabe von Videodateien 1 Drücken Sie auf der Fernbedienung auf die Taste VIDEO, um das Menü VIDEO aufzurufen. 2 Die Videodateien befinden sich in Ordnern. Dieses ist die Anzahl der momentan ausgewählten Einträge und die Gesamtzahl der Einträge im Menü.
  • Seite 39: Systemvoraussetzungen

    DEUTSCH Dateien nicht unterstützter Formate und Codecs werden u. U. nicht einwandfrei wiedergegeben. Der DMA-1000W unterstützt die folgenden Dateiformate. Ausführliche Informationen dazu finden Sie im Benutzerhandbuch. Dolby Digital, DVD-Audio, MPEG-1 und MPEG-2 Layer I, II und III (MP3), MPEG- Audio 2 BC Multi-channel-Layer I, II und III, MPEG-2 und MPEG-4 AAC-LC, WMA9.
  • Seite 40: Schritte Zum Ansehen Von Produktzertifizierung(En)

    DEUTSCH Schritte zum Ansehen von Produktzertifizierung(en) 1 Zu www.zyxel.com. 2 Wählen Sie Ihr Produkt aus der Drop-down-Liste in dem Feld auf der ZyXEL-Homepage und gehen Sie auf diese Produktseite. 3 Wählen Sie auf dieser Seite die gewünschte Zertifizierung.
  • Seite 41 DEUTSCH...
  • Seite 42: Español

    ESPAÑOL ESPAÑOL Utilice su DMA-1000W para reproducir audio, vídeo y archivos de fotos en su televisor en lugar de en el monitor de su ordenador. Los archivos pueden estar en los ordenadores o en un lápiz de memoria o disco duro USB.
  • Seite 43 1 Instalar el software del servidor multimedia Debe instalar el software del servidor multimedia en cada ordenador que utilice para compartir archivos con el DMA-1000W. Sólo puede utilizar el software del servidor multimedia en un ordenador con Windows XP. Consulte Requisitos para más detalles.
  • Seite 44 ESPAÑOL 2 Aparecerá el asistente para la instalación. Siga las direcciones para instalar el software. Consulte la sección de los requisitos si tiene problemas para instalar o utilizar el servidor multimedia. 3 Escriba su información en esta pantalla. Escriba un nombre de usuario (hasta 64 caracteres ASCII recomendado).
  • Seite 45 ESPAÑOL texto con un número de serie. Copie y pegue el número de serie en el campo Serial Number(Numero de serie) en la pantalla mostrada aquí. 4 Seleccione la ruta de destino para el software (o deje la predeterminada).
  • Seite 46 ESPAÑOL 5 Puede especificar el nombre para el servidor multimedia que el DMA-1000W mostrará en su televisor. Resulta útil utilizar nombres únicos si instala el servidor multimedia en varios ordenadores. Hasta 34 caracteres ASCII recomendado. 6 Si ve una pantalla pidiéndole configurar el cortafuegos de Windows XP, haga clic en Sí.
  • Seite 47 8 La Published Folder List (Lista de carpetas publicadas) muestra las carpetas de archivos que su ordenador compartirá con el DMA-1000W. • Sus carpetas Mi música, Mis imágenes y Mis vídeos están incluidas por defecto.
  • Seite 48 ESPAÑOL • Para quitar la carpeta de la lista, haga clic en ella y luego en Cancel Publication (Cancelar publicación).
  • Seite 49 ESPAÑOL 2 Conectar su DMA-1000W Apague su televisor antes de conectar el DMA-1000W. 1 Si su televisor tiene un conector HDMI, utilice un cable HDMI para conectar el conector HDMI (mostrado) del DMA-1000W al televisor.
  • Seite 50 2 Si su televisor no tiene un conector HDMI: A Utilice un cable de S-vídeo para conectar el conector S-VIDEO (mostrado) del DMA-1000W al televisor. B Si su televisor o sistema de audio C Si su televisor o sistema de audio no...
  • Seite 51 4 Si desea reproducir archivos desde un lápiz de memoria USB, conéctelo al puerto USB del DMA-1000W. Esto es opcional si utiliza la conexión con cables o inalámbrica para conectar a su ordenador. 5 Conecte el zócalo POWER a una toma de corriente utilizando únicamente el adaptador de...
  • Seite 52 3 Utilice Windows Connect Now para guardar la configuración inalámbrica de su ordenador en un lápiz de memoria USB y conéctelo al DMA-1000W para ajustar la configuración inalámbrica del DMA-1000W (vaya a la sección 3.2). 3.1 Pasos para la configuración de la LAN inalámbrica...
  • Seite 53 3 Seleccione Wireless LAN Settings (Configuración de LAN inalámbrica) y luego OK. 4 Seleccione si desea que el DMA-1000W busque las redes inalámbricas disponibles, introducir manualmente la configuración de redes o usar Windows Connect Now (ver sección 3.2). En este ejemplo, ha seleccionado la opción de...
  • Seite 54 Windows Connect Now está incluido con Windows XP Service Pack 2 (SP2). Siga estos pasos para utilizar Windows Connect Now para guardar la configuración inalámbrica de su ordenador en un lápiz de memoria USB que conectará al DMA-1000W para ajustar la configuración inalámbrica del DMA-1000W. No necesita conectar el lápiz USB al ordenador aún, se le pedirá...
  • Seite 55 • Quite el lápiz USB de su ordenador e insértelo en el puerto USB del DMA-1000W. • Siga las instrucciones en la sección 3.1. • Tras haber ajustado la configuración inalámbrica del DMA- 1000W, quite el lápiz USB del DMA-1000W y vuelva a...
  • Seite 56 IP automáticamente, el ordenador y el DMA-1000W podrán comunicarse. Consulte la Guía del usuario si necesita configurar el DMA-1000W con una dirección IP estática. Haga clic en cualquier lugar de esta ventana. Puede que necesite esperar dos o tres minutos. Si la ventana continua sin aparecer, compruebe los LEDs del DMA-1000W y las conexiones y utilice el botón de alimentación para reiniciar el DMA-1000W.
  • Seite 57 (compartidos). 5 Reproducir sus archivos Ajuste la entrada de su televisor a la conexión del DMA-1000W (bien HDMI o S-Vídeo). Recuerde cambiarla cuando desee utilizar otra entrada. 1 Mire a su televisor. El DMA-1000W organizará automáticamente los archivos en el servidor en los menús MUSIC (MÚSICA), VIDEO (VÍDEO) y PHOTO (FOTO).
  • Seite 58 ESPAÑOL 4 Utilice el mando a distancia para navegar por los menús y reproducir música. Power cambia entre los Regresa al menú principal. modos suspendido y operación. Utilice las teclas 0~9, CLEAR (BORRAR) y INPUT (ENTRADA) para introducir números (como para escenas o secuencias individuales).
  • Seite 59 ESPAÑOL Ejemplo de reproducción de archivos de vídeo 1 Presione el botón VIDEO del mando y entre en el menú VIDEO. 2 Los archivos de vídeo están organizados en carpetas. El número del elemento seleccionado actualmente seguido por el número total de elementos en el menú.
  • Seite 60 ESPAÑOL El DMA-1000W soporta los siguientes formatos de archivo. Consulte la Guía del usuario para más detalles. Audio Dolby Digital, DVD-Audio, MPEG-1 y MPEG-2 Capas I, II y III(MP3), MPEG-2 BC Capas multicanal I, II y III, MPEG-2 y MPEG-4 AAC-LC, WMA9.
  • Seite 61 ESPAÑOL...
  • Seite 62: Français

    Les fichiers peuvent se trouver sur les ordinateurs, une clé USB ou sur un disque dur. Dans cette figure, le DMA-1000W permet à la téléviseur de lire des fichiers stockés sur des clients A et B sans fil.
  • Seite 63 1 Installer le logiciel du serveur multimédia Vous devez installer le logiciel du serveur multimédia sur chaque ordinateur que vous utiliserez pour partager les fichiers avec le DMA-1000W. Vous pouvez uniquement installer le logiciel du serveur multimédia sur un ordinateur fonctionnant sous Windows XP. Voir...
  • Seite 64 FRANÇAIS Si cet écran n'apparaît pas, localisez et double cliquez sur setup.exe. 2 L'assistant d'installation apparaît. Suivez les instructions pour installer le logiciel. Voir la section Requirements (Configuration requise) si vous avez des difficultés à installer ou à utiliser le serveur multimédia. 3 Entrez vos informations dans cet écran.
  • Seite 65 4 Sélectionnez une destination pour le logiciel (ou laissez simplement la valeur par défaut). 5 Vous pouvez spécifier un nom au serveur multimédia que le DMA-1000W affichera sur votre téléviseur. Il est plus pratique d'utiliser des noms uniques si vous installez le...
  • Seite 66 6 Si vous voyez apparaître un écran vous invitant à configurer le pare feu de Windows XP, cliquez sur Yes (Oui). Cela permet au DMA-1000W d'accéder aux fichiers sur votre ordinateur que vous partagez. Consultez le guide de l'utilisateur si votre ordinateur est équipé d'un autre logiciel pare feu (comme ZoneAlarm par exemple) que vous devez configurer.
  • Seite 67 8 La Published Folder List (Liste des dossiers publiés) donne la liste des dossiers de fichiers que votre ordinateur partagera avec le DMA-1000W. • Vos dossiers My Music (Ma musique), My Pictures (Mes images) et My Videos (Mes vidéos) sont inclus par défaut.
  • Seite 68 FRANÇAIS • Pour supprimer un dossier dans la liste, cliquez sur celui-ci et cliquez ensuite sur Cancel Publication (Annuler la publication).
  • Seite 69 FRANÇAIS 2 Connectez votre DMA-1000W Eteignez votre téléviseur avant de connecter le DMA-1000W. 1 Si votre téléviseur est équipée d'un connecteur HDMI, utilisez un câble HDMI pour relier le connecteur HDMI du DMA-1000W (indiqué) au téléviseur.
  • Seite 70 FRANÇAIS 2 Si votre téléviseur n'est pas équipée d'un connecteur HDMI : A Utilisez un câble S-Vidéo pour relier le connecteur S-VIDEO du DMA-1000W (indiqué) au téléviseur. B Si votre téléviseur ou système audio C Si votre téléviseur ou système audio est équipé...
  • Seite 71 à votre ordinateur. 4 Si vous voulez lire des fichiers à partir d'une clé USB, connectez-la au port USB du DMA-1000W. Ceci est facultatif si vous utilisez la connexion filaire ou sans fil pour vous connecter à votre ordinateur.
  • Seite 72 Procédez de l'une des manières suivantes pour configurer les paramètres sans fil. 1 Faites rechercher le réseau sans fil par le DMA-1000W (voir la section 3.1). 2 Configurez manuellement les paramètres sans fil (consultez le guide de l'utilisateur pour les détails).
  • Seite 73 Settings (Paramètres LAN sans fil) et ensuite 4 Choisissez de faire rechercher les réseaux sans fil disponibles par le DMA-1000W, entrez manuellement les paramètres réseau, ou utilisez Windows Connect Now (voir la section 3.2). Dans cet exemple, vous sélectionnez l'option de...
  • Seite 74 étapes pour utiliser Windows Connect Now pour enregistrer les paramètres sans fil de votre ordinateur sur une clé USB que vous connectez au DMA-1000W pour configurer les paramètres sans fil du DMA-1000W. Il n'est pas encore nécessaire de connecter la clé...
  • Seite 75 8 Cet écran apparaît une fois que vos paramètres sans fil sont enregistrés sur la clé USB. • Retirez la clé USB de votre ordinateur et insérez-la dans le port USB du DMA-1000W. • Suivez les instructions de la section 3.1.
  • Seite 76 FRANÇAIS • Après avoir configuré les paramètres sans fil du DMA-1000W, retirez la clé USB du DMA-1000W et réinsérez-la dans le port USB de votre ordinateur et cliquez sur Next (Suivant). 9 Cet écran s'affiche quand vous avez réussi à établir un réseau sans fil sécurisé.
  • Seite 77 FRANÇAIS 3 Cliquez sur Yes (Oui) pour permettre au DMA-1000W d'accéder à vos fichiers (partagés) publiés. 5 Lire vos fichiers Paramétrez l'entré de votre téléviseur sur la connexion (HDMI ou S-Vidéo) du DMA-1000W. Pensez à changer cette valeur quand vous voulez utiliser une autre entrée.
  • Seite 78 (favoris) de votre MUSIC (MUSIQUE) ouvre un liste de lecture en désordre. menu de fichiers vidéo à lire. OPTION ouvre le menu où USB ouvre un menu de fichiers vous configurez les sur votre périphérique USB. paramètres du DMA-1000W.
  • Seite 79 FRANÇAIS Exemple de lecture de fichiers vidéo 1 Appuyez sur le bouton VIDEO de la télécommande et entrez dans le menu VIDEO. 2 Les fichiers vidéo sont classés par dossiers. Le nombre d'éléments actuellement sélectionnés suivi du nombre total d'éléments dans le menu.
  • Seite 80: Configuration Requise

    FRANÇAIS Le DMA-1000W prend en charge les formats de fichiers suivants. Voir le guide de l'utilisateur pour plus de détails. Audio Dolby Digital, DVD-Audio, MPEG-1 et MPEG-2 Couches I, II et III(MP3), MPEG-2 BC multi-canal Couches I, II et III, MPEG-2 et MPEG-4 AAC-LC, WMA9.
  • Seite 81 FRANÇAIS...
  • Seite 82: Italiano

    ITALIANO ITALIANO Utilizzare il DMA-1000W per riprodurre file audio, video e fotografie sulla TV invece che sul monitor del computer. I file possono trovarsi su un computer, su una penna di archiviazione o su un disco rigido USB. In questa figura, lo DMA-1000W consente le riproduzione sulla TV dei file memorizzati sui client wireless A e B.
  • Seite 83 1 Installazione del software Media Server È necessario installare il software Media Server su ogni computer che si desidera utilizzare per condividere i file con DMA-1000W. Il software Media Server può essere installato solo su un computer Windows XP. Vedere Requisiti per maggiori informazioni.
  • Seite 84 ITALIANO Se la schermata non viene visualizzata, individuare e fare doppio clic sul file setup.exe. 2 Appare l'installazione guidata. Attenersi alle istruzioni per installare il software. Fare riferimento alla sezione dei requisiti di sistema in caso di problemi nell'installazione o nell'uso del software Media Server. 3 Immettere le informazioni in questa schermate.
  • Seite 85 ITALIANO di testo con un numero seriale. Copiare e incollare il numero seriale nel campo Serial Number (numero seriale) della schermata qui illustrata. 4 Selezionare la destinazione in cui installare il software (oppure lasciare la destinazione predefinita).
  • Seite 86 Massimo 34 caratteri ASCII. 6 Se viene visualizzata una schermata relativa alla configurazione del firewall di Windows XP, scegliere Sì. In questo modo, DMA-1000W può accedere ai file condivisi sul computer. Fare riferimento alla Guida dell'utente se sul computer è presente un altro...
  • Seite 87 8 Il Published Folder List (elenco delle cartelle pubblicate) elenca le cartelle di file che il computer dovrà condividere con DMA-1000W. • Per impostazione predefinita sono incluse le cartelle Musica, Immagini e Video.
  • Seite 88 ITALIANO • Per rimuovere una cartella dall'elenco, selezionarla e quindi fare clic su Cancel Publication (annulla pubblicazione).
  • Seite 89 ITALIANO 2 Collegamento del DMA-1000W Spegnere la TV prima di collegare il DMA-1000W . 1 Se la TV dispone di un connettore HDMI, utilizzare un cavo HDMI per collegare il connettore HDMI del DMA-1000W (vedere figura) alla TV.
  • Seite 90 ITALIANO 2 Se la TV non dispone di un connettore HDMI: A Utilizzare un cavo S-video per collegare il connettore S-VIDEO del DMA-1000W (vedere figura) alla TV. B Se la TV o il sistema audio dispone C Se la TV o il sistema audio non...
  • Seite 91 4 Per riprodurre file da una penna di memorizzazione USB, eseguire il collegamento alla porta USB del DMA-1000W. Questo è opzionale se si utilizza la connessione cablata o wireless per connettersi al computer.
  • Seite 92 Eseguire una delle azioni seguenti per configurare le impostazioni Wireless. 1 Avviare in DMA-1000W la ricerca della rete Wireless (vedere la sezione 3.1). 2 Configurare manualmente le impostazioni Wireless (vedere la Guida dell'utente per i dettagli).
  • Seite 93 ITALIANO 2 Selezionare Network Settings (impostazioni di rete) e quindi premere OK. 3 Selezionare Wireless LAN Settings (impostazioni LAN Wireless) e quindi 4 Selezionare se lasciare che sia lo DMA- 1000W a cercare la reti Wireless disponibili, immettere manualmente le impostazioni di rete oppure utilizzare Windows Connect Now (vedere la...
  • Seite 94 Windows Connect Now è incluso con Windows XP Service Pack 2 (SP2). Attenersi alla procedura seguente per utilizzare Windows Connect Now al fine di salvare le impostazioni Wireless del computer su una memoria USB collegata allo DMA-1000W per configurare le impostazioni Wireless dello DMA-1000W. Non è ancora necessario collegare la penna USB al computer.
  • Seite 95 7 Collegare la memoria USB alla porta USB del computer. 8 Una volta salvate le impostazioni Wireless sulla memoria USB, appare la schermata seguente. • Rimuovere la memoria USB dal computer e inserirla nella porta USB dello DMA-1000W. • Seguire le istruzioni nella sezione 3.1.
  • Seite 96 IP. Se anche il computer ottiene automaticamente un indirizzo IP, il computer e lo DMA-1000W potranno comunicare. Consultare la Guida per l'utente se occorre configurare lo DMA-1000W con un indirizzo IP statico. Fare clic in un punto qualsiasi di questa finestra.
  • Seite 97 ITALIANO 3 Fare clic su Yes (sì) per consentire al DMA-1000W di accedere ai file pubblicati (condivisi). 5 Riproduzione dei file Impostare l'ingresso della TV al collegamento del DMA-1000W (HDMI oppure S-Video). Ricordare di cambiare ingresso quando si desidera utilizzarne un altro.
  • Seite 98 MUSIC apre un meni di file l'elenco di brani (preferiti) in musicali da riprodurre. ordine casuale. USB apre il menu dei file OPTION (opzioni) apre un presenti sul dispositivo USB. menu in cui è possibile configurare le impostazioni del DMA-1000W.
  • Seite 99 ITALIANO Esempio di riproduzione dei file video 1 Premere il pulsante VIDEO del telecomando per aprire il menu VIDEO. 2 I file video sono disposti in cartelle. Il numero dell'elemento correntemente selezionato seguito dal numero totale di elementi presenti nel menu.
  • Seite 100 ITALIANO DMA-1000W supporta i seguenti formati di file. Cedere la Guida dell'utente per ulteriori informazioni. Audio Dolby Digital, DVD-Audio, MPEG-1 e MPEG-2 Layer I, II e III(MP3), MPEG-2 BC Layer I, II e III multicanale, MPEG-2 e MPEG-4 AAC-LC, WMA9.
  • Seite 101 ITALIANO...
  • Seite 102: Русский

    системой Windows XP. Если Windows XP на вашем компьютере не установлена, или вы не хотите инсталлировать программное обеспечение, то можно разместить ваши файлы на карту памяти USB. Карта памяти USB подключается прямо к DMA-1000W без необходимости установки программного обеспечения медиа-сервера или...
  • Seite 103 сети Совместный доступ к файлам Воспроизведение файлов 1 Установка программного обеспечения Media Server На каждом компьютере, который будет обмениваться файлами с DMA-1000W необходимо установить программное обеспечение медиа-сервера. Вы можете установить это ПО только на компьютер с Windows XP. Смотрите Требования...
  • Seite 104 РУССКИЙ Если это окно не появляется автоматически, то дважды щелкните на приложении setup.exe. 2 Появится окно мастера установки. Следуйте инструкциям по установке программного обеспечения. При возникновении проблем с установкой или использованием медиа- сервера обратитесь к разделу, где описаны системные требования. 3 Введите...
  • Seite 105 РУССКИЙ файл с серийным номером. Скопируйте и вставьте серийный номер в показанное здесь поле Serial Number (Серийный номер). 4 Выберите папку для установки ПО (или просто оставьте значение по умолчанию). 5 Вы можете присвоить медиа-серверу имя, которое будет отображаться DMA- 1000W на...
  • Seite 106 компьютером, полезно присваивать им уникальные имена. Рекомендуемая длина имени до 34 символов. 6 При появлении окна с запросом на установку конфигурации брандмауэра Windows XP щелкните Yes (Да). Это позволит DMA-1000W получить доступ к файлам на вашем компьютере. Обратитесь к соответствующему руководству пользователя, если на...
  • Seite 107 дважды щелкните на этом значке. 8 В списке Published Folder List (Список опубликованных папок) приведены папки, которые используются совместно вашим компьютером и DMA-1000W. • Ваши папки My Music (Моя музыка), My Pictures (Мои рисунки) и My Videos (Мое видео) добавляются в этот список по умолчанию.
  • Seite 108 РУССКИЙ • Чтобы удалить папку из списка, выберите ее щелчком мыши, а затем нажмите кнопку Cancel Publication (Отменить публикацию).
  • Seite 109 РУССКИЙ 2 Подключение DMA-1000W Перед подключением DMA-1000W необходимо выключить телевизор. 1 Если ваш телевизор имеет разъем HDMI, то к нему можно подключить расположенный на DMA-1000W разъем HDMI при помощи кабеля HDMI, который не входит к комплект поставки.
  • Seite 110 РУССКИЙ 2 Если ваш телевизор не имеет разъема HDMI: A При помощи кабеля S-video соедините разъемы S-VIDEO вашего DMA-1000W и телевизора. B Если ваш телевизор или аудио- C Если ваш телевизор или аудио- система оборудована система не имеют коаксиального коаксиальным разъемом S/PDIF, разъема...
  • Seite 111 написания этого руководства) для подключения непосредственно к вашему компьютеру. 4 Если вы хотите воспроизводить файлы с карты памяти USB, то подключите ее к USB-порту вашего DMA-1000W. Для подключения к своему компьютеру вы можете использовать по выбору проводное или беспроводное соединение. 5 Подключите розетку POWER (ПИТАНИЕ) к...
  • Seite 112 изменения параметров настройки используется пульт дистанционного управления (показан на странице 119). Для конфигурирования настроек беспроводной сети выполните следующие действия. 1 Включите на вашем DMA-1000W сканирование беспроводной сети (см. раздел 3.1). 2 Установите настройки беспроводной сети вручную (обратитесь к Руководству пользователя).
  • Seite 113 Wireless LAN Settings (Настройки беспроводной ЛВС) и нажмите кнопку OK. 4 Выберите один из трех вариантов: включить сканирование DMA-1000W всех доступных беспроводных сетей, установить настройки вручную или использовать функцию Windows Connect Now (см. раздел 3.2). В данном примере выбирается вариант...
  • Seite 114 Функция Windows Connect Now включена в Windows XP Service Pack 2 (SP2). Выполнив приведенные ниже действия вы сможете сохраните настройки беспроводной сети вашего компьютера при помощи функции Windows Connect Now на карте памяти USB, после чего подключите ее к DMA-1000W, чтобы установить беспроводные настройки DMA-1000W.
  • Seite 115 РУССКИЙ 1 Нажмите Start > Control Panel (Пуск > Панель управления) и дважды щелкните на значке Wireless Network Setup Wizard (Мастер беспроводной сети). Пока не нужно подключать карту памяти к компьютеру USB. Сообщение о необходимости подключения карты появится позже. 2 Появиться первое окно мастера. На каждой следующей странице...
  • Seite 116 будут сохранены на флэш-памяти USB на экране появится следующее сообщение. • Извлеките флэш-память USB с вашего компьютера и вставьте его в USB порт DMA-1000W . • Следуйте указаниям в разделе 3.1. • После установки настроек беспроводной сети на DMA- 1000W, извлеките флэш-память USB из DMA-1000W, вставьте...
  • Seite 117 функцию Auto-IP для его самостоятельного назначения. Если ваш компьютер также получает IP-адрес автоматически, то он будет способен связаться с DMA- 1000W . Если вам необходимо назначить DMA-1000W статический IP-адрес, то обратитесь к Руководству пользователя. Щелкните на любой части этого окна.
  • Seite 118 (HDMI или S-Video). Не забывайте вносить изменения в настройки при переходе на использование другого входа. 1 Посмотрите на экран телевизора. Ваш DMA-1000W автоматически отсортирует файлы на сервере по категориям MUSIC (Музыка), VIDEO (Видео) и PHOTO (Фотографии). Файлы на карте памяти USB будут доступны в меню USB.
  • Seite 119 меню выбора видеофайлов SHUFFLE (Случайный)- воспроизведение вашего для воспроизведения. MUSIC (Музыка) - открывает списка произведения меню выбора аудиофайлов (избранного) в случайном порядке. для воспроизведения. USB - открывает меню OPTION (Настройки) - открывает меню настроек выбора файлов на карте памяти USB. DMA-1000W.
  • Seite 120 РУССКИЙ Пример воспроизведения видеофайлов. 1 Нажмите на кнопку VIDEO (Видео) пульта дистанционного управления и войдите в меню VIDEO (Видео). 2 Видеофайлы рассортированы по категориям. Количество выбранных в данный момент элементов указывается рядом с общим количеством файлов в меню. Инструкции по перемещению между меню. В этом примере при помощи кнопок со стрелками...
  • Seite 121 300Мб или больше. Жесткий диск Процедура просмотра информации о сертификации продукта 1 Посетите сайт www.zyxel.com 2 Выберите ваш продукт из выпадающего списка на домашней странице ZyXEL и перейдите на его страницу. 3 Выберите на этой странице сертификат, который вы хотите просмотреть.

Inhaltsverzeichnis