Herunterladen Inhalt Inhalt Diese Seite drucken

Werbung

Verfügbare Sprachen
  • DE

Verfügbare Sprachen

  • DEUTSCH, seite 20
NPS-520
MFP Print Server
Quick Start Guide
Table of Contents
ENGLISH
DEUTSCH
Copyright © 2007. All rights reserved.
Version 1.00
Edition 2
1/2007
1
19
39
59
79
99
119

Werbung

Inhaltsverzeichnis
loading

Inhaltszusammenfassung für ZyXEL NPS-520

  • Seite 1: Inhaltsverzeichnis

    NPS-520 MFP Print Server Quick Start Guide Version 1.00 Edition 2 1/2007 Table of Contents ENGLISH DEUTSCH ESPAÑOL FRANÇAIS ITALIANO РУССКИЙ SVENSKA Copyright © 2007. All rights reserved.
  • Seite 2 ENGLISH ENGLISH Overview The NPS-520 is a print server and comes with one Ethernet port and one USB (v2.0) port. You can use the USB port to share a printer with the computers in the network to which the NPS-520 (labeled NPS in the following graphic) is connected.
  • Seite 3: Hardware Connection

    Windows users can use the utility or web configurator to configure the NPS-520. Macintosh and Linux/UNIX users can use the web configurator to configure the NPS-520. See page for a list of system requirements. If your computer operating system version is...
  • Seite 4 2 Connect the LAN port to your local network using an Ethernet cable. 3 Use the included power adaptor to connect the power socket on the NPS-520 to an appropriate power source. 1.1 LEDs Look at the LEDs (lights) on the top panel.
  • Seite 5 The installation procedures are similar for all supported Windows versions. 1 Insert the included CD into the CD-ROM drive on your computer (that is connected to the NPS-520 directly or connected to your network). When the following screen displays, click Setup.
  • Seite 6 ENGLISH 2 Select your preferred language and click OK. 3 The following screen displays. Click Next.
  • Seite 7 ENGLISH 4 Click Next to accept the default file location or click Change to select an alternate folder. 5 Select Yes, I want to configure the ZyXEL NPS-520 now and click Next to configure the NPS-520 now.
  • Seite 8 ENGLISH 6 Your unique NPS-520’s device name automatically displays in the text box. If it does not show up, click Refresh to update this screen. Click Next. 7 Enter the default password (1234) and click OK. 8 Replace the unique generated device name with a more friendly recognizable name with additional descriptive text if you want.
  • Seite 9 ENGLISH 9 If the NPS-520 is connected to a network that has a DHCP server, select DHCP to have the DHCP server assign TCP/IP information (such as IP address and subnet mask) to your NPS-520. Otherwise, select Manual IP and enter an IP address (in the same subnet as your network), subnet mask and the gateway’s IP address.
  • Seite 10 DHCP server found in your network, the following screen displays. Click Yes to go back to the TCP/IP configuration screen or click No to have the NPS-520 search for the DHCP server again. If your computer and the NPS-520 are not in the same subnet, the following screen pops up.
  • Seite 11 ENGLISH Finish. Otherwise, click Back to re-configure the information. 11Click Finish to complete the installation. 12Repeat these steps on each Windows computer in your network that will use the NPS-520.
  • Seite 12 If you already installed a printer driver, you still need to associate it with the NPS-520. 2.2.1 Printer Driver Installation and Association 1 Start the ZyXEL utility by either double-clicking the utility icon in the system tray or clicking Start > (All) Programs > ZyXEL NPS-520 Utility > NPS-520 Utility.
  • Seite 13 Auto connect allows the NPS-520 to communicate with the printer when you want to use it. The NPS-520 drops the connection after the job is finished. Alternatively, click Connect and set the Auto Release idle...
  • Seite 14 ENGLISH If you disable Auto Release, only that computer can use the printer. Click Disconnect to manually drop the connection. The Auto Release and Auto Connect features are not configurable if your computer operating system version is older then Windows 2000 SP4.
  • Seite 15 Guide for more information and how to add a printer on your computer. Use Internet Explorer 6.0 and later or Netscape Navigator 7.0 and later versions. 1 Open your web browser. 2 Type the NPS-520’s default IP address (192.168.1.6) as the URL.
  • Seite 16 4 Click Setup TCP/IP to configure the NPS-520’s IP address. If the NPS-520 is connected to a network that has a DHCP server, select Obtain IP automatically to have the DHCP server assign TCP/IP information (such as IP address and subnet mask) to your NPS-520.
  • Seite 17: System Requirements

    ENGLISH We recommend you give the NPS-520 a static IP address or configure your DHCP server to always give it the same IP address (static DHCP). If the NPS-520’s IP address changes, you need to uninstall and reinstall the ZyXEL utility on each computer that uses it.
  • Seite 18 Procedure to View a Product's Certification(s) 1 Go to www.zyxel.com. 2 Select your product from the drop-down list box on the ZyXEL home page to go to that product's page. 3 Select the certification you wish to view from this page.
  • Seite 19 ENGLISH...
  • Seite 20: Übersicht

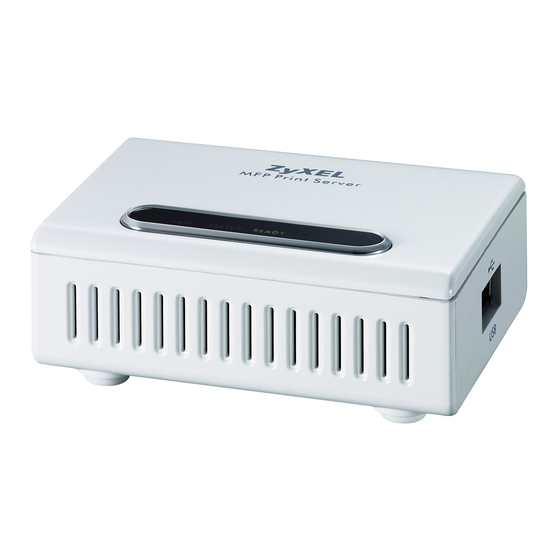
    520 (in der folgenden Abbildung als NPS bezeichnet) kann ein Drucker angeschlossen werden, welcher dann von allen Computern des Netzwerkes verwendet werden kann. Über den NPS-520 arbeitet der Drucker, als wäre er direkt an dem Computer angeschlossen. Der Treiber (und wenn vorhanden das Utility-...
  • Seite 21 DEUTSCH 2 Installieren und Benutzen des ZyXEL Utility-Programms (nur bei Windows). 3 Um den NPS-520 zu verwalten, verwenden Sie den Web- Konfigurator. Wenn Sie mit Windows arbeiten, können Sie den NPS-520 mit dem Utility-Programm oder dem Web-Konfigurator konfigurieren. Bei den Betriebssystemen Macintosh und Linux/UNIX wird der NPS-520 mit dem Web-Konfigurator konfiguriert.
  • Seite 22: Anschließen Der Hardware

    1 Schließen Sie einen USB-2.0-kompatiblen Drucker mit einem USB-Kabel an den Anschluss USB an. 2 Schließen Sie das lokale Netzwerk mit einem Ethernetkabel an den Anschluss LAN an. 3 Verbinden Sie den Netzanschluss des NPS-520 mit dem mitgelieferten Netzadapter mit einer geeigneten Stromquelle.
  • Seite 23: Das Zyxel Utility-Programm

    Kabel unbeschädigt und richtig verbunden sind. Wenn die LEDs weiterhin nicht leuchten, wenden Sie sich an Ihren Fachhändler. 2 Das ZyXEL Utility-Programm Mit dem Ultiliy-Programm wird sowohl der Druckertreiber installiert und mit eventuell bereits installierten Druckertreibern verknüpft als auch der NPS-520 bedient.
  • Seite 24 Die Schritte für die Installation sind bei allen unterstützten Versionen von Windows sehr ähnlich. 1 Legen Sie die mitgelieferte in das CD-ROM-Laufwerk des Computers (der direkt mit dem NPS-520 oder mit dem Netzwerk verbunden ist). Wenn das folgende Fenster erscheint, klicken Sie auf Setup (Installieren).
  • Seite 25 DEUTSCH 2 Wählen Sie eine Sprache aus, und klicken Sie auf OK. 3 Das folgende Fenster wird angezeigt. Klicken Sie auf Next (Weiter). 4 Klicken Sie auf Next (Weiter), um den vorgegebenen Standardordner als Speicherort für die Datei zu...
  • Seite 26 Sie auf Change (Ändern), um einen anderen Ordner auszuwählen. 5 Wählen Sie Yes, I want to configure the ZyXEL NPS-520 now (Ja, ich möchte den ZyXEL NPS-520 jetzt konfigurieren), und klicken Sie auf Next (Weiter), um den...
  • Seite 27 DEUTSCH 6 Im Textfeld wird automatisch der einmalige Gerätename des NPS-520 angezeigt. Sollte er nicht angezeigt werden, klicken Sie auf Refresh (Aktualisieren), um die Anzeige dieses Fensters zu aktualisieren. Klicken Sie auf Next (Weiter). 7 Geben Sie das Standardkennwort (1234) ein, und klicken Sie auf OK.
  • Seite 28 DEUTSCH 9 Wenn der NPS-520 mit einem Netzwerk verbunden ist, das über einen DHCP-Server verfügt, wählen Sie die Option DHCP, damit der DHCP-Server Ihrem NPS-520 die TCP/IP-Daten (wie IP-Adresse und Subnetz-Maske) zuweist. Anderenfalls wählen Sie Manual IP (Manuelle IP), und geben Sie eine IP-Adresse (im selben Subnetz wie das Netzwerk), eine Subnetz-Maske und die IP- Adresse des Gateways ein.
  • Seite 29 Wenn Sie im vorhergehenden Fenster die Option DHCP gewählt haben, aber im Netzwerk kein DHCP-Server gefunden wurde, erscheint das folgende Fenster. Klicken Sie auf Yes (Ja), um zum Fenster TCP/IP configuration (TCP/ IP-Konfiguration) zurückzukehren, oder auf No (Nein), damit der NPS-520 noch einmal nach dem DHCP-Server sucht.
  • Seite 30 DEUTSCH Wenn sich der Computer und der NPS-520 nicht im selben Subnetz befinden, erscheint das folgende Fenster. Klicken Sie zum Fortfahren auf OK (oder Yes (Ja)). 10In diesem schreibgeschützten Fenster werden die aktuellen Einstellungen angezeigt. Prüfen Sie die Einstellungen, und klicken Sie auf Finish (Fertig stellen).
  • Seite 31: Installieren Und Verknüpfen Des Druckertreibers

    Wenn Sie bereits einen Druckertreiber installiert haben, muss dieser mit dem NPS-520 verknüpft werden. 2.2.1 Installieren und Verknüpfen des Druckertreibers 1 Starten Sie das ZyXEL Utility-Programm, indem Sie entweder doppelt auf das entsprechende Symbol in der Taskleiste klicken oder indem Sie es über Start (Start) >...
  • Seite 32 DEUTSCH (All) Programs ((Alle) Programme) > ZyXEL NPS-520 Utility > NPS-520 Utility aufrufen. 2 Das Fenster Status erscheint. Wählen Sie den Namen des NPS-520, und klicken Sie auf Connect (Verbinden). 3 Windows erkennt automatisch den Drucker und fordert Sie auf, den Druckertreiber zu installieren. Führen Sie die...
  • Seite 33 Sie im Fenster Status die Option Auto Connect (Automatisch verbinden) wählen und dort einen Standarddrucker einstellen. Mit der Funktion Auto Connect kann der NPS-520 mit dem Drucker kommunizieren, wenn Sie ihn benutzen möchten. Nach abschließen der Druckaufgabe beendet der NPS-520 die Verbindung.
  • Seite 34 DEUTSCH Wenn Sie die Option Auto Release (Automatisch freigeben) deaktivieren, kann nur dieser Computer den Drucker benutzen. Klicken Sie auf Disconnect (Trennen), um die Verbindung manuell zu trennen. Wenn Ihr Computer mit einem älteren Betriebssystem als Windows 2000 SP4 arbeitet, können die Optionen Auto Release (Automatisch freigeben) und Auto Connect (Automatisch verbinden) nicht konfiguriert...
  • Seite 35 Auto Connect (Automatisch verbinden) aktiviert ist. 3 Web-Konfigurator Führen Sie die folgenden Schritte aus, um die TCP/IP- Einstellungen des NPS-520 mit dem Web-Konfigurator zu konfigurieren. Weitere Informationen dazu sowie eine Anleitung, wie Sie einen Drucker im Computer installieren, finden Sie im Benutzerhandbuch.
  • Seite 36 DEUTSCH 1 Starten Sie Ihren Webbrowser. 2 Geben Sie als URL die IP-Standardadresse des NPS-520 ein (192.168.1.6). 3 Geben Sie Kennwort "1234" (Standard) ein, und klicken Sie auf Login (Anmelden). Wenn das Anmeldefenster nicht erscheint, stellen Sie sicher, dass sich der Computer und der NPS-520 im selben Subnetz befinden.
  • Seite 37 DEUTSCH Wenn der NPS-520 mit einem Netzwerk verbunden ist, in dem sich ein DHCP-Server befindet, wählen Sie die Option Obtain IP automatically (IP automatisch beziehen), damit der DHCP-Server dem NPS-520 automatisch die TCP/IP- Daten (wie IP-Adresse und Subnetz-Maske) zuweist. Anderenfalls wählen Sie Use Fixed IP Address (Feste IP-...
  • Seite 38: Systemvoraussetzungen

    DEUTSCH Klicken Sie auf Apply (Übernehmen), damit die Änderungen gespeichert werden. 4 Systemvoraussetzungen Stellen Sie vor der Installation sicher, dass Ihr Computer die folgenden Voraussetzungen erfüllt: • Pentium II 300 MHz oder höher • Mindestens 20 MB freier Festplattenspeicher • Mindestens 32 MB RAM •...
  • Seite 39: Schritte Zum Ansehen Der Produktzertifizierung(En)

    Programm-CD für Windows 98 SE Schritte zum Ansehen der Produktzertifizierung(en) 1 Rufen Sie die Website www.zyxel.com auf. 2 Wählen Sie auf der ZyXEL-Startseite aus der Dropdown-Liste Ihr Produkt aus, um die Seite des Produkts aufzurufen. 3 Wählen Sie auf dieser die Zertifizierung aus, die...
  • Seite 40: Vista Previa

    ESPAÑOL ESPAÑOL Vista previa El NPS-520 es un servidor de impresión y viene con un puerto Ethernet y otro USB (v2.0). Puede utilizar el puerto USB para compartir una impresora con los ordenadores de la red a los que el NPS-520 (etiquetado como NPS en el siguiente gráfico) esté...
  • Seite 41 ESPAÑOL 2 Instalar y usar la utilidad ZyXEL (sólo usuarios de Windows). 3 Utilice el configurador web para administrar el NPS-520. Los usuarios de Windows pueden usar la utilidad o configurador web para configurar el NPS-520. Los usuarios de Macintosh y Linux/UNIX pueden usar el configurador web para configurar el NPS-520.
  • Seite 42: Conexión Del Hardware

    ESPAÑOL 1 Conexión del hardware Siga los pasos siguientes para conectar el NPS-520 a su red. 1 Conecte el puerto USB a una impresora compatible con USB v2.0 utilizando un cable USB. 2 Conecte el puerto LAN a su red local utilizando un cable Ethernet.
  • Seite 43 Si los LEDs continúan apagados, contacte con su vendedor local. 2 Utilidad ZyXEL Utilice la utilidad para instalar y asociar el controlador de su impresora y para administrar el NPS-520.
  • Seite 44 ESPAÑOL 2.1 Instalación de la utilidad en Windows La dirección IP predeterminada del NPS-520 es 192.168.1.6. Los procedimientos de instalación son similares para todas las versiones de Windows soportadas. 1 Inserte el CD incluido en la unidad de CD-ROM de su ordenador (conectada a su NPS-520 directamente o conectada a la red).
  • Seite 45 ESPAÑOL 2 Seleccione el idioma preferido y haga clic en OK (Aceptar). 3 Aparecerá la siguiente pantalla. Haga clic en Next (Siguiente).
  • Seite 46 4 Haga clic en Next (Siguiente) para aceptar la ubicación del archivo predeterminada o haga clic en Change (Cambiar) para seleccionar una carpeta distinta. 5 Seleccione Yes, I want to configure the ZyXEL NPS-520 now (Sí, deseo configurar el ZyXEL NPS-520 ahora) y...
  • Seite 47 ESPAÑOL haga clic en Next (Siguiente) para configurar el NPS-520 ahora. 6 El nombre único del dispositivo de su NPS-520 aparecerá automáticamente en el cuadro de texto. Si no aparece, haga clic en Refresh (Actualizar) para actualizar la pantalla. Haga clic en Next (Siguiente).
  • Seite 48 Por otro lado, puede dejar los campos de forma predeterminada. Haga clic en Next (Siguiente). 9 Si el NPS-520 está conectado a una red que tiene un servidor DHCP, seleccione DHCP para que el servidor DHCP asigne la información TCP/IP (como la dirección IP y máscara de subred) a su NPS-520.
  • Seite 49 ESPAÑOL Le recomendamos asignar al NPS-520 una dirección IP estática o configurar su servidor DHCP para asignarle siempre la misma dirección IP (DHCP estática). Si la dirección IP del NPS-520 cambia, deberá desinstalar y reinstalar la utilidad ZyXEL en cada ordenador...
  • Seite 50 Haga clic en Yes (Sí) para regresar a la pantalla TCP/IP configuration (Configuración TCP/IP) o haga clic en No para que el NPS-520 busque de nuevo el servidor DHCP. Si su ordenador y el NPS-520 no están en la misma subred, aparecerá...
  • Seite 51 Finish (Finalizar). De lo contrario, haga clic en Back (Atrás) para volver a configurar la información. 11Haga clic en Finish (Finalizar) para completar la instalación. 12Repita estos pasos en cada ordenador con Windows que utilice el NPS-520 en su red.
  • Seite 52 2.2.1 Instalación del controlador de la impresora y asociación 1 Inicie la utilidad ZyXEL haciendo doble clic en el icono de la utilidad en la bandeja del sistema o haciendo clic en Start (Inicio) > (All) Programs ((Todos los) Programas) >...
  • Seite 53 Auto Connect (Conexión automática) en la pantalla Status (Estado) de la utilidad y seleccione una impresora predeterminada. La conexión automática permite al NPS-520 comunicarse con la impresora cuando desee utilizarla. El NPS-520 detiene la conexión tras finalizar el trabajo.
  • Seite 54 ESPAÑOL Si deshabilita Auto Release (Liberación automática) la impresora podrá utilizarla sólo ése ordenador. Haga clic en Disconnect (Desconectar) para detener la conexión manualmente. Las características Auto Release (Liberación automática) y Auto Connect (Conexión automática) no son configurables si la versión del sistema operativo de su ordenador es anterior a Windows 2000 SP4.
  • Seite 55 Windows. 3 Configurador web Siga los pasos siguientes para usar el configurador web para ajustar la configuración TCP/IP del NPS-520. Consulte la Guía del usuario para más información y cómo añadir una impresora a su ordenador. Utilice Internet Explorer 6.0 o superior o Netscape Navigator 7.0 o una versión superior.
  • Seite 56 ESPAÑOL 2 Escriba la dirección IP predeterminada del NPS-520 (192.168.1.6) como URL. 3 Escriba "1234"(predeterminado) como contraseña y haga clic en Login (Acceso). Si la pantalla de acceso no aparece, compruebe que su ordenador esté en la misma subred que el NPS-520.
  • Seite 57 ESPAÑOL Si el NPS-520 está conectado a una red que tiene un servidor DHCP, seleccione Obtain IP automatically (Obtener IP automáticamente) para que el servidor DHCP asigne la información TCP/IP (como la dirección IP y máscara de subred) a su NPS-520. Por otro lado, seleccione Use Fixed IP Address (Usar dirección IP fija) y escriba una...
  • Seite 58: Requisitos Del Sistema

    ESPAÑOL Haga clic en Apply (Aplicar) para guardar los cambios. 4 Requisitos del sistema Antes de la instalación, compruebe si su PC tiene lo siguiente: • Pentium II 300 MHz o superior • Un mínimo de 20 MB de espacio libre en el disco duro •...
  • Seite 59 Procedimiento para ver la(s) certificación(es) del producto 1 Vaya a www.zyxel.com. 2 Seleccione su producto de la lista desplegable en la página inicial de ZyXEL para ir a la página de ese producto. 3 Seleccione el certificado que desee visualizar en esta página.
  • Seite 60: Présentation

    FRANÇAIS FRANÇAIS Présentation Le NPS-520 est un serveur d'impression, il est équipé d'un port Ethernet et un port USB (v2.0). Vous pouvez utiliser le port USB pour partager une imprimante avec les ordinateurs du réseau sur lequel leNPS-520 (portant la marque NPS dans le graphique suivant) est connecté.
  • Seite 61 FRANÇAIS 2 Installer et utiliser l'utilitaire ZyXEL (Utilisateurs de Windows seulement). 3 Utilisez le configurateur web pour gérer le NPS-520. Les utilisateurs de Windows peuvent utiliser l'utilitaire ou le configurateur web pour configurer le NPS-520. Les utilisateurs de Macintosh et Linux/UNIX peuvent utiliser le configurateur web pour configurer le NPS-520.
  • Seite 62 FRANÇAIS 1 Connexion matérielle Suivez les étapes ci-dessous pour connecter le NPS-520 à votre réseau. 1 Connectez le port USB à une imprimante conforme USB v2.0 à l'aide d'un câble USB. 2 Connectez le port LAN à votre réseau local à l'aide d'un câble Ethernet.
  • Seite 63 Si aucune des LED n'est allumée, vérifiez vos connexions, et vérifiez si vos câbles ne sont pas endommagés. Si les LED sont toujours éteintes, contactez votre revendeur. 2 Utilitaire ZyXEL Utilisez l'utilitaire pour installer et associer le pilote de votre imprimante ainsi que pour gérer le NPS-520.
  • Seite 64 FRANÇAIS 2.1 Installation de l'utilitaire sous Windows L'adresse IP par défaut du NPS-520 est 192.168.1.6. Les procédures d'installation sont semblables pour toutes les versions Windows prises en charge. 1 Insérez le CD inclus dans le lecteur CD-ROM sur votre ordinateur (connecté directement au NPS-520 ou connecté...
  • Seite 65 FRANÇAIS 2 Sélectionnez votre langue préférée et cliquez sur OK. 3 L'écran suivant s'affiche. Cliquez sur Next (Suivant).
  • Seite 66 4 Cliquez sur Next (Suivant) pour accepter l'emplacement des fichiers par défaut ou cliquez sur Change (Modifier) pour sélectionner un autre dossier. 5 Sélectionnez Yes, I want to configure the ZyXEL NPS-520 now (Oui, je veux configurer le ZyXEL NPS-520...
  • Seite 67 FRANÇAIS maintenant) et cliquez sur Next (Suivant) pour configurer le NPS-520 maintenant. 6 Le nom de matériel unique de votreNPS-520 s'affiche automatiquement dans la zone de texte. S'il n'apparaît pas, cliquez sur Refresh (Actualiser) pour mettre à jour cet écran. Cliquez sur Next (Suivant).
  • Seite 68 Vous pouvez aussi laisser les champs avec leurs paramètres par défaut. Cliquez sur Next (Suivant). 9 Si le NPS-520 est connecté à un réseau comportant un serveur DHCP, sélectionnez DHCP pour que le serveur DHCP attribue l'information TCP/IP (telle que l'adresse IP et le masque de sous réseau) à...
  • Seite 69 FRANÇAIS Nous vous conseillons de donner au NPS-520 une adresse IP statique ou de configurer votre serveur DHCP pour lui donner toujours la même adresse IP (DHCP statique). Si l'adresse IP du NPS-520 change, vous devez désinstaller et réinstaller l'utilitaire ZyXEL sur chaque...
  • Seite 70 à l'écran TCP/IP configuration (configuration TCP/IP) ou cliquez sur No (Non) pour que le NPS-520 cherche à nouveau le serveur DHCP. Si votre ordinateur et le NPS-520 ne sont pas dans le même sous-réseau, l'écran suivant apparaît. Cliquez sur OK (ou sur Yes (Oui)) pour continuer.
  • Seite 71 FRANÇAIS Finish (Terminer). Autrement, cliquez sur Back (Retour) pour reconfigurer les informations. 11Cliquez sur Finish (Terminer) pour terminer l'installation. 12Répétez ces étapes sur chaque ordinateur fonctionnant sous Windows dans votre réseau qui utilisera le .NPS-520...
  • Seite 72 Si vous avez déjà installé un pilote d'imprimante, vous devez néanmoins l'associer au NPS-520. 2.2.1 Installation du pilote d'imprimante et association 1 Lancez l'utilitaire ZyXEL en double-cliquant sur l'icône de l'utilitaire dans la barre d'état ou en cliquant sur Start (Démarrer) > (All) Programs ((Tous) Programmes) >...
  • Seite 73 Auto connect (Connexion automatique) permet au NPS-520 de communiquer avec l'imprimante quand vous voulez l'utiliser. Le NPS-520 désactive la connexion quand le travail est terminé. Vous pouvez aussi cliquer sur Connect (Connecter) et définir le délai d'inactivité pour Auto Release (Abandon...
  • Seite 74 FRANÇAIS Si vous désactivez Auto Release (Abandon automatique), seul cet ordinateur peut utiliser l'imprimante. Cliquez sur Disconnect (Déconnecter) pour désactiver manuellement la connexion. Les fonctionnalités Auto Release (Abandon automatique) et Auto Connect (Connexion automatique) ne sont pas configurables si la version du système d'exploitation de votre ordinateur est antérieure à...
  • Seite 75 Windows. 3 Configurateur Web Suivez les étapes ci-dessous pour utiliser le configurateur web pour configurer les paramètres TCP/IP du NPS-520. Consultez votre guide de l'utilisateur pour plus d'informations ainsi que sur la manière d'ajouter une imprimante à votre ordinateur.
  • Seite 76 FRANÇAIS 1 Ouvrez votre navigateur web. 2 Tapez l'adresse IP par défaut du NPS-520 (192.168.1.6 ) comme URL. 3 Tapez "1234" (par défaut) comme mot de passe et cliquez sur Login (Ouvrir une session). Si l’écran d’ouverture de session n’apparaît pas, vérifiez que votre ordinateur se trouve dans le...
  • Seite 77 FRANÇAIS Si le NPS-520 est connecté à un réseau comportant un serveur DHCP, sélectionnez Obtain IP automatically (Obtenir automatiquement une IP) pour que le serveur DHCP attribue l'information TCP/IP (telle que l'adresse IP et le masque de sous réseau) à votre NPS-520. Autrement, sélectionnez Use Fixed IP Address (Utiliser une adresse IP...
  • Seite 78: Configuration Requise

    FRANÇAIS Cliquez sur Apply (Appliquer) pour enregistrer vos modifications. 4 Configuration requise Avant l'installation, vérifiez que votre ordinateur comporte les éléments suivants : • Pentium II 300 MHz ou supérieur • Un espace minimum de 20 Mo disponible sur le disque dur •...
  • Seite 79 Procédure pour afficher la (les) certification(s) d'un produit 1 Allez à www.zyxel.com. 2 Sélectionnez votre produit dans la liste déroulante dans la page d'accueil du ZyXEL pour aller à la page de ce produit. 3 Sélectionnez la certification que vous désirez consulter dans cette page.
  • Seite 80: Cenni Generali

    ITALIANO ITALIANO Cenni generali NPS-520 è un server di stampa dotato di una porta Ethernet e di una porta USB (v2.0). È possibile utilizzare la porta USB per condividere una stampante con i computer nella rete a cui NPS-520 (didascalia NPS nella figura seguente) è collegato.
  • Seite 81 3 Utilizzare lo strumento di configurazione Web per gestire lo NPS-520. Gli utenti Windows possono utilizzare l'utility o lo strumento di configurazione Web per configurare lo NPS-520. Gli utenti Macintosh e Linux/UNIX possono utilizzare lo strumento di configurazione Web per configurare lo NPS-520. Vedere a pagina per l'elenco dei requisiti di sistema.
  • Seite 82 ITALIANO 1 Collegamento hardware Attenersi alla procedura seguente per collegare NPS-520 alla rete. 1 Utilizzare un cavo USB per collegare la porta USB a una stampante compatibile USB v2.0. 2 Collegare la porta LAN alla rete locale utilizzando un cavo Ethernet.
  • Seite 83 Se nessuno dei LED è acceso, controllare i collegamenti e controllare la presenza di eventuali danni ai cavi. Se i LED restano ancora spenti, contattare il rivenditore locale. 2 Utility ZyXEL Utilizzare l'utility per installare e associare il driver della stampante nonché gestire le funzioni di NPS-520.
  • Seite 84: Installazione Dell'utility In Windows

    Le procedure di installazione sono simili per tutte le versioni di Windows supportate. 1 Inserire il CD fornito a corredo nel lettore CD-ROM del computer (collegato direttamente a NPS-520 o collegato alla rete). Alla visualizzazione della schermata seguente, fare clic su Setup (installazione).
  • Seite 85 ITALIANO 2 Selezionare la lingua desiderata e fare clic su OK. 3 Viene visualizzata la seguente schermata. Fare clic su Next (avanti).
  • Seite 86 4 Fare clic su Next (avanti) per accettare la posizione predefinita o fare clic su Change (cambia) per selezionare una cartella alternativa. 5 Scegliere Yes, I want to configure the ZyXEL NPS-520 now (sì, desidero configurare ora lo ZyXEL NPS-520) e fare clic su Next (avanti) per configurare NPS-520.
  • Seite 87 ITALIANO 6 Nella casella di testo viene visualizzato automaticamente il nome di dispositivo univoco di NPS-520. Se il nome non viene visualizzato, fare clic su Refresh (aggiorna) per aggiornare la schermata. Fare clic su Next (avanti). 7 Immettere la password predefinita (1234) e fare clic su 8 Sostituire il nome di dispositivo generato univocamente con un nome mnemonico riconoscibile più...
  • Seite 88 ITALIANO 9 Se NPS-520 è collegato a una rete in cui è presente un server DHCP, selezionare DHCP per permettere al server DHCP di assegnare le impostazioni TCP/IP (quali indirizzo IP e subnet mask) allo NPS-520. In alternativa, selezionare Manual IP (IP manuale) e immettere un indirizzo IP (della stessa subnet della rete), la relativa subnet mask e l'indirizzo IP del gateway.
  • Seite 89 (configurazione TCP/IP) oppure fare clic su No per consentire a NPS-520 di cercare nuovamente il server DHCP. Se il computer e NPS-520 non sono nella stessa subnet, viene visualizzata la schermata seguente. Fare clic su OK (oppure su Yes (sì)) per continuare.
  • Seite 90 Finish (fine). In caso contrario, fare clic su Back (indietro) per riconfigurare le impostazioni. 11Fare clic su Finish (fine) per completare l'installazione. 12Ripetere questa procedura su tutti i computer Windows della rete che dovranno utilizzare NPS-520.
  • Seite 91 NPS-520. 2.2.1 Installazione e associazione del driver della stampante 1 Avviare l'utility ZyXEL facendo doppio clic sulla sua icona nell'area di notifica di Windows oppure scegliendo Start > (All) Programs ((Tutti i) Programmi) > ZyXEL NPS-520 Utility > NPS-520 Utility.
  • Seite 92 è necessario abilitare Auto Connect (connessione automatica) nella schermata Status (stato) dell'utility e selezionare una stampante predefinita. La connessione automatica consente a NPS-520 di comunicare con la stampante quando la si utilizza. Una volta terminato il lavoro, NPS-520 chiude la connessione.
  • Seite 93 ITALIANO Se si disabilita Auto Release (rilascio automatico), la stampante può essere utilizzata solo da quel computer. Fare clic su Disconnect (disconnetti) per chiudere manualmente la connessione. Le funzioni Auto Release (rilascio automatico) e Auto Connect (connessione automatica) non sono configurabili se la versione del sistema operativo del computer è...
  • Seite 94 3 Strumento di configurazione Web Attenersi alla istruzioni seguenti per utilizzare lo strumento di configurazione Web al fine di configurare le impostazioni TCP/IP dello NPS-520. Vedere la Guida dell'utente per ulteriori informazioni e per sapere come aggiungere una stampante al computer.
  • Seite 95 ITALIANO 2 Digitare l'indirizzo IP predefinito dello NPS-520 (192.168.1.6) nel campo URL. 3 Immettere "1234" (predefinita) come password e fare clic su Login (accesso). Se la schermata di login non viene visualizzata, verificare che il computer sia nella stessa sottorete (subnet) dello NPS-520.
  • Seite 96 ITALIANO Se NPS-520 è collegato a una rete in cui è presente un server DHCP, selezionare Obtain IP automatically (ottieni IP automaticamente) per permettere al server DHCP di assegnare le impostazioni TCP/IP (quali indirizzo IP e subnet mask) allo NPS-520. In alternativa, selezionare Use...
  • Seite 97: Requisiti Di Sistema

    ITALIANO Fare clic su Apply (applica) per salvare le modifiche. 4 Requisiti di sistema Prima di eseguire l'installazione, verificare che il computer sia dotato dei seguenti requisiti: • Pentium II 300 MHz o superiore • Almeno 20 MB di spazio libero su disco rigido •...
  • Seite 98 Procedura per visualizzare le certificazioni di un prodotto 1 Aprire la pagina www.zyxel.com. 2 Selezionare il prodotto dall'elenco di riepilogo a discesa nella Home Page di ZyXEL per passare alla pagina del prodotto in questione. 3 Selezionare da questa pagina la certificazione che si desidera visualizzare.
  • Seite 99 ITALIANO...
  • Seite 100: Русский

    имеет по одному порту Ethernet и USB (v2.0). Вы можете использовать порт USB для совместного использования принтера с компьютерами, которые подключены к сети имеющей NPS-520 (на иллюстрации внизу указан как NPS). При использовании NPS-520 принтер работает так, как будто он напрямую подключен к компьютеру.
  • Seite 101 РУССКИЙ 1 Установить оборудование. 2 Установите и используйте утилиту ZyXEL (только для пользователей Windows). 3 Для управления NPS-520 используйте Web- конфигуратор. Пользователи Windows для изменения конфигурации NPS-520 могут использовать утилиту или Web- конфигуратор. Пользователи Macintosh и Linux/UNIX для изменения конфигурации NPS-520 могут использовать...
  • Seite 102: Подключение Оборудования

    РУССКИЙ 1 Подключение оборудования Для подключения NPS-520 к сети выполните следующие операции. 1 Подключите USB порт к поддерживающему USB v2.0 принтеру при помощи кабеля USB. 2 Подключите порт LAN к вашей локальной сети при помощи кабеля Ethernet. 3 Подключите прилагаемый сетевой адаптер к сетевой...
  • Seite 103: Светодиодные Индикаторы

    Если ни один из индикаторов не загорается, то проверьте надежность соединений и отсутствие повреждений кабелей. Если индикаторы все равно не включаются то обратитесь к вашему местному поставщику. 2 Утилита ZyXEL Утилита необходима для установки соответствующего вашему принтеру драйвера и управления NPS-520.
  • Seite 104 РУССКИЙ 2.1 Установка утилиты для Windows IP-адрес NPS-520 по умолчанию - это 192.168.1.6. Процедура установки однотипна для всех поддерживаемых версий Windows. 1 Вставьте CD-диск в привод CD-ROM вашего компьютера (который подключен к NPS-520 напрямую или по сети). Когда отобразится следующее окно, щелкните...
  • Seite 105 РУССКИЙ 2 Выберите из списка язык и щелкните на кнопке OK. 3 Отобразится следующее окно. Нажмите Next (Далее).
  • Seite 106 РУССКИЙ 4 Нажмите Next (Далее), чтобы подтвердить расположение файла по умолчанию, или Change (Изменить), чтобы выбрать другую папку. 5 Выберите Yes, I want to configure the ZyXEL NPS-520 now (Да, я хочу настроить ZyXEL NPS-520 сейчас) и...
  • Seite 107 РУССКИЙ щелкните на Next (Далее) для перехода к конфигурированию NPS-520. 6 В текстовом окне автоматически отобразится уникальное имя устройства NPS-520. Если оно не будет показано, то обновите это окно, щелкнув на Refresh (Обновить). Нажмите Next (Далее).
  • Seite 108 поясняющим текстом. Если вы не желаете этого делать, то оставьте установки по умолчанию. Нажмите Next (Далее). 9 Если NPS-520 подключается к сети, имеющей DHCP сервер, то установите DHCP для получения назначаемой сервером информации TCP/IP (например, IP-адреса и маски подсети) вашим NPS- 520.
  • Seite 109 РУССКИЙ Мы рекомендуем вам присваивать NPS-520 статический IP-адрес или настроить DHCP сервер так, чтобы он постоянно присваивал постоянный IP-адрес (статический DHCP). При изменении IP-адреса NPS-520 вы будете вынуждены удалять и устанавливать заново утилиту ZyXEL на каждом компьютере, который ее использует.
  • Seite 110 (Конфигурация TCP/IP) или щелкните No (Нет), чтобы заставить NPS-520 выполнить поиск DHCP сервера еще раз. Если компьютер и NPS-520 находятся в разных подсетях, то появится следующее окно. Щелкните OK (или Yes (Да)), чтобы продолжить установку. 10Это предназначенное только для чтения окно...
  • Seite 111 РУССКИЙ неточностей щелкните Back (Назад) для изменения информации. 11Нажмите Finish (Завершить), чтобы завершить процесс установки. 12Повторите эти операции на всех компьютерах с ОС Windows в вашей сети, которые будут использовать NPS-520.
  • Seite 112 должны ассоциировать его с NPS-520. 2.2.1 Установка и ассоциирование драйвера принтера 1 Запустите утилиту ZyXEL, или дважды щелкнув на ее значке на панели задач Windows, или нажав Start (Пуск) > (All) Programs ((Все) Программы) > ZyXEL NPS-520 Utility > NPS-520 Utility.
  • Seite 113 3 Windows автоматически обнаружит принтер и подскажет вам, как установить его драйвер. Следуйте инструкциям на экране, чтобы установить новый драйвер и/или ассоциировать его с NPS-520. 2.2.2 Управление NPS-520 Чтобы компьютеры в вашей сети могли поочередно использовать принтер вы должны установить пункт Auto Connect (Авто...
  • Seite 114 РУССКИЙ При отключении функции Auto Release (Авто освобождение) пользоваться принтером сможет только один компьютер. Щелкните на Disconnect (Разъединить) для принудительного разрыва соединения. Функции Auto Release (Авто освобождение) и Auto Connect (Авто подключение) не работают в операционных системах более ранних версий, чем Windows 2000 SP4.
  • Seite 115 Connect (Авто подключение) на всех компьютерах с Windows. 3 Web-конфигуратор Ниже приведены инструкции по конфигурированию настроек TCP/IP для NPS-520 с использованием Web- конфигуратора. Более подробная информация и инструкции по добавлению принтера приведены в Руководстве пользователя. Используйте Internet Explorer версии 6.0 и выше или...
  • Seite 116 РУССКИЙ 2 Наберите IP-адрес NPS-520 по умолчанию (192.168.1.6) в поле адреса URL. 3 Введите “1234” (по умолчанию) в качестве пароля и щелкните на кнопке Login (Вход). Если окно входа в систему не появляется, то проверьте имеет ли ваш компьютер ту же...
  • Seite 117 РУССКИЙ Если NPS-520 подключен к сети, в которой находится DHCP сервер, то выберите Obtain IP automatically (Получать IP автоматически). Это позволит DHCP серверу назначать настройки TCP/IP (такие как IP-адрес и маску подсети) для вашего NPS-520. В противном случае, выберите Use Fixed IP Address (Использовать...
  • Seite 118: Системные Требования

    РУССКИЙ Щелкните Apply (Применить) для сохранения сделанных изменений. 4 Системные требования Перед началом установки убедитесь, что ваш компьютер удовлетворяет следующим требованиям: • Pentium II 300 МГц и выше • Минимум 20 Мб пространства на жестком диске • Минимум 32 Мб оперативной памяти •...
  • Seite 119 диск с дистрибутивом Windows 98 SE Процедура просмотра сертификатов продукта 1 Посетите сайт www.zyxel.com. 2 Выберите ваш продукт из выпадающего списка на домашней странице ZyXEL и перейдите на его страницу. 3 Выберите на этой странице сертификат, который вы хотите просмотреть.
  • Seite 120: Svenska

    NPS- 520 (märkt NPS i följande grafik) är ansluten till. Tack vare NPS-520 fungerar skrivaren som om den är direkt ansluten till din dator. Du ska redan ha installerat drivrutinen (och eventuellt verktygsprogram) för skrivaren...
  • Seite 121 Om datorns operativsystemversion är äldre än Windows 2000 SP4, kan du bara skriva ut på skrivaren, även om skrivaren skulle ha funktioner för att skriva ut, kopiera, faxa och/ eller skanna. 1 Maskinvaruanslutning Följ stegen nedan för att ansluta NPS-520 till ditt nätverk.
  • Seite 122 1 Anslut USB-porten till en USB v2.0-anpassad skrivare med en USB-sladd. 2 Anslut LAN-porten till ditt lokala nätverk med en Ethernet- sladd. 3 Använd den medföljande strömadaptern och anslut strömuttaget på NPS-520 till en lämplig strömkälla. 1.1 Indikatorlampor Titta på indikatorlamporna på toppanelen. Indikatorlampan READY lyser när systemet är klart.
  • Seite 123 Installationsprocedurerna är likartade för alla Windows- versioner som stöds. 1 Sätt in den medföljande CD-skivan i CD-ROM-enheten på din dator (som är ansluten till NPS-520 direkt eller ansluten till ditt nätverk). När följande skärm visas, klicka på Setup (inställningar). Om skärmen inte visas, leta reda på och...
  • Seite 124 SVENSKA 2 Välj önskat språk och klicka på OK. 3 Följande skärm visas. Klicka på Next (nästa).
  • Seite 125 4 Klicka på Next (nästa) för att acceptera standardfilplats eller klicka på Change (ändra) för att välja en annan mapp. 5 Välj Yes, I want to configure the ZyXEL NPS-520 now (ja, jag vill konfigurera ZyXEL NPS-520 nu) och klicka på Next (nästa) för att konfigurera NPS-520 nu.
  • Seite 126 SVENSKA 6 NPS-520;s unika enhetsnamn visas automatiskt i textrutan. Om det inte visas, klicka på Refresh (uppdatera) för att uppdatera skärmen. Klicka på Next (nästa). 7 Ange standardlösenordet (1234) och klicka på OK. 8 Om du vill kan du ersätta det unika genererade enhetsnamnet med ett mer lättigenkännligt namn med...
  • Seite 127 SVENSKA 9 Om NPS-520 är ansluten till ett nätverk som har en DHCP-server, välj DHCP och låt DHCP-servern tilldela TCP/IP-information (som t. ex. IP-adress och subnetmask) till NPS-520. I annat fall cäljer du Manual IP (manuell IP) och anger en IP-adress (i samma subnet som ditt nätverk), subnetmask och gateway-IP-adress.
  • Seite 128 (TCP/IP-konfiguration) eller klicka på No (nej) för att låta NPS-520 söka efter DHCP-servern igen. Om din dator och NPS-520 inte finns i samma subnet, visas följande skärm. Klicka på OK (eller Yes (ja)) för att fortsätta. 10Denna skrivskyddade skärm visar de aktuella...
  • Seite 129 SVENSKA rätt och klicka på Finish (slutför). I annat fall klickar du på Back (bakåt) för att omkonfigurera informationen. 11Klicka på Finish (slutför) för att slutföra installationen. 12Upprepa dessa steg för varje Windows-dator i ditt nätverk som ska använda NPS-520.
  • Seite 130 Start > (All) Programs (alla program) > ZyXEL NPS-520 Utility (verktyg) > NPS-520 Utility. 2 Skärmen Status visas. Välj namnet på din NPS-520 och klicka på Connect (anslut). 3 Windows detekterar automatiskt skrivaren och uppmanar...
  • Seite 131 Auto Connect (automatisk anslutning) på verktygsskärmen Status och välja en standardskrivare. Autoanslutningen låter NPS-520 kommunicera med skrivarne när du vill använda den. NPS-520 kopplar bort anslutningen när jobbet är klart. Alternativt kan du klicka på Connect (anslut) och ställa in Auto Release (automatisk bortkoppling) efter en viss tids inaktivitet.
  • Seite 132 SVENSKA Om du inaktiverar alternativet Auto Release, blir det bara denna dator som kan använda skrivaren. Klicka på Disconnect (koppla från) för att avbryta anslutningen manuellt. Funktionerna Auto Release (automatisk bortkoppling) och Auto Connect (automatisk anslutning) kan inte konfigureras ifall datorns operativsystemversion är äldre än Windows 2000 SP4.
  • Seite 133 SVENSKA Om skrivaren inte är ansluten eller inte är tillgänglig när du skickar ut en begäran, kommer din begäran att hamna i din dators utskriftskö tills skrivaren är tillgänglig. Om du inte kan använda skrivaren, se till att aktivera alternativet Auto Release (automatisk bortkoppling) och/eller Auto Connect (automatisk anslutning) på...
  • Seite 134 3 Skriv in ”1234” (standard) som lösenord och klicka på Login (Inloggning). Om inloggningsskärmen inte visas, kontrollera att din dator befinner sig i samma subnet som NPS-520. Eventuellt måste du också kontrollera datorns säkerhetsinställningar och kontrollera att datorns Ethernet-kort är installerat och fungerar som det ska.
  • Seite 135 SVENSKA Om NPS-520 är ansluten till ett närverk som har en DHCP- server, välj Obtain IP automatically (Erhåll IP automatiskt) för att DHCP-servern ska tilldela TCP/IP-information (t.ex. IP-adress och subnetmask) till NPS-520. Välj annars Use Fixed IP Address (Använd fast IP-adress) och skriv in en IP-adress (i samma subnet som nätverket), subnetmask och...
  • Seite 136 Windows 98 SE. Procedur för att visa en produkts certifikat 1 Gå till www.zyxel.com. 2 Välj din produkt från rullgardinslistrutan på ZyXEL:s hemsida för att gå till denna produkts sida. 3 Välj det certifikat du vill titta på från denna sida.
  • Seite 137 SVENSKA...

Inhaltsverzeichnis