Werbung
Verfügbare Sprachen
Verfügbare Sprachen
Quicklinks
Werbung

Inhaltszusammenfassung für AGPtek SW03
- Seite 1 SMART WATCH User Manual Quick Start>>...
- Seite 2 CONTENTS 01/06 English 07/13 Deutsch 14/19 Italiano 20/26 Español 27/32 Français 33/38 日本語...
- Seite 3 Charge the Smart Watch Golden Contact Area Buckled up Connect to an USB port to charge...
- Seite 4 Put the Smart Watch on the charging base, ensure the golden contact area are positioned against each other, press until they are buckled. Connect it to a USB port for charging with the included USB cable. Remove the Base Note: To remove the charging base from the watch, you can push the protrusion part of the charging base, then gently separate the watch from...
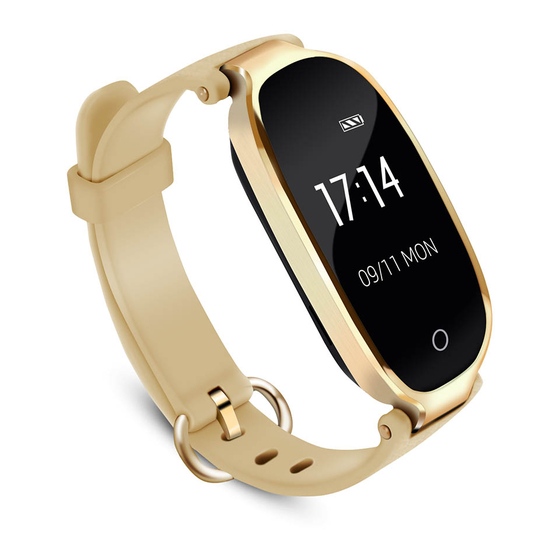
- Seite 5 Buttons and Control Power on: Long press the round button for 3 seconds, and a pairing code will be displayed to identify the watch. Switch information panel: tap the round button to turn on the screen, tap again to switch the information panel between main panel/pedometer/ sports monitor/heart rate monitor.
- Seite 6 and find button and choose “OFF”, then hold the round button for 5 seconds to turn off the watch. Connect the Smart Watch to the APP on Your Phone Scan the QR code, or search for "i-Fit" on Google Play or App store and download it.
- Seite 7 Set your personal information and synchronize it to your watch. In response to the call of Greenpeace organization to save paper, we have uploaded the electronic version of the User Manual in our website, please visit http://www.agptek.com/support/downl oad.html to download the detailed User Manual.
- Seite 8 After synchronizing, you can view the exercise of each day/month/year on the daily records, step counting data/distance, burned calories, achieved goal, sleeping quality and the related history records. If you have any problem about this product, please feel free to contact support@agptek.com.
- Seite 9 Aufladung Metalloberfläche Schließen Sie die rückseitige Abdeckung Durch USB Kabel aufladen...
- Seite 10 Setzen Sie die Armband auf den Ladenstecker. Stellen Sie bitte sicher, dass die Metalloberfläche auf dem richtig Position ist, schließen Sie die rückseitige Abdeckung. Verwenden Sie zum Laden das USB-Kabel. Entfernen Sie die Uhr auf dem Ladegerät Hinweis: Um die Ladestation von der Uhr zu entfernen, können Sie den Vorsprungsteil des Ladenstecker halten Schieben Sie hier um es zu...
- Seite 11 und dann die Uhr vorsichtig auf dem Ladegerät mit der entgegengesetzte Richtung trennen. Tasten und Kontrolle Einschalten: Halten Sie die runde Taste 3 Sekunden gedrückt, danach wird ein Paarungscode auf die Uhr gezeigt. Informationstafel Schalten: Klicken Sie die runde Taste um das Bildschrim aufzuwachen.
- Seite 12 ungefahr 3 Sekunden um die Funktion Menü einzugehen. Wählen Sie die unterschiedliche Taste, durch die runde Taste klicken. (Nicht verfügbar auf dem Musikseite). Ausschalten: Halten Sie die runde Taste 3 Sekunden gedrückt, finden Sie die Taste auf dem Bildschrim und dann wählen Sie “OFF”.
- Seite 13 Google Play oder App store und es herunterladen. Halten Sie die Smart Armband im einschalten Zustand. Öffnen Sie bitte die Bluetooth auf ihrem Handy. Suchen Sie das Armband durch die Bluetooth Ihrem Handys. Durch App Ihre Informationen und die Aufgaben einstellen. Öffnen Sie bitte die APP , dann wählen Sie mit Ihrer E-Mail registrieren oder ignorieren.
- Seite 14 Informationen und synchronisieren Sie es auf Ihrem Smart Armband. Um Papier zu sparen und die Umwelt zu schützen, haben wir elektronische Anleitung schon unserer Website hochgeladen. Bitte besuchen Sie die Webseite dem: http://www.agptek.com/support/downl oad.html Anleitung herunterladen.
- Seite 15 Übung von jedem Tag / Monat / Jahr auf die täglichen Aufzeichnungen, Schritt zählen Daten / Entfernung, verbrannte Kalorien, erreicht Ziel, Schlafqualität damit verbundenen Geschichte Datensätze sehen. Für weitere Fragen stehen wir Ihnen sehr gerne Email support@agptek.com zur Verfügung.
- Seite 16 Ricarica dell'Braccialetto Intelligente Zona di contatto dorata Allacciato Connessione a una porta USB per caricare...
- Seite 17 Mettere l'Braccialetto Intelligente sulla base di ricarica, assicurarsi che la zona di contatto dorato sono posizionati uno contro l'altro, premere fino a quando non sono allacciati. Collegarlo a una porta USB per la ricarica con il cavo USB in dotazione. Rimuovere la base Nota: per rimuovere la base di ricarica dall'orologio, è...
- Seite 18 Pulsanti e controllo Accensione: Premere lungo pulsante rotondo per 3 secondi e verrà visualizzato codice accoppiamento identificare l'orologio. Cambia pannello informazioni: toccare il pulsante rotondo per accendere lo schermo, toccare di nuovo per passare il pannello informazioni tra pannello principale/pedometro/monitor sportivo/cardiofrequenzimetro.
- Seite 19 tenere premuto entrare confermare selezione/ritorno (eccetto nella musica). Spegnimento: Vai al menu funzione e trovare il pulsante e scegliere "off", quindi tenere premuto il pulsante rotondo per 5 secondi per spegnere l'orologio. Collegare l'Braccialetto Intelligente all'app sul telefono Scansiona il codice QR o Cerca "i-fit"...
- Seite 20 Device-Paring, selezionare il dispositivo Smart Watch e terminare l'accoppiamento. Apri l'app, quindi scegli di registrarti con la tua email o ignorala per sperimentare parti delle sue funzioni. Modalità Sport/Sleep Imposta il tuo obiettivo/tempo di riposo sul telefono. Indossa il tuo orologio intelligente. Visualizzare l'esercizio e i dati del sonno sull'orologio.
- Seite 21 Dopo la sincronizzazione, è possibile visualizzare l'esercizio ogni giorno/mese/anno record giornalieri, conteggio dati passo/distanza, le calorie bruciate, obiettivo raggiunto, la qualità del sonno e la storia correlata record. Se avete qualunque problema circa questo prodotto, ritenga prego libero di contattare support@agptek.com.
- Seite 22 Cargando el pulsera actividad Área de contacto de oro Abrochado Conectar a un puerto USB para cargar...
- Seite 23 Coloca el Pulsera Actividad en la base de carga, asegúrese de que el área de contacto dorada esté colocada la una contra la otra, presione hasta que queden abrochadas. Conéctelo a un puerto USB para cargarlo con el cable USB incluido. Quitar la base Nota: para quitar la base de carga del reloj, usted puede sostener la parte de...
- Seite 24 Botones y Controles Encendido: Pulse el botón redondo por 3 segundos y se mostrará un código emparejamiento para identificar el reloj. Cambia panel de información: pulse el botón redondo para encender la pantalla, pulse de nuevo para cambiar el panel de información entre el panel principal/podómetro/monitor deportes/pulsómetro.
- Seite 25 mantenga pulsado para entrar o confirmar selección/retorno (excepto en la música). Apagado: vaya al menú de funciones y encuentre el botón y elija "OFF", luego mantenga pulsado el botón redondo durante 5 segundos para apagar el reloj. Conecte el pulsera actividad a la aplicación en su teléfono Escanea el código QR, o busca "i-Fit"...
- Seite 26 BuscarDevice-Paring, seleccione dispositivo pulsera actividad y finalizar el emparejamiento. Abra la aplicación y elija registrarse con su correo electrónico, o ignorar para experimentar partes de sus funciones. Modo de deportes/ duermo Fije su meta del ejercicio/tiempo del sueño en su teléfono. Pone tu Pulsera inteligente.
- Seite 27 Para respuesta a la llamada de la organización de Greenpeace para salvar el papel, hemos subido la versión electrónica del manual del usuario en nuestro Web site, por favor visita http://www.agptek.com/support/downl oad.html para descargar el manual de usuario detallado.
- Seite 28 Si usted tiene cualquier problema sobre este producto, por favor sienta libre de entrar en contacto con support@agptek.com.
- Seite 29 Charger votre bracelet Contacteur Or Bouclez Connectez sur le port USB pour charger.
- Seite 30 Mettez le bracelet sûr le socle de changement assurez-vous contacteur or est contacté. Bouclez le socle et puis le connectez port USB avec le câble USB pour charger. Enlever le socle Note: Pour enlever le socle de votre bracelet, vous pouvez le maintenir et puis le séparer doucement.
- Seite 31 Boutons et Contrôles Allumer l’appareil: Appuyez 3 secondes sur le bouton rond, et puis il s’affichera un code de jumelage pour l’identifier. Changez d'information panneau: touchez le bouton rond pour allumer l'écran, touchez encore une fois pour changer d'information entre le panneau principal / podomètre /le sport moniteur / moniteur cardiaque.
- Seite 32 à l’interface musicale). Eteindre l’appareil: Trouvez l’icône dans sous-menu puis choisissez”OFF”, maintenez le bouton rond pendent 5 secondes pour éteindre le bracelet. Connectez le bracelet intelligent àAPP sur votre samrtphone Scannez le code QR ou rechercher "i-Fit" sur Google Play ou App store et puis le téléchargez.
- Seite 33 Regardez les data sur la montre. Definissez votre information personelle et synchronisez-la à la montre. En réponse à l'appel de l'organisme greenpeace pour économiser le papier, nous avons téléchargé version électronique du manuel de l'utilisateur dans notre site web, vous pouvez visiter http://www.agptek.com/support/downl...
- Seite 34 Synchroniser Information d’utilisateur Après la synchronization, vous pouvez voir l’exercice chaque jour /mois/année sur le record et d’autres informations. N‘hésitez pas à nous contacter si vous avez questions support@agptek.com.
- Seite 35 充電について 金属接触面 固定 USB ポートに接続して充電...
- Seite 36 スマートウォッチの裏面を充電台の金 属接触面と合わせてください。固定し たら付属の USB ケーブルで USB ポー トに接続して充電してください。 充電台を取り外す ご注意:充電台を本製品から取り外 すには、充電台の突起部分を逆方向 へ抜き出してください。 ここを抜き出してください...
- Seite 37 基本操作 電源オン:丸ボタンを 3 秒間長押し すると、本製品を認識するための QR コードが表示されます。 スイッチ情報パネル:丸ボタンをクリック して画面をオンにし、再度クリックすると、 メインパネル/歩数計/スポーツモニター /心拍数モニターに切り替える可能で す。 メニューに移動します:画面がオフ時 に丸ボタンをクリックして、画面をオンに します。丸ボタンを 3 秒間押して機能 メニューに入り、丸ボタンを短く押すより、 各機能間に切り替えます。選択/戻る (音楽を除く)には、丸ボタンを長押 してください。 電源オフ:機能メニューに入り、 ボタ ンを見つけて「OFF」を選択し、丸ボタ ンを 5 秒間押し続けて本製品をオフに します。...
- Seite 38 スマートウォッチを APP に接続し ます QR コードをスキャン し て く だ さ い 。 又 は 、 Google Play や App Store で「i-Fit」を検索 してダウンロードしてください。 本製品の電源を入れたままにして おいてください。 携帯で Bluetooth 機能をオンに して、APP に入ってください。 デバイス のペアリングを検索し、スマートウォッチ デバイスを選択してペアリングを完了し ます。 APP をオンにして、お持ちのメール アドレスを ID として登録できます。また はメールアドレスなしで登録するも対応 します。...
- Seite 39 スポーツ/スリープモード 携帯で運動目標/睡眠時間を設 定してください。 スマートウォ ッチを着用 してくだ さ い。 スマートウォッチで運動と睡眠のデ ータを表示します。 個人情報を設定し、スマートウォッ チと同期させてください。 Greenpeace 組織の要望に 応じて、本製品の詳しい日本 語取扱説明書(PDF ファイ ル)をダウンロードしてご覧いただけま す 。詳しくは http://www.agptek.com/supp ort/download.html にご覧くださ い。...
- Seite 40 ユーザー情報の同期 同期完了後、日/月/年に記録が見つ けます。歩数データ/距離、燃焼カロリ ー、達成目標、睡眠時間および関連 する履歴データも表示できます。 本製品に関する質問がある場合は、 support@agptek.com までお気軽 にお問い合わせください。...