Werbung
Quicklinks
TM
HAYFLOW
1. When to change the HAYFLOW filter element?
Fluid through the filter medium creates a pressure drop across the system. This
pressure increases as the element continues to trap contamination from the flow
system. The pressure drop is the best indication of when to change the HAYFLOW
element.
Under normal circumstances and unless otherwise indicated on the datasheet, the
recommended maximum pressure drop should not exceed 2.5 bar (36 psi). The
optimal pressure drop and the frequency of element change-out can only be
determined by experience with each process.
2. Installing a new HAYFLOW filter element
● Preparing the housing
1. The filter housing has to be opened according to the installation and maintenance
instructions delivered together with the specific housing.
2. Remove the used filter element from the basket (Photo 1). The element can be
easily lifted from the basket by the handles of the SENTINEL
handle in the centre sleeve or at both. Dispose of in an appropriate manner.
3. Clean the housing/basket if necessary, paying special attention to the O-rings and
sealing surfaces. With another tool the basket can be lifted up from the housing
until it can be taken out by hand (photo 2). Do not use this tool to carry the basket
around.
4. Replace O-Rings of the housing when deformed or damaged with new O-Rings of
the correct material.
● Installing your new HAYFLOW element
1. Remove the label. Note: the label contains the batch and product code numbers
and should be retained as a reference.
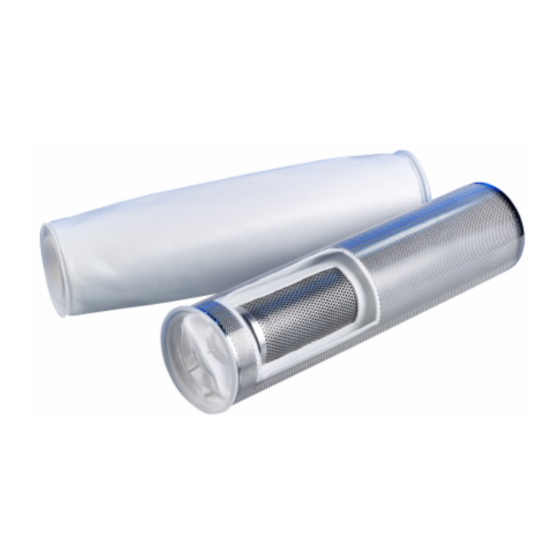
2. Insert the HAYFLOW installation tool into the element (photo 3) and push the
installation tool down to the bottom of the element.
3. Install the element with help of the installation tool into the basket. Push it down
until it sits at the bottom (photo 4).
4. Remove the installation tool by pulling it out.
5. Check that the SENTINEL ring sits properly on the machined seat (photo 5).
6. See that every basket is fitted with a new filter element.
3. Starting up again
Close the filter housing and start up the filtration process following the installation
instructions supplied with the housing.
For further info or questions, please contact your Eaton Filtration representative.
Headquarters EUROPE, MIDDLE EAST and
AFRICA
Eaton Filtration GmbH
Auf der Heide 2
D-53947 Nettersheim, Germany
Customer Service:
Germany
Tel.: +49/(0) 2486 809 400
France
Tel.: +33/(0) 4 72 78 84 50
UK
Tel.: +44/(0) 1206 848 350
Austria
Tel.: 0800 29 36 89
Italy
Tel.: 800 78 58 83
Belgium
Tel.: 0800 77 0 22
Luxembourg
Tel.: 800 2 42 98
Tel.: 0800022 27 03
Netherlands
Tel.: 90098 49 15
Spain
Tel.: +49/(0) 2486 809 470
Export
Tel.: +27/(0) 11 791 4331
South Africa
Important Installation Instructions
Tel.: +49/(0) 2486 809 0
Fax: +49/(0) 2486 809 800
info-filtration@eaton.com
www.filtration.eaton.com
Fax: +49/(0) 2486 809 500
Fax: +33/(0) 4 78 74 43 07
Fax: +44/(0) 1206 848 359
Fax: 0800 29 36 90
Fax: 800 78 58 84
Fax: 0800 77 0 23
Fax. 800 2 42 99
Fax: 0800 0 22 26 95
Fax: 900 98 49 15
Fax: +49/(0) 2486 809 570
Fax: +27/(0) 11 791 0583
Photo 1:
Taking out the element.
®
ring, at the cut
Photo 2:
The lifting tool: Lifting
up the basket.
Photo 3:
Insert the HAYFLOW installation
tool in the element.
Photo 4:
Push the element with the instal-
lation tool down to the bottom of
the basket.
.
Photo 5:
Push the HAYFLOW collar
down.
Werbung

Inhaltszusammenfassung für Eaton HAYFLOW
- Seite 1 Fluid through the filter medium creates a pressure drop across the system. This pressure increases as the element continues to trap contamination from the flow system. The pressure drop is the best indication of when to change the HAYFLOW element.
- Seite 2 2. Positionner I'outil d'installation dans I'élément HAYFLOW Etikett sollte als Referenz aufbewahrt werden. (photo 3). Insérer les 3 barres de I'outil d´installation vers le 2. Setzen Sie die HAYFLOW Einbauhilfe in das Element fond de I'élément. (Photo 3) und drücken Sie die drei Stangen der Einbauhilfe 3.

