Herunterladen Inhalt Inhalt Diese Seite drucken
Targus Ergo D-Pro Bedienungsanleitung

Targus Ergo D-Pro Bedienungsanleitung

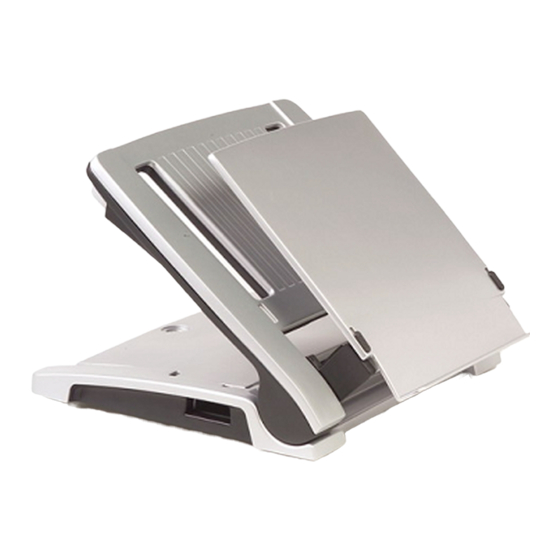
Desktop stand for notebooks

Werbung

Verfügbare Sprachen
  • DE

Verfügbare Sprachen

  • DEUTSCH, seite 16

Werbung

Inhaltsverzeichnis
loading

Inhaltszusammenfassung für Targus Ergo D-Pro

  • Seite 2: Inhaltsverzeichnis

    Targus Ergo D-Pro™ Desktop Stand for Notebooks.... 3 Deutsch Ergo D-Pro™ Desktopständer für Notebooks von Targus ................... 16 Español Soporte de escritorio Ergo D-Pro™ para portátiles de Targus ................... 29 Français Support de bureau Ergo D-Pro™ pour ordinateurs portables de Targus ................42 Italiano Targus Stand Ergo D-Pro™...
  • Seite 3: Targus Ergo D-Pro™ Desktop Stand For Notebooks

    PRO™ DESKTOP STAND FOR NOTEBOOKS Introduction Congratulations on your purchase of the Targus Ergo D-Pro Desktop Stand for Notebooks. The D-Pro is a unique, ergonomically correct desktop notebook stand that allows a notebook computer to be comfortably used as a desktop replacement.
  • Seite 4 Targus Ergo D-Pro™ Desktop Stand for Notebooks Setting Up The D-Pro 1 Press buttons (A) on both sides to raise the D-Pro to desired angle. 2 Open the document holder and flip it towards you.
  • Seite 5 Targus Ergo D-Pro™ Desktop Stand for Notebooks 3 Check that the D-Pro is assembled correctly and carefully place your notebook on the stand as shown. 4 Fold the document holder up into place. Adjust the inclination of the document holder by using the shift buttons (B).
  • Seite 6: Cable Management

    Targus Ergo D-Pro™ Desktop Stand for Notebooks Cable Management Without Targus Mobile Docking Station 1 Remove compartment cover (A). 2 Guide cables through as indicated and reinstall compartment cover.
  • Seite 7 Targus Ergo D-Pro™ Desktop Stand for Notebooks With Targus Mobile Docking Station 1 Remove compartment cover (A). 2 Place the Mobile Docking Station in the cavity. 3 Guide cables through (B) and connect them to the docking station.
  • Seite 8 Targus Ergo D-Pro™ Desktop Stand for Notebooks 4 Connect your notebook and power supply at (C). 5 Replace compartment cover. Connecting a Security Cable The D-Pro offers two options for securing your notebook and peripherials; a slot lock or video port lock.
  • Seite 9 Targus Ergo D-Pro™ Desktop Stand for Notebooks Port Replicator Module The Port Replicator Module (PRM) allows you to mount your OEM docking station to the D-Pro. Attention IBM & Toshiba Users Your docking station may be positioned and attached to the PRM with the screw rivets that are provided.
  • Seite 10 Targus Ergo D-Pro™ Desktop Stand for Notebooks 2 Connect your notebook first to your docking station and place them together onto the D-Pro, making sure your notebook is supported at (B) and centred. 3 Use the knobs to position the PRM after determining the proper position to attach the docking station according to the outlining instructions below.
  • Seite 11 Targus Ergo D-Pro™ Desktop Stand for Notebooks Toshiba Advanced port replicator ll and lll: Line up the top of your port replicator with the indication lines on the PRM at (F). Port Replicator Module (PRM) The position where the docking station is to be attached to the PRM is now determined.
  • Seite 12 Targus Ergo D-Pro™ Desktop Stand for Notebooks docking station onto the PRM and hold for at least 20 seconds. 2 The docking station is now attached to the PRM and the notebook screen should be positioned at the centre of the D-Pro.
  • Seite 13 Targus Ergo D-Pro™ Desktop Stand for Notebooks Ergonomic Guidelines The following guidelines will help you to create a comfortable and ergonomic working environment. 1 Adjust the armrest of your chair such that it is level with the height of the table or keyboard. In this position, your shoulders should be relaxed;...
  • Seite 14: Technical Support

    Targus Ergo D-Pro™ Desktop Stand for Notebooks Technical Support For technical questions, please visit: Internet: English http://www.targus.com/uk/support.asp French http://www.targus.com/fr/support.asp German http://www.targus.com/de/support.asp Spanish http://www.targus.com/sp/support.asp Italian http://www.targus.com/it/support.asp Our knowledgeable staff is also available to answer your questions through one of the following telephone numbers.
  • Seite 15: Product Registration

    This warranty does not cover accidental damage, wear and tear, or consequential or incidental loss. Under no conditions is Targus liable for loss of, or damage to a computer; nor loss of, or damage to, programs, records, or data; nor any consequential or incidental damages, even if Targus has been informed of their possibility.
  • Seite 16: Desktopständer Für Notebooks Von Targus

    FÜR NOTEBOOKS VON TARGUS Einführung gratulieren Kauf Ergo D-Pro™ Desktopständer für Notebooks von Targus. Der D-Pro ist einzigartiger, ergonomisch richtiger Desktop- Notebookständer, durch den ein Notebook bequem als Ersatz für einen Desktop-Computer verwendet werden kann. Der D-Pro besitzt ein Fach für den mobilen Dockingstation von Targus oder einen Hub sowie zur Kabelführung, damit der Arbeitsplatz übersichtlich bleibt.
  • Seite 17: Ergo D-Pro™ Desktopständer Für Notebooks Von Targus

    Ergo D-Pro™ Desktopständer für Notebooks von Targus Einrichtung des D-Pro 1 Die Knöpfe (A) auf beiden Seiten drücken, um den D- Pro in den gewünschten Winkel zu stellen. 2 Den Dokumenthalter öffnen und nach vorne aufklappen.
  • Seite 18 Ergo D-Pro™ Desktopständer für Notebooks von Targus 3 Prüfen, ob der D-Pro richtig montiert ist und das Notebook vorsichtig auf den Ständer stellen (siehe Abbildung). 4 Den Dokumenthalter hochklappen. Schiebeknöpfen (B) die Neigung des Dokumenthalters nachstellen. Nun die externe Maus und die externe Tastatur anschließen und Sie können effizient und...
  • Seite 19: Kabelführung

    Ergo D-Pro™ Desktopständer für Notebooks von Targus Kabelführung Ohne mobilen Dockingstation von Targus 1 Den Fachdeckel (A) abnehmen. 2 Die Kabel wie dargestellt einlegen und den Fachdeckel wieder aufsetzen.
  • Seite 20: Mit Der Mobilen Dockingstation Von Targus

    Ergo D-Pro™ Desktopständer für Notebooks von Targus Mit der mobilen Dockingstation von Targus 1 Den Fachdeckel (A) abnehmen. 2 Die Dockingstation in das Fach setzen. 3 Die Kabel einlegen (B) und an die Dockingstation anschließen. 4 Das Notebook und das Netzteil an (C) anschließen.
  • Seite 21: Anschluss Eines Sicherheitskabels

    Ergo D-Pro™ Desktopständer für Notebooks von Targus Anschluss eines Sicherheitskabels Der D-Pro bietet zwei Möglichkeiten zur Sicherung von Notebook und Peripheriegeräten: eine Verriegelung für den Steckplatz oder für die Videobuchse. Befolgen Sie bitte die zum Sicherheitskabel gehörende Gebrauchsanleitung. Verriegelung Steckplatz...
  • Seite 22 Ergo D-Pro™ Desktopständer für Notebooks von Targus Buchsen-Replikator-Modul Mit dem Buchsen-Replikator-Modul (BRM) können Sie Ihre OEM-Dockingstation oder den Dockingstation an den D- Pro anschließen. Achtung & Toshiba Benutzer Ihre Dockingstation kann mitgelieferten Schraubengewindenieten positioniert befestigt werden. Die Dockingstation am BRM befestigen,...
  • Seite 23: Umriss Der Höhe

    Ergo D-Pro™ Desktopständer für Notebooks von Targus 2 Schließen Notebook zuerst Dockingstation an und stellen Sie sie zusammen auf den D-Pro. Vergewissern Sie sich, dass das Notebook an (B) abgestützt ist und zentriert ist. 3 Anhand der Knöpfe kann das BRM positioniert werden,...
  • Seite 24 Ergo D-Pro™ Desktopständer für Notebooks von Targus Toshiba Advanced Buchsen-Replikator ll und lll: Die Oberseite Buchsen-Replikators Führungslinien auf dem BRM (F) ausrichten. Buchsen-Replikator-Modul (BRM) Es folgt die Festlegung der Stellung, in der die Dockingstation am BRM befestigt wird. Wenn Sie die Schraubengewindenieten zur Befestigung...
  • Seite 25 Ergo D-Pro™ Desktopständer für Notebooks von Targus abstützen und die Dockingstation vorsichtig und kräftig mindestens 20 Sekunden lang auf das BRM drücken. 2 Die Dockingstation sitzt nun fest am BRM und der Notebookbildschirm sollte in der Mitte des D-Pro positioniert sein.
  • Seite 26 Ergo D-Pro™ Desktopständer für Notebooks von Targus Ergonomische Richtlinien Die folgenden Richtlinien werden Ihnen bei der Einrichtung eines komfortablen und ergonomischen Arbeitsumfeldes helfen. 1 Die Armlehne Ihres Stuhls so einstellen, dass sie mit dem Tisch oder der Tastatur auf gleicher Höhe ist. In dieser Stellung sollten Ihre Schultern entspannt sein;...
  • Seite 27: Technische Unterstützung

    Ergo D-Pro™ Desktopständer für Notebooks von Targus Technische Unterstützung Bei technischen Fragen besuchen Sie bitte: Internet: Englisch http://www.targus.com/uk/support.asp Französisch http://www.targus.com/fr/support.asp Deutsch http://www.targus.com/de/support.asp Spanisch http://www.targus.com/sp/support.asp Italienisch http://www.targus.com/it/support.asp Unser Expertenteam steht Ihnen auch telefonisch zur Beantwortung Ihrer Fragen zur Verfügung. Österreich 01 795 676 42...
  • Seite 28: Produktregistrierung

    Ihrer Nähe. In jedem Ort werden Ihnen dieseSammelstellen zu Verfügung gestellt. Die Targus Recycling-Richtlinien können Sie einsehen unter: www.targus.com/recycling Änderungen bei Ausstattungsmerkmalen und technischen Daten jederzeit vorbehalten. Alle sonstigen Warenzeichen sind Eigentum der jeweiligen Besitzer. © 2006, Targus Group International, Inc. und Targus, Inc., Anaheim, CA 92806...
  • Seite 29: Soporte De Escritorio Ergo D-Pro™ Para Portátiles De Targus

    TARGUS Introducción Felicidades por su compra de Soporte de escritorio Ergo D-Pro para portátiles de Targus. El D-Pro es una base para ordenador portátil exclusiva y ergonómicamente correcta, para usar sobre el escritorio, que permite usar el ordenador portátil como un ordenador de sobremesa de manera cómoda.
  • Seite 30 Soporte de escritorio Ergo D-Pro™ para portátiles de Targus Cómo instalar el D-Pro 1 Pulse los botones (A) ubicados a ambos lados, para elevar el D-Pro al ángulo deseado. 2 Abra el portadocumentos e inclínelo hacia usted.
  • Seite 31 Soporte de escritorio Ergo D-Pro™ para portátiles de Targus 3 Cerciórese de que el D-Pro quede bien armado y coloque su ordenador portátil con cuidado, como se ilustra. 4 Pliegue el portadocumentos en su sitio. Ajuste la inclinación portadocumentos empleando botones de desplazamiento (B).
  • Seite 32: Organización De Los Cables

    Soporte de escritorio Ergo D-Pro™ para portátiles de Targus Organización de los cables Sin la Docking Station portátil de Targus 1 Quite la tapa del compartimiento (A). 2 Haga pasar los cables como se indica, y vuelva a colocar la tapa del compartimiento.
  • Seite 33 Soporte de escritorio Ergo D-Pro™ para portátiles de Targus Con la Docking Station portátil de Targus 1 Quite la tapa del compartimiento (A). 2 Coloque la docking station en el compartimiento. 3 Haga pasar los cables por (B) y conéctelos a la docking station.
  • Seite 34 Soporte de escritorio Ergo D-Pro™ para portátiles de Targus Cómo conectar un cable de seguridad El D-Pro ofrece dos formas de proteger su ordenador portátil y sus dispositivos periféricos: un candado para ranura de seguridad o un candado para el puerto de video.
  • Seite 35 Soporte de escritorio Ergo D-Pro™ para portátiles de Targus Módulo del replicador de puertos El Módulo del replicador de puertos (MRP) le permite instalar su docking station original en el D-Pro. Advertencia para usuarios de IBM y de Toshiba Puede colocar su docking station y fijarlo al MRP con los remaches roscados que se suministra.
  • Seite 36 Soporte de escritorio Ergo D-Pro™ para portátiles de Targus 2 Primero conecte su ordenador portátil a la docking station colóquelos juntos sobre D-Pro, asegurándose de que el ordenador portátil quede bien apoyado sobre (B) y centrado. 3 Use las tuercas de sujeción para ubicar el MRP después de establecer la posición correcta de la...
  • Seite 37 Soporte de escritorio Ergo D-Pro™ para portátiles de Targus Replicador de puertos Advanced ll y lll de Toshiba: Alinee la parte superior de su replicador de puertos con las líneas indicadoras del MRP en (F). Módulo del replicador de puertos (MRP) Ya ha quedado establecida la posición en la que se debe...
  • Seite 38 Soporte de escritorio Ergo D-Pro™ para portátiles de Targus apoyado sobre (B), y sosténgalos durante al menos 20 segundos. 2 La docking station ya queda fijada al MRP y la pantalla de la ordenador portátil debe quedar en el centro del D- Pro.
  • Seite 39 Soporte de escritorio Ergo D-Pro™ para portátiles de Targus Pautas de ergonomía Las siguientes pautas le ayudarán a crear un ambiente de trabajo cómodo y ergonómico. 1 Ajuste el posabrazos de su silla de modo que quede a la altura de la mesa o del teclado. En esta posición, sus hombros deben estar relajados;...
  • Seite 40: Asistencia Técnica

    Soporte de escritorio Ergo D-Pro™ para portátiles de Targus Asistencia Técnica Para consultas técnicas, visite: Internet: Inglés http://www.targus.com/uk/support.asp Francés http://www.targus.com/fr/support.asp Alemán http://www.targus.com/de/support.asp Español http://www.targus.com/sp/support.asp Italiano http://www.targus.com/it/support.asp Nuestro personal experto también puede contestarle sus preguntas a través de uno de los siguientes números telefónicos.
  • Seite 41: Registro Del Producto

    Targus se le informó de la posibilidad que existieran. La presente garantía no afecta los derechos que la ley le otorga.
  • Seite 42 TARGUS Introduction Nous vous félicitons d'avoir acheté le Support de bureau Ergo D-Pro pour ordinateurs portables de Targus. Le D-Pro est un support unique de bureau, de conception ergonomique, et qui permet à un ordinateur portable d'être utilisé de manière confortable, en remplacement d’un ordinateur bureau.
  • Seite 43: Support De Bureau Ergo D-Pro™ Pour Ordinateurs Portables De Targus

    Support de bureau Ergo D-Pro™ pour ordinateurs portables de Targus Installation du D-Pro 1 Pressez les boutons (A) situés de chaque côté afin de surélever le D-Pro à l'angle désiré. 2 Ouvrez le porte-documents et dépliez-le vers vous.
  • Seite 44 Support de bureau Ergo D-Pro™ pour ordinateurs portables de Targus 3 Vérifiez que le D-Pro est bien monté, et placez doucement votre portable sur le support comme indiqué. 4 Repliez le porte-documents pour le mettre en place. Réglez l'inclinaison du porte-document en utilisant les boutons de décalage (B).
  • Seite 45 Support de bureau Ergo D-Pro™ pour ordinateurs portables de Targus Range-câbles Sans station d’accueil Targus 1 Retirez le couvercle du compartiment (A). 2 Faites passer les câbles comme indiqué, puis replacez le couvercle du compartiment.
  • Seite 46 Support de bureau Ergo D-Pro™ pour ordinateurs portables de Targus Avec station d’accueil Targus 1 Retirez le couvercle du compartiment (A). 2 Placez la station dans l'orifice. 3 Faites passer les câbles dans (B) et connectez-les à la station. 4 Connectez votre portable et l'alimentation électrique en (C).
  • Seite 47 Support de bureau Ergo D-Pro™ pour ordinateurs portables de Targus Connexion d'un câble de sécurité Le D-Pro propose deux solutions pour protéger votre ordinateur portable et ses périphériques : le verrouillage par cran ou le verrouillage du port vidéo. Suivez les instructions d'utilisation fournies avec le câble de sécurité.
  • Seite 48 Support de bureau Ergo D-Pro™ pour ordinateurs portables de Targus Module de duplicateur de ports Le module de duplicateur de ports (MDP) vous permet de monter votre station d'accueil OEM sur le D-Pro. Pour les utilisateurs de matériel IBM et Toshiba Il se peut que votre station d'accueil soit placée sur le MDP...
  • Seite 49: Réglage De La Hauteur

    Support de bureau Ergo D-Pro™ pour ordinateurs portables de Targus 2 Connectez d'abord votre ordinateur portable à votre station d'accueil, puis placez-les ensemble sur le D-Pro, en vous assurant que l'ordinateur soit bien en appui sur (B) et centré. 3 Utilisez les attaches pour positionner le MDP après avoir déterminé...
  • Seite 50 Support de bureau Ergo D-Pro™ pour ordinateurs portables de Targus Duplicateur de ports Toshiba avancé ll et lll : alignez le haut de votre duplicateur de ports avec les tracés indicateurs figurant sur le MDP en (F). Module de duplicateur de ports (MDP) La position dans laquelle la station d'accueil sera fixée au...
  • Seite 51 Support de bureau Ergo D-Pro™ pour ordinateurs portables de Targus d'accueil sur le MDP et maintenez-le pendant au moins 20 secondes. 2 La station d'accueil est à présent attachée au MDP, et l'écran de l'ordinateur doit être positionné au centre du D-Pro.
  • Seite 52 Support de bureau Ergo D-Pro™ pour ordinateurs portables de Targus Principes ergonomiques Les directives suivantes vous aideront à créer un environnement de travail confortable et ergonomique. 1 Ajustez les accoudoirs de votre fauteuil de manière à ce qu'ils soient à la même hauteur que le haut de la table ou que le clavier.
  • Seite 53: Support Technique

    Support de bureau Ergo D-Pro™ pour ordinateurs portables de Targus Support Technique Pour toute question technique, veuillez visiter les sites suivants: Internet: Anglais http://www.targus.com/uk/support.asp Français http://www.targus.com/fr/support.asp Allemand http://www.targus.com/de/support.asp Espagnol http://www.targus.com/sp/support.asp Italien http://www.targus.com/it/support.asp Nos employés qualifiés sont également disponibles aux numéros de téléphone ci-dessous pour répondre à vos questions.
  • Seite 54: Enregistrement Du Produit

    TARGUS est consultable à l'adresse: http://www.targus.com/recycling. Les caractéristiques et spécifications peuvent être modifiées sans préavis. Toutes les autres marques citées sont la propriété de leurs détenteurs respectifs. © 2006, Targus Group International, Inc. et Targus, Inc., Anaheim, CA 92806, États-Unis...
  • Seite 55: Targus Stand Ergo D-Pro™ Desktop Per Notebook

    Il D-Pro e' provvisto di uno scomparto per conservare un Docking Station Portatile Targus od un hub ed organizzare i cavi in modo da avere una stazione di lavoro ordinata. Il D-Pro include un leggio per documenti in attesa di brevetto.
  • Seite 56 Targus Stand Ergo D-Pro™ Desktop per notebook Installazione del D-Pro 1 Premete i bottoni (A) collocati su entrambi i lati per sollevare D-Pro, fino raggiungere l'angolo desiderato.
  • Seite 57 Targus Stand Ergo D-Pro™ Desktop per notebook 2 Aprite il leggio e giratelo verso di voi. 3 Controllate che il D-Pro sia montato correttamente e posizionate con attenzione il notebook sullo stand come mostrato nell'illustrazione.
  • Seite 58 Targus Stand Ergo D-Pro™ Desktop per notebook 4 Aprite il leggio. Sistemate l'inclinazione del leggio utilizzando i bottoni per la regolazione (B). Collegate il mouse e la tastiera esterni e sarete pronti a lavorare in maniera efficiente ed ergonomica.
  • Seite 59 Targus Stand Ergo D-Pro™ Desktop per notebook Organizzazione dei cavi Senza Docking Station Portatile Targus 1 Togliete il coperchio dello scomparto (A). 2 Passate i cavi nel modo indicato e chiudete il coperchio dello scomparto.
  • Seite 60 Targus Stand Ergo D-Pro™ Desktop per notebook Con Docking Station Portatile Targus 1 Togliete il coperchio dello scomparto (A). 2 Collocate il docking station nello scomparto. 3 Passate i cavi da (B) e collegateli la docking station. 4 Collegate il notebook e l'alimentatore a (C).
  • Seite 61 Targus Stand Ergo D-Pro™ Desktop per notebook Collegamento di un cavo di sicurezza Il D-Pro offre due opzioni per assicurare il notebook e le periferiche; un attacco slot lock od un lucchetto per la porta video. Seguite le istruzioni per l'uso incluse con il cavo di sicurezza.
  • Seite 62 Targus Stand Ergo D-Pro™ Desktop per notebook Modulo di Replicatore di Porta Il Modulo di Replicatore di Porta (MRP) consente di montare la docking station OEM al D-Pro. Attenzione utenti IBM & Toshiba La docking station possono essere posizionati e collegati al MRP con i rivetti inclusi nella confezione.
  • Seite 63: Regolazione Dell'altezza

    Targus Stand Ergo D-Pro™ Desktop per notebook sul D-Pro, assicurandosi che il notebook sia sorretto da (B) e posizionato al centro. 3 Usare le manopole per posizionare il MRP dopo aver determinato la posizione giusta per collegare la docking station secondo le istruzioni fornite qui di seguito.
  • Seite 64 Targus Stand Ergo D-Pro™ Desktop per notebook Replicatore di porta Toshiba Advanced ll e lll: Allineate la parte superiore del replicatore di porta con le linee situate sul MRP al punto (F). Modulo di Replicatore di Porta (MRP) La posizione nella quale la docking station devono essere collegati al MRP e' adesso determinata.
  • Seite 65 Targus Stand Ergo D-Pro™ Desktop per notebook la docking station sul MRP e teneteli premuti per almeno 20 secondi. 2 La docking station sono adesso collegati al MRP e lo schermo del notebook dovrebbe essere posizionato al centro del D-Pro.
  • Seite 66: Direttive Ergonomiche

    Targus Stand Ergo D-Pro™ Desktop per notebook Direttive ergonomiche Le direttive che seguono vi aiuteranno a creare un ambiente di lavoro confortevole ed ergonomico. 1 Posizionate il bracciolo della vostra sedia in modo tale che si trovi al livello dell'altezza del tavolo o della tastiera.
  • Seite 67: Supporto Tecnico

    Targus Stand Ergo D-Pro™ Desktop per notebook Supporto Tecnico Per quesiti di natura tecnica, visitate: Internet: Inglese http://www.targus.com/uk/support.asp Francese http://www.targus.com/fr/support.asp Tedesco http://www.targus.com/de/support.asp Spagnolo http://www.targus.com/sp/support.asp Italiano http://www.targus.com/it/support.asp Il nostro staff di tecnici esperti è anche disponibile per rispondere telefonicamente alle vostre domande. Potete quindi chiamare uno dei numeri seguenti.
  • Seite 68: Registrazione Del Prodotto

    Caratteristiche e specifiche soggette a modifiche senza preavviso. Tutti gli altri marchi di fabbrica sono di proprietà dei rispettivi depositari. © 2006, Targus Group International, Inc. eTargus, Inc., Anaheim, CA 92806 USA.
  • Seite 69: Targus Ergo D-Pro™ Bureaustandaard Voor Notebooks

    TARGUS ERGO D-PRO™ BUREAUSTANDAARD VOOR NOTEBOOKS Inleiding Gefeliciteerd met uw aankoop van de Targus Ergo D-Pro Bureaustandaard voor notebooks. De D-Pro is een unieke en ergonomisch correct gemaakte laptopstander waarmee u uw laptop op comfortabele wijze kunt gebruiken als een pc.
  • Seite 70 Targus Ergo D-Pro™ Bureaustandaard voor notebooks Installatie van de D-Pro 1 Druk op de knoppen (A) aan beide zijden om de D-Pro in de gewenste hoek te plaatsen. 2 Open de documentenhouder en draai deze naar u toe.
  • Seite 71 Targus Ergo D-Pro™ Bureaustandaard voor notebooks 3 Controleer of de D-Pro goed is gemonteerd en plaats uw laptop voorzichtig op de standard, zoals wordt getoond. 4 Vouw de documentenhouder op in zijn locatie. Stel de helling van de documentenhouder bij door gebruik te maken van de schuifknoppen (B).
  • Seite 72 Targus Ergo D-Pro™ Bureaustandaard voor notebooks Ordentelijke kabels Zonder Targus mobiel basisstation 1 Verwijder de bedekking van het betreffende gedeelte (A). 2 Geleid de kabels erdoor, zoals wordt aangegeven, en plaats de bedekking terug.
  • Seite 73 Targus Ergo D-Pro™ Bureaustandaard voor notebooks Met Targus mobiel basisstation 1 Verwijder de bedekking van het betreffende gedeelte (A). 2 Plaats de basisstation in de holte. 3 Geleid de kabels door (B) en verbind ze met de docking station. 4 Sluit uw laptop en de voeding aan bij (C).
  • Seite 74 Targus Ergo D-Pro™ Bureaustandaard voor notebooks Verbinding beveiligingskabel Met de D-Pro kunt u uw laptop en de randapparatuur op twee wijzen beveiligen: met een sleufslot of met een slot voor de videopoort. Volg de gebruiksinstructies die met uw beveiligingskabel worden geleverd.
  • Seite 75 Targus Ergo D-Pro™ Bureaustandaard voor notebooks Opmerking voor gebruikers van IBM of Toshiba Uw basisstation kan aan de PRM worden geïnstalleerd en bevestigd met de meegeleverde klinkschroeven. Bevestig uw basisstation aan de PRM door de twee klinkschroeven in de plaat van de PRM en het basisstation te schroeven voordat u de D-Pro met de knoppen vastmaakt.
  • Seite 76 Targus Ergo D-Pro™ Bureaustandaard voor notebooks 2 Verbind eerst uw laptop met uw basisstation en plaats ze beide op de D-Pro. Zorg ervoor dat uw laptop bij (B) wordt ondersteund en in het midden staat. 3 Plaats de PRM in de juiste positie door gebruik te...
  • Seite 77 Targus Ergo D-Pro™ Bureaustandaard voor notebooks Toshiba Advanced portreplicator ll en lll: breng de bovenzijde van uw portreplicator in lijn met de aangegeven lijnen op de PRM bij (F). portreplicatormodule (PRM) U hebt nu de plaats bepaald waar uw basisstation aan de PRM moet worden bevestigd.
  • Seite 78 Targus Ergo D-Pro™ Bureaustandaard voor notebooks op de PRM. Houd gedurende ten minste 20 seconden vast. 2 Het basisstation is nu aan de PRM bevestigd en het scherm van de laptop zou in het midden van de D-Pro moeten staan.
  • Seite 79 Targus Ergo D-Pro™ Bureaustandaard voor notebooks Ergonomische suggesties De onderstaande suggesties zullen u helpen een gemakkelijke en ergonomische werkruimte te creëren. 1 Plaats de armsteun van uw stoel op de hoogte van de tafel of het toetsenbord. Uw schouders kunnen dan rusten.
  • Seite 80: Technische Ondersteuning

    Targus Ergo D-Pro™ Bureaustandaard voor notebooks Technische ondersteuning Voor technische vragen raadpleegt u: Internet: Engels http://www.targus.com/uk/support.asp Frans http://www.targus.com/fr/support.asp Duits http://www.targus.com/de/support.asp Spaans http://www.targus.com/sp/support.asp Italiaans http://www.targus.com/it/support.asp kunnen vragen tevens telefonisch beantwoorden. Oostenrijk 01 795 676 42 België 02-717-2451 Denemarken +45 35 25 87 51...
  • Seite 81 Targus Ergo D-Pro™ Bureaustandaard voor notebooks Productregistratie Targus raadt aan dat u uw Targus-product zo snel mogelijk na de aankoop registreert. U kunt uw Targus-product registreren op: http://www.targus.com/registration.asp U zult uw volledige naam, e-mailadres, telefoonnummer en bedrijfsinformatie (indien van toepassing) moeten opgeven.
  • Seite 82 A base D-Pro providencia um compartimento para arrumação de um Estação móvel de Acopulamento de Targus ou hub, e gestão de cabos, para ter um local de trabalho limpo. A base D-Pro incorpora um suporte de documento com registo de patente pendente.
  • Seite 83: Apoio De Secretária Ergo D-Pro™ Da Targus Para Computadores Portáteis

    Apoio de secretária Ergo D-Pro™ da Targus para computadores portáteis Montagem da Base D-Pro 1 Pressione os botões (A) em ambos os lados, para levantar a base D-Pro até ao ângulo desejado. 2 Abra o suporte de documento e vire-o na sua direcção.
  • Seite 84 Apoio de secretária Ergo D-Pro™ da Targus para computadores portáteis 3 Verifique se a base D-Pro está correctamente montada e, com cuidado, coloque o seu computador portátil na base, como se mostra. 4 Dobre o suporte de documento no lugar. Ajuste a inclinação do suporte de documento, utilizando os...
  • Seite 85 Apoio de secretária Ergo D-Pro™ da Targus para computadores portáteis Gestão de Cabos Estação acopulamento da Targus 1 Remova a cobertura do compartimento (A). 2 Guie os cabos como indicado e volte a instalar a cobertura do compartimento.
  • Seite 86 Apoio de secretária Ergo D-Pro™ da Targus para computadores portáteis Estação acopulamento da Targus 1 Remova a cobertura do compartimento (A). 2 Coloque o estação na cavidade. 3 Guie os cabos (B) e ligue-os ao estação. 4 Ligue o seu computador portátil e abastecimento de energia em (C).
  • Seite 87 Apoio de secretária Ergo D-Pro™ da Targus para computadores portáteis Ligação Cabo Segurança A base D-Pro oferece duas opções para prender o seu computador portátil e periféricos; uma tranca de ranhura ou uma tranca de porta de vídeo . Siga as instruções de utilização incluídas com o seu cabo de segurança.
  • Seite 88 Apoio de secretária Ergo D-Pro™ da Targus para computadores portáteis Atenção Utilizadores de IBM e Toshiba A sua estação de acopulamento pode ser posicionada e ligada ao MDP com os rebites de aparafusar que são fornecidos. Ligue a sua estação de acopulamento ao MDP aparafusando os dois rebites na placa do MDP e estação...
  • Seite 89 Apoio de secretária Ergo D-Pro™ da Targus para computadores portáteis assegurando-se de que o seu computador portátil está apoiado em (B) e centrado. 3 Utilize os botões para posicionar o MDP depois de determinar a posição adequada para ligar a estação de acopulamento de acordo com as instruções de...
  • Seite 90 Apoio de secretária Ergo D-Pro™ da Targus para computadores portáteis Duplicador de Porta Toshiba Advanced ll e lll: Alinhe o topo do seu duplicador de porta com as linhas indicadoras existentes no MDP, em (F). Módulo de Duplicador de Porta (MDP) A posição em que a estação de acopulamento deve ser...
  • Seite 91 Apoio de secretária Ergo D-Pro™ da Targus para computadores portáteis estação de acopulamento para o MDP e segure durante, pelo menos, 20 segundos. 2 A estação de acopulamento está, agora, presa ao MDP e a tela do computador portátil deve estar posicionada no centro da base D-Pro.
  • Seite 92 Apoio de secretária Ergo D-Pro™ da Targus para computadores portáteis Directivas Ergonómicas As directivas ergonómicas que se seguem ajudarão a criar um ambiente de trabalho confortável e ergonómico. 1 Ajuste o braço da sua cadeira de forma a que fique ao mesmo nível da altura da mesa ou do teclado.
  • Seite 93: Assistência Técnica

    Apoio de secretária Ergo D-Pro™ da Targus para computadores portáteis Assistência Técnica Para questões técnicas, visite: Internet: Inglês http://www.targus.com/uk/support.asp Francês http://www.targus.com/fr/support.asp Alemão http://www.targus.com/de/support.asp Espanhol http://www.targus.com/sp/support.asp Italiano http://www.targus.com/it/support.asp O nosso pessoal especializado está também disponível para responder às suas questões através de um dos seguintes números de telefone.
  • Seite 94: Registo De Produto

    Targusencontra-se disponível para visualização em: http://www.targus.com/recycling As características e especificações estão sujeitas a alterações sem aviso prévio. Todas as outras marcas comerciais são propriedade dos seus respectivos proprietários. © 2006, Targus Group International, Inc. e Targus, Inc., Anaheim, CA 92806 USA.

Inhaltsverzeichnis