Herunterladen Inhalt Inhalt Diese Seite drucken
auna multimedia Areal Bar 541 Anschluss- Und Anwendungshinweise

auna multimedia Areal Bar 541 Anschluss- Und Anwendungshinweise

Soundbar mit aux, opt. eingang, rca, fernbedienung

Werbung

Verfügbare Sprachen

Verfügbare Sprachen

Areal Bar 541
Soundbar mit AUX, Opt. Eingang, RCA, Fernbedienung
10029139
www.auna-multimedia.com

Werbung

Inhaltsverzeichnis
loading

Inhaltszusammenfassung für auna multimedia Areal Bar 541

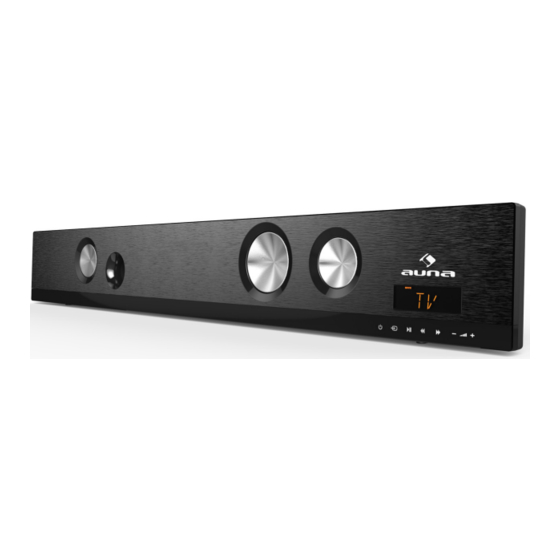
  • Seite 1 Areal Bar 541 Soundbar mit AUX, Opt. Eingang, RCA, Fernbedienung 10029139 www.auna-multimedia.com...
  • Seite 2: Sicherheitshinweise

    Sehr geehrter Kunde, zunächst möchten wir Ihnen zum Erwerb Ihres Gerätes gratulieren. Bitte lesen Sie die folgenden Anschluss- und Anwendungshinweise sorgfältig durch und befolgen Sie diese um möglichen technischen Schäden vorzubeugen. Sicherheitshinweise • Diese Bedienungsanleitung dient dazu, Sie mit der Funktionsweise dieses Produktes vertraut zu ma- chen.
  • Seite 3: Technische Daten

    Technische Daten Artikelnummer 10029139 Allgemein Ausgangsleistung 100W max. Frequenzgang 20Hz - 20KHz (±3dB) Eingangs-Sensitivität 520mV Stromversorgung Netzstrom 100-240V ~ 50-60Hz Energieverbrauch 20W (Standby ≤0,5W) Full Range: 8 Ohm, 52mm (2”), Frequenzgang 250Hz - 20Khz Lautsprecher Woofer: 4 Ohm, 78mm (3”), Frequenzgang 55~250Hz Maße 770 x 103 x 55mm Länge Netzkabel 1,5m...
  • Seite 4 Bedienelemente Rückseite: Haken für die Wandmontage Netzkabel Frontpanel und Anschlüsse: Optischer Eingang (Ein/Standby) Cinch-Anschluss (Eingangsquelle wählen) AUX-Anschluss (3,5mm Klinke) VOL +/- Display...
  • Seite 5 Fernbedienung: Display Dimmer (Ein/Standby) EQ Modi (STandarD, MUSIC, MOVIE, NEWS) Bass +/- VOL+ / - Mute (Stummschaltung) Sleep Timer (Eingangsquelle wählen)
  • Seite 6 Inbetriebnahme: Vorbereitung und Anschlüsse Vorbereitung und Gebrauch der Fernbedienung • Drücken Sie den Batteriehalter wie auf den Bild zu sehen (1) und ziehen Sie diesen heraus (2). • Ersetzen Sie die Batterie. Beachten Sie hierbei die richtige Polung (3). • Setzen Sie den Batteriehalter wieder in die Fernbedienung ein (4).
  • Seite 7 2) Anschluss via COAX-Kabel: Schließen Sie Ihr TV-Gerät, DVD- oder Blu-Ray-Player per optischem Kabel 3) Anschluss via COAX-Kabel: Schließen Sie Ihr TV-Gerät, DVD- oder Blu-Ray-Player mit einem Audiokabel (3,5mm-Klinke auf Cinch) an:...
  • Seite 8 4) AUX-Verbindung: Verbinden Sie externe Geräte (wie MP3-Player, Smartphones etc.) zum Beispiel am AUX-Eingang der Soundbar:...
  • Seite 9: Bedienung

    Bedienung Standby / Einschalten Verbinden Sie das Gerät mit einer Haushaltssteckdose. Drücken Sie (Ein/Standby) am Gerät oder auf der Fernbedienung, um die Soundbar einzuschalten. Drücken Sie erneut, um das Gerät wieder auszuschal- ten (Standbybetrieb). Eingangsquelle wählen Drücken Sie mehrfach, um zwischen den Audio-Eingängen (TV, AUX, COAX, BT, OPTC und USB) zu wählen.
  • Seite 10 BT Funktionen • Drücken Sie den Eingangswahl-Taster mehrfach, um aus den Audio-Eingängen BT auszuwählen. • „BT“ erscheint auf dem Display und blinkt, während das Gerät nach zuvor verbundenen BT-Geräten scannt. Werden keine gefunden, ist die Soundbar bereit zum BT-Pairing mit einem neuen Gerät. •...
  • Seite 11: Montage

    Montage • Halten Sie die Soundbar an der gewünschten Stelle an die Wand und zeichnen Sie die Bohrlöcher im Abstand von 630mm vor. • Die Soundbar sollte mindestens 7,5cm unterhalb des TV-Geräts angebracht werden. • Bohren Sie - in Abhängigkeit von der Beschaffenheit der gewählten Wand die zwei Löcher und setzen Sie Dübel und Schrauben ein - drehen Sie diese nicht vollständig ein, sondern so, dass der Kopf ca.
  • Seite 12: Troubleshooting

    Troubleshooting Problem Mögliche Lösung Stellen Sie sicher, dass das Gerät an eine Steckdo- se angeschlossen ist, dass die entsoprechenden Kein Strom notwendigen Sicherungen intakt sind und dass das Gerät eingeschaltet ist. • Stellen Sie bei AUX-Geräten sicher, dass die Lautstärke an der Signalquelle aufgedreht ist. •...
  • Seite 13: Hinweise Zur Entsorgung

    Hinweise zur Entsorgung Elektroaltgeräte Befindet sich die diese Abbildung (durchgestrichene Mülltonne auf Rädern) auf dem Pro- dukt, gilt die Europäische Richtlinie 2002/96/EG. Diese Produkte dürfen nicht mit dem normalen Hausmüll entsorgt werden. Informieren Sie sich über die örtlichen Regelungen zur getrennten Sammlung elektrischer und elektronischer Gerätschaften. Richten Sie sich nach den örtlichen Regelungen und entsorgen Sie Altgeräte nicht über den Hausmüll.
  • Seite 14: Important Safety Advice

    Dear Customer, Congratulations on purchasing this product. Please read and follow these instructions, in order to avoid damaging the item. We do not cover any damages that may arise from improper use of the item or the disregard of the safety instructions. Important Safety Advice •...
  • Seite 15: Technical Data

    Technical Data Article # 10029138 General Output power 100W max. Frequency response 20Hz - 20KHz (±3dB) Input sensititvity 520mV Power supply Houshold mains outlet 100-240V ~ 50-60Hz Power consumption 20W (Standby ≤0,5W) Full Range: 8 Ohm, 52mm (2”), Frequenzgang 250Hz - 20Khz Speakers Woofer: 4 Ohm, 78mm (3”), Frequenzgang...
  • Seite 16 Controls Rear: Titel vor / zurück (Ein/Standby) Front panel and connection terminal: Optical input (on/standby) RCA input (source) AUX input (3.5mm jack) VOL +/- Display...
  • Seite 17 Remote control: Display dimmer (on/standby) EQ modes (STandarD, MUSIC, MOVIE, NEWS) Bass +/- VOL+ / - Mute Sleep Timer (SOURCE button)
  • Seite 18 Initial Use: Preparation and Connections Preparation and Use of the Remote Control • First push to inside as the direction indicated by the arrow (See 1) and then Remove the battery holder as the direction indicated by the arrow (See 2). •...
  • Seite 19 2) DIGITAL connection to a TV, DVD or Blu-ray player using the OPTICAL cable: 3) DIGITAL connection to a TV, DVD or other device using the RCA cable:...
  • Seite 20 4) Connection to a mp3 player, TV or other device using the 3.5mm audio cable:...
  • Seite 21: Operation

    Operation Standby / On Press (On/Standby) on the front panel or on the RC to switch the sound bar on - press again to switch to standby. Choose Audio Source Press repeatedly to choose from the available audio inputs (TV, AUX, COAX, BT, OPTC and USB). Please keep in mind that those are named by the connection they are supposedly used for - which is not necessarily the one you actually use it for.
  • Seite 22: Wall Mounting

    Wall Mounting • Align the Sound bar in the chosen location. Use a pencil to mark the drilling positions 630mm (24.8”) apart: • The Sound bar should be located at least 7.5cm (3”) below the bottom of the TV: • Drill holes as marked in step 1.
  • Seite 23 Troubleshooting Problem Possible Solution • Ensure the mains plug is connected to a pow- No power er supply, and is switched ON. • Make sure there is power to the mains socket . • Make sure if playing from the AUX input, the external source has the volume turned up and is playing a track .
  • Seite 24: Environmental Concerns

    Environmental Concerns According to the European waste regulation 2002/96/EG this symbol on the product or on its packaging indicates that this product may not be treated as household waste. In- stead it should be taken to the appropriate collection point for the recycling of electrical and electronic equipment.
  • Seite 25: Consignes De Sécurité

    Chère cliente, cher client, Toutes nos félicitations pour l’acquisition de ce nouvel appareil. Veuillez lire attentivement et respecter les instructions de ce mode d’emploi afin d’éviter d’éventuels dommages. Nous ne saurions être tenus pour responsables des dommages dus au non-respect des consignes et à la mauvaise utilisation de l’appareil Consignes de sécurité...
  • Seite 26: Données Techniques

    Données techniques Numéro d’article 10029139 Données générales Puissance de sortie 100W max. Réponse en fréquence 20Hz - 20KHz (±3dB) Tension d’entrée 520mV Alimentation électrique 100-240V ~ 50-60Hz Consommation électrique 20W (Standby ≤0,5W) Full Range: 8 Ohm, 52 mm (2”), ”), réponse en fré- quence 250Hz - 20Khz Enceintes Woofer: 4 Ohm, 78 mm (3”), ”), réponse en fré-...
  • Seite 27: Éléments De Commande

    Éléments de commande Arrière : Crochet pour accrochage mural Cordon d’alimentation Panneau avant et connectique : Entrée optique (Marche/veille) Prise RCA (Sélectionner la source) Prise AUX VOL +/- Affichage...
  • Seite 28 Télécommande : Variateur d’affichage (Marche/veille) Modes EQ (STandarD, MUSIC, MOVIE, NEWS Basses +/- VOL+ / - Mute (silencieux) Mise en veille programmée (Sélectionner la source)
  • Seite 29 Mise en marche : préparation et branchements Préparation et utilisation de la télécommande • Appuyer sur le compartiment à piles comme illustré sur l’image (1) et le tirer à soi (2). • Remplacer la pile. Bien respecter les polarités (3). •...
  • Seite 30 2) ) Branchement avec un câble coaxial : brancher un téléviseur, un lecteur DVD ou Blu-Ray avec un câble optique 3) Branchement avec un câble RCA-jack : brancher un téléviseur, un lecteur DVD ou Blu-Ray avec un câble RCA :...
  • Seite 31 4) Branchement à l’entrée AUX avec un câble double jack : connecter un appareil externe (comme un lecteur MP3, un smartphone etc.) à l’entrée AUX de la barre de son :...
  • Seite 32 Utilisation Veille / marche Brancher l’appareil à une prise électrique domestique. Appuyer sur la touche (Marche/veille) de l’appa- reil ou de la télécommande pour mettre la barre de son en marche. Appuyer sur la touche de nouveau pour éteindre l’appareil (mise en mode veille). Sélectionner la source d’entrée Appuyer plusieurs fois sur la touche pour choisir entre les différentes entrées audio (TV, AUX, COAX,...
  • Seite 33 FONCTIONS BT • Appuyer plusieurs fois sur la touche de sélection de la source d‘entrée mehrfach, um aus den Audio-Eingängen BT auszuwählen. • « BT » apparaît sur l’affichage et clignote, pendant que l’appareil recherche les appareils BT préalable- ment branchés. •...
  • Seite 34 Montage • Tenir la barre de son contre le mur à l’endroit souhaité et marquer au crayon les trous à percer en maintenant un écart de 630 mm entre eux. • La barre de son doit être installée au minimum 7,5 cm en-dessous du téléviseur. •...
  • Seite 35: Résolution Des Problèmes

    Résolution des problèmes Problème Solution S’assurer que l’appareil est bien branché à une Pas de courant prise électrique, que les fusibles de sécurité sont intacts et que l’appareil est allumé. • S’assurer que le volume des appareils AUX est monté, au niveau de la source du signal. •...
  • Seite 36: Information Sur Le Recyclage

    Information sur le recyclage Appareils électriques et électroniques usagés Vous trouverez sur le produit l’image ci-contre (une poubelle sur roues, barrée d‘une croix), ce qui indique que le produit se trouve soumis à la directive européenne 2002/96/CE. Renseignez-vous sur les dispositions en vigueur dans votre région concernant la collecte séparée des appareils électriques et électroniques.

Inhaltsverzeichnis