Herunterladen Inhalt Inhalt Diese Seite drucken

Nexx X-COM Benutzerhandbuch

Flaches motorrad bluetooth headset & gegensprechanlage
Vorschau ausblenden Andere Handbücher für X-COM:
Inhaltsverzeichnis

Werbung

Verfügbare Sprachen
  • DE

Verfügbare Sprachen

  • DEUTSCH, seite 170
®
Low Profile Motorcycle Bluetooth
Headset & Intercom
User's Guide
Users Guide
www.senabluetooth.com
www.nexx-helmets.com

Werbung

Inhaltsverzeichnis
loading

Inhaltszusammenfassung für Nexx X-COM

  • Seite 1 ® Low Profile Motorcycle Bluetooth Headset & Intercom User's Guide Users Guide www.senabluetooth.com www.nexx-helmets.com...
  • Seite 2 X-COM © 1998-2013 Sena Technologies, Inc. All rights reserved. Sena Technologies, Inc. reserves the right to make any changes and improvements to its product without providing prior notice. Sena™ is a trademark of Sena Technologies, Inc. or its subsidiaries in the USA and other countries. SMH10™, SMH10R™, SMH5™, SMH5-FM™, SPH10™, SPH10H™, SPH10H-FM™, SPH10S™, SR10™, SM10™...
  • Seite 3: Inhaltsverzeichnis

    CE Declaration of Conformity …………………………………………………………………………………… 51 9. INTERCOM PAIRING …………………………………………………………………………………… 21 Industry Canada Statement …………………………………………………………………………………… 51 9.1 Pairing with Other X-COM Headsets for Intercom Conversation …………………………………… 21 Bluetooth License ………………………………………………………………………………………………… 51 9.2 Pairing with Other Sena Headset Models for Intercom Conversation ……………………………… 22 WAIVER AND GENERAL RELEASE ………………………………………………………………………...
  • Seite 4: Introduction

    • Bluetooth stereo headset for Bluetooth audio devices such as MP3 players Thank you for choosing the NEXX X-COM, Low Profile Bluetooth • Bluetooth stereo headset for Bluetooth GPS navigation Stereo Headset and Intercom. With the X-COM, you can call •...
  • Seite 5: Package Contents

    X-COM 2. PACKAGE CONTENTS • Speakers • Headset Main Unit • Wired Microphone (+) Button / (-) Button • Volume adjustment • Navigate through voice • Battery Pack configuration menu • MP3 Track-forward and track-back • Velcro Pads for Speakers •...
  • Seite 6: Installing The X-Com On Your Helmet

    X-COM 3. INSTALLING THE X-COM ON YOUR HELMET • Microphone Sponges To securely install the main unit of the X-COM, you can use the velcro pad or double sided adhesive tape. Please follow the • USB Power & Data Cable procedure below.
  • Seite 7 X-COM 3. Remove the cover that protects the cavity for the main unit. Place the main unit in the prepared cavity. 6. For the wired microphone attach the velcro pad inside the chin protector of full-face helmets. Place the wired microphone in the Velcro Pad and plug the microphone connector in the 2-pin of the 4.
  • Seite 8: Powering Off

    X-COM You can charge the X-COM on a helmet by connecting the supplied 4. POWERING ON/OFF AND CHARGING USB power & data cable or cigarette charger. You can use any standard micro-USB cable to charge the X-COM. 4.1 Powering On...
  • Seite 9: Low Battery Warning

    X-COM 4.4 Low Battery Warning 5. VOLUME ADJUSTMENT When the battery is low, the blinking blue LED in stand-by mode turns to red and you will hear mid-tone triple beeps and a voice prompt, “Low battery”. You can easily adjust the volume by tapping the (+) Button or the (-) Button.
  • Seite 10 (8) VOX sensitivity (2) Multipoint pairing (9) Voice prompt (3) Phone selective pairing (10) Sidetone You can set the configuration of the X-COM by the voice menu (4) Media selective pairing (11) Delete all pairings instructions as below. (12) Factory reset (5) Speed dial 1.
  • Seite 11: Mobile Phone Pairing

    X-COM 6.1 Mobile Phone Pairing 6.3 Phone Selective Pairing Voice Prompt “Phone pairing” Voice Prompt “Phone selective pairing” Factory Default Factory Default To go into mobile phone pairing mode, tap the (+) Button or the (-) To go into phone selective pairing mode, tap the (+) Button or Button until you hear the voice prompt, “Phone pairing”.
  • Seite 12 Button to confirm. You will then hear a voice prompt saying you have to tap the Center Button to answer an incoming call. “Cancel”. If any button is not pressed within 1 minute, the X-COM will exit the configuration menu and go back to stand- by mode.
  • Seite 13 X-COM 6.7 Enabling/Disabling Voice Activated Intercom the VOX sensitivity level by tapping the (+) Button or the (-) Button. Level of 4 is the highest sensitivity setting and 1 the lowest. After Voice Prompt “VOX intercom” you have completed the setting, tap the Center Button to apply...
  • Seite 14 Execute Tap the Center Button To restore factory default settings on the X-COM, tap the (+) Button or the (-) Button until you hear the voice prompt, “Factory reset”. Tap the Center Button to confirm. The X-COM powers off with a...
  • Seite 15 None BLUETOOTH DEVICES Multipoint Pairing None Phone Selective Pairing None Before using the X-COM Bluetooth headset with any Bluetooth Media Selective Pairing None device for the first time, you need to do the pairing operation. It can Speed Dial Execute...
  • Seite 16 5. The mobile phone confirms that pairing has completed and the PIN. 5. The mobile phone confirms that pairing has completed and the X-COM is ready to use. You will hear the voice prompt, “Your X-COM is ready to use. You will hear the voice prompt, “Your headset is paired”.
  • Seite 17 If the Bluetooth stereo device is integrated with a mobile phone You can listen to voice instruction from Bluetooth GPS navigation. such as a smartphone, you don’t need to pair the X-COM with it Some GPS systems use a mobile phone profile (HFP, Hands-Free separately.
  • Seite 18 6. If the pairing process is not completed within three minutes, the the GPS to the X-COM by following the simple procedures in “7.1 X-COM will return to stand-by mode. Mobile Phone Pairing”. When you do this, the X-COM thinks the GPS is a mobile phone.
  • Seite 19 If you pair the X-COM with an SR10 by multipoint the background via SR10 while having an intercom conversation pairing, the X-COM is able to have two HFP devices at the same time: or phone call. Please refer to the SR10 user's guide for details.
  • Seite 20 Wired Connection phone and X-COM. To clear the pairing list on X-COM, please do a factory reset or follow the pairing list clearing procedure described in this manual. To clear the pairing list on the mobile phone, please refer to the mobile phone manual.
  • Seite 21 Bluetooth intercom conversation. X-COM in the list of devices detected on your phone. 1. Turn on the two X-COM headsets (A and B) that you would like 4. Enter 0000 for the PIN. Some smart phones may not ask for a to pair with each other.
  • Seite 22 Note: The SMH5 cannot participate in three-way or four-way conference intercom with the X-COM. The SMH5 has a limited capability, and can only manage two-way intercom or with other Sena headset models. Pairing A & C Pairing A & D...
  • Seite 23 The X-COM operates in the following order of priority: You can listen to stereo music from your Bluetooth wireless audio device. The Bluetooth audio device must be paired with the X-COM (highest) Mobile phone, by following the “Bluetooth Stereo Device Pairing” procedures Intercom, described in chapter 7.3.
  • Seite 24 X-COM 2. To play or pause music, press the Center Button for 1 second 12. MOBILE PHONE CALL MAKING AND until you hear a mid-tone double beep. ANSWERING 12.1 Mobile Phone Call Making and Answering 1. When you have an incoming call, tap the Center Button to answer the call.
  • Seite 25: Speed Dialing

    GPS, you may not be able to listen to the GPS voice instruction “Cancel”, and tap the Center Button. If any button is not during the phone call. pressed within 15 seconds, the X-COM will exit the voice speed dial menu and goes back to stand-by mode. 12.2 Speed Dialing 7.
  • Seite 26: Two-Way Intercom

    X-COM Answer Tap the Center Button or Say “Hello” 13. TWO-WAY INTERCOM Press the Center Button for 2" Reject Press the Center Button for 2" 13.1 Start and End Two-way Intercom Call Use phone keypad 1. You can start a one-on-one intercom conversation with any Speed Dial Press the (+) Button for 3"...
  • Seite 27: Voice Activated Intercom (Vox Intercom)

    X-COM 2. To terminate a one-on-one intercom conversation, single tap the conversation by tapping the Center Button, you have to terminate the intercom conversation manually. Center Button. This will end the intercom conversation. 13.3 Intercom and Mobile Phone Call 1. When you have an incoming mobile phone call during an intercom conversation, you will hear a ring tone.
  • Seite 28: Intercom And Gps

    13.4 Intercom and GPS an intercom conversation but is heard in background. This is useful If you pair a Bluetooth GPS to the X-COM as described in 7.4 of when you have an intercom conversation with a passenger on the...
  • Seite 29: Three-Way Conference Intercom

    14.1 Start Three-way Intercom Smart Phone You (A) can have a three-way conference intercom with two other Two-way Radio X-COM friends (B & C) by establishing two intercom connections Mobile Phone at the same time. While a three-way conference intercom is in Pairing...
  • Seite 30 Second Friend First Friend Second Friend 4. Now you (A) and two X-COM intercom friends (B & C) are having 2. Start an intercom conversation with one of the two friends in your a three-way conference intercom. intercom group. For example, you (A) may start an intercom conversation with intercom friend (B).
  • Seite 31: End Three-Way Intercom

    1. Press the Center Button for 1 second until you hear a beep You can have four-way conference intercom with three other X-COM users by adding one more intercom participant to the to terminate three-way conference intercom completely. It terminates both intercom connections with (B) and (C).
  • Seite 32: End Four-Way Intercom

    X-COM 15.2 End Four-way Intercom 16. MUSIC SHARING As in the case of three-way intercom, you can completely exit from the four-way conference intercom or just disconnect a single intercom connection. You can start sharing music with an intercom friend using Bluetooth 1.
  • Seite 33: Universal Intercom

    2. Press and hold the Center Button on the X-COM for 8 seconds until the blue LED flashes rapidly. You will hear a voice prompt...
  • Seite 34: Three-Way Universal Intercom

    1. You (A) need to be paired with non-Sena Bluetooth headset (B) and other X-COM (C) for three-way conference intercom. 3. The Other X-COM (C) may join the intercom by making an intercom call to you (A).
  • Seite 35: Four-Way Universal Intercom

    X-COM 17.4 Four-way Universal Intercom 4. Now you (A), non-Sena Bluetooth headset (B), and other X-COM (C) are having a three-way conference intercom. You may make four-way Universal Intercom connection with a couple of configurations, 1) three X-COMs and one non-Sena Bluetooth headset or 2) two X-COMs and two non-Sena Bluetooth headsets.
  • Seite 36 Bluetooth headset (B). intercom by making an intercom call to the X-COM (C). 2. The other X-COM (C) may join the intercom by making an 4. Now two X-COM headsets (A & C) and two non-Sena Bluetooth intercom call to you (A).
  • Seite 37: Three-Way Conference Phone Call With Intercom Participant

    X-COM 17.4.2 Four-way Universal Intercom Case 2 18. THREE-WAY CONFERENCE PHONE Three X-COM headsets (A, C and D) and one non-Sena Bluetooth CALL WITH INTERCOM PARTICIPANT headsets (B). The procedure is as same as the case 1 described in section 17.4.1.
  • Seite 38 In this case, the X-COM automatically tries to beep signifying that the intercom is busy. In this case, you have to reconnect the intercom every 8 seconds and you will hear high try again later.
  • Seite 39: Fault Reset

    21. FAULT RESET 22. FIRMWARE UPGRADE When the X-COM is not working properly or is faulty for any reason, The X-COM supports a firmware upgrade function. Please visit the you may reset it by disconnecting the battery back connector. The NEXX Helmets web site at www.nexx-helmets.com to check the...
  • Seite 40: Mobile Phone Pairing

    X-COM Bluetooth Pairing Procedure 23. SENA BLUETOOTH CONNECTION CASE Mobile Phone Pairing Multipoint Pairing STUDIES Intercom Pairing Bluetooth GPS* Case 1 zumo 220/350/550/660/665, TomTom Rider Usage • Mobile phone: phone call, listening to music • GPS: GPS instruction Mobile Phone •...
  • Seite 41: Multipoint Pairing

    X-COM Case 2 Case 3 GPS - Mobile Phone Pairing Bluetooth GPS* Mobile Phone Bluetooth GPS* Mobile Phone Mobile Phone Pairing Pairing Intercom Multipoint Pairing Pairing Intercom Mobile Phone Pairing Bluetooth Pairing Procedure Mobile Phone Pairing Bluetooth Pairing Procedure GPS - Mobile Phone Pairing...
  • Seite 42 X-COM Case 4 Case 5 Mobile Phone Mobile Phone Mobile Phone Mobile Phone Pairing Pairing Mobile Phone Intercom Intercom Mobile Phone Pairing Pairing Bluetooth GPS* Motorcycle Bluetooth Pairing Pairing Audio System* Music Bluetooth Pairing Procedure Bluetooth Pairing Procedure Mobile Phone Pairing...
  • Seite 43 X-COM Case 6 Bluetooth Pairing Procedure Mobile Phone Pairing Mobile Phone Pairing Multipoint Pairing Intercom Pairing Mobile Phone Bluetooth GPS* Mobile Phone zumo 220/350/550/660/665, TomTom Rider Pairing Motorcycle Bluetooth Audio System* BMW R1200RT, K1600GT, K1600GTL Usage Intercom • Mobile Phone: phone call...
  • Seite 44 X-COM Case 7 Bluetooth Pairing Procedure Mobile Phone Pairing Multipoint Pairing Intercom Pairing Usage Mobile Phone • Mobile Phone: phone call Mobile Phone • SR10: two-way radio, GPS guidance, Radar detecting signal Pairing • Intercom SR10 Multipoint Pairing Two-way Radio...
  • Seite 45 X-COM Case 8 Bluetooth Pairing Procedure GPS - Mobile Phone Pairing Mobile Phone Pairing Mobile Phone Pairing GPS - Mobile Phone Mobile Phone Intercom Pairing Mobile Pairing Pairing MP3 Player Bluetooth GPS* Mobile Phone Phone Bluetooth GPS* Pairing zumo 220/350/550/660/665, TomTom Rider...
  • Seite 46 X-COM Case 9 Bluetooth Pairing Procedure Mobile Phone Pairing Mobile Phone Pairing Mobile Phone Pairing Multipoint Pairing Mobile Phone Intercom Pairing Mobile Phone Usage Pairing • Mobile Phone: phone call • SR10: two-way radio, GPS instruction, Radar detecting signal • SM10: listening to music/sharing...
  • Seite 47 X-COM Case 10 Bluetooth Pairing Procedure Mobile Phone Pairing Mobile Phone Pairing Mobile Phone Pairing Multipoint Pairing Mobile Phone Intercom Pairing Mobile Phone Bluetooth GPS* Pairing zumo 220/350/550/660/665, TomTom Rider Usage • Mobile Phone: phone call • GPS: GPS instruction...
  • Seite 48: Operation Quick Reference

    X-COM 24. OPERATION QUICK REFERENCE Type Description Button Duration Beep Type Description Button Duration Beep Center Button 5 sec Mid-tone Center Button & 1 sec Solid blue Ascending Power-on (+) Button beeps flashing single beep Intercom pairing Center Button of any one of the two headsets Basic Center Button &...
  • Seite 49: Battery Information

    X-COM BATTERY INFORMATION MAINTENANCE AND CARE The X-COM has an external, rechargeable battery. The battery can The SHM10R should be treated with care and the following be charged and discharged hundreds of times, but it will eventually suggestions will help you protect your warranty coverage.
  • Seite 50: Disposal

    X-COM DISPOSAL CERTIFICATION AND SAFETY APPROVALS FCC Compliance Statement The crossed-out wheel bin symbol on the product, literature, or packaging reminds you that all This device complies with part 15 of the FCC Rules. Operation is electrical and electronic products, batteries, and...
  • Seite 51: Fcc Rf Exposure Statement

    Other trademarks and trade names are those of their respective ® owners The X-COM is compliant with and adopts Bluetooth CE Declaration of Conformity Specification 3.0 and has successfully passed all interoperability This product is CE marked according to the provisions of the ®...
  • Seite 52: Waiver And General Release

    By purchasing this Device and not returning it for a full refund (see below), you are irrevocably releasing, indemnifying from any By using the X-COM you waive all substantial legal rights including liability, loss, claim and expense (including attorney’s fees) and the right to sue.
  • Seite 53: Two-Year Limited Warranty

    (a) any misapplication or misuse of the Product; (b) or any third party involved in designing or manufacturing the failure of the Customer to adhere to any of NEXX’s specifications or Device; (c) these risks and dangers may arise from foreseeable instructions;...
  • Seite 54: Limitation Of Liability

    Return for Full Refund Customer agrees to insure the Product or assume the risk of loss or damage in transit, to prepay shipping charges to NEXX, and to IF YOU ARE UNWILLING TO ACCEPT AND AGREE TO THE use the original shipping container or equivalent.
  • Seite 55: Warning

    X-COM WARNING NEXX informs you that using this device in public traffic may not be authorized by the law. Please check your local laws and do not use this device in public traffic, but only on private property or closed circuits. If the simultaneous use of both ear speakers while riding a motorcycle is prohibited by your local law, please use only a single ear speaker while riding.
  • Seite 56 1.2.0 www.nexx-helmets.com User's Guide for Firmware v5.0...
  • Seite 57 Ecouteurs et intercom Bluetooth ® ultra-compact Manuel d’utilisation www.nexx-helmets.com...
  • Seite 58 9. COUPLAGE POUR CONVERSATION PAR INTERCOM ………………………………………………… 21 Déclaration de conformité IC (Industrie Canada) ………………………………………………………………………………… 51 9.1. Couplage avec d’autres X-COM pour une conversation par intercom …………………………………………………… 21 Licence Bluetooth ……………………………………………………………………………………………………………………… 51 9.2 Couplage avec d’autres systèmes de communication Sena pour une conversation par intercom …………………………… 22 RENONCIATION ET REMISE GENERALE ……………………………………………………………………...
  • Seite 59: Introduction

    • Le couplage multipoint avec superposition du GPS ou avec l’adaptateur radio bidirectionnelle Sena SR10 Le X-COM est conforme à la spécification Bluetooth 3.0 et supporte • Bluetooth multipoint pour deux téléphones mobiles les profils suivants : profil casque, profil mains-libres (HFP), profil •...
  • Seite 60: Contenu De L'emballage

    X-COM 2. CONTENU DE L'EMBALLAGE • Écouteurs • Unité principale • Microphone filaire (+) Button / (-) Button • Ajustement du volume • Naviguer dans le menu de • Batterie configuration vocal • Piste suivante / piste précédente • Tampons velcro pour haut-parleurs •...
  • Seite 61: Installation Du X-Com Sur Votre Casque

    3. INSTALLATION DU X-COM SUR VOTRE CASQUE • Mousse de microphone Pour accrocher solidement l'unité principale du X-COM, vous pouvez • Câble USB d’alimentation et de données utiliser le tampon velcro ou la bande adhésive double face inclus. 1. Insérer la batterie et le système électronique dans les cavités situées à...
  • Seite 62 X-COM 3. Retirez le couvercle qui protège la cavité de l'unité principale. Placez l'unité principale dans la cavité préparée. 6. Pour le microphone filaire coller la bande velcro sur l'intérieur du protecteur de menton du casque. Placer le microphone filaire sur 4.
  • Seite 63: Marche/Arret Et Charge

    X-COM Vous pouvez recharger le X-COM équipant un casque en 4. MARCHE/ARRET ET CHARGE branchant le câble USB d'alimentation et de données fournies ou un allume-cigare. Tout câble micro-USB classique peut être utilisé pour recharger le X-COM. 4.1 Mise en marche Appuyez sur le bouton central et le bouton (+) en même temps...
  • Seite 64: Avertissement Batterie Faible

    à volume élevé. Vous entendrez ensuite une voix vous indiquant le niveau de la batterie. Cependant, si vous relâchez les boutons dès que le X-COM vient d’être allumé, vous ne pourrez pas entendre le message vocal...
  • Seite 65 (2) Couplage multipoint (9) Instruction vocales (3) Couplage sélectif téléphone (10) Effet local Vous pouvez définir la configuration du X-COM via les instructions (11) Effacer tous les couplages (4) Couplage sélectif média du menu vocal comme ci-dessous: (5) Numérotation rapide (12) Paramètres usine...
  • Seite 66: Couplage Du Téléphone Mobile

    X-COM 6.1 Couplage du téléphone mobile 6.3 Couplage de téléphone sélectif Instructions vocales « Couplage téléphone » Instructions vocales « Couplage sélectif téléphone » Paramètres usine Paramètres usine Pour passer en mode couplage de téléphone mobile, maintenez Pour passer en mode couplage de téléphone sélectif, maintenez enfoncé...
  • Seite 67 X-COM 6.5 Configurer la numérotation rapide X-COM sera fermé et l'appareil se remettra en veille. Instructions vocales « Appel rapide » Remarque : Paramètres d'usine Sans objet 1. Vous pouvez enregistrer au maximum 3 numéros de téléphone dans la numérotation rapide.
  • Seite 68 X-COM 6.8 Réglage de la sensibilité VOX fort. Notez que la fonction VOX téléphone ne fonctionne pas si vous êtes connecté à l'intercom. Cette fonction est activée dans Instructions vocales « Sensibilité VOX » les paramétrages d’usine, mais vous pouvez désactiver cette Paramètres usine...
  • Seite 69 Pour supprimer toutes les informations de couplage Bluetooth toujours actives : du X-COM, appuyez sur le bouton (+) ou (-) jusqu'à ce que vous - Les commandes vocales pour le menu de configuration entendiez le message vocal « Annulation couplages ». Appuyez - Les commandes vocales pour l'indicateur de niveau de batterie sur le bouton central pour confirmer.
  • Seite 70 X-COM 6.13 Quitter le menu de configuration vocale Appuyez sur le bouton (+) ou (-) Appuyez sur le bouton central Instructions vocales « Sortir du menu configuration » Couplage téléphone Paramètres usine Couplage multipoint Exécuter Appuyez sur le bouton central Couplage sélectif téléphone...
  • Seite 71 5. Le téléphone mobile confirme que le couplage est terminé et Bluetooth, les appareils stéréo Bluetooth tels que MP3 ou GPS que le X-COM est prêt à l'emploi. Vous entendrez un message moto Bluetooth spécifiques, ou encore avec un adaptateur ou un vocal disant: «...
  • Seite 72 « Casque couplé ». Remarque : 1. Si la connexion Bluetooth entre le X-COM et un téléphone portable n’est 6. Ou si vous voulez connecter un GPS par couplage multipoint, plus effective, appuyez sur le bouton central pendant 3 secondes pour recherchez le périphérique Bluetooth sur l'écran du GPS, et...
  • Seite 73 Couplage multipoint avec superposition du GPS 4. Entrez 0000 pour le code PIN. 5. Le GPS confirme que le couplage est terminé et que le X-COM est prêt à l'emploi. Vous entendrez un message vocal à partir du X-COM disant: « Casque couplé ».
  • Seite 74 GPS automobiles n'ont pas cette fonction. suivant les procédures simples du paragraphe 6.1 « Couplage de téléphone mobile ». Quand vous faites cela, le X-COM pense que le 7.5 Couplage avec le Sena SR10, adaptateur pour GPS est un téléphone mobile. Mais le X-COM peut directement être couplé...
  • Seite 75 4. Lorsque le couplage est terminé, vous entendez un message vocal disant « Casque couplé ». 5. Si le processus de couplage n'est pas terminé dans les trois minutes, le X-COM repassera en mode veille. Le signal audio entrant de la radio bidirectionnelle via le SR10 est Smartphone...
  • Seite 76 X-COM, vous devez effacer la liste de couplages précédents des 8.2 Couplage sélectif média : profil A2DP pour deux dispositifs, soit le téléphone mobile et le X-COM. Pour effacer musique stéréo uniquement la liste de couplages du X-COM, veuillez effectuer un retour aux 1.
  • Seite 77 LEDS des deux modules passent au bleu et la connexion avec l’intercom est automatiquement établie. Les deux modules du X-COM A et B sont couplés l’un à l’autre afin de converser via intercom. Si le processus de couplage n'est pas terminé...
  • Seite 78: Priorité Des Fonctions

    Sena. Remarque : Le SMH5 ne peut pas participer à une conférence intercom composée de trois ou quatre personnes avec le X-COM. Le SMH5 a une capacité limitée de conversation bidirectionnelle entre kits identiques ou avec d'autres modèles Sena.
  • Seite 79 Vous pouvez écouter la musique en stéréo de votre périphérique audio Bluetooth sans fil. Le dispositif audio Bluetooth doit être couplé au X-COM en suivant les instructions de couplage d’un dispositif audio Bluetooth décritent dans le chapitre « 7.3 Couplage des dispositifs stéréo Bluetooth ».
  • Seite 80 Remarque : bouton central pour répondre à l'appel. 1. Si la connexion Bluetooth entre le X-COM et un téléphone portable n’est 2. Vous pouvez également répondre à un appel entrant en plus effective, appuyez sur le bouton central pendant 3 secondes pour énonçant à...
  • Seite 81: Numérotation Rapide

    : le X-COM repassera en mode veille. « Appel rapide ». 7. Pour fermer la commande de composition vocale ou de 2.
  • Seite 82: Conversation Par Intercom Bidirectionnel

    X-COM 2. Pour mettre fin à une conversation par intercom bidirectionnel, 13. CONVERSATION PAR INTERCOM appuyez sur le bouton central. Cela mettra fin à la conversation BIDIRECTIONNEL intercom. 13.1 Commencer et mettre fin à une conversation par intercom bidirectionnel mettre fin 1.
  • Seite 83 X-COM 13.2 Intercom activé par la voix (VOX Intercom) a. Pour répondre à l'appel et mettre fin à la conversation en Si la VOX Intercom est activée dans les paramètres de intercom, appuyez sur le bouton central. La fonction VOX configuration comme décrit dans la section 6.6, vous pouvez...
  • Seite 84: Intercom Et Gps

    13.4 Intercom et GPS 13.5 Intercom et radio bidirectionnelle Si vous couplez un GPS Bluetooth au X-COM selon la méthode Comme décrit au point 7.5 de ce manuel d’utilisation, vous pouvez décrite au point 7.4 de ce manuel d’utilisation, vous pourrez utiliser simultanément une radio bidirectionnelle et le X-COM sous...
  • Seite 85: Intercom Et Radio Bidirectionnelle

    X-COM 14. CONVERSATION À TROIS PAR INTERCOM 14.1 Commencer une conférence à trois par intercom Vous (A) pouvez établir une conversation à trois par intercom avec Smartphone deux autres personnes (B et C) en établissant deux connexions radio bidirectionnelle Couplage du simultanées par intercom.
  • Seite 86 X-COM 1. Pour la communication intercom de groupe à trois, il faut que 3. Le deuxième ami interlocuteur sur intercom (C) pourra rejoindre vous (A) soyez couplé avec deux modules (B & C). la conversation par intercom en vous (A) appelant par intercom.
  • Seite 87: Mettre Fin À Une Conférence À Trois Par Intercom

    Vous pouvez avoir une conférence à quatre par intercom avec 1. Appuyez sur le bouton central pendant 1 seconde jusqu'à trois autres utilisateurs de X-COM en ajoutant un autre participant ce que vous entendiez un bip pour mettre totalement fin à la sur intercom à...
  • Seite 88: Mettre Fin À Une Conférence À Quatre Par Intercom

    X-COM 15.2 Mettre fin à une conférence à quatre par intercom 16. PARTAGER DE LA MUSIQUE À l’instar de la conférence à trois par intercom, vous pouvez terminer l’ensemble d’une conférence à quatre par intercom ou interrompre l’une des connexions par intercom.
  • Seite 89: Intercom Universel

    à un appel). 1. Allumez le X-COM et le casque avec lequel vous voulez le coupler. 2. Appuyez et maintenez enfoncé le bouton central du X-COM pendant 8 secondes, jusqu'à...
  • Seite 90 1. Vous (A) devez être couplé avec un casque d'un autre fabricant 3. Le X-COM (C) pourra rejoindre la conversation en vous (A) que Sena (B) et un X-COM (C) pour une conversation intercom appelant par intercom.
  • Seite 91: Intercom Universel À 4 Voies

    Vous avez différentes autres possibilités de configurations d'intercom universel à quatre voies : 1) votre casque (A), un autre casque (B), un X-COM (C) et encore un autre casque (D) ; 2) votre casque (A), un autre casque (B) et deux X-COM (C et D).
  • Seite 92 17.4.1 Intercom universel à 4 voies Cas 1 3. L'autre casque (D) pourra rejoindre la conférence intercom en Deux X-COM (A et C) et deux casques d'un autre fabricant (B et D). passant un appel intercom au X-COM (C). 1. Vous (A) pouvez commencer une conversation avec l'autre casque (B).
  • Seite 93: Conference Telephonique A Trois Avec Un Ami Interlocuteur Sur Intercom

    17.4.2 Intercom universel à 4 voies Cas 2 18. CONFERENCE TELEPHONIQUE A TROIS AVEC Trois X-COM (A, C et D) et un casque d'un autre fabricant (B). La démarche à suivre est la même que dans le cas 1 décrit à la UN AMI INTERLOCUTEUR SUR INTERCOM section 17.4.1.
  • Seite 94: Echec De La Communication Par Intercom

    Dans ce cas, intercom avec un autre ami interlocuteur ou à un appel mobile le X-COM essayera automatiquement de reconnecter l’intercom avec une autre personne, vous entendrez un double bip à faible toutes les 8 secondes et vous entendrez des bips doubles à...
  • Seite 95: Réinitialisation

    X-COM 22. MISE A JOUR DU MICROLOGICIEL 21. RÉINITIALISATION Le X-COM prend en charge la fonctionnalité de mise à jour du Lorsque le X-COM ne fonctionne pas correctement ou qu’il est micrologiciel. Veuillez consulter le site web NEXX Helmets à...
  • Seite 96: Connexion Sena Bluetooth : Cas Possibles

    X-COM Instructions de couplage Bluetooth 23. CONNEXION SENA BLUETOOTH : Couplage du téléphone mobile Couplage multipoint CAS POSSIBLES Couplage pour conversation par intercom GPS Bluetooth* Cas 1 zumo 220/350/550/660/665, TomTom Rider Utilisation • Téléphone mobile: appel téléphonique, écouter de la musique •...
  • Seite 97 X-COM Cas 2 Cas 3 Couplage téléphone mobile - GPS GPS Bluetooth* GPS Bluetooth* Téléphone mobile Couplage du Couplage du téléphone mobile téléphone mobile Couplage Couplage pour Couplage pour multipoint conversation par Téléphone conversation intercom mobile par intercom Instructions de couplage Bluetooth Instructions de couplage Bluetooth Couplage téléphone mobile - GPS...
  • Seite 98 X-COM Cas 4 Cas 5 Téléphone mobile Téléphone mobile Couplage du téléphone mobile Couplage du téléphone mobile Couplage du Couplage pour téléphone conversation par Couplage pour Couplage du GPS Bluetooth* mobile Système audio intercom conversation téléphone Bluetooth pour par intercom...
  • Seite 99 X-COM Cas 6 Instructions de couplage Bluetooth Couplage du téléphone mobile Couplage du téléphone mobile Couplage multipoint Couplage pour conversation par intercom Téléphone mobile GPS Bluetooth* Couplage du zumo 220/350/550/660/665, TomTom Rider téléphone mobile Système audio Bluetooth pour motos* BMW R1200RT, K1600GT, K1600GTL...
  • Seite 100 X-COM Cas 7 Instructions de couplage Bluetooth Couplage du téléphone mobile Couplage multipoint Couplage pour conversation par intercom Utilisation Téléphone mobile • Téléphone mobile: appel téléphonique Couplage du • SR10: radio bi-directionnelle, guidage GPS, signal de détection des téléphone mobile radars •...
  • Seite 101 X-COM Cas 8 Cas 9 Téléphone mobile Couplage Couplage du Couplage du téléphone téléphone téléphone Lecteur MP3 Couplage du GPS Bluetooth* Téléphone mobile - mobile mobile téléphone mobile mobile Couplage pour conversation par intercom SM10 SR10 Couplage du Couplage téléphone...
  • Seite 102 X-COM Cas 10 Instructions de couplage Bluetooth Couplage du téléphone mobile Couplage du téléphone mobile Couplage du téléphone mobile Couplage multipoint Téléphone mobile Couplage pour conversation par intercom Couplage du Utilisation téléphone mobile • Téléphone mobile : appel téléphonique • SR10: radio bi-directionnelle, instructions GPS, signal de détection des radars •...
  • Seite 103: Memo D'utilisation

    X-COM Instructions de couplage Bluetooth 24. MEMO D’UTILISATION Couplage du téléphone mobile Couplage du téléphone mobile Couplage du téléphone mobile Couplage multipoint Type Description Bouton Durée Couplage pour conversation par intercom Bouton central 1 sec Bleu fixe Bips de plus Mise sous &...
  • Seite 104: Informations Concernant La Batterie

    Description Bouton Durée Bouton central 5 sec Clignotement Bip à Le X-COM est équipé d’une batterie interne, rechargeable, fixe. rouge volume Couplage N’essayez en aucun cas d’enlever la batterie de l’appareil, car vous moyen intercom risqueriez d’endommager l’appareil. La batterie peut être chargée Bouton central de l'un des deux casques et se décharger des centaines de fois, mais elle finira par s’user.
  • Seite 105: Maintenance Et Entretien

    MAINTENANCE ET ENTRETIEN ELIMINATION Le symbole poubelle barrée figurant sur le produit, Le X-COM doit être entretenu avec soin et les suggestions suivantes la documentation ou l’emballage signifie que tous vous aideront certainement à préserver votre garantie : les produits électriques et électroniques, les 1.
  • Seite 106: Certification Et Homologation En Termes De Securite

    X-COM CERTIFICATION ET HOMOLOGATION EN TERMES des mesures suivantes : • Réorienter ou repositionner l'antenne réceptrice. DE SECURITE • Augmenter la séparation entre le matériel et le récepteur. • Connecter le matériel à une sortie sur un circuit différent de celui sur Déclaration de conformité...
  • Seite 107: Déclaration De Conformité Ic (Industrie Canada)

    Européenne. Au sein de l’Union Européenne, ce produit est destiné à être utilisé en Autriche, Belgique, Danemark, Finlande, France, En utilisant le X-COM, vous renoncez à tous recours légaux fondamentaux, Allemagne, Grèce, Irlande, Italie, Luxembourg, Pays-Bas, Portugal, comprenant le droit de poursuite. Nous vous invitons donc à lire Espagne, Suède et Royaume-Uni et au sein de l’AELE, en Islande,...
  • Seite 108 En achetant cet appareil et en ne le renvoyant pas pour un NEXX et Sena volontairement et pour toujours de tout litige, remboursement total (voir plus avant), vous renoncez de manière réclamation, dette, revendication, action et responsabilité qui irrévocable et indemnisez et exonérez NEXX et Sena de toute...
  • Seite 109: Garantie Limitée De Deux (2) Ans

    à la discrétion de NEXX, d’un ces risques et ces dangers peuvent avoir des causes prévisibles produit défectueux ou non conforme et NEXX ne saurait être tenu pour ou imprévisibles. Vous assumez par la présente tous les risques et responsable de l’impossibilité...
  • Seite 110: Limitation De Responsabilité

    CI-APRES OU L'EXECUTION, L'UTILISATION OU L'INCAPACITE A UTILISER CEUX-CI, MEME SI NEXX OU SON REVENDEUR AVAIT ETE PREVENU DE LA POSSIBILITE DE TELS DOMMAGES. EN AUCUN CAS, LA RESPONSABILITE TOTALE DE NEXX OU DE SES REVENDEURS NE POURRA EXCEDER LE PRIX PAYE POUR LE PRODUIT.
  • Seite 111 X-COM AVERTISSEMENT NEXX vous informe que l’utilisation de cet appareil sur les routes publiques ne peut pas être autorisée par la loi. Veuillez contrôler la législation locale et n'utiliser cet appareil qu’en dehors des routes publiques, sur des propriétés privées ou des circuits fermés, par exemple.
  • Seite 112 1.2.0 www.nexx-helmets.com Manuel d’utilisation pour du micrologiciel v5.0...
  • Seite 113 Auriculares e intercomunicador ® Bluetooth para motocicletas de bajo perfil Guía del usuario Users Guide www.senabluetooth.com www.nexx-helmets.com...
  • Seite 114 9. EMPAREJAMIENTO DEL INTERCOMUNICADOR …………………………………………………………………………… 20 Declaración de conformidad CE……………………………………………………………………………………………………… 50 9.1 Emparejamiento con otros auriculares X-COM para mantener una conversación a través del intercomunicador …… 20 Declaración Industry Canada ………………………………………………………………………………………………………… 50 9.2 Emparejamiento con otros modelos de auricular Sena para conversación a través del intercomunicador …………… 22 Licencia Bluetooth ………………………………………………………………………………………………………………………...
  • Seite 115: Introducción

    Gracias por escoger el conjunto de auricular e intercomunicador • Auricular Bluetooth o auricular estéreo para navegadores GPS estéreo Bluetooth de bajo perfil X-COM de NEXX. Con el X-COM, con Bluetooth. podrá usar la función manos libres de su teléfono móvil Bluetooth, •...
  • Seite 116: Contenidos Del Envase

    X-COM 2. CONTENIDOS DEL ENVASE • Auriculares (+) Button / (-) Button • Micrófono con cable • Volume adjustment • Navigate through voice configuration menu • Batería • MP3 Track-forward and track-back • Almohadillas con velcro para auriculares • Almohadilla con velcro para micrófono con cable •...
  • Seite 117: Instalación Del X-Com En Su Casco

    3. INSTALACIÓN DEL X-COM EN SU CASCO • Espuma de protección para el micrófono Para instalar la unidad principal del X-COM de forma segura, puede usar la almohadilla de velcro o la cinta adhesiva doble. • Cable de corriente USB y de datos Siga estos pasos.
  • Seite 118 X-COM 3. Retire la tapa que cubre la cavidad de la unidad principal. Coloque la unidad principal del dispositivo en la cavidad respectiva. 6. Para el micrófono con cable, conecte la almohadilla de Velcro del micrófono con cable al interior del protector de barbilla de los cascos integrales.
  • Seite 119: Encendido, Apagado Y Carga

    Puede utilizar el conector del adaptador de micro USB para aproximadamente 1 segundo para encender la unidad. Se iluminará cargar el X-COM sin la batería. Debe conectar el cable USB de el LED azul y escuchará pitidos de tono ascendente y “Hola”.
  • Seite 120: Control De Nivel De Batería

    X-COM 4.5 Control de nivel de batería 5. AJUSTE DEL VOLUMEN Puede comprobar el nivel de batería de dos formas diferentes cuando el auricular está encendido. Puede ajustar fácilmente el volumen utilizando los botones (+) y 4.5.1 Indicador LED (-). Oirá un pitido cuando el volumen alcance el nivel máximo o Cuando se enciende el auricular, el LED rojo parpadea mínimo.
  • Seite 121 (1) Emparejamiento de teléfono (7) VOX de intercomunicador (2) Emparejamiento multipunto (8) Sensibilidad de VOX Puede establecer la configuración del X-COM mediante las (3) Emparejamiento selectivo (9) Mensaje de voz instrucciones del menú de voz tal como se indica a continuación.
  • Seite 122: Emparejamiento Con Teléfono Móvil

    X-COM 6.1 Emparejamiento con teléfono móvil “Emparejamiento selectivo de teléfono”. Consulte la sección 8 para ver detalles sobre emparejamiento selectivo de teléfonos. Si Mensaje de voz “Emparejar teléfono” pulsa el botón (+) o (-), puede salir del modo de emparejamiento Valor predefinido de fábrica...
  • Seite 123 A continuación, oirá el mensaje de voz “Cancelado”. la llamada diciendo en voz alta “Hola” o cualquier otra palabra. Si no se presiona ningún botón en 1 minuto, el X-COM saldrá Sin embargo, la función VOX no funciona si está conectado al del menú...
  • Seite 124 X-COM 6.7 Habilitar / deshabilitar la función de intercomunicador 6.8 Configuración de sensibilidad de VOX activado por voz Mensaje de voz “Sensibilidad VOX” Mensaje de voz “Intercomunicador VOX” Valor predefinido de fábrica Valor predefinido de fábrica Habilitado Ajuste de nivel Pulse el botón (+) o (-) (1-4)
  • Seite 125 “Salir de configuración”. Pulse el botón central para confirmar. Para borrar toda la información de emparejamiento de Bluetooth del X-COM, pulse el botón (+) o (-) hasta que escuche un mensaje de voz, “Borrar todos los emparejamientos”, y pulse el botón...
  • Seite 126 Emparejamiento de teléfono Nada Emparejamiento multipunto Nada Emparejamiento selectivo de teléfono Nada Antes de usar por primera vez el auricular Bluetooth X-COM Emparejamiento selectivo de medios Nada con cualquier dispositivo Bluetooth, debe realizar la operación Marcación rápida Ejecutar de emparejamiento. El auricular puede emparejarse con teléfonos móviles con Bluetooth, dispositivos estéreo Bluetooth,...
  • Seite 127 3. Busque dispositivos Bluetooth con su teléfono móvil. Seleccione la lista de dispositivos detectados en su teléfono. el NEXX X-COM en la lista de dispositivos detectados en el 4. Introduzca 0000 para el PIN. Es posible que algunos teléfonos teléfono móvil.
  • Seite 128: Emparejamiento Con Navegadores Gps Bluetooth

    Bluetooth. Algunos sistemas de GPS usan el perfil de teléfono emparejar el X-COM con este de forma separada. Cuando el móvil (HFP, Handsfree Profile) y otros usan el perfil de música X-COM esté...
  • Seite 129 “7.1 Emparejamiento con teléfono 5. El GPS confirma el que emparejamiento se ha completado y móvil”. Cuando haga esto, el X-COM interpreta que el GPS es un que el X-COM está listo para usarse. Escuchará el mensaje de teléfono móvil.
  • Seite 130 GPS específicos para motocicletas. como se muestra en el siguiente diagrama. Es posible conectar un Si empareja el X-COM con un SR10 mediante el emparejamiento multipunto, el X-COM puede tener dos dispositivos HFP al mismo GPS o un detector de radares con salida de audio o de auriculares al SR10 mediante un cable.
  • Seite 131 Si tiene un teléfono con música en estéreo MP3, como un Smartphone, Radio bidireccional es posible que algunas veces necesite usar de manera selectiva el Emparejamiento con teléfonos X-COM solo para música en estéreo A2DP o solo como manos libre Conexión por A2DP móviles cable para el teléfono móvil.
  • Seite 132 3. Busque los dispositivos Bluetooth en su Smartphone. mediante el intercomunicador. Si el proceso de emparejamiento Seleccione NEXX X-COM en la lista de dispositivos detectados no se completa en un minuto, el X-COM regresará al modo de en el teléfono. espera.
  • Seite 133 X-COM 5. La cola del emparejamiento del intercomunicador es “Último en llegar, primero atendido”. Si un auricular está emparejado con múltiples auriculares para conversaciones a través del intercomunicador, el último auricular emparejado se establece como “primer amigo de intercomunicador”. El amigo de intercomunicador anterior se convierte en el “segundo amigo...
  • Seite 134 Bluetooth (mínimo) El SMH5 no puede participar en conferencias de intercomunicador con tres o cuatro participantes con el X-COM. El SMH5 tiene una Las funciones de mayor prioridad interrumpirán siempre las capacidad limitada y solo puede gestinoar conversaciones a través funciones de menor prioridad.
  • Seite 135: Música En Estéreo

    X-COM siguiendo los procedimientos de “Emparejamiento de dispositivo estéreo Bluetooth” descritos en el capítulo 7.3 El X-COM admite el perfil de control remoto de audio/ 3. Para pasar a la siguiente pista o a la anterior, pulse el botón (+) vídeo (AVRCP), por lo que si su dispositivo de sonido Bluetooth...
  • Seite 136: Marcación Rápida

    X-COM Nota: 12. REALIZAR Y RESPONDER LLAMADAS 1. Si está usando una conexión con teléfono móvil multipunto y tiene una A TRAVÉS DEL TELÉFONO MÓVIL llamada entrante en el segundo teléfono durante la llamada del primer teléfono, podrá seguir recibiendo la llamada del segundo teléfono. En este caso, la llamada del primer teléfono está...
  • Seite 137 (+) o el botón (-) hasta que oiga el mensaje de voz “Cancelar” y pulse el botón central. Si no se presiona ningún botón en 15 segundos, el X-COM cerrará el menú de marcación rápida por voz y volverá al modo de espera.
  • Seite 138: Intercomunicador Bidireccional

    X-COM 2. Para terminar una conversación a través del intercomunicador, 13. INTERCOMUNICADOR BIDIRECCIONAL pulse una vez el botón central y la conversación finalizará. 13.1 Abrir y cerrar el intercomunicador bidireccional 1. Puede iniciar una conversación a través del intercomunicador con Terminar cualquiera de sus amigos de intercomunicador pulsando el botón...
  • Seite 139: Intercomunicación Activada Por Voz (Vox De Intercomunicador)

    13.4 Intercomunicador y GPS 1. Cuando tenga una llamada entrante por intercomunicador durante Si empareja un GPS Bluetooth con el X-COM, como se describe en la una conversación por intercomunicador, se oirá un tono de llamada. sección 7.4 de esta guía, puede escuchar las instrucciones giro por Puede optar por 1) responder la llamada de teléfono y detener...
  • Seite 140: Intercomunicador Y Radio Bidireccional

    Bluetooth del X-COM Detector de radares simultáneamente usando el Sena SR10, un adaptador de radio bidireccional Bluetooth, junto con el X-COM. El audio entrante de la radio bidireccional no interrumpe una conversación por el Amigo de intercomunicador intercomunicador ya que se oye de fondo.
  • Seite 141: Iniciar Una Conversación A Través Del Intercomunicador Para Tres Personas

    X-COM 1. Ud.(A) necesita estar emparejado con otros dos amigos (B y C) 14. CONVERSACIÓN A TRAVÉS DEL para la llamada en intercomunicador de tres vías. INTERCOMUNICADOR A 3 BANDAS 14.1 Iniciar una conversación a través del intercomunicador para tres personas Usted (A) puede mantener una conversación a 3 bandas a través...
  • Seite 142: Finalizar Una Conversación A Través Del Intercomunicador Entre Tres Personas

    X-COM 14.2 Finalizar una conversación a través del 3. El segundo amigo de intercomunicador (C) puede unirse a la intercomunicador entre tres personas conversación realizándole una llamada de intercomunicador a usted (A). Cuando usted forma parte de una conversación a través del intercomunicador ente tres personas en activo, puede finalizar la conversación a través del...
  • Seite 143: Iniciar Una Conversación A Través Del Intercomunicador Entre Cuatro Personas

    Puede realizar una conferencia a través del intercomunicador del intercomunicador. Finaliza todas las conexiones del para cuatro personas con otros tres usuarios de X-COM si agrega intercomunicador entre usted (A), y sus participantes de un participante a la conversación a través del intercomunicador intercomunicador (B) y (C).
  • Seite 144: Compartir Música

    2. Cuando reciba una llamada entrante, efectúe una llamada telefónica 1. Encienda el X-COM y el auricular Bluetooth de otra marca con el u oiga una instrucción de voz giro a giro del GPS mientras esté que desea emparejarlo.
  • Seite 145: Intercomunicador Universal A Dos Bandas

    Puede realizar una conexión por intercomunicador universal a tres usuario del auricular que desea utilizar). El X-COM se emparejará bandas con dos X-COM y un auricular Bluetooth de otra marca. automáticamente con el auricular Bluetooth de otra marca si está...
  • Seite 146 Consulte la sección 14.2: “Finalizar una conversación a 3. El otro X-COM (C) puede unirse a la conversación realizándole una través del intercomunicador entre tres personas”. llamada por intercomunicador a usted (A).
  • Seite 147: Intercomunicador Universal A Cuatro Bandas

    Puede establecer una conexión por intercomunicador universal a cuatro bandas con dos configuraciones diferentes: 1) tres X-COM y un auricular Bluetooth de otra marca, o 2) dos X-COM y dos auriculares Bluetooth de otras marcas. Puede haber otras dos configuraciones alternativas de intercomunicación...
  • Seite 148 X-COM (C). 17.4.2 Intercomunicador universal a cuatro bandas Caso 2 Tres auriculares X-COM (A, C y D) y un auricular Bluetooth de otra marca (B). El procedimiento es el mismo que en el caso 1 descrito en la sección 17.4.1.
  • Seite 149: Conferencia Telefónica Para Tres Personas Con Un Participante De Intercomunicador

    Iniciar través del teléfono móvil que posteriormente el intercomunicador se desconecte. En este Finalizar la conversación caso, el X-COM intentará restablecer la conexión a través del a través del Pulse el botón central intercomunicador automáticamente cada 8 segundos, y usted intercomunicador primero oirá...
  • Seite 150: Restablecimiento De Fallos

    22. ACTUALIZACIÓN DEL FIRMWARE Cuando el X-COM no funciona correctamente o se encuentra El X-COM admite la función de actualización del firmware. Visite en estado de fallo por cualquier motivo, puede reiniciarlo el sitio web de NEXX Helmets en www.nexx-helmets.com para desconectando el conector de la batería.
  • Seite 151: Estudio De Caso

    X-COM Caso 2 23. ESTUDIO DE CASO Emparejamiento GPS - teléfono móvil Caso 1 GPS por Bluetooth* Teléfono móvil Emparejamiento con teléfono móvil Teléfono móvil Emparejamiento con teléfono móvil Empareja- miento de intercomuni- cador Emparejamiento Empare- de intercomuni- jamiento GPS por Bluetooth*...
  • Seite 152 X-COM zumo 550, TomTom Rider: instrucciones de GPS, llamadas telefónicas • Teléfono móvil: llamadas telefónicas • Intercomunicador • GPS zumo 660/665: instrucciones de GPS, oír música zumo 220/350/550, TomTom Rider: instrucciones de GPS Caso 3 • Intercomunicador GPS por Bluetooth* Emparejamiento con teléfono móvil...
  • Seite 153 X-COM Caso 4 Caso 5 Teléfono móvil Teléfono móvil Emparejamiento con Emparejamiento con teléfono móvil teléfono móvil Empareja- Empareja- Empareja- Emparejamiento miento con miento de GPS por Sistema miento de con teléfono teléfono intercomuni- Bluetooth* de audio intercomuni- móvil cador móvil...
  • Seite 154 X-COM Caso 6 Procedimiento de emparejamiento de Bluetooth Emparejamiento con teléfono móvil Emparejamiento con teléfono móvil Emparejamiento multipunto Teléfono móvil Emparejamiento de intercomunicador Emparejamiento con GPS por Bluetooth* teléfono móvil zumo 220/350/550/660/665, TomTom Rider Sistema de audio Bluetooth para motocicletas*...
  • Seite 155 X-COM Caso 7 Procedimiento de emparejamiento de Bluetooth Emparejamiento con teléfono móvil Emparejamiento multipunto Emparejamiento de intercomunicador Teléfono móvil Emparejamiento con • Teléfono móvil: llamadas telefónicas teléfono móvil • SR10: radio bidireccional, instrucciones de GPS, señal de detección de radares •...
  • Seite 156 X-COM Caso 8 Procedimiento de emparejamiento de Bluetooth Emparejamiento GPS - teléfono móvil Emparejamiento con teléfono móvil Emparejamiento con teléfono móvil Empareja- Empareja- Empareja- Emparejamiento de intercomunicador miento miento con miento con Reproductor GPS por Teléfono GPS - teléfono teléfono...
  • Seite 157 X-COM Caso 9 Procedimiento de emparejamiento de Bluetooth Emparejamiento con teléfono móvil Emparejamiento con teléfono móvil Emparejamiento con teléfono móvil Emparejamiento con teléfono móvil Emparejamiento multipunto Emparejamiento con Emparejamiento de intercomunicador teléfono móvil • Teléfono móvil: llamadas telefónicas • SR10: radio bidireccional, instrucciones de GPS, señal de detección...
  • Seite 158 X-COM Caso 10 Procedimiento de emparejamiento de Bluetooth Emparejamiento con teléfono móvil Emparejamiento con teléfono móvil Emparejamiento con teléfono móvil Teléfono móvil Emparejamiento multipunto Emparejamiento de intercomunicador Emparejamiento con teléfono móvil GPS por Bluetooth* zumo 220/350/550/660/665, TomTom Rider • Teléfono móvil: llamadas telefónicas...
  • Seite 159: Referencia Rápida Sobre El Funcionamiento

    X-COM 24. REFERENCIA RÁPIDA SOBRE EL FUNCIONAMIENTO Tipo Descripción Botón Duración Pitido Tipo Descripción Botón Duración Pitido Botón 1 seg Azul fijo Pitidos Botón 5 seg Rojo Pitido de tono Emparejamiento central y ascendentes central parpadeante medio Encendido botón (+) intercomunicador Botón central de cualquiera de los dos auriculares...
  • Seite 160: Información Sobre La Batería

    MANTENIMIENTO Y CUIDADOS El X-COM debe tratarse con cuidado. Las siguientes recomendaciones El X-COM incluye una batería interna recargable y no extraíble. No le ayudarán a proteger la cobertura de su garantía. intente extraer la batería del dispositivo, ya que podría dañarlo. La 1.
  • Seite 161: Eliminación

    X-COM ELIMINACIÓN CERTIFICACIÓN Y APROBACIÓN DE SEGURI- El símbolo del contenedor tachado sobre el producto, la documentación o el embalaje sirve para recordarle Declaración de conformidad con la FCC que todos los productos eléctricos y electrónicos, Este dispositivo cumple lo dispuesto en el Apartado 15 de las baterías y acumuladores deben segregarse para su...
  • Seite 162: Declaración Sobre La Exposición A Radiofrecuencias Según La Fcc

    X-COM Declaración de conformidad CE apagando y encendiendo el equipo), el usuario debe intentar corregir dichas interferencias llevando a cabo una o varias de las Este producto dispone del marcado CE según las provisiones siguientes medidas: de la Directiva sobre Equipos Radioeléctricos y Terminales de •...
  • Seite 163: Licencia Bluetooth

    SIG, Inc., y cualquier uso de dichas marcas por parte de Sena se realiza bajo licencia. El resto de marcas y nombres comerciales Al utilizar el X-COM usted renuncia a derechos legales sustanciales, pertenecen a sus respectivos propietarios. El dispositivo X-COM incluyendo el derecho a demandar.
  • Seite 164 Dispositivo es utilizado por el comprador original o por un tercero. del Dispositivo. Además, declara que no consumirá ninguna Por la presente, NEXX y Sena le notifican que el uso de este Dispositivo bebida alcohólica que pueda afectar a su estado de alerta ni puede contravenir leyes o regulaciones locales, federales, estatales ninguna sustancia psicotrópica, y que no llevará...
  • Seite 165: Garantía Limitada De Dos Años

    Esta garantía se limita a la reparación y/o sustitución, a discreción de riesgos y peligros y toda responsabilidad por cualquier pérdida NEXX, de un Producto defectuoso o no conforme, y NEXX no será y/o daño, incluso aunque estén causados totalmente o en parte responsable de que el Producto no pueda llevar a cabo funciones por la negligencia o conducta de otros, incluyendo la Compañía.
  • Seite 166: Limitación De Responsabilidad

    X-COM Devolución con reembolso íntegro envío a NEXX, y utilizar el embalaje original u otro equivalente. SI USTED NO ACEPTA NI RECONOCE LAS CONDICIONES Limitación de responsabilidad INDICADAS ANTERIORMENTE, PUEDE DEVOLVER ESTE A EXCEPCIÓN DE LO EXPRESAMENTE ESTABLECIDO EN EL DISPOSITIVO A NEXX PARA OBTENER UN REEMBOLSO ÍNTEGRO,...
  • Seite 167 X-COM ADVERTENCIA NEXX le informa de que el uso de este dispositivo en las vías públicas puede estar prohibido por la ley. Consulte las leyes locales y utilice exclusivamente este dispositivo fuera de las vías públicas, en lugares como propiedades privadas o circuitos cerrados. Si el uso simultáneo de auriculares en ambos oídos mientras circula en...
  • Seite 168 1.2.0 www.nexx-helmets.com Guía del usuario para el Firmware v5.0...
  • Seite 169 Flaches Motorrad Bluetooth ® Headset & Gegensprechanlage Benutzerhandbuch Users Guide www.senabluetooth.com www.nexx-helmets.com...
  • Seite 170 2. PACKUNGSINHALT ……………………………………………………………………………………………… 4 13.1 Eine Kommunikation über Gegensprechanlage beginnen und beenden …………………………………… 26 13.2 Sprachaktivierung der Gegensprechanlage VOX-Gegensprechanlage ……………………………………… 27 3. INSTALLATION DES X-COM AN IHREM HELM ……………………………………………………………… 5 13.3 Gegensprechanlage und Handyanruf …………………………………………………………………………… 27 4. AN-/AUSSCHALTEN UND AUFLADEN ………………………………………………………………………… 7 13.4 Gegensprechanlage und GPS ……………………………………………………………………………………...
  • Seite 171: Einleitung

    Bluetooth-Freisprechanlage für Bluetooth Handys • Bluetooth Stereo Headset für Bluetooth-Audiogeräte wie z.B. • MP3-Player Vielen Dank, dass Sie sich für das NEXX X-COM entschieden haben, Bluetooth Stereo Headset für Bluetooth-GPS-Navis. • ein flaches Bluetooth-Stereo-Headset mit Gegensprechanlage. Bluetooth-Gegensprechanlage, Reichweite bis zu 900 Meter* •...
  • Seite 172: Packungsinhalt

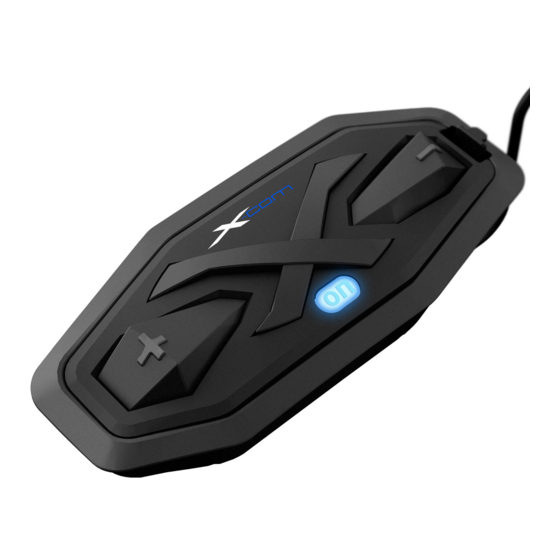
    X-COM 2. PACKUNGSINHALT • Lautsprecher • Headset-Hauptgerät • Kabelmikrofon (+) Taste / (-) Taste • Lautstärkenregelung • Im Sprachkonfigurations-Menü • Akkupack navigieren • Titel vor und Titel zurück • Klettpolster für Lautsprecher • Klettpolster für Kabelmikrofon • Elektronik Lade-LED Mittlere Taste DC-Ladegerät &...
  • Seite 173: Installation Des X-Com An Ihrem Helm

    X-COM 3. INSTALLATION DES X-COM AN IHREM HELM • Mikrofonaufsätze Um das Hauptgerät des X-COM sicher zu befestigen, können Sie • USB-Lade- und Datenkabel die Klebekissen des Klettverschlusses oder das doppelseitige Klebeband benutzen. Beachten Sie bitte die folgenden Anweisungen. 1. Installieren Sie die Batterie und das System in die dafür vorgesehene Aussparung im hinteren Bereich des Helms.
  • Seite 174 X-COM 3. Entfernen Sie die Abdeckung welche die Aussparung für die Haupteinheit schützt. Platzieren Sie dann die Haupteinheit in die vorgesehene Aussparung. 6. Nutzen Sie zur Befestigung des Mikrofons bitte die beigefügten Klebepads und befestigen diese auf die Innenseite Ihres Kinnschutzes.
  • Seite 175: An-/Ausschalten Und Aufladen

    4.1 Anschalten Drücken Sie die mittlere Taste und die (+) Taste für 1 Sekunde Zum Laden des X-COM mit dem Akkupack können Sie den Micro- gleichzeitig zum Einschalten des Geräts. Die blaue LED leuchtet USB-Adapter verwenden. Schließen Sie das USB-Lade- und auf und Sie werden lauter werdende Pieptöne hören und ein...
  • Seite 176: Akkuladezustand Überprüfen

    X-COM 4.5 Akkuladezustand überprüfen 5. EINSTELLEN DER LAUTSTÄRKE Sie können den Akkustand bei eingeschaltetem Headset auf zwei unterschiedliche Arten überprüfen. Die Lautstärke ist über die (+) Taste oder die (-) Taste ganz 4.5.1 LED-Indikator einfach einstellbar. Sie hören einen Piepton, wenn die Lautstärke Wenn das Headset eingeschaltet wird, blinkt die rote LED schnell die höchste oder niedrigste Stufe erreicht hat.
  • Seite 177: X-Com Konfigurationseinstellungen

    (1) Handy Kopplung (8) VOX Empfindlichkeit (2) Multipunkt Kopplung (9) Sprachansage (3) Handyauswahl Kopplung (10) Eigenecho Sie können die Konfiguration des X-COM mithilfe der folgenden (4) Medienauswahl Kopplung (11) Alle Kopplungen löschen Sprachmenü-Anleitung einstellen: (12) Zurücksetzen auf (5) Kurzwahl 1. Für den Zugang zum Sprachkonfigurations-Menü drücken Sie...
  • Seite 178: Handy Kopplung

    X-COM 6.1 Handy Kopplung 6.3 Handyauswahl Kopplung “Koppeln mit ausgewähltem Sprachansage “Handy koppeln” Sprachansage Handy” Werkseinstellung Nicht verfügbar Werkseinstellung Nicht verfügbar Für den Modus Handy Kopplung drücken Sie die (+) Taste oder die Zum Zugang in den Modus Handyauswahl drücken Sie die (+) Taste (-) Taste, bis Sie eine Sprachansage hören: “Handy koppeln”.
  • Seite 179: Kurzwahl Zuweisen

    6.5 Kurzwahl zuweisen Hinweis: “ Sprachansage 1. Sie können bis zu drei Telefonnummern als Kurzwahl zuordnen. Kurzwahl” 2. Sie können Telefonnummern für die Kurzwahl auch mit der NEXX Werkseinstellung Nicht verfügbar Device Manager-Software zuordnen. Weitere Informationen finden Ausführen Mittlere Taste drücken Sie auf der NEXX Helmets-Website unter www.nexx-helmets.com.
  • Seite 180 X-COM 6.8 Einstellen der VOX Empfindlichkeit der dieser Modus deaktiviert ist, müssen Sie die mittlere Taste drücken, Gegensprechanlage um einen eingehenden Anruf entgegenzunehmen. Sprachansage “VOX Empfindlichkeit” 6.7 Aktivierung / Deaktivierung Sprachaktivierung der Werkseinstellung Gegensprechanlage Drücken der (+) oder (-) Taste...
  • Seite 181: Aktivierung / Deaktivierung Der Sprachansagen

    Sie eine Sprachansage hören: “Zurücksetzen”. Drücken Sie eigenen Kopfhörer an Ihr Ohr übertragen wird. Dieser Effekt hilft die mittlere Taste zur Bestätigung. Das X-COM wird sich mit der Ihnen, die richtige Gesprächslautstärke auch bei wechselnden Sprachansage ausschalten: “Zurücksetzen, Auf wiederhören”.
  • Seite 182: Verlassen Des Sprachkonfigurationsmenüs

    X-COM 6.13 Verlassen des Sprachkonfigurationsmenüs Drücken der (+) Taste oder (-) Taste Drücken der mittleren Taste Sprachansage “Konfiguration verlassen” Phone pairing (Handy Kopplung) Keine Werkseinstellung Nicht verfügbar Multipunkt Kopplung Keine Ausführen Drücken Sie die mittlere Taste Handyauswahl Kopplung Keine Medienauswahl Kopplung...
  • Seite 183: Koppeln Mit Ausgewähltem Profil: A2Dp Stereo Oder Handsfree (Hfp)

    X-COM 3. Suchen Sie auf Ihrem Handy nach dem Bluetooth-Gerät. Wählen 7. KOPPELN MIT AUSGEWÄHLTEM PROFIL: Sie das NEXX X-COM in der Liste der Geräte, die auf Ihrem A2DP STEREO ODER HANDSFREE (HFP) Handy gefunden wurden. 4. Geben Sie 0000 als PIN ein. Einige Handys benötigen auch keine PIN.
  • Seite 184: Koppeln Mit Einem Bluetooth-Stereo-Musikspieler

    NEXX X-COM in der Liste der auf Ihrem Handy gefundenen Smartphones, müssen Sie das X-COM nicht nochmals koppeln. Geräte. Wenn das X-COM mit dem Handy verbunden ist, ist es gleichzeitig 4. Geben Sie 0000 als Ihr PIN ein. Einige Handys benötigen auch auch mit dem Stereomusikgerät gekoppelt.
  • Seite 185 7.4 Koppeln mit einem GPS-Navigationsgerät 3. Suchen Sie auf dem GPS-Bildschirm nach einem Bluetooth-Gerät. Sie können die Sprachbefehle von Ihrem Bluetooth-GPS- Wählen Sie das NEXX X-COM in der Liste der Geräte aus, die auf Navigationssystem hören. Einige GPS-Systeme arbeiten mit dem GPS gefunden wurden.
  • Seite 186: Navi Als Handy Koppeln

    X-COM mit folgenden Anweisungen in “7.1 Koppeln mit nicht über diese Eigenschaft. dem Handy”. Falls Sie dies machen, interpretiert das X-COM Ihr GPS als ein Handy. Das X-COM kann aber auch direkt mit einem 7.5 Koppeln mit dem Sena SR10 Bluetooth-Adapter für zusätzlichen Handy gekoppelt werden.
  • Seite 187 X-COM 5. Wenn der Kopplungsprozess nicht innerhalb von 3 Minuten abgeschlossen wird, wechselt das X-COM in Stand-by-Modus. Der eingehende Ton vom Handfunkgerät via SR10 wird im Hintergrund gehört, während man ein Gespräch über die Gegensprechanlage oder das Handy führt. Sie können Musik hören, einen Anruf über Smartphone Handfunkgerät...
  • Seite 188: Koppeln Mit Einem Ausgewählten Profil: Hfp Oder A2Dp Stereo

    3. Suchen Sie nach Bluetooth-Geräten auf Ihrem Smartphone. X-COM ausschließlich für A2DP (Stereomusik) oder für HFP Wählen Sie das NEXX X-COM aus der Liste der Geräte aus, die (Freisprechanlage) zu nutzen. Diese Anweisung wendet sich auf Ihrem Handy erkannt wurden.
  • Seite 189: Koppeln Der Gegensprechanlage

    Das X-COM kann mit bis zu drei anderen Headsets zur drahtlosen Kommunikation über Bluetooth als Gegensprechanlage genutzt werden. 1. Schalten Sie die zwei X-COM Headsets (A und B) ein, die Sie Kopplung mit A & B miteinander koppeln wollen. 2. Drücken und halten Sie die mittlere Taste für 5 Sekunden.
  • Seite 190: Koppeln Mit Anderen Sena Headsets / Gegensprechanlagen

    Eine Funktion mit niedriger Priorität wird stets durch die mit der Gegensprechanlagen höheren Priorität unterbrochen. Zum Beispiel wird Musik durch Das X-COM kann mit allen anderen Sena Headset-Modellen für ein einen Anruf über die Gegensprechanlage unterbrochen und eine Gespräch per Sprechanlage gekoppelt werden, wie SPH10 und Unterhaltung über die Gegensprechanlage wird durch einen...
  • Seite 191 X-COM gekoppelt werden. Folgen Sie dafür den Anweisungen über das “Koppeln mit einem Bluetooth-Stereo-Musikspieler” im Abschnitt 7.3. Das X-COM unterstützt das Audio Video Remote Control Profile (AVRCP), d. h. wenn Ihr Bluetooth-Audiogerät 3. Um den vorherigen oder nächsten Song abzuspielen, drücken AVRCP unterstützt, können Sie das SMH5 als Fernbedienung des...
  • Seite 192: Anrufe Über Das Handy Tätigen Und Entgegennehmen

    X-COM per Sprachbefehl unterstützen. In Ihrem Handy-Handbuch finden 12. ANRUFE ÜBER DAS HANDY TÄTIGEN Sie weitere Anweisungen. UND ENTGEGENNEHMEN Hinweis: 1. Wenn Sie die Mehrpunktkopplung für Handys verwenden und einen eingehenden Anruf vom zweiten Handy während des Gesprächs mit 12.1 Anrufe über das Handy tätigen und entgegennehmen dem ersten Handy erhalten, können Sie den Anruf vom zweiten Handy...
  • Seite 193 Bedienung der Mobiltelefontasten (+) oder die Taste (-), bis Sie die Sprachansage “Abbrechen” hören. Drücken Sie die mittlere Taste. Wird innerhalb von 15 Sekunden keine Taste gedrückt, verlässt das X-COM selbsttätig das Sprachkurzwahlmenü und wechselt wieder in den Standby- Modus.
  • Seite 194: Gegensprechanlage

    X-COM 2. Um ein Gespräch per Gegensprechanlage zu beenden, 13. GEGENSPRECHANLAGE drücken Sie einmal auf die mittlere Taste. Jedes Gespräch per Gegensprechanlage mit einem Freund wird durch ein einfaches Antippen beendet. 13.1 Eine Kommunikation über Gegensprechanlage beginnen und beenden 1. Sie können ein Gespräch per Gegensprechanlage mit einem Ihrer...
  • Seite 195: Sprachaktivierung Der Gegensprechanlage Vox-Gegensprechanlage

    X-COM 13.2 Sprachaktivierung der Gegensprechanlage VOX- Gegensprechanlage mit jemandem verbunden sind. Wenn Gegensprechanlage Sie das Telefonat beenden, setzt sich die Verbindung per Wenn die VOX Gegensprechanlage über die entsprechende Gegensprechanlage automatisch wieder fort. Konfigurationseinstellung aktiviert wurde, wie im Abschnitt 6.6 b.
  • Seite 196: Gegensprechanlage Und Gps

    X-COM 13.4 Gegensprechanlage und GPS 13.5 Gegensprechanlage und Handfunkgeräte Wenn Sie ein Bluetooth-GPS mit dem X-COM koppeln, wie unter Wie unter 7.5 in diesem Handbuch beschrieben, können Sie ein 7.4 dieser Bedienungsanleitung beschrieben, können Sie die Handfunkgerät und die X-COM Bluetooth-Gegensprechanlage Sprachansagen für die Routenführung des Navis hören, und zwar...
  • Seite 197: Drei-Wege-Konferenzschaltung

    X-COM 14. DREI-WEGE-KONFERENZSCHALTUNG 14.1 Ein Drei-Wege-Konferenzgespräch starten Smartphone Sie (A) können ein Drei-Wege-Konferenzgespräch mit zwei anderen Handfunkgerät Personen (B und C) führen, indem Sie zwei Verbindungen zur selben Koppeln mit Zeit einrichten. Während eines Drei-Wege-Konferenzgesprächs einem Handy A2DP Kabel- Verbindung mit Gegensprechanlage wird die Handy-Verbindung aller drei Teilnehmer zwar vorübergehend unterbrochen, aber sobald...
  • Seite 198 Erster Freund Zweiter Freund Erster Freund Zweiter Freund 4. Jetzt können Sie (A) und zwei der X-COM Biker-Freunde (B und C) ein Drei-Wege-Konferenzgespräch über die Gegensprechanlage 2. Beginnen Sie eine Unterhaltung über die Gegensprechanlage führen. mit einem der beiden Biker-Freunde. Sie (A) können z.B. eine Unterhaltung über die Gegensprechanlage mit dem ersten...
  • Seite 199: Ein Drei-Wege-Konferenzgespräch Beenden

    1. Drücken Sie die mittlere Taste für 1 Sekunde, bis Sie einen Piepton Sie (A) können ein Vier-Wege-Konferenzgespräch mit drei hören, um die Drei-Wege-Konferenz per Gegensprechanlage anderen X-COM Biker-Freunden führen, wenn Sie einen weiteren zu beenden. Dies beendet beide Gegensprechanlage- Teilnehmer zu dem Konferenzgespräch hinfügen. Während Sie Verbindungen mit (B) und (C).
  • Seite 200: Ein Vier-Wege-Konferenzgespräch Beenden

    X-COM 15.2 Ein Vier-Wege-Konferenzgespräch beenden 16. MUSIK TEILEN Genauso wie im Fall eines Drei-Wege-Konferenzgespräches können Sie auch die Vier-Wege-Konferenzschaltung beenden oder einzelne Verbindungen trennen. Sie können Musik in Stereo während einer Kommunikation über 1. Drücken Sie die mittlere Taste für 1 Sekunde, bis Sie einen Piepton Gegensprechanlage über Bluetooth mit einem Biker-Freund...
  • Seite 201: Universal-Sprechanlage

    X-COM 2. Halten Sie die mittlere Taste des X-COM für 8 Sekunden gedrückt, 17. UNIVERSAL-SPRECHANLAGE bis die blaue LED schnell blinkt. Sie hören die Sprachansage “Universelle Gegensprechanlage wird gekoppelt”. 3. Führen Sie alle erforderlichen Schritte für das Koppeln als Mithilfe der Universal-Sprechanlage können Sie auch über Freisprechanlage bei dem Drittanbieter-Bluetooth-Headset durch.
  • Seite 202: Drei-Wege-Universal-Sprechanlage

    X-COM 17.3 Drei-Wege-Universal-Sprechanlage 1. Sie (A) müssen mit einem Drittanbieter-Bluetooth-Headset (B) und Sie können eine Drei-Wege-Universal-Gegensprechverbindung einem anderen X-COM-Headset (C) für die Konferenz über die Drei-Wege-Universal-Sprechanlage gekoppelt sein. mit zwei X-COM-Geräten und einem Drittanbieter-Headset herstellen. Wenn eine Gegensprechverbindung hergestellt wurde, sind über die verbundenen Headsets keine Handyanrufe möglich,...
  • Seite 203: Vier-Wege-Universal-Sprechanlage

    X-COM 3. Das zweite X-COM (C) kann sich am Gespräch beteiligen, indem 14.2 “Ein Drei-Wege-Konferenzgespräch beenden”. der Gesprächspartner Sie (A) über die Sprechanlage anruft. 17.4 Vier-Wege-Universal-Sprechanlage Sie können die Verbindung für eine Vier-Wege-Universal- Sprechanlage mit verschiedenen Konfigurationen herstellen: 1) Drei X-COM und ein Drittanbieter-Bluetooth-Headset oder 2) zwei X-COM und zwei Drittanbieter-Bluetooth-Headsets.
  • Seite 204 Konferenzgespräch teilnehmen, indem der Sprecher das X-COM (C) über die Sprechanlage anruft. 2. Das zweite X-COM (C) kann sich am Gespräch beteiligen, indem der Gesprächspartner Sie (A) über die Sprechanlage anruft. 4. Jetzt sind beide X-COM-Headsets (A und C) und beide Drittanbieter-Bluetooth-Headsets (B und D) mit der Vier-Wege- Universal-Sprechanlage verbunden.
  • Seite 205: Drei-Wege-Telefonkonferenz Mit Einem Gegensprech-Teilnehmer

    Gegensprechanlage einen Freund dem Handygespräch zuschalten. Während Ihres Gesprächs am Handy machen Sie einen Anruf per Drei X-COM-Headsets (A, C und D) und ein Drittanbieter- Gegensprechanlage zu einem Ihrer Freunde, indem Sie die mittlere Bluetooth-Headset (B). Der Prozess ist der gleiche wie in Beispiel Taste antippen und eine Drei-Weg-Konferenz aufbauen, zusammen 1 in Abschnitt 17.4.1.
  • Seite 206: Versagen Der Gegensprechanlage

    Fall müssen Sie es später nochmals versuchen. Gegensprechkommunikation unterbrochen. In diesem Fall versucht das X-COM automatisch alle 8 Sekunden die Verbindung wieder herzustellen und Sie hören einen hohen doppelten Piepton bis zur Wiederherstellung der Verbindung. Falls Sie keine Wiederwahl...
  • Seite 207: Reset Bei Fehlfunktion

    Fehlerstatus anzeigt, könnten Sie einen Reset ausführen, indem Sie die neusten Software zu suchen. die Resettaste auf der durch Abklemmen der Batterie-Anschluss. Das X-COM wird abgeschaltet. Sie müssen das Headset wieder einschalten und die gewünschte Funktion nochmals versuchen. Der Reset wird die werkseitigen Standardeinstellungen nicht...
  • Seite 208: Fallbeispiele Zur Verbindung Mit Sena Bluetooth

    X-COM Bluetooth-Kopplungsvorgang 23. FALLBEISPIELE ZUR VERBINDUNG Koppeln mit Handy Mehrpunktkoppeln MIT SENA BLUETOOTH Koppeln der Gegensprechanlage Bluetooth-Navigationsgerät* Beispiel 1 zumo 220/350/550/660/665, TomTom Rider Verwendung • Handy: telefonieren, Musik hören • Navi: Navigationsanweisungen Handy • Gegensprechanlage Koppeln mit Handy Koppeln der...
  • Seite 209 X-COM Beispiel 2 Beispiel 3 Navi: Koppeln mit Handy Bluetooth-Navigationsgerät* Bluetooth-Navigationsgerät* Handy Koppeln mit Koppeln mit Handy Handy Koppeln der Mehrpunkt- Gegen- koppeln Koppeln der Handy sprechanlage Gegen- sprechanlage Bluetooth-Kopplungsvorgang Bluetooth-Kopplungsvorgang Koppeln mit Handy Navi: Koppeln mit Handy Koppeln mit Handy...
  • Seite 210: Verwendung

    X-COM Beispiel 4 Beispiel 5 Handy Handy Koppeln mit Koppeln mit Handy Handy Navi Koppeln mit Koppeln der Koppeln der Koppeln mit Handy Gegen- Bluetooth- Bluetooth- Gegen- Handy sprechanlage Navigationsgerät* Audiosystem des sprechanlage Fahrzeugs* Musik Bluetooth-Kopplungsvorgang Bluetooth-Kopplungsvorgang Koppeln mit Handy...
  • Seite 211 X-COM Bluetooth-Kopplungsvorgang Beispiel 6 Koppeln mit Handy Koppeln mit Handy Mehrpunktkoppeln Koppeln der Gegensprechanlage Handy Bluetooth-Navigationsgerät* Koppeln mit zumo 220/350/550/660/665, TomTom Rider Handy Bluetooth-Audiosystem des Fahrzeugs* BMW R1200RT, K1600GT, K1600GTL Verwendung Koppeln der • Handy: telefonieren Koppeln mit Musik Gegen-...
  • Seite 212 X-COM Beispiel 7 Bluetooth-Kopplungsvorgang Koppeln mit Handy Mehrpunktkoppeln Koppeln der Gegensprechanlage Handy Verwendung • Handy: telefonieren Navi Koppeln mit • SR10: Handfunkgerät, Navigationsanweisungen, Radarwarnsignal Handy • Gegensprechanlage SR10 Mehrpunkt- koppeln Handfunkgerät Koppeln der Gegen- sprechanlage Radarwarner...
  • Seite 213 X-COM Beispiel 8 Bluetooth-Kopplungsvorgang Navi: Koppeln mit Handy Koppeln mit Handy Koppeln mit Handy Koppeln der Gegensprechanlage Navi: Koppeln mit Koppeln mit Bluetooth-Navigationsgerät* Koppeln Handy Handy MP3 Player Bluetooth- Handy mit Handy Navigations- zumo 220/350/550/660/665, TomTom Rider gerät* Koppeln der...
  • Seite 214 X-COM Beispiel 9 Bluetooth-Kopplungsvorgang Koppeln mit Handy Koppeln mit Handy Koppeln mit Handy Mehrpunktkoppeln Handy Koppeln der Gegensprechanlage Koppeln mit Navi Verwendung Handy • Handy: telefonieren • SR10: Handfunkgerät, Navigationsanweisungen, Radarwarnsignal • SM10: Musik hören/teilen SM10 SR10 • Gegensprechanlage Koppeln mit...
  • Seite 215 X-COM Beispiel 10 Bluetooth-Kopplungsvorgang Koppeln mit Handy Koppeln mit Handy Koppeln mit Handy Mehrpunktkoppeln Handy Koppeln der Gegensprechanlage Koppeln mit Bluetooth-Navigationsgerät* Handy zumo 220/350/550/660/665, TomTom Rider Verwendung • Handy: telefonieren • Navi: Navigationsanweisungen Mehrpunktkoppeln Koppeln der • SM10: Musik hören/teilen...
  • Seite 216: Schnellreferenz Für Den Betrieb

    X-COM 24. SCHNELLREFERENZ FÜR DEN BETRIEB Beschreibung Taste Dauer Signal Beschreibung Taste Dauer Signal Mittlere 1 Sek. Durchgehend Lauter Mittlere 5 Sek. Leuchtet rot Mittelhoher Gegensprechanlage Anschalten Taste & blau werdende Taste Piepton koppeln Taste (+) Pieptöne Mittlere Taste und eines der beiden Headsets Mittlere Drücken Durchgehend...
  • Seite 217: Akku-Informationen

    X-COM AKKU-INFORMATIONEN WARTUNG UND PFLEGE Das X-COM hat einen internen, fest installierten, wiederaufladbaren Das X-COM sollte sorgfältig behandelt werden. Die folgenden Akku. Versuchen Sie nicht, den Akku aus dem Gerät zu entfernen, Hinweise helfen Ihnen beim Erhalt Ihrer Gewährleistungsansprüche. da das Gerät dadurch beschädigen werden kann. Der Akku kann 1.
  • Seite 218: Entsorgung

    X-COM ENTSORGUNG ZULASSUNGEN UND SICHERHEITS-ZERTIFIKATE Erklärung zur Einhaltung der FCC-Vorschriften Das Entsorgungssymbol auf dem Produkt, den Handbüchern oder der Verpackung weist darauf Dieses Gerät entspricht Abschnitt 15 der FCC-Vorschriften (Federal Communications Comission - Amerikanische Bundeskommission hin, dass dieses Produkt wie alle anderen zur Regelung der Kommunikationswege).
  • Seite 219: Fcc Rf Exposure Statement

    X-COM CE-Konformitätserklärung Die Empfangsantenne neu einstellen oder an einen neuen • Standort verlegen. Dieses Produkt ist gemäß den Bestimmungen der R&TTE-Richtlinie Den Abstand zwischen dem Gerät und dem Empfänger • (99/5/EC) CE-gekennzeichnet. Sena erklärt hiermit, dass dieses vergrößern. Produkt mit den grundsätzlichen Voraussetzungen und anderen Das Gerät an einem anderen Anschluss bzw.
  • Seite 220: Bluetooth-Lizenz

    Ihnen dringend, alle erforderlichen Vorsichtsmaßnahmen zu treffen, um auf den Verkehr, das Wetter und den Zustand der Straße zu achten, wenn Sie das X-COM Headset einschließlich aller anderen Modelle benutzen möchten, unabhängig von deren Handelsnamen oder Branding (nachfolgend kurz als das "Gerät" bezeichnet),...
  • Seite 221 Werbung, Bekanntgaben oder ähnliche Mitteilungen, welche sich Dritten benutzt wird. auf die Benutzung des Geräts während des Betreibens eines NEXX und Sena teilt Ihnen hiermit mit, dass die Benutzung Fahrzeug beziehen, beabsichtigen ausschließlich, die technischen dieses Geräts ein Verstoß gegen Gemeinde-, Bundes-, Landes- Fähigkeiten des Geräts aufzuzeigen, und sollten nicht dahingehend...
  • Seite 222: Begrenzte Gewährleistung Von 2 Jahren

    (b) Diese Risiken und Gefahren können durch Käufer/Endverbraucher abtretbar oder übertragbar. die Fahrlässigkeit der Hersteller oder deren Vertreter oder Dritte Diese Gewährleistung ist je nach NEXX' s Ermessen auf die verursacht werden, die bei dem Design oder der Herstellung des...
  • Seite 223: Haftungseinschränkung

    PROFITE DARAUS, ODER IM ZUSAMMENHANG MIT DER des Transports zu übernehmen, die Transportkosten im Voraus BENUTZUNG ODER BEREITSTELLUNG DER AUSRÜSTUNG, an NEXX zu bezahlen und die Originalverpackung oder eine TEILEN DERSELBEN ODER DIENSTLEISTUNGEN NACH DEM gleichwertige Verpackung zu verwenden. VORLIEGENDEN VERTRAG ODER DIE LEISTUNG, BENUTZUNG ODER UNFÄHIGKEIT DER BENUTZUNG DERSELBEN, SELBST...
  • Seite 224: Rückgabe Gegen Vollständige Rückzahlung

    WARNUNG MÖGLICHKEIT DERARTIGER SCHÄDEN IN KENNTNIS GESETZT WURDEN, WOBEI DIESE AUFZÄHLUNG NICHT ABSCHLIESSEND NEXX weist darauf hin, dass die Benutzung dieses Geräts im IST. DIE GESAMTHAFTUNG VON NEXX ODER DEREN VERKÄUFER öffentlichen Verkehr durch Gesetze verboten sein kann. Bitte ÜBERSTEIGT IN KEINEM FALL DEN PREIS, DER FÜR DAS überprüfen Sie Ihre regionalen Gesetze und benutzen Sie...
  • Seite 225 X-COM...
  • Seite 226 1.2.0 www.nexx-helmets.com Benutzerhandbuch für Firmware v5.0...
  • Seite 227 Auricular e Intercomunicador ® Bluetooth com perfil discreto para motas Manual de Utilizador Users Guide www.senabluetooth.com www.nexx-helmets.com...
  • Seite 228 X-COM © 1998-2013 Sena Technologies Inc. Todos os direitos reservados. Sena Technologies Inc. reserva-se o direito de fazer quaisquer alterações e melhorias no seu produto sem aviso prévio. Sena™ é uma marca da Sena Technologies Inc. ou das suas filiais nos EUA e outros países. SMH10™, SMH10R™, SMH5™, SMH5- FM™, SPH10™, SPH10H™, SPH10H-FM™, SPH10S™, SR10™, SM10™...
  • Seite 229 DECLARAÇÃO DE CONFORMIDADE CE …………………………………………………………………… 50 9. INTERCOMUNICADOR ………………………………………………………………………………… 22 DECLARAÇÃO DA INDÚSTRIA DO CANADÁ ……………………………………………………………… 51 9.1 SINCRONIZAÇÃO COM OUTROS DISPOSITIVOS X-COM PARA CONVERSAÇÃO ……………… 22 LICENÇA BLUETOOTH ………………………………………………………………………………………… 51 9.2 SINCRONIZAÇÃO COM OUTROS DISPOSITIVOS SENA PARA CONVERSAÇÃO ………………… 23 ISENÇÃO E DISPOSIÇÕES GERAIS DE DIVULGAÇÃO ………………………………………………...
  • Seite 230 • Sincronização Multipoint Bluetooth com sistema de navegação GPS ou Sena O X-COM é compatível com Bluetooth 3.0 suportando os seguintes • Conexão Multipoint Bluetooth para 2 telemóveis perfis: Auricular, Mãos Livres (HFP), Distribuiçção de Audio •...
  • Seite 231: Conteúdos Da Embalagem

    X-COM 2. CONTEÚDOS DA EMBALAGEM • Auscultadores • Unidade Principal do Dispositivo • Microfone de fio Botões (+) / (-) • Ajuste de Volume • Bateria • Navegação através do menu de configuração de voz • Avançar e Recuar faixa MP3 •...
  • Seite 232: Instalar O X-Com No Seu Capacete

    X-COM 3. INSTALAR O X-COM NO SEU CAPACETE • Esponjas de microfone Para instalar de forma segura a unidade principal do X-COM, pode utilizar a almofada de velcro ou fita adesiva dupla face. Por • Cabo de USB e Dados favor, siga o procedimento abaixo.
  • Seite 233 X-COM 3. Retirar a tampa que cobre a cavidade da unidade principal. Fixar a unidade principal do dispositivo na respectiva cavidade. 6. No caso do microfone com fio, anexar a almofada velcro do microfone com fio no interior do protector de queixo para 4.
  • Seite 234 Pode utilizar o conector do adaptador de Micro-USB para carregar Pressione o botão central e o botão (+) ao mesmo tempo por 1 o X-COM com a bateria. Deve conectar o cabo de energia e de segundo para ligar. O LED azul acende e irá ouvir sinais sonoros dados USB ao conector do Micro-Adaptador USB do dispositivo ascendentes e "Hello"(Olá).
  • Seite 235: Ajustar O Volume

    X-COM 4.4 Aviso de Bateria Fraca 5. AJUSTAR O VOLUME Quando a bateria está fraca, o LED azul que pisca em modo stand- by torna-se vermelho e irá ouvir triplos sinais sonoros médios e uma voz alerta, "Low Battery"(Bateria Fraca).
  • Seite 236 (1) Sincronização Telemóvel (7) Intercom VOX (2) Sincronização Multipoint (8) Sensibilidade VOX (3) Sincronização Seletiva (9) Comando de Voz Pode definir a configuração do X-COM pelas instruções do menu Telefone (10) Sidetone de voz abaixo. (11) Apagar Sincronizações (4) Sincronização Seletiva 1.
  • Seite 237 X-COM 6.1 Sincronização com Telemóvel 6.3 Sincronização Chamadas Seletiva Comando de Voz “Phone pairing” Comando de Voz “Phone selective pairing” Padrão de Origem Padrão de Origem Para entrar em modo de sincronização telemóvel, pressione Para entrar em modo Sincronização Chamadas Seletiva, pressione o botão (+) ou (-) até...
  • Seite 238 Botão Central para confirmar. Ouvirá uma mensagem de voz ao intercomunicador. Esta opção já está ativada de origem, mas dizendo “Cancel”(Cancelado). Se não for premido qualquer pode ser desativada. Se este modo estiver desativado, tem que botão no prazo de 1 minuto, o X-COM sairá do menu de...
  • Seite 239 X-COM pressionar o botão central para atender uma chamada. que irá levá-lo para o modo de ajuste de nível. Se entrar no modo, 6.7 Ativar/Desativar Activação do Intercom por Voz irá ouvir um comando a dizer o nível de sensibilidade VOX actual.
  • Seite 240 Para apagar todas as informações de sincronização Bluetooth no de voz, “Exit configuration” (Sair da Configuração). Pressione o X-COM, presisone no botão (+) ou (-) até ouvir uma mensagem botão central para confirmar. de voz “Delete all pairings”(Apagar todas as Sicronizações).
  • Seite 241 Nenhum DISPOSITIVOS BLUETOOTH Sincronização Multipoint Nenhum Sincronização de Telefone Seletiva Nenhum Antes de utilizar o auricular Bluetooth X-COM com qualquer Sincronização Multimedia Seletiva Nenhum dispositivo Bluetooth pela primeira vez, precisa executar Marcação Rápida Executar a operação de sincronização. Pode ser sincronizado com telemóveis Bluetooth, dispositivos Bluetooth stereo como MP3,...
  • Seite 242 X-COM retornará ao modo stand-by. procure o dispositivo Bluetooth no ecrã do GPS, e selecione o NEXX X-COM no passo 3. Por favor, consulte a secção " 7.4.1 7.2 Sincronização Multipoint Sincronização GPS Multipoint” para mais detalhes.
  • Seite 243 Bluetooth GPS Se um dispositivo Bluetooth stereo está integrado com o telemóvel, como o caso dos smartphones, não é preciso sincronizar o X-COM Pode ouvir a instrução de voz de navegação GPS Bluetooth. com ele separadamente. Quando o X-COM está sincronizado com Alguns sistemas GPS usam o perfil do telemóvel (HFP, Hands-...
  • Seite 244 GPS. 4. Digite 0000 para o PIN. SmartPhone 5. O GPS confirma que a sincronização foi concluída e o X-COM está pronto para utilizar. Irá ouvir uma mensagem de voz, “Your Sincronização headset is paired” (O Auricular está sincronizado).
  • Seite 245 O Sena SR10 é um adaptador de rádio Bluetooth bidirecional para comunicação em grupo, e usa HFP tal como a maioria dos sistemas de navegação GPS para motos. Se sincronizar o X-COM com um SR10 por sincronização multipoint, o X-COM pode funcionar em Sincronização...
  • Seite 246 X-COM na figura seguinte . A navegação GPS ou um detector de radar com auricular que tenha entrada para auriculares ou saída de áudio pode ser conectado com fio ao SR10. A instrução de voz GPS ou o alarme detector de radar também pode ser ouvido de fundo via SR10 numa conversa...
  • Seite 247 A2DP para música ou HFP para chamadas. telemóvel. 4. Digite 0000 para o PIN. Alguns Smartphones não pedem PIN. Se já sincronizou um telemóvel ao X-COM, deve limpar a lista de sincronização anterior em ambos os dispositivos, o telemóvel e 8.2 Sincronização Multimedia Seletiva: A2DP Apenas o X-COM.
  • Seite 248 O X-COM pode ser sincronizado com outros auriculares (até três) para conversa intercomunicador Bluetooth. 1. Ligue os dois auriculares X-COM (A e B) que gostaria de sincronizar com outro. 2. Pressione e segure o botão central por 5 segundos, de seguida Sincronizar A &...
  • Seite 249 Nota: O SMH5 não está preparado para conversa intercomunicador de três ou quatro canais com o X-COM. O SMH5 tem uma capacidade limitada, e poderá apenas controlar uma conversa dois canais ou com outros modelos Sincronizar A & C Sincronizar A &...
  • Seite 250 (highest) Telemóvel, com o X-COM seguindo as instruções "Sincronização com Intercomunicador, Dispositivo Bluetooth Stereo" descritas na secção 7.3. O X-COM Partilha de música através de música stereo suporta o Perfil de Controlo Remoto de Áudio / Vídeo (PCRAV). por Bluetooth, Se o seu dispositivo áudio Bluetooth também suporta o PCRAV,...
  • Seite 251 X-COM 2. Para reproduzir ou pausar a música, pressione o botão central 12. FAZER E RECEBER CHAMADAS durante 1 segundo até ouvir um duplo bip de tom-médio. TELEFÓNICAS 12.1 Fazer e Receber Chamadas Telefónicas 1. Quando recebe uma chamada, clique no botão central para atender a chamada.
  • Seite 252 “Cancel” (Cancelar), e pressione o botão central. Se nenhum 1. Para entrar no menu de voz de marcação rápida, mantenha botão for pressionado em 15 segundos, o X-COM sairá do pressionado o botão (+) durante 3 segundos e ouvirá um menu de voz de marcação rápida e voltará...
  • Seite 253: Intercomunicação Entre Dois Canais

    X-COM Nota: 13. INTERCOMUNICAÇÃO ENTRE DOIS Certifique-se de que tem o telemóvel e o auricular conectados de CANAIS forma a que possa usar a marcação rápida. Atender Pressione o botão central ou diga “Hello” 13.1 Iniciar e Terminar Conversação entre dois canais 1.
  • Seite 254: Intercomunicador E Chamadas Telefónicas

    X-COM soprar poeira do microfone. Se iniciar uma conversa pelo VOX 2. Para terminar uma conversa intercomunicador um-para-um, clique único no botão central. Isso vai terminar a conversa Intercom, o intercomunicador termina automaticamente quando intercomunicador. você e seu amigo intercom permanecerem em silêncio durante 20 segundos.
  • Seite 255: Intercomunicador E Gps

    13.4 Intercomunicador e GPS 13.5 Intercomunicador e Rádio de Dois Canais Se associar um GPS Bluetooth para o X-COM conforme descrito Conforme descrito no ponto 7.5 deste guia do utilizador, pode no ponto 7.4 do guia do utilizador, pode ouvir as instruções usar um rádio bidireccional e intercomunicador X-COM Bluetooth...
  • Seite 256: Iniciar Conversação Entre Três Canais

    14.1 Iniciar Conversação entre Três Canais SmartPhone Rádio Dois Canais Você (A) pode ter uma conversa intercomunicador três canais Sincronização com outros dois amigos intercomunicadores X-COM (B & Telemóvel A2DP Conexão C), estabelecendo duas ligações de intercomunicação em por cabo simultâneo.
  • Seite 257 2º Amigo 2. Inicie uma conversa por intercomunicador com um dos dois 4. Agora você (A) e dois amigos intercom X-COM (B & C) estão a amigos do seu grupo de intercomunicação. Por exemplo, ter uma conversa de intercomunicador três canais.
  • Seite 258: Conversação Entre Quatro Canais

    Pode ter uma conversa por intercomunicador em quatro canais 1. Pressione o botão central por 1 segundo até ouvir um sinal sonoro com outros três utilizadores do X-COM pela adição de mais um para terminar completamente a conversa intercomunicador três participante intercom à...
  • Seite 259: Terminar Conversação Entre Quatro Canais

    GPS, a função é pausada. 3. Para partilhar música, certifique-se que tem actualizado ambos os Terminar Conversação entre Quatro Canais dispositivos com o firmware que tenha opção de partilha de música e a opção EDR activa no NEXX Device Manager.
  • Seite 260: Intercomunicador Universal

    (de acordo com as opções de marcação por voz, 1. Ligue o X-COM e o dispositivo de outra marca com o qual remarcação e término de chamadas presentes no manual do deseja sincronizar.
  • Seite 261: Intercom Universal Entre Três Canais

    1. Você (A) precisa de estar sincronizado com o dispositivo que não seja Sena Bluetooth (B) e outro X-COM (C) para uma 3. O outro X-COM (C) poderá juntar-se à conversa fazendo uma conferência de intercomunicador em três canais.
  • Seite 262: Intercom Universal Entre Quatro Canais

    Sena Bluetooth (B), outro X-COM (C), e outro dispositivo que não seja Sena Bluetooth (D), 2) o seu dispositivo (A), dispositivo que não seja Sena Bluetooth (B), e outros X-COM (C e D). Poderá fazer uma ligação Intercom Universal em quatro canais da mesma forma que 5.
  • Seite 263 2. O outro X-COM (C) poderá juntar-se à conversa fazendo uma chamada de intercomunicador para si (A). 4. Agora os dois dispositivos X-COM (A e C) e os dois dispositivos de outras marcas (B e D) ficam conectados através de uma ligação Intercom Universal de quatro canais.
  • Seite 264 INTERCOMUNICADOR PARTICIPANTE 17.4.2 Intercom Universal em quatro Canais - Exemplo 2 Três dispositivos X-COM (A, C e D) e um dispositivo de outra marca (B). O procedimento é o mesmo do exemplo 1 descrito na Pode ter uma conversação móvel de três canais, adicionando secção 17.4.1.
  • Seite 265: Reiniciar O Dispositivo

    O X-COM será desligado, e tem que voltar a ligar o sinal sonoro de baixo tom significando sinal de intercomunicador sistema e tentar novamente.
  • Seite 266: Atualização De Firmware

    X-COM 22. ATUALIZAÇÃO DE FIRMWARE 23. EXEMPLOS DE CONEXÃO BLUETOOTH DO X-COM O X-COM suporta a função de atualização de software. Por favor, Exemplo 1 visite o website NEXX Helmets em www.nexx-helmets.com para verificar os mais recentes downloads de software.
  • Seite 267: Sincronização Multipoint

    X-COM Exemplo 2 Exemplo 3 GPS - Sincronização Telemóvel GPS* Bluetooth GPS* Bluetooth Telemóvel Sincronização Sincronização Telemóvel Telemóvel Sincronização Sincronização Intercom Sincronização Multipoint Telemóvel Intercom Procedimento de Sincronização Bluetooth Procedimento de Sincronização Bluetooth Sincronização Telemóvel GPS - Sincronização Telemóvel Sincronização Multipoint Telemóvel...
  • Seite 268 X-COM Exemplo 4 Exemplo 5 Telemóvel Telemóvel Sincronização Sincronização Telemóvel Telemóvel Sistema de Audio Bluetooth para Motas* Sincronização Sincronização Sincronização Sincronização Telemóvel Intercom GPS* Bluetooth Intercom Telemóvel Procedimento de Sincronização Bluetooth Música Sincronização Telemóvel Sincronização Telemóvel Procedimento de Sincronização Bluetooth Sincronização Intercom...
  • Seite 269 X-COM Exemplo 6 Procedimento de Sincronização Bluetooth Sincronização Telemóvel Sincronização Telemóvel Sincronização Multipoint Sincronização Intercom Telemóvel GPS* Bluetooth Sincronização zumo 220/350/550/660/665, TomTom Rider Telemóvel Sistema de Audio Bluetooth para Motas* BMW R1200RT, K1600GT, K1600GTL Sincronização • Telemóvel: chamadas telefónicas Sincronização Música...
  • Seite 270 X-COM Exemplo 7 Procedimento de Sincronização Bluetooth Sincronização Telemóvel Sincronização Multipoint Sincronização Intercom Telemóvel Sincronização • Telemóvel: chamadas telefónicas Telemóvel • SR10: rádio dois canais, orientação GPS, Detector Sinal de Radar • Intercomunicador SR10 Sincronização Multipoint Rádio Dois Canais Sincronização...
  • Seite 271 X-COM Exemplo 8 Exemplo 9 Sincronização Sincronização Sincronização GPS - Telemóvel Telemóvel Telemóvel Telemóvel Bluetooth GPS* Leitor MP3 Telemóvel Sincronização Telemóvel Sincronização Intercom SM10 SR10 Sincronização Sincronização Telemóvel Multipoint Rádio Dois Canais Sincronização Procedimento de Sincronização Bluetooth Intercom GPS - Sincronização Telemóvel Sincronização...
  • Seite 272 X-COM Exemplo 10 Sincronização Intercom • Telemóvel: chamadas telefónicas • SR10: rádio dois canais, instruções GPS, Detector Sinal de Radar Telemóvel • SM10: ouvir/partilhar música • Intercomunicador Sincronização Telemóvel Sincronização Sincronização Multipoint Intercom GPS* Bluetooth Sincronização Sincronização Telemóvel Telemóvel SM10...
  • Seite 273: Guia De Referência De Operações

    X-COM Procedimento de Sincronização Bluetooth 24. GUIA DE REFERÊNCIA DE OPERAÇÕES Sincronização Telemóvel Sincronização Telemóvel Sincronização Telemóvel Sincronização Multipoint Tipo Descrição Botão Duração Sincronização Intercom Botão Central & 1 seg Azul Sinais Ligar Botão (+) Sólido Ascendentes GPS* Bluetooth zumo 220/350/550/660/665, TomTom Rider Função...
  • Seite 274: Informação Da Bateria

    X-COM INFORMAÇÃO DA BATERIA Tipo Descrição Botão Duração O X-COM tem uma bateria externa recarregável. A bateria pode Botão Central 5 seg Flash Sinal Sonoro Vermelho Médio Sincronização ser carregada e descarregada centenas de vezes até se esgotar Intercom com o tempo. Recarregue a bateria apenas com carregadores Botão Central de qualquer um dos dispositivos...
  • Seite 275: Manutenção E Cuidados

    X-COM MANUTENÇÃO E CUIDADO ELIMINAÇÃO O X-COM deve ser tratado com cuidado e as seguintes sugestões O símbolo do caixote do lixo cruzado no produto, vão ajudá-lo a proteger a cobertura da garantia. manuais ou na embalagem indica que todos os 1.
  • Seite 276: Certificação E Homologações De Segurança

    X-COM CERTIFICAÇÃO E HOMOLOGAÇÕES DE • Ligar o equipamento a uma tomada num circuito diferente daquele ao qual o receptor está conectado. SEGURANÇA • Consulte o revendedor ou um técnico de rádio / TV experiente para ajudar. Declaração de Conformidade FCC Este dispositivo está...
  • Seite 277: Declaração Da Indústria Do Canadá

    UE. Dentro da UE este produto destina-se a DIVULGAÇÃO ser utilizado na Alemanha, Áustria, Bélgica, Dinamarca, Espanha, Ao utilizar o X-COM renuncia a todos os direitos legais substanciais Finlândia, França, Grécia, Holanda, Irlanda, Itália, Luxemburgo, incluindo o direito de processá-lo. Por favor, leia cuidadosamente Portugal, Suécia, Reino Unido e na EFTA, na Islândia, Noruega...
  • Seite 278 Também confirma que original ou qualquer terceiro. A NEXX e a SENA comunicam que o não vai consumir qualquer bebida alcoólica que possa afectar uso deste Dispositivo pode estar em contravenção local, regional, seu estado de alerta ou qualquer substância que altere a...
  • Seite 279: Dois Anos De Garantia Limitada

    NEXX, de defeito ou não conformidade do produto, e NEXX não causados por negligência dos fabricantes ou seus agentes ou deve ser responsável pela falha do Produto para executar funções qualquer terceira parte envolvida na concepção ou no fabrico...
  • Seite 280: Devolução E Reembolso

    PEÇAS OU SERVIÇOS NOS TERMOS DESTE INSTRUMENTO OU DA SUA PERFORMANCE, USO OU INCAPACIDADE DE USAR O MESMO, MESMO QUE NEXX OU O SEU REVENDEDOR TENHAM SIDO AVISADOS DA POSSIBILIDADE DE TAIS DANOS. EM NENHUMA HIPÓTESE SENA OU SEUS REVENDEDORES ASSUMEM RESPONSABILIDADE TOTAL SE O PREÇO PAGO...
  • Seite 281 X-COM AVISO NEXX informa que a utilização deste dispositivo na via pública pode não ser autorizado pela lei. Por favor verifique a sua legislação local e utilize este dispositivo exlusivamente fora das vias públicas, como propriedades privadas ou circuitos fechados.
  • Seite 282 1.2.0 Manual de Utilizador www.nexx-helmets.com para Firmware v5.0...
  • Seite 283 Auricolare Bluetooth ® e interfono per Motocicli a basso profilo Guida dell'utente Users Guide www.senabluetooth.com www.nexx-helmets.com...
  • Seite 284 6.13 Menu di uscita dalla configurazione a voce …………………………………………………………………………………… 13 23. STUDI DEL CASO CONNESSIONE BLUETOOTH SENA ……………………………………………… 39 7. COME ACCOPPIARE LA CUFFIA MODELLO X-COM CON I DISPOSITIVI BLUETOOTH ……………………… 14 24. RIFERIMENTO RAPIDO OPERAZIONI …………………………………………………………………… 47 7.1 Accoppiamento con i cellulari …………………………………………………………………………………………………… 14 INFORMAZIONI SULLA BATTERIA ………………………………………………………………………………...
  • Seite 285: Introduzione

    • Multipoint Bluetooth per due telefoni cellulari • Peso leggero e profilo ultra sottile La cuffia con microfono X-COM è conforme alla specifica Bluetooth • Possibilità di upgrade del firmware 3.0, e supporta i seguenti profili: Profilo cuffia con microfono a viva...
  • Seite 286: Contenuto Della Confezione

    X-COM 2. CONTENUTO DELLA CONFEZIONE • Auricolari • Unità principale cuffia auricolare • Microfono con filo (+) Tasto / (-) Tasto • Regolazione volume • Navigazione tramite il menu di configurazione vocale • Batteria • MP3 Traccia avanti e traccia indietro •...
  • Seite 287: Installazione Del Modello X-Com Sul Casco

    3. INSTALLAZIONE DEL MODELLO X-COM SUL CASCO • Spugne per microfoni Per installare con sicurezza l'unità principale di X-COM è possibile • Cavo USB elettrico e trasferimento dati usare l'imbottitura in velcro o il nastro biadesivo. Per favore seguire la seguente procedura.
  • Seite 288 X-COM 3. Rimuovere il coperchio che protegge la cavità per l'unità 5. Posizionare gli auricolari nel casco con i pad in velcro fino alle principale. Posizionare l'unità principale nella cavità preparata. orecchie nei fori casco orecchio. Se il casco ha buchi all'orecchio profondi è...
  • Seite 289: Accensione/Spegnimento (On/Off) E Ricarica

    USB standard per ricaricare X-COM. E RICARICA Si può utilizzare il adattatore micro USB per mettere in carica X-COM con il set di batterie. Collegare il cavo di alimentazione 4.1 Accensione e trasferimento dati USB al connettore nell'Sistema Elettronico.
  • Seite 290: Avviso Batteria Quasi Scarica

    X-COM 4.4 Avviso batteria quasi scarica 5. REGOLAZIONE VOLUME Quando il livello della batteria è basso, il LED blu lampeggiante in stand by, diventa rosso e si sentiranno 3 segnali acustici a mezzo tono e un comando vocale che recita “Ricaricare batteria”.
  • Seite 291: Impostazioni Di Configurazione Di X-Com

    (2) Accoppiamento multipointt (9) Messaggio vocale (3) Accoppiamento selettivo (10) Sidetone del telefono (11) Eliminare tutti gli Si può impostare la configurazione di X-COM tramite l'istruzione (4) Accoppiamento selettivo accoppiamenti del menu vocale come indicato sotto. dei media (12) Impostazioni predefinite di 1.
  • Seite 292: Accoppiamento Con I Telefoni Cellulari

    X-COM 6.1 Accoppiamento con i telefoni cellulari 6.3 Accoppiamento selettivo del telefono “Accoppiamento selettivo Messaggi vocali “Accoppiamento telefono” Messaggi vocali telefono” Impostazione predefinita di fabbrica Non applicabile Impostazione predefinita di fabbrica Non applicabile Per entrare nella modalità accoppiamento con i telefoni cellulari, Per entrare nella modalità...
  • Seite 293: Assegnazione Della Composizione Rapida

    2. È possibile assegnare i numeri di telefono per la composizione Esecuzione Premere il pulsante Centro rapida utilizzando il software NEXX Device Manager. Per maggiori informazioni, visitare il sito NEXX Helmets all'indirizzo www.nexx- 1. Per assegnare un numero di telefono a un numero di helmets.com.
  • Seite 294: Abilitare / Disabilitare L'intercom Attivato A Voce

    X-COM una chiamata. si entra in questa modalità, sentirete un comando recitare l’attuale 6.7 Abilitare / disabilitare l'intercom attivato a voce reattività VOX. È possibile regolare la reattività VOX premendo il Tasto (+) o (-). Il livello 4 è l’impostazione di reattività più elevata Messaggi vocali “VOX Intercom”...
  • Seite 295: Abilitare/Disabilitare Sidetone

    Per cancellare tutte le informazioni dell’accoppiamento Bluetooth Premere il Tasto Centrale per confermare. di X-COM, premere il Tasto (+) o il Tasto (-) fino a che non si sentirà un comando vocale, “Cancellare tutti gli accoppiamenti”. Premere il Tasto Centrale per confermare.
  • Seite 296: Come Accoppiare La Cuffia Modello X-Com Con I Dispositivi Bluetooth

    7. COME ACCOPPIARE LA CUFFIA MODELLO Accoppiamento telefono X-COM CON I DISPOSITIVI BLUETOOTH Accoppiamento multipoint Accoppiamento selettivo del telefono Prima di usare l'auricolare bluetooth X-COM con qualsiasi altro Accoppiamento selettivo dei media dispositivo bluetooth per la prima volta è necessario effettuare Composizione vocale Esecuzione l'operazione di accoppiamento.
  • Seite 297: Accoppiamento Multipoint Di Telefoni Cellulari

    5. Il telefono cellulare confermerà che l'accoppiamento è stato 5. Il telefono cellulare confermerà che l'accoppiamento è stato completato e che X-COM è pronto all'uso. Si udirà un messaggio completato e che X-COM è pronto all'uso. Si udirà un messaggio vocale che recita “Dispositivo accoppiato”.
  • Seite 298: Accoppiamento Dispositivi Stereo Bluetooth

    5. Il GPS confermerà che l'accoppiamento è stato completato e Hands-Free) e altri usano il profilo musica stereo (A2DP, Profilo che X-COM è pronto all'uso. Si udirà un messaggio vocale che distribuzione audio avanzata). Molti sistemi GPS specifici per recita “Dispositivo accoppiato”.
  • Seite 299 Bluetooth, si può accoppiare il GPS a X-COM seguendo del GPS è mostrato nella figura sottostante. le semplici procedure nella sezione “7.1 Accoppiamento con i cellulari”. Quando si fa questo, X-COM penserà che il GPS sia un telefono cellulare. Ma X-COM può accoppiarsi direttamente a un cellulare aggiuntivo.
  • Seite 300: Accoppiamento Con Sena Sr10, Adattatore Radio Bluetooth Bidirezionale

    X-COM con un SR10 tramite un accoppiamento multipoint, dettagli fare riferimento alla guida utente di SR10. X-COM è in grado di effettuare due dispositivi HFP allo stesso tempo: telefono cellulare e Sena SR10. 1. Per Entrare nel menu di configurazione vocale, premere e tenere premuto il Tasto Centrale per 12 secondi fino a che non si sente un comando vocale recitare “Configurazione”.
  • Seite 301: Accoppiamento Con Profilo Selettivo: Stereo A2Dp O Handsfree

    Se precedentemente un cellulare è stato accoppiato a X-COM, via cavo è necessario azzerare la precedente lista di accoppiamento su entrambi i dispositivi; il cellulare e X-COM. Per azzerare la lista di accoppiamento su X-COM, effettuare un ripristino delle impostazioni predefinite di fabbrica o seguire la procedura di...
  • Seite 302: Profilo Stereo A2Dp Solo Per Riproduzione Musicale

    2. Premere 3 volte il Tasto (+) e si sentirà un comando vocale Conversazioni via Intercom “Accoppiamento selettivo telefono”. La cuffia X-COM può essere accoppiata a tre altre cuffie per la 3. Cercare dispositivi Bluetooth sul vostro telefono cellulare. conversazione intercom su Bluetooth.
  • Seite 303 X-COM Accoppiamento A & B Accoppiamento A & C Accoppiamento A & D 4. È possibile effettuare altri accoppiamenti tra la cuffia A e C, e tra 5. La coda di accoppiamento di intercom è “Ultimo Arrivato, l'auricolare A e D seguendo la stessa procedura come sopra.
  • Seite 304: Accoppiamento Con Altri Modelli Di Cuffie Sena Per Conversazioni Intercom

    SMH5 non può partecipare a una conferenza via interfono a quattro o stereo Bluetooth, a tre voci con X-COM. SMH5 ha la capacità limitata di effettuare una chiamata via interfono fra uno e l’altro o con altri modelli di Auricolari (più...
  • Seite 305: Musica Stereo

    Bluetooth deve essere accoppiato con l'X- COM seguendo le istruzioni sull'accoppiamento del dispositivo stereo Bluetooth nel capitolo 7.3. X-COM supporta il Profilo con telecomando audio/video (AVRCP), così se il dispositivo audio Bluetooth supporta anche l'AVRCP sarà possibile utilizzare SMH5 per controllare a distanza la riproduzione della musica.
  • Seite 306: Rispondere E Effettuare Chiamate

    X-COM riferimento al manuale di istruzioni del vostro cellulare per 12. RISPONDERE E EFFETTUARE CHIAMATE ulteriori informazioni Nota: 12.1 Rispondere ed effettuare chiamate 1. Se si sta utilizzando una connessione cellulare multipoint e si riceve una chiamata dal secondo telefono durante la chiamata del primo 1.
  • Seite 307 (+) o (-) finché si sente il comando vocale “Cancellare” e premere il pulsante Centro. Se entro 15 minuti non si preme alcun pulsante, l'X-COM abbandona il menu vocale di composizione rapida e ritorna in modalità stand-by.
  • Seite 308: Intercom A Due Voci

    X-COM 13. INTERCOM A DUE VOCI 13.1 Avviare e terminare un intercom a due voci Terminare 1. È possibile avviare una conversazione intercom uno a uno con Terminare una conversazione intercom a due voci qualsiasi amico intercom toccando il tasto centrale: premere...
  • Seite 309: Chiamate Tra Cellulari E Intercom

    2) rifiutare la chiamata telefonica e mantenere la 13.4 Intercom e GPS conversazione intercom. Se si accoppia un GPS Bluetooth a X-COM come descritto nella sezione 7.4 della presente guida utente, si possono a. Per rispondere a una chiamata e fermare la conversazione via udire le istruzioni vocali passo a passo del GPS durante una interfono, premere il Tasto Centrale.
  • Seite 310: Intercom E Radio Bidirezionale

    Come descritto nella sezione 7.5 della presente guida utente, si possono utilizzare una radio bidirezionale e Intercom Bluetooth X-COM contemporaneamente utilizzando Sena SR10, un adattatore radio Bluetooth bidirezionale insieme a X-COM. L'audio in entrata Smartphone dalla radio bidirezionale non interrompe una conversazione intercom, radio bidirezionale ma si ode in sottofondo.
  • Seite 311: Conferenza Intercom A Tre Voci

    X-COM 1. Per la comunicazione interfonica di gruppo a tre, occorre che tu 14. CONFERENZA INTERCOM A TRE VOCI (A) sia accoppiato con altri due Amici Interom (B & C). 14.1 Avviare un intercom a tre voci L'utente (A) sarà in grado di stabilire una conferenza intercom a 3 voci con altre due persone (B e C) stabilendo due connessioni intercom contemporaneamente.
  • Seite 312: Terminare Un Intercom A Tre Voci

    2. Premere o premere due volte a seconda del caso il Tasto Centrale per disconnettere la connessione via interfono con uno 4. Ora l'utente (A) e due amici intercom X-COM (B & C) stanno dei due amici di interfono. Per esempio, premendo una volta effettuando una conferenza intercom a tre voci.
  • Seite 313: Conferenza Intercom A Quattro Voci

    Si può effettuare una conferenza intercom a quattro voci con un segnale acustico per terminare la conferenza intercom a altri tre utenti X-COM aggiungendo un partecipante intercom in quattro voci. Tale funzione termina tutte le connessioni intercom più all'intercom a tre voci. Durante un intercom a tre voci come tra l'utente (A) e partecipanti intercom (B), e (C).
  • Seite 314: Condivisione Di Musica

    2. Se si riceve una chiamata in arrivo o si effettua una chiamata, oppure 1. Accendere la cuffia X-COM e la cuffia Bluetooth non Sena con si ascoltano le istruzioni vocali passo a passo del GPS durante la la quale si intende effettuare l'accoppiamento.
  • Seite 315: Intercom Universale A Due Voci

    È possibile effettuare una connessione intercom universale a tre necessaria per l'accoppiamento in viva voce (fare riferimento voci con due cuffie X-COM e una Bluetooth non Sena. Non appena al manuale di utilizzo della cuffia che si intende utilizzare). La viene stabilita la connessione intercom, tutte le cuffie connesse non cuffia X-COM eseguirà...
  • Seite 316 4. Ora l'utente (A), la cuffia Bluetooth non Sena (B) e l'altra cuffia non Sena (B) nel proprio gruppo intercom. Per esempio, l'utente X-COM (C) sono in una conferenza intercom a tre voci. (A) avvia una conversazione intercom con una cuffia Bluetooth non Sena (B).
  • Seite 317: Intercom Universale A Quattro Voci

    17.4.1 Intercom universale a quattro voci – Caso 1 È possibile effettuare una connessione intercom universale a quattro Due cuffie X-COM (A e C) e due cuffie Bluetooth non Sena (B e D). voci mediante due diversi tipi di configurazione: 1) tre cuffie X-COM 1.
  • Seite 318 La procedura che si esegue è la stessa del caso 1 descritto nella sezione 17.4.1. 4. Ora le due cuffie X-COM (A e C) e le due cuffie Bluetooth non Sena (B e D) sono connesse in un intercom universale a quattro voci.
  • Seite 319: Conferenza Telefonica A Tre Voci Con Partecipante Intercom

    X-COM 18. CONFERENZA TELEFONICA A TRE VOCI 19. FALLIMENTO DELLA CONNESSIONE INTERCOM CON PARTECIPANTE INTERCOM Durante una chiamata al cellulare, fare una chiamata via interfono Quando si tenta di avviare una conversazione intercom con a un amico di interfono premendo il Tasto Centrale per creare un amico intercom che è...
  • Seite 320: Riconnessione Intercom

    X-COM 21. RIPRISTINO GUASTO 20. RICONNESSIONE INTERCOM Quando la cuffia X-COM non funziona bene o è guasta per qualsiasi Se l’amico intercom esce dal range durante la conversazione, motivo si può ripristinarla scollegare il connettore posteriore si udranno rumori di statica e la comunicazione verrà interrotta.
  • Seite 321: Aggiornamento Del Firmware

    X-COM 23. STUDI DEL CASO CONNESSIONE 22. AGGIORNAMENTO DEL FIRMWARE BLUETOOTH SENA X-COM ammette la funzione di aggiornamento del firmware. Situazione 1 Visitare il sito di NEXX Helmets www.nexx-helmets.com per verificare i download più recenti del software. Telefono cellulare Accoppiamento con i...
  • Seite 322 X-COM Situazione 2 Situazione 3 GPS - Accoppiamento con i cellulari GPS Bluetooth* Telefono cellulare GPS Bluetooth* Accoppiamento Accoppiamento con i con i cellulari cellulari Accoppiamento Accoppiamento Accoppiamento Intercom Intercom Multipoint Accoppiamento Multipoint Procedura di accoppiamento Bluetooth Procedura di accoppiamento Bluetooth...
  • Seite 323 X-COM Situazione 4 Situazione 5 Musica Telefono cellulare Accoppiamento con i cellulari Accoppiamento con i cellulari Accoppiamen- Accoppiamento Sistema audio to Intercom con i cellulari Accoppiamento Accoppiamento Bluetooth per Intercom con i cellulari GPS Bluetooth* motocicli* Musicale Procedura di accoppiamento Bluetooth...
  • Seite 324 X-COM Situazione 6 Procedura di accoppiamento Bluetooth Accoppiamento con i cellulari Accoppiamento con i cellulari Accoppiamento Multipoint Telefono cellulare Accoppiamento Intercom Accoppiamento con GPS Bluetooth* i cellulari zumo 220/350/550/660/665, TomTom Rider Sistema audio Bluetooth per motocicli* BMW R1200RT, K1600GT, K1600GTL...
  • Seite 325 X-COM Situazione 7 Procedura di accoppiamento Bluetooth Accoppiamento con i cellulari Accoppiamento Multipoint Accoppiamento Intercom Telefono cellulare Utilizzo Accoppiamento • Telefono cellulare: chiamata con i cellulari • SR10: radio bidirezionale, guida GPS, segnale radar detector • Intercom SR10 Accoppiamento Multipoint...
  • Seite 326 X-COM Situazione 8 Procedura di accoppiamento Bluetooth GPS - Accoppiamento con i cellulari Accoppiamento con i cellulari Accoppiamento con i cellulari GPS - Accoppiamento Intercom Accoppiamento Accoppiamento Accoppiamento con i cellulari con i cellulari Lecteur MP3 Telefono con i cellulari...
  • Seite 327 X-COM Situazione 9 Procedura di accoppiamento Bluetooth Accoppiamento con i cellulari Accoppiamento con i cellulari Accoppiamento con i cellulari Telefono cellulare Accoppiamento Multipoint Accoppiamento con i Accoppiamento Intercom cellulari Utilizzo • Telefono cellulare: chiamata • SR10: radio bidirezionale, istruzioni GPS, segnale radar detector...
  • Seite 328 X-COM Situazione 10 Procedura di accoppiamento Bluetooth Accoppiamento con i cellulari Accoppiamento con i cellulari Accoppiamento con i cellulari Telefono cellulare Accoppiamento Multipoint Accoppiamento Intercom Accoppiamento con i cellulari GPS Bluetooth* zumo 220/350/550/660/665, TomTom Rider Utilizzo • Telefono cellulare: chiamata...
  • Seite 329: Riferimento Rapido Operazioni

    X-COM 24. RIFERIMENTO RAPIDO OPERAZIONI Tipo Descrizione Pulsante Durata Tipo Descrizione Pulsante Durata Pulsante 1 sec. Blu fisso Pulsante 5 sec. Rosso Bip singolo Accensione Centro & ascendenti Centro lampeggiante di tono Accoppiamento Pulsante (+) medio intercom Funzione di Pulsante...
  • Seite 330: Informazioni Sulla Batteria

    MANUTENZIONE E CURA La cuffia X-COM ha una batteria ricaricabile, interna, non rimovibile. La cuffia X-COM dovrebbe essere trattata con cura e i seguenti Non tentare di rimuovere la batteria dal dispositivo poiché questo suggerimenti vi aiuteranno a proteggere la copertura della garanzia.
  • Seite 331: Eliminazione

    X-COM ELIMINAZIONE CERTIFICAZIONI E APPROVAZIONI PER LA SICUREZZA Il simbolo del bidone con una croce sopra su prodotti, sugli opuscoli o sulle confezioni ricorda che tutti i prodotti Dichiarazione di conformità FCC elettrici ed elettronici, le batterie e gli accumulatori Questo dispositivo è...
  • Seite 332: Dichiarazione Di Esposizione Rf Fcc

    SIG, Inc.; qualsiasi uso di detti marchi è concesso in licenza a Sena. Dichiarazione di conformità CE Altri marchi e denominazioni commerciali appartengono ai rispettivi proprietari Il X-COM è conforme con e adotta la Specifica Bluetooth ® Questo prodotto è provvisto di marcatura CE ai sensi dei provvedimenti della Direttiva R&TTE (99/5/EC).
  • Seite 333: Garanzia Generale Ed Esonero Verso Eventuali Responsabilità

    Usando un (incluse quelle legali) e si esonera NEXX e Sena da ogni e qualsiasi dispositivo di comunicazione mentre si guida una moto, uno scooter, infortunio, danno fisico o decesso, nonché...
  • Seite 334: Garanzia Limitata Della Durata Di Due Anni

    NEXX e fratture, paralisi parziale e/o totale, decesso o altre infermità che Sena da ogni responsabilità e qualsiasi azione legale, contenzioso, potrebbero causare disabilità...
  • Seite 335: Limitazioni Alla Responsabilità

    Prodotto (b) mancanza, da parte PARTICOLARE. NÈ NEXX NÈ IL SUO RIVENDITORE SARÀ del Cliente di rispetto delle specifiche o istruzioni di NEXX ; (c) RESPONSABILE DI ALTRI DANNI, CHE COMPRENDONO, SENZA trascuratezza, abuso o accidenti che il Prodotto subisce oppure LIMITAZIONI, DANNI DIRETTI, INDIRETTI;...
  • Seite 336: Rimborso Completo

    NEL CASO L’UTENTE NON ACCETTI O SI DICHIARI D’ACCORDO CON LE CONDIZIONI SOPRAINDICATE, POTRÀ RESTITUIRE IL NEXX informa gli utenti del fatto che l’uso del dispositivo nel traffico DISPOSITIVO A NEXX E OTTENERE IL RIMBORSO COMPLETO, A pubblico potrebbe non essere autorizzato per legge. Consultare...
  • Seite 337 1.2.0 www.nexx-helmets.com Manuale Utente per Firmware v5.0...

Inhaltsverzeichnis