Philips 17809**16 Benutzerhandbuch

Verwandte Anleitungen für Philips 17809**16


Inhaltszusammenfassung für Philips 17809**16
- Seite 1 17809/**/16 Gebruiksaanwijzing Notice d’emploi Benutzerhandbuch User manual Manual de usuario...
- Seite 2 Incl. Excl. IP X4...
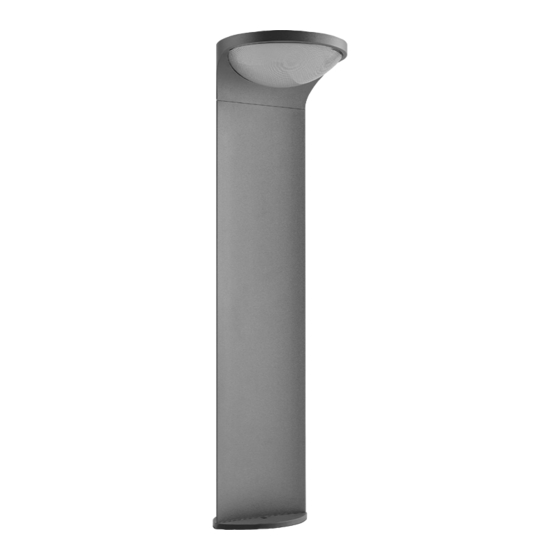
- Seite 3 Type 1 Type 2...
- Seite 4 Type 1...
- Seite 5 Type 2...
- Seite 6 Automatic...
- Seite 7 Automatic...
- Seite 8 17825/30/16 3,7V Li-ion 2200mah...
- Seite 12 Philips Lighting Contact Centre www.philips.com/homelighting Int. Business Reply Service (+800 7445 4775 I.B.R.S. / C.C.R.I. Numéro 10461 5600 VB Eindhoven 4404.016.95381 Pays-Bas / The Netherlands Last update: 23/10/13...
- Seite 13 Philips Belgium nv Satenrozen 13 2550 Kontich - Belgium www.philips.com MX0 000 069 Last update: Sept‘10 IP20 IP X1 IP X4 IPX3 IP X4 IP X1 IPX3 IP X7 IP X7 IP 5X IP 6X IP X7 IP 5X IP X8 IP X5 ±8mm...
- Seite 14 VEILIGHEIDSINSTRUCTIES - DEEL B • De fabrikant adviseert een juiste toepassing van verlichtingsarmaturen! Volg én bewaar daarom deze gebruiksaanwijzing voor een veilige en betrouwbare installatie en werking van het armatuur. • Schakel altijd eerst de elektriciteit uit voor installatie, onderhoud of herstelling. • Raadpleeg bij twijfel steeds een vakman of het verkooppunt. Leef in ieder geval de lokale installatievoorschriften na. Zo geven bijvoorbeeld bepaalde installatievoorschriften aan dat een verlichtingsartikel moet worden geïnstalleerd door een erkend vakman (b.v. Duitsland). • Draai steeds de (klem)schroeven van alle elektrische aansluitingen stevig aan, vooral de bevestigingen van de 12V-laagspanningdraden (indien van toepassing). • Houd bij de aansluiting van de bedrading de juiste kleuren in acht: blauw (N), bruin of zwart (L) en indien beschermklasse I, geelgroen (aardleiding). • Onderhoud binnenverlichting met een droge doek of borsteltje, gebruik geen schuur- of oplosmiddelen. Vermijd vocht op alle elektrische onderdelen. • Indien het armatuur wordt bevestigd op een metalen ondergrond, dient deze ondergrond geaard te zijn, of verbonden te zijn met de aarding van de elektrische installatie. • Gelieve de wandlichten buiten het bereik van kinderen te monteren • Houd steeds alle technische specificaties van uw armatuur in acht. Raadpleeg hiervoor de specifiek vermelde pictogrammen van het identificatielabel op het armatuur én de pictogrammen die worden vermeld in deel A van uw veiligheidsinstructies. • Verwijdering van uw oude product. Uw product is vervaardigd van kwalitatief hoogwaardige materialen en onderdelen, welke gerecycled en opnieuw gebruikt kunnen worden. Als u op uw product een doorstreepte afvalcontainer op wieltjes ziet, betekent dit dat het product valt onder de EU-richtlijn 2002/96/EC. Win inlichtingen in over de manier waarop elektrische en elektronische producten in uw regio gescheiden worden ingezameld. Neem bij de verwijdering van oude producten de lokale wetgeving in acht en plaats deze producten niet bij het gewone huishoudelijke afval. Als u oude producten correct verwijdert voorkomt u negatieve gevolgen voor het milieu en de volksgezondheid. OPGELET: Hieronder vindt u echter wel alle tekstuele verklaringen met numerieke verwijzing naar de respectievelijke pictogrammen vooraan deze gebruiksaanwijzing: 01- Installeer het armatuur enkel binnenshuis. 02- Het armatuur is niet geschikt voor montage in de badkamer, althans niet in de aangegeven zone. 03- Het armatuur is geschikt voor bevestiging/plaatsing aan/op normaal ontvlambare materialen/oppervlakten. Inbouwarmaturen mogen onder geen enkele voorwaarde bedekt worden met isolatiemateriaal of gelijkaardig materiaal.
- Seite 15 49- Elektrische installatiedraden mogen nooit geklemd of getorst (getwist) worden tussen het armatuur en het montageoppervlak. 50- Armatuur geschikt voor gebruik van kopspiegellamp. 51- Dit verlichtingsarmatuur bevat plaatselijk warme delen. 52- Dit armatuur is niet geschikt voor kinderen onder de 14 jaar. Het verlichtingsarmatuur is - net als alle andere producten uit het assortiment - ontworpen, geproduceerd en getest volgens de strengste Europese veiligheidsvoorschriften (EN 60.598 / ). Bij constructiefouten of materiële gebreken geeft de fabrikant 2 jaar garantie op binnenverlichting en op buitenverlichting (tenzij anders vermeld op de verpakking). Glasbreuk, batterijen en lichtbronnen vallen niet onder de garantievoorwaarden. De garantieperiode gaat in vanaf factuurdatum en geldt enkel op vertoon van het aankoopbewijs. Schade aan het verlichtings-armatuur door gebruik ervan in extreme omstandigheden (zeekustgebieden, industriële omgevingen, frequente blootstelling aan meststoffen,...), valt eveneens niet onder de garantievoorwaarden. De garantie vervalt indien het verlichtingsarmatuur niet volgens de gebruiksaanwijzing werd geïnstalleerd of door onbevoegde personen werd hersteld of aangepast. De fabrikant aanvaardt ook geen enkele aansprakelijkheid voor schade als gevolg van een verkeerde toepassing van het verlichtingsarmatuur of door gebruik in combinatie met onjuiste apparatuur of wisselstukken. Wijzigingen in ontwerp en technische specificaties voorbehouden. INSTRUCTIONS DE SECURITE - PARTIE B • Le fabricant donne toujours des conseils pour une utilisation correcte des articles d’éclairage! Pour vous assurer d’une installation correcte et sûre, il faut donc suivre les instructions qui vous sont données avec chaque article. • Coupez systématiquement l’arrivée de courant avant de commencer une installation, une maintenance ou une réparation sur un article d’éclairage. • Si vous avez un doute, demandez conseil à un électricien ou au vendeur. Assurez vous que vous installez toujours les articles suivant la réglementation en vigueur. Certaines règlementations imposent l’installation de certains articles par un électricien qualifié. (ex. en Allemagne). • Serrez toujours fermement les écrous de fixation, plus spécialement les attaches pour les équipements en très basse tension (12V). • Vérifiez la bonne couleur des câbles de branchement. Bleu: neutre (N). Brun ou noir (L): positif, et si l’article est en classe I: vert et jaune pour la terre. • Installer les appliques hors de la portée des enfants • Si le luminaire est installé sur une surface métallique, celle-ci doit être reliée au fil de terre ou à une liaison équipotentielle de l'installation. • Le nettoyage des articles d’éclairage se fait avec un chiffon sec, n’utilisez pas de solvants ou de produits abrasifs. Evitez les projections de liquides sur les parties électriques.
- Seite 16 spécifications techniques identiques. Si nécessaire, demandez conseil à votre vendeur habituel. 41- Article pour conditions sévères d'emplois. 42- Possibilité de programmer la mise en route et la durée de l’éclairage. Détails en partie A. 43- L’article peut être installé jusqu’à six mètres de haut. 44- Pour une utilisation optimale, placez la monture à hauteur mentionnée sur le schéma. La portée minimale et maximale du détecteur est mentionnée dans l’icône, partie A. 45- L’angle d’action du détecteur est indiqué dans l’icône. 46- L’article peut être installé horizontalement . Pour prolonger la durée de vie de votre appareil, l’ampoule ne doit pas excéder de 4 degrés l’angle conseillé . 47- Assurez vous que vous ne percez pas de trous au milieu de réseaux câblés existants (dans les murs ou plafonds) lorsque vous installez un équipement. 48- Si vous utilisez une boîte d'encastrement pour poser votre applique ou votre plafonnier, il est obligatoire de fermer la boîte avec un couvercle. 49- Adapter la longueur des fils de votre installation afin d'éviter la torsion et l'écrasement des fils. 50- Utilisation possible d'ampoules à calotte argentée. 51- Ce luminaire contient des composants pouvant monter en température. 52- Ce produit n'est pas adapté pour les enfants de moins de 14 ans. L’équipement d’éclairage aussi bien que tous les produits de la gamme est dessiné, produit et testé en accord avec les normes de standard Européennes (EN 60.598/ ). En cas de défaut de fabrication, ou matériel endommagé, le fabricant offre une garantie allant jusqu’à 2 ans pour les équipements d’intérieur pour les équipements d’extérieurs. Les bris de verrerie, les piles et les ampoules ne sont pas couverts par la garantie. Tous dommages causés par l’utilisation du luminaire dans des circonstances exceptionnelles (zone côtière, environnement industriel, en contact fréquent avec des engrais...), ne sont pas couverts par les conditions de garantie. La période de garantie démarre à partir de la date d’achat et n’est valable qu’avec une facture ou ticket de caisse. La garantie est nulle si l’équipement n’a pas été installé selon les instructions du constructeur. Le fabricant n’est pas tenu pour responsable des dommages causés suite à une mauvaise utilisation, ou détournement de l’utilisation de ses produits. Sous réserve de modifications dans le modèle et les spécifications techniques. SICHERHEITSHINWEISE - TEIL B • Diese Sicherheitshinweise sind nur in Verbindung mit Teil „A“ zu verwenden.
- Seite 17 34- Dieses Produkt ist nur für Kerzenlampen geeignet. 35- Verwenden Sie in keinem Fall „cool beam“ – Leuchtmittel in dieser Armatur. 36- Diese Leuchte ist nur geeignet für die Verwendung von Leuchtmitteln mit integriertem Sicherheits-Hüllkolben oder Niederdruck- Leuchtmitteln. Ein zusätzliches Schutzglas ist nicht erforderlich. 37- Halogenleuchtmittel in Birnen- und Röhrenform dürfen nicht mit bloßen Händen berührt werden. 38- Die Leuchte ist mit einer Sicherung ausgestattet. Wenn die Leuchte nach einem Leuchtmittelwechsel nicht funktioniert, muss die Sicherung im Inneren der Leuchte ersetzt werden. Ist bei diesem Vorgang der Kontakt mit der inneren Leitung möglich, sollte die Sicherung von einem Fachmann ersetzt werden. 39- Diese Leuchte kann mit einem Dimmer verwendet werden. Ausgenommen bei Verwendung einer PL-Sparlampe. Fragen Sie einen Fach mann bei der Wahl des richtigen Dimmer-Typs. 40- Diese Leuchte ist mit einem Sicherheitstransformator ausgestattet. Ersetzen Sie einen defekten Transformator nur mit einem Ersatztyp mit d en gleichen technischen Daten. Ziehen Sie einen Fachmann zu Rate. 41- Leuchte für rauhen Betrieb. 42- Leuchte mit Möglichkeit der Zeit- und Dämmerungsstufen-Einstellung. Minimum und Maximum ist im entsprechenden Symbol in Teil „A“ dargestellt. 43- Die Leuchte kann maximal in einer Höhe von 6 Metern montiert werden. 44- Um eine optimale Funktion zu erreichen, ist die Leuchte in der, in der Abbildung angegebenen Höhe zu montieren. 45- Der Erfassungsbereich deckt den in der Abbildung angegebenen Bereich ab. 46- Diese Leuchte darf nur horizontal montiert werden. Zur Erreichung der optimalen Lebensdauer des Leuchtmittels darf diese nicht mehr als 4 Gradgeneigt betrieben werden. 47- Achten Sie darauf, dass Sie keine Elektroleitungen und andere Hindernisse in der Wand bei der Montage durchbohren! 48- Wird die Leuchte auf eine Decken- oder Wanddose montiert, muss diese erst mit einem entsprechenden Deckel verschlossen werden (z.B. in den Niederlanden). 49- Elektrische Leitungen dürfen niemals zwischen der Leuchte und der Montageoberfläche gequetscht werden! 50- Leuchte geeignet für die Verwendung von Kopfspiegellampen.
- Seite 18 30- The fitting is only suitable for PLCE lamps. 31- The fitting is not suitable for PLCE lamps. 32- Only an incandescent lamp with a diameter of 60mm can be used. A lamp with a 45mm diameter must not be used for this fitting. 33- Only use an incandescent globe bulb that is the size of the indicated diameter. Never use a standard incandescent bulb. 34- This product is only suitable for candle shaped bulbs. 35- Never use "cool-beam" lamps for this fitting. 36- The fitting is only suitable for a lamp with built-in safety or a low pressure lamp. An extra safety glass is not necessary. 37- Capsule and linear halogen lamps may not be touched by bare hands. 38- The fitting is equipped with a fuse. If the fitting is out of order after the bulb has been replaced, the internal fuse has to be replaced. If contact with the internal wiring can be made during this operation, this should be done by a competent electrician. 39- The fitting can be used in combination with a dimmer with exception where PLCE-lamps are used. Consult a qualified electrician for choosing the right type (especially important for 12V-fittings). 40- The fitting is working with a safety transformer. Replace a broken transformer only with a transformer with identical technical specifications. Consult a qualified electrician or your retail outlet. 41- Fittings for rough use. 42- Fitting with time and light setting options. Minimum and maximum will be shown in the icon in part A. 43- The fitting can be placed at a maximum of 6 meters height. 44- To reach an optimal working, you have to place the fitting on the height mentioned in the icon. The maximum and minimum reach of the detector is also mentioned in the icon in part A. 45- The standard active range of vision of the detector covers the given degrees mentioned in the icon. 46- This fitting should be mounted horizontally. For longer life, the bulb should not be at a greater angle than 4 degrees. 47- Ensure that you don’t drill through electrical wires or any other obstruction in the wall or ceiling during installation! 48- If the luminaire is mounted onto a ceiling-box or wall-box, it is obliged to cover the box with a lid first. (e.g. The Netherlands) 49- Electrical wiring may never be clamped or twisted between the luminaire and the mounting surface ! 50- Luminaires designed for use with bowl mirror lamps.
- Seite 19 30- El aparato sólo es apropiado para bombillas PLCE. (Bajo consumo) 31- El aparato no es apropiado para bombillas PLCE. (Bajo consumo) 32- Únicamente una bombilla de 60mm de diámetro puede ser colocada. No se puede usar una bombilla de 45mm de diámetro. 33- Use únicamente bombilla globo incandescente con el diámetro indicado. Nunca usar una bombilla incandescente estándar. 34- Este producto es solo adecuado para bombillas vela. 35- No usar nunca una bombilla de tipo "cool beam". 36- El aparato es sólo apto para una bombilla con seguridad incorporada o bombilla de baja presión. Un cristal de seguridad adicional no es necesario. 37- Las bombillas halógenas no deben ser tocadas directamente con las manos. 38- El aparato está protegido por un fusible. Si el aparato no funciona después de haber reemplazado la bombilla, el fusible debe ser cambiado. Si durante esta operación es necesario tocar los cables internos, ésta debe realizarse por un electricista cualificado 39- El aparato puede combinarse con un regulador de intensidad salvo que se quiera usar una bombilla de bajo consumo. Consulte a un electricista cualificado para elegir el modelo correcto (especialmente importante para aparatos de 12V). 40- El aparato funciona con un transformador de seguridad. Reemplazar el transformador únicamente por otro de idénticas especifi- caciones técnicas. Consultar a personal cualificado o a su establecimiento habitual. 41- Aparatos aptos para trato duro. 42- Aparato con posibilidad de selección de tiempo y luz. Mínimo y máximo se indican en un icono en la Parte A. 43- El aparato se puede colocar a una altura máxima de 6m. 44- Para obtener el rendimiento máximo, el aparato ha de colocarse en la altura indicada en el icono en la Parte A. 45- El ángulo estándar de visión del detector está indicado, en grados, en el icono. 46- El aparato ha de instalarse horizontalmente. Para alargar la vida de la bombilla, no debe tener un ángulo de más de 4 grados. 47- Asegurarse de no dañar el cableado eléctrico de la red al taladrar la pared o el techo 48- Si se monta la lámpara encima de una caja de conexión empotrada en la pared o el techo (ej.: Holanda), esta caja se ha de cubrir con una tapa.
- Seite 20 ISTRUZIONI DI SICUREZZA - PARTE B • Il fabbricante informa sul corretto uso degli articoli d’illuminazione. Pertanto attenetevi sempre a queste istruzioni che assicurano una corretta ed appropriata installazione nonchè funzionamento e conservatele quindi per future consultazioni. • Staccate sempre il filo della corrente prima di iniziare un’installazione, manutenzione o riparazione. • Se avete un dubbio, consultate un elettricista qualificato o informatevi presso il vostro rivenditore. Assicuratevi di installare apparecchi che seguano le norme in vigore. Alcune norme impongono che certi articoli siano installati da un elettricista qualificato (es.: in Germania). • Stringete sempre energicamente le viti di fissaggio specialmente se si tratta di articoli a bassa tensione (12V). • Verificate il colore corretto del cavo da collegare: blu (N), marrone o nero (L) e se con protezione in classe I, giallo/verde (terra). • Effettuate la pulizia degli articoli d’illuminazione con panni asciutti e non usate nè solventi nè prodotti abrasivi. Evitate di spargere liquidi su tutte le parti elettriche. • Montate gli articoli a muro fuori dalla portata dei bambini. • Se l’apparecchio viene montato su di una superficie metallica, questa superficie deve essere collegata al dispositivo di protezione a terra o collegato a massa sull’apposito dispositivo. • Tenete sempre in considerazione tutte le specifiche tecniche dell’apparecchio. Verificate i simboli che si trovano sull’etichetta di identificazione di ogni articolo e le icone visibili nella parte A delle Vostre istruzioni di sicurezza. • Smaltimento di vecchi prodotti: Il prodotto è stato progettato e assemblato con materiali e componenti di alta qualità che possono essere riciclati e riutilizzati. Se su un prodotto si trova il simbolo di un bidone con ruote, ricoperto da una X, vuol dire che il prodotto soddisfa i requisiti della Direttiva comunitaria 2002/96/CE. Informarsi sulle modalità di raccolta, dei prodotti elettrici ed elettronici, in vigore nella zona in cui si desidera disfarsi del prodotto. Attenersi alle normative locali per lo smaltimento dei rifiuti e non gettare i vecchi prodotti nei normali ri.uti domestici. Uno smaltimento adeguato dei prodotti aiuta a prevenire l’inquinamento ambientale e possibili danni alla salute. ATTENZIONE: Qui sotto troverete tutte le spiegazioni con riferimenti numerici alle corrispondenti icone allegate a queste istruzioni di sicurezza. 01- Questo apparecchio può essere installato solo all’interno. 02- Non è adatto per essere installato in sale da bagno (ad eccezione di zone specifiche). 03- E’ adatto per essere installato su normali facciate infiammabili. Le apparecchiature d'illuminazione da incasso non devono essere coperte con materiale isolante o similare.
- Seite 21 20- Protezione in classe II: l’apparecchio ha una doppia protezione e può non essere collegato ad una presa di terra. 21- Protezione in classe III: è adatto solo per articoli in bassa tensione (12V) 22- Spelare il cavo come indicato nel diagramma. 23- Il filo di messa a terra deve essere sempre più lungo del cavo di alimentazione. 24- L’utilizzo del tubetto fornito e resistente al calore è necessario su cavi spelati e sguainati. 25- Utilizzare un cavo resistente alle elevate temperature per collegare il portalampade alla rete elettrica. 26- L’articolo è adatto per l’allacciamento diretto alla rete. 27- Collegamento X: In caso di danneggiamento, il cavo deve essere sostituito con un cavo dello stesso tipo. Collegamento Y: In caso di danneggiamento, il cavo deve essere sostituito esclusivamente dal costruttore, dal distributore o da un tecnico esperto per evitare rischi. Collegamento Z: Il cavo non può essere sostituito. 28- MAX. …W: usate solo lampadine adatte per questo articolo e con potenza non superiore al wattaggio indicato. 29- Utilizzate esclusivamente lampadine con riflettore 30- Utilizzate esclusivamente lampadine PLCE. 31- Non potete utilizzare lampadine PLCE. 32- Utilizzare solo lampade a incandescenza del diametro di 60mm. Non utilizzare lampade del diametro di 45mm per questo portalampade. 33- Usare solo una lampada globo a incandescenza del diametro indicato. Non usare mai una lampadina a incandescenza standard. 34- Questo prodotto è adatto solo per lampadine oliva. 35- Non utilizzare mai lampade a luce fredda per questo portalampade. 36- Il portalampade è idoneo esclusivamente per lampade con dispositivi di sicurezza incorporati o per lampade a bassa pressione. Non è necessario montare un vetro di sicurezza supplementare. 37- Le lampadine bispina od alogene lineari non devono essere toccate a mani nude. 38- L’apparecchio è dotato di un fusibile. Se il portalampade non funziona dopo aver sostituito la lampadina, il fusibile interno deve essere sostituito. Se può avvenire un contatto con i fili interni durante questa operazione, allora deve essere effettuata da un elettricista competente.
- Seite 22 Distributor Satenrozen 13 2550 Kontich – Belgium Addendum 4 4 0 4 . 0 1 8 . 2 8 9 7 1 Last update: 02/05/12 EN:Always consult a professional in advance, for choosing the right fastener for a secure mounting of the product.
- Seite 23 SK: Pri výbere správneho spôsobu upevnenia na bezpečnú montáž produktu sa vždy vopred poraďte s odborníkom. Zohľadnite hmotnosť produktu a materiál povrchu určeného na montáž. LT: Norėdami išsirinkti tinkamą laikiklį ir saugiai pritvirtinti gaminį, visada iš anksto pasikonsultuokite su profesionalu. Atkreipkite dėmesį į gaminio svorį ir tvirtinimo paviršiaus medžiagą. CS: Před montáží vždy nejprve kontaktujte profesionála z oblasti osvětlení, který vám pomůže se správným upevněním výrobku. Vezměte v úvahu hmotnost výrobku a typ materiálu, ze kterého je vyroben povrch pro upevnění. HU: A biztonságos rögzítés érdekében a megfelelő pánt kiválasztásához mindig kérje szakember segítségét. Vegye figyelembe a készülék súlyát és a fal szerkezetét. HR: Prilikom odabira odgovarajuće spone za sigurnu montažu proizvoda obavezno se unaprijed posavjetujte sa stručnjakom. Uzmite u obzir težinu proizvoda i materijal površine za montažu. ET: Pidage kindlasti enne paigaldamist nõu spetsialistiga, et valida toote turvaliseks kinnitamiseks õige kinnitus. Võtke arvesse nii toote kaalu kui ka materjali, millest on valmistatud pind, kuhu toode kinnitatakse. LV: Pirms pareizā stiprinājuma izvēles drošai produkta uzstādīšanai vienmēr konsultējieties ar speciālistu. Ņemiet vērā produkta svaru un uzstādīšanas virsmas materiālu. RU:Прежде чем купить крепление для монтажа устройства, обратитесь за помощью к специалисту. Учитывайте вес продукта и материал поверхности, на которой будет размещено устройство. SL: Predhodno se vedno posvetujte s strokovnjakom, da boste izbrali pravo zaponko za varno pritrditev izdelka. Pri tem upoštevajte težo izdelka in material površine namestitve. BG: Винаги се консултирайте предварително с професионалист, за да изберете начин на закрепване за стабилно монтиране на продукта. Отчетете теглото на продукта и материала на повърхността на монтиране. SR: Prilikom izbora odgovarajućeg pričvršćivača za bezbedno montiranje proizvoda uvek se unapred konsultujte sa stručnjakom. Vodite računa o težini proizvoda i materijalu površine za montiranje. UK: Завжди заздалегідь проконсультуйтеся зі спеціалістом щодо вибору відповідного фіксатора для...