Inhaltsverzeichnis
Werbung
Verfügbare Sprachen
Verfügbare Sprachen
Quicklinks
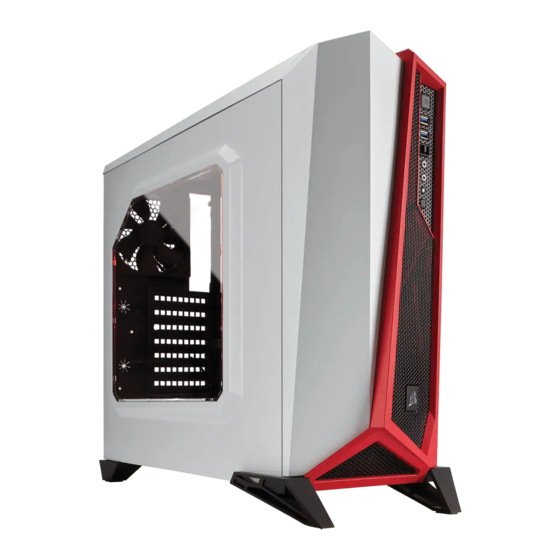
CARBIDE SERIES
®
47100 Bayside Parkway • Fremont • California • 94538 • USA | corsair.com
INSTALLATION GUIDE n GUIDE D'INSTALLATION
© 2015 Corsair Components, Inc.
All rights reserved. Corsair, the sails logo, and Carbide Series are
INSTALLATIONSANLEITUNG n Guía de instalación
registered trademarks of Corsair in the United States and/or other
countries. All other trademarks are the property of their respective
РУКОВОДСТВО ПО УСТАНОВКЕ n GUIA DE INSTALAÇÃO
owners. Product may vary slightly from those pictured.
インストールガイド
PN: 49-001445 rev AA
Werbung
Kapitel
Inhaltsverzeichnis

Verwandte Anleitungen für Corsair Carbide Series SPEC-ALPHA


Inhaltszusammenfassung für Corsair Carbide Series SPEC-ALPHA
- Seite 1 CARBIDE SERIES ® 47100 Bayside Parkway • Fremont • California • 94538 • USA | corsair.com INSTALLATION GUIDE n GUIDE D’INSTALLATION © 2015 Corsair Components, Inc. All rights reserved. Corsair, the sails logo, and Carbide Series are INSTALLATIONSANLEITUNG n Guía de instalación registered trademarks of Corsair in the United States and/or other countries.
- Seite 2 English: ....................5-14 Français: ....................15-24 Deutsch: ....................25-34 Español: ....................35-44 Россию: ....................45-54 Português: ..................55-64 :....................65-74 日本人...
-
Seite 3: Inhaltsverzeichnis
CARBIDE SERIES SPEC-ALPHA ® Table of Contents Case Specifications Congratulations: ................................5 Length: ...................... 518mm Case specifications:..............................6 Width: ....................... 220mm Accessory kit contents:.............................7 Height: ...................... 474mm Case features: ................................8 Weight: ......................6.2kg Removing the side panels: ............................9 Installing the motherboard: ............................9 Installing PCI-E/PCI card(s): ..........................10 Maximum GPU length: ............... -
Seite 4: Accessory Kit Contents
CARBIDE SERIES SPEC-ALPHA ® Accessory Kit Contents Case Features I/O Panel (x2 USB 3.0, Headphone/Mic, and Power/Reset) Removable front fascia x2 Front 120mm LED fans (room for 3) Rear 120mm LED fan x2 Top 120mm fan mounts Windowed side panel Cable ties MBD/HDD screws SSD/ODD screws... -
Seite 5: Removing The Side Panels
Note: Corsair recommends removing both side panels and setting them aside when building your system to avoid accidental damage. Both side panels are interchangeable and should be removed to reduce clutter. -
Seite 6: Removing The Front Fascia
CARBIDE SERIES SPEC-ALPHA ® 5. Removing the Front Fascia 7. Installing HDDs and SSDs To remove the front fascia, Simply pull back retention arm gently pull the front away from and slide in the 2.5" SSD or the case while pressing on the 3.5"... -
Seite 7: Connecting The Fan Controller
4. Where can I mount a fan? Fan Mount Locations Front 2 x 140mm or 120mm (2 x 120mm included) 2 x 120mm Rear 120mm (included) Bottom 120mm Side To learn more about this case visit the product page at corsair.com... - Seite 8 220mm 518mm Merci d'avoir acheté le boîtier de jeu mi-tour Carbide Series SPEC-ALPHA. Avec une conception audacieuse aux lignes angulaires, le SPEC- ALPHA trônera fièrement sur votre bureau. Ses courbes élégantes cachent d'incroyables atouts : l'agencement moderne et aéré du disque optique offre des options de refroidissement astucieuses.
-
Seite 9: Contenu Du Kit D'accessoires
CARBIDE SERIES SPEC-ALPHA ® Contenu du kit d’accessoires Caractéristiques du boîtier Panneau E/S (x2 USB 3.0, Casque/Mic, et Alimentation/Réinitialisation) Façade amovible x2 ventilateurs frontaux à LED de 120 mm (3 possible) Arrière – Ventilateur à LED de 120 mm x2 fixations supérieures pour ventilateur de 120 mm Panneau latéral à... -
Seite 10: Retrait Des Panneaux Latéraux
à l'aide des vis. Remarque : Corsair recommande de retirer les deux panneaux latéraux et de les mettre de côté lors de l'assemblage de votre système, afin d'éviter toute détérioration accidentelle. -
Seite 11: Retrait De La Façade
CARBIDE SERIES SPEC-ALPHA ® 5. Retrait de la façade 7. Installation des disques durs et des disques SSD Pour retirer la façade, Tirez simplement sur le bras appuyez sur les languettes de retenue et glissez le disque qui la sécurisent et retirez-la SSD de 2,5 po ou le disque dur doucement du boitier. -
Seite 12: Raccordement Du Contrôleur De Ventilateur
Montage pour ventilateur Emplacements Avant 2 x 140mm ou 120mm (2 x 120mm fourni) Haut 2 x 120mm Arrière 120mm (fourni) 120mm Côté Milieu Pour en savoir plus sur ce boîtier, veuillez vous rendre sur le site corsair.com, à la page des produits. -
Seite 13: Technische Daten Des Gehäuses
CARBIDE SERIES SPEC-ALPHA ® Inhaltsverzeichnis Technische Daten des Gehäuses Vielen Dank:.................................25 Länge:......................518mm Technische Daten des Gehäuses: ........................26 Breite: ......................220mm Inhalt des Zubehörkits: ............................27 Höhe: ......................474mm Funktionsmerkmale des Gehäuses: ........................28 Gewicht: ....................... 6.2kg Abnehmen der Seitenplatten: ..........................29 Installation des Motherboards: ...........................29 Installation der PCI-E-/PCI-Karte(n): .......................30 Maximale GPU-Länge: ................ -
Seite 14: Inhalt Des Zubehörkits
CARBIDE SERIES SPEC-ALPHA ® Inhalt des Zubehörkits Funktionsmerkmale des Gehäuses I/O-Abdeckung (2 USB 3.0-Anschlüsse, Kopfhörer/Mikrofon und Stromschalter/Reset) Abnehmbare Frontplatte 2x 120-mm-Frontlüfter mit LED (Platz für 3) 120-mm-Hecklüfter mit LED 2x 120-mm-Montagepunkte für obere Lüfter Seitenabdeckung mit Fenster Kabelbinder MBD/HDD-Schrauben SSD/ODD-Schrauben Unten angebrachtes Netzteil und Staubfilter 2x 2,5-Zoll-Laufwerkhalterungen (werkzeugfrei) Öffnung für CPU-Backplate... -
Seite 15: Abnehmen Der Seitenplatten
CARBIDE SERIES SPEC-ALPHA ® 1. Abnehmen der Seitenplatten 3. Installation der PCI-E-/PCI-Karte(n) Entfernen Sie einfach die Nehmen Sie die Steckplattenabdeckung Rändelschrauben und ab, installieren Sie eine Erweiterungskarte schieben Sie die Seitenplatte und sichern Sie sie gegebenenfalls mit nach hinten heraus. Schrauben. -
Seite 16: Entfernen Der Frontplatte
CARBIDE SERIES SPEC-ALPHA ® 5. Entfernen der Frontplatte 7. Installation von HDD- und SSD-Laufwerken Um die Frontblende zu Ziehen Sie einfach den entfernen, ziehen Sie Haltearm zurück und schieben die Front leicht nach Sie die 2,5-Zoll SSD oder vorne vom Gehäuse weg, 3,5-Zoll HDD hinein, bis der während Sie gleichzeitig Haltearm zurück an seinen... -
Seite 17: Anschließen Der Lüftersteuerung
HDD LED POWER SW POWER LED – erhalten habe oder einer der Lüfter nicht mehr funktioniert? Gehen Sie zu www.corsair.force.com und fordern Sie eine RMA an, HD AUDIO RESET SW damit wir die beschädigten Teile ersetzen können. POWER LED + 4. - Seite 18 CARBIDE SERIES SPEC-ALPHA ® Contenido Especificaciones del chasis Felicitaciones: ................................35 Largo: ......................518mm Especificaciones del chasis: ..........................36 Ancho: ....................... 220mm Contenido del conjunto de accesorios: ......................37 Ancho: ....................... 474mm Características del chasis: .............................38 Peso: ......................6.2kg Cómo remover los paneles laterales: .......................39 Cómo instalar la placa base: ..........................39 Cómo instalar la(s) tarjeta(s) de PCI-E/PCI: ....................40 Longitud máxima de la GPU: ............
-
Seite 19: Contenido Del Conjunto De Accesorios
CARBIDE SERIES SPEC-ALPHA ® Contenido del conjunto de accesorios Características del chasis Panel de E/S (2 puertos USB 3.0, auricular y micrófono, y alimentación y reinicio) Fascia frontal desmontable 2 ventiladores de 120 mm con luces LED (espacio para 3) Un ventilador posterior de 120 mm con luces LED 2 montajes superiores para ventiladores de 120 mm Panel lateral transparente... -
Seite 20: Cómo Remover Los Paneles Laterales
Nota: Corsair recomienda remover ambos paneles laterales y ponerlos en un lugar seguro cuando monte su sistema para que no se dañen. Los paneles laterales se pueden intercambiar y deben removerse para mantener el orden. -
Seite 21: Cómo Remover La Fascia Delantera
CARBIDE SERIES SPEC-ALPHA ® 5. Cómo remover la fascia delantera 7. Cómo instalar unidades HDD y SSD Para extraer la fascia Simplemente tire hacia atrás delantera, presione los el brazo de retención y deslice pestillos que aseguran la la unidad SSD de 6,4 cm o la parte delantera del chasis y unidad HDD de 8,9 cm hasta extráigala con cuidado. -
Seite 22: Cómo Conectar El Controlador Del Ventilador
USB 3.0 HDD LED POWER SW POWER LED – o uno de los ventiladores ya no funciona? Por favor, diríjase a www.corsair.force.com y pida un RMA HD AUDIO RESET SW para que podamos reemplazar las piezas dañadas. POWER LED + 4. - Seite 23 Поздравляем! 220mm 518mm Благодарим за приобретение корпуса игрового компьютера Carbide Series SPEC-ALPHA формата Mid Tower. Корпус SPEC-ALPHA привлекает к себе внимание благодаря смелому геометрическому дизайну. Но внешний вид не всегда свидетельствует о функциональных возможностях — современная технология установки оптических приводов в любом месте корпуса обеспечивает фантастические...
-
Seite 24: Содержимое Комплекта Аксессуаров
CARBIDE SERIES SPEC-ALPHA ® Содержимое комплекта аксессуаров Особенности корпуса панель ввода-вывода (2 разъема USB 3.0, наушники/микрофон, питание/перезагрузка) съемная передняя панель два передних 120-миллиметровых вентилятора со светодиодной подсветкой (пространство для установки трех вентиляторов) задний 120-миллиметровый вентилятор со светодиодной подсветкой 2 крепления для верхних 120-миллиметровых вентиляторов боковая... -
Seite 25: Снятие Боковых Панелей
снимите их. при необходимости закрепите ее винтами. Примечание. Во избежание случайных повреждений при сборке системы компания Corsair рекомендует снять и отложить в сторону обе боковые панели. Обе боковые панели взаимозаменяемы и должны быть сняты во избежание путаницы. 2. Установка материнской платы... -
Seite 26: Снятие Передней Панели
CARBIDE SERIES SPEC-ALPHA ® 5. Снятие передней панели 7. Установка жестких дисков и твердотельных накопителей Чтобы снять переднюю панель, Просто потяните фиксатор назад осторожно сдвиньте ее с корпуса, и задвигайте 2,5-дюймовый надавив на фиксирующие защелки. твердотельный накопитель или 3,5-дюймовый жесткий диск, пока фиксатор... -
Seite 27: Подключение Контроллера Вентилятора
или один из вентиляторов больше не работает? USB 3.0 HDD LED POWER SW POWER LED – Перейдите на веб-сайт www.corsair.force.com и запросите разрешение на возврат материалов (RMA), чтобы мы смогли заменить поврежденные детали. HD AUDIO RESET SW POWER LED + 4. - Seite 28 220mm 518mm Obrigado por ter adquirido o gabinete para jogos mid-tower Carbide Series SPEC-ALPHA. Com o seu design arrojado e angular, o SPEC-ALPHA foi concebido para ser o centro das atenções. Mas essa aparência não é apenas superficial – o layout moderno e sem unidade óptica permite opções de resfriamento fantásticas, bem como o suporte integrado para USB...
-
Seite 29: Conteúdo Do Kit De Acessórios
CARBIDE SERIES SPEC-ALPHA ® Conteúdo do kit de acessórios Recursos do gabinete Painel de E/S (x2 USB 3.0, fone de ouvido/microfone e interruptor de energia/redefinição) Painel dianteiro removível x2 ventoinhas com LED dianteiras de 120 mm (espaço para 3) Ventoinha com LED traseira de 120 mm x2 montagens de ventoinhas de 120 mm superiores Painel lateral com janelas Braçadeiras para... -
Seite 30: Remover Os Painéis Laterais
Observação: A Corsair recomenda remover os dois painéis laterais e reservá-los enquanto constrói o seu sistema para evitar danos acidentais. Os dois painéis laterais são intercambiáveis e... -
Seite 31: Remover O Painel Dianteiro
CARBIDE SERIES SPEC-ALPHA ® 5. Remover o painel dianteiro 7. Instalar HDDs e SSDs Para remover o painel Simplesmente puxe o braço de dianteiro, retire com retenção para trás e deslize a cuidado o painel do SSD de 2,5" ou a HDD de 3,5" gabinete pressionando até... -
Seite 32: Conectar O Controlador Da Ventoinha
USB 3.0 HDD LED POWER SW POWER LED – ou uma das ventoinhas não estiver mais funcionando? Acesse www.corsair.force.com e solicite um RMA, para que HD AUDIO RESET SW possamos substituir a(s) peça(s) danificada(s). POWER LED + 4. Onde posso montar uma ventoinha? Montar um fã... - Seite 33 CARBIDE SERIES SPEC-ALPHA ® 目次 ケースの仕様 ご購入いただき, ありがとうございます: .........................65 長さ: ......................518mm ケースの仕様: .................................66 幅: ........................ 220mm アクセサリーキットの内容: ............................67 高さ: ......................474mm ケースの特徴: .................................68 重量: ........................ 6.2kg サイドパネルの取り外し: ............................69 マザーボードの取り付け: ............................69 PCI-E/PCI カードの取り付け: ..........................70 GPU 最大長: ....................380mm 電源ユニットの取り付け: ............................70 CPU クーラー最大高さ: ................
-
Seite 34: アクセサリーキットの内容
CARBIDE SERIES SPEC-ALPHA ® アクセサリーキットの内容 ケースの特徴 I/O パネル (USB 3.0 x2, ヘッドフォン/マイク, 電源/リセット) 取り外し可能前面パネル 前部の 120mm の換気ファン (3 つ分) x2 後部の 120mm の換気ファン 上部の 120mm ファンマウント x2 窓付きのサイドパネル SSD/光学ドライブ用 ケーブル結束バンド マザーボード/HDD 用 ネジ ネジ 底部の PSU マウントとダストフィルタ 工具不要の 2.5 インチドライブマウント x2 CPU バックプレートの切り抜き... -
Seite 35: サイドパネルの取り外し
CARBIDE SERIES SPEC-ALPHA ® 1. サイドパネルの取り外し 3. PCI-E/PCI カードの取り付け 蝶ねじを取り外してから、サイド スロット カバーを取り外し、拡張 パネルを後ろにスライドさせて、 カードを取り付けます。必要に応 取り外します。 じてネジで固定します。 注:Corsair では、システムを構築す る際、事故による破損を避けるため に、両サイドのパネルを取り外して、 それらを脇に置くよう推奨します。 両側のパネルは左右関係ありません。 変形を防ぐため、作業時には取り外し てください。 2. マザーボードの取り付け 4. 電源ユニットの取り付け SPEC-ALPHA STEP1 最初に、マザーボード用の I/O プ ケースの底面に電源ユニットを置 き、ケースの穴位置に合わせま レートを取り付けます(マザーボ す。その後、電源ユニットに付属 ード付属の取扱説明書を参照して ください)。 のネジで固定します。... -
Seite 36: 前面パネルの取り外し
CARBIDE SERIES SPEC-ALPHA ® 5. 前面パネルの取り外し 7. HDD と SDD の取り付け 前面パネルを取り外すには、タブ リテンションアームを後ろに引い をしっかりと押さえながら、ケー て、リテンションアームが元の位 置に戻るまで、2.5 インチ SSD スから前面をそっと引っ張ってく または 3.5 インチ HDD をスライ ださい。 ドさせるだけです。 SPEC-ALPHA Step 8 6. 天板の取り外し 8. 追加 SSD の取り付け 2.5 インチのドライブをケースの ケースの上部からねじを外し、天 SPEC-ALPHA STEP5 板が外せるまでそっと後ろにずら... -
Seite 37: ファンコントローラの接続
切り替えます。 10. フロント I/O コネクターの取り付け 2. I/O パネルの電源とリセットヘッダーで極性は重要ですか? フロントパネルのヘッダーの場所 いいえ。LED のヘッダーでのみ重要です。 とピン配列は、マザーボードのマ ニュアルを確認してください。 3. 破損したケースを受け取ったか、またはファンが動作しない場合、 誰に連絡すべきですか? 弊社の Web サイト (www.corsair.force.com) にアクセスし、 USB 3.0 HDD LED POWER SW POWER LED – 破損した部品の交換について RMA を依頼してください。 HD AUDIO RESET SW 4. どこにファンを搭載できますか? POWER LED + ファンマウントの位置... - Seite 38 CARBIDE SERIES SPEC-ALPHA ® Notes Notes...