Werbung
Quicklinks
B E D I E N U N G S A N L E I T U N G
w w w. c o n r a d . c o m
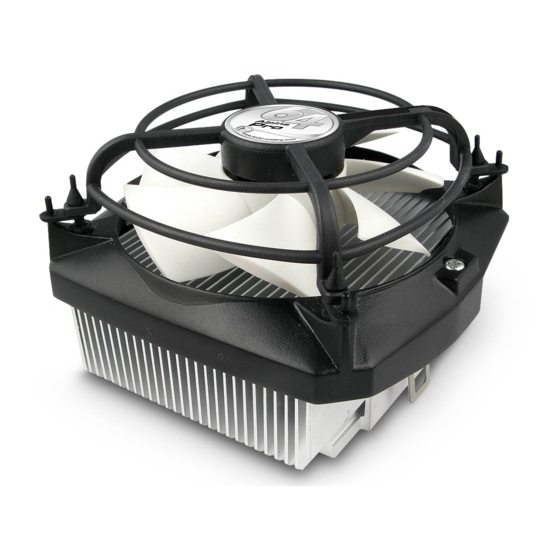
CPU-Kühler
Version 05/06
„Arctic Cooling Alpine 64"
Best.-Nr. 99 90 45
Bestimmungsgemäße Verwendung
Das Produkt dient zur Kühlung einer CPU vom Typ AMD64 bzw. AMD Sempron.
Alle enthaltenen Firmennamen und Produktbezeichnungen sind Warenzeichen der jeweiligen
Inhaber. Alle Rechte vorbehalten.
Lieferumfang
• CPU-Kühler
• Montagematerial
• Bedienungsanleitung
Sicherheitshinweise
Bevor Sie mit dem Einbau beginnen, lesen Sie sich diese Bedienungsanleitung bitte
komplett durch. Falls Sie keine Fachkenntnisse für den Einbau des CPU-Kühlers
haben, so lassen Sie den Einbau von einer Fachkraft oder einer entsprechenden
Fachwerkstatt durchführen!
CPUs mit abgebrochenen Beinchen und Mainboards mit tiefen Kratzern neben dem
CPU-Sockel fallen nicht unter Garantie oder Gewährleistung!
Bei falscher Montage des CPU-Kühlers ist die Kühlwirkung nicht ausreichend, die
CPU wird nach kurzer Zeit durch Überhitzung zerstört, Verlust von Garantie/Gewähr-
leistung!
Vorsicht, Lebensgefahr!
Schalten Sie Ihren Computer aus und trennen Sie ihn von der Netzspannung, ziehen
Sie den Netzstecker! Das Ausschalten über den Netzschalter genügt nicht!
• Das Produkt ist kein Spielzeug, es gehört nicht in Kinderhände.
• Bei unsachgemäßem Umgang mit Wärmeleitpaste besteht Gefahr für die Gesundheit (Mund-/Augen-
kontakt mit Wärmeleitpaste!). Suchen Sie in diesem Fall sofort einen Arzt auf.
Bei Hautkontakt mit Wärmeleitpaste kann diese mit einem trockenen Tuch abgewischt werden. Reinigen
Sie die Stelle danach ausgiebig mit warmem Wasser und Seife.
• Auf der Unterseite des Kühlkörpers ist bereits Wärmeleitpaste aufgebracht. Berühren Sie diese nicht,
verschmieren Sie diese nicht. Andernfalls muss diese entfernt und neue Wärmeleitpaste (nicht im
Lieferumfang) aufgebracht werden.
Einbau
Je nachdem, ob der CPU-Kühler als Ersatz für einen bestehenden „alten" CPU-Kühler dienen soll, oder ob
Sie einen neuen Computer zusammenbauen wollen, ist die Vorgehensweise anders.
• Beim Ersatz eines alten CPU-Kühlers öffnen Sie das Computergehäuse, bauen Sie das Mainboard aus
und entfernen Sie den alten CPU-Kühler (A).
Reinigen Sie die Oberfläche der CPU vollständig von vorhandenen Resten von Wärmeleitpaste oder
Wärmeleitfolie (B). Benutzen Sie dazu nur einen weichen Gegenstand (z.B. sauberes weiches Tuch) und
seien Sie sehr vorsichtig, da sonst die CPU zerstört wird!
• Beim Zusammenbau eines neuen Computers stellen Sie den Hebel des CPU-Sockels senkrecht, setzen
Sie die CPU korrekt (und vorsichtig) ein und schließen Sie den CPU-Sockel wieder. Berühren Sie die
Kontakte von CPU/Sockel niemals!
• Platzieren Sie das Mainboard auf einer festen, glatten, ebenen Oberfläche. Zum Schutz der Oberfläche
(z.B. Schreibtisch) legen Sie einen Karton zwischen Mainboard und Oberfläche.
• Normalerweise wird jedes Mainboard mit dem sog. „AMD Retention Modul" geliefert. Dabei handelt es
sich um einen Kunststoffrahmen auf der CPU-Seite und einer Gegenplatte für die Unterseite des
Mainboards. Montieren Sie diese anhand der Anleitung zu Ihrem Mainboard (C).
• Nehmen Sie den CPU-Kühler aus der Verpackung; berühren Sie die Unterseite mit der Wärmeleitpaste
nicht. Montieren Sie die beiden Befestigungsbügel (von unten her einstecken und ein bis zwei
Umdrehungen festschrauben, Orientierung der Bügel siehe Abbildung D, E und F).
Halten Sie den CPU-Kühler in Schräglage und hängen Sie den Befestigungsbügel (1) auf einer Seite ein
(D). Setzen Sie den CPU-Kühler auf die CPU auf, achten Sie darauf, dass sicher und horizontal im
Haltemodul sitzt.
• Clipsen Sie den zweiten Befestigungsbügel (2) auf der anderen Seite in das Haltemodul ein.
• Ziehen Sie die Schrauben (E) abwechselnd fest (gleichmäßig, je max. eine Umdrehung pro Schraube,
dann wieder die andere Schraube usw.). Wenden Sie aber keine Gewalt an.
• Der Kühler sollte nun fest im „Retention Modul" sitzen (F).
• Verbinden Sie den dreipoligen Lüfterstecker mit dem CPU-Lüfteranschluss Ihres Mainboards (z.B. mit
„CPU_FAN" o.ä. beschriftet (G). Verlegen Sie das Kabel so, dass es nicht in einen Lüfter des Computers
gelangen kann (Kabelbinder verwenden). Gleiches gilt für alle anderen Kabel.
• Bauen Sie die restlichen Komponenten des Computers ein, z.B. Grafikkarte, Festplatten usw.
Tipps und Hinweise
• Wenn der CPU-Kühler irgendwann entfernt werden sollte, muss vor dem erneuten Aufsetzen der CPU-
Kühler und die CPU von sämtlichen Resten der alten Wärmeleitpaste gereinigt werden.
Wärmeleitpaste ist nur für den einmaligen Gebrauch geeignet! Durch die Hitzeeinwir-
kung verändert sich das Material. Deshalb muss für eine erneute Montage des CPU-
Kühlers auch neue Wärmeleitpaste verwendet werden.
• Zwischen CPU und dem Kühlkörper darf nur die dünne Schicht Wärmeleitpaste (ca. 0.1mm-0.2mm
reichen aus) liegen. Die Wärmeleitpaste muss auf der gesamten oberen Metallfläche aufgebracht
werden.
• Platzieren Sie zwischen CPU und Kühlkörper auf keinen Fall z.B. einen Temperatursensor! Die schlechte
Wärmeleitung durch den größeren Abstand zwischen CPU und Kühlkörper führt zur Zerstörung der CPU!
Verlust von Garantie/Gewährleistung!
• Das hohe Gewicht des CPU-Kühlers führt beim Transport des Computers zu Problemen. Durch Stöße/
Schläge, wie sie z.B. beim Transport im Auto auftreten, könnte es zur Beschädigung des Mainboards
kommen.
Transportieren Sie den Computer deshalb im Auto so, dass das Mainboard „unten" liegt.
Bei einem Versand des Computers sollten Sie den CPU-Kühler ausbauen, um Schäden zu
vermeiden.
Entsorgung
Entsorgen Sie das Produkt am Ende seiner Lebensdauer gemäß den geltenden gesetzlichen
Bestimmungen.
Diese Bedienungsanleitung ist eine Publikation der Conrad Electronic GmbH,
Klaus-Conrad-Straße 1, D-92240 Hirschau.
Diese Bedienungsanleitung entspricht dem technischen Stand bei Druck-
legung. Änderungen in Technik und Ausstattung vorbehalten.
© 2006 by Conrad Electronic GmbH. Printed in Germany.
O P E R A T I N G I N S T R U C T I O N S
CPU Cooler
"Arctic Cooling Alpine 64"
Item No. 99 90 45
Prescribed Use
The product is intended for cooling a CPU type AMD64 or AMD Sempron.
All company names and product designations contained herein are trademarks of the respective
owners. All rights are reserved.
Included in Delivery
• CPU Cooler
• Installation material
• Operating instructions
Safety Instructions
Please read these operating instructions thoroughly before starting installation.
When in doubt about how to install the CPU cooler correctly, please contact an expert
or a specialist workshop and let them do the installation!
CPUs with broken pins and main boards with deep scratches next to the CPU socket
are not covered by the guarantee!
In case of incorrect installation of the CPU cooler, the cooling effect is not sufficient
and the CPU will be damaged after a short time due to overheating. This is not covered
by the guarantee!
Attention! Lethal danger!
Switch off your PC and separate it from the mains voltage. Unplug the mains plug!
Switching off via the mains switch is not sufficient!
• The product is not a toy and should be kept out of reach of children!
• In the case of improper handling of the heat transfer compound there is a health risk (mouth/eye contact
with heat transfer compound!). In such case, seek instant medical care!
If the skin gets into contact with the heat transfer compound, it can be wiped off with a dry cloth.
Afterwards clean the spot thoroughly with plenty of warm water and soap.
• Heat transfer compound has already been applied to the bottom of the heat sink. Do not touch it, do not
spread it. Otherwise it has to be removed and new heat transfer compound (not included in delivery) has
to be applied.
Installation
The procedure depends on whether you want to use the CPU cooler to replace an "older" CPU cooler or
whether you want to assemble a new PC.
• To replace an old CPU cooler, open the PC housing and remove the mainboard and the old CPU cooler
(A).
Thoroughly clean the CPU surface by removing the residues of heat transfer compound or heat transfer
film (B). Please only use a soft material (e.g. a clean and soft cloth), but be very carefully otherwise the
CPU may be destroyed!
• When assembling a new PC, position the lever of the CPU socket vertically, insert the CPU correctly (and
carefully) and close the CPU socket again. Never touch any contacts of the CPU/socket!
• Place the mainboard on a firm, plain and even surface. Place a cardboard between the mainboard and
surface to protect the surface (e.g. writing table).
• Normally each mainboard is delivered with the so called "AMD Retention Module". This is a plastic frame
on the CPU side and a counterplate for the bottom of the mainboard. Install it and follow the instructions
for your mainboard (C).
• Take the CPU cooler out of the packaging, do not touch the bottom with the heat transfer compound.
Install the two fastening brackets (insert them from the bottom and tighten them with one to two turns,
orientation of the brackets see illustration D, E and F).
Hold the CPU cooler in an inclined position and hook the fastening bracket (1) on one side (D). Place the
CPU cooler onto the CPU, make sure that it is located securely and horizontally in the retention module.
• Clip the two fastening brackets (2) on the other side into the holding module.
• Tighten the screws (E) alternately (evenly, each max. turn per screw, then again the other screw etc.).
However, do not use any force.
• The cooler should now be tightly positioned in the "Retention Module" (F).
• Connect the three-pin fan plug with the CPU fan connection of your mainboards (eg marked with
"CPU_FAN" or something similar(G). Lay the cable in a way that it cannot get into a fan of the PC (use
cable fasteners). The same applies for all other cables as well.
• Install the other components of the computer such as e.g. graphic board, hard disks etc.
Tips and Notes
• Should the CPU cooler ever be removed from your PC at some point, all residues of old heat transfer
compound have to be completely removed, before the new CPU cooler and the CPU are installed.
The heat transfer compound is to be used only once! The material changes due to the
impact of heat. This is why you always need to be apply a new heat transfer compound
when reinstalling the CPU cooler.
• There must only be a thin layer of the heat transfer compound between the CPU and the cooler (approx.
0.1mm to -0.2mm is sufficient). The heat transfer compound must be applied onto the entire top metal
surface.
• Never place e.g. a temperature sensor between the CPU and the heat sink! Bad heat conduction caused
by the large distance between the CPU and heat sink results in a destruction of the CPU! This is not
covered by the guarantee/warranty
• The heavy weight of the CPU cooler leads to problems during the transport of computers. Knocks/blows
as the occur, eg during the transport in a car, could cause damages to the mainboard.
*2006/05/03mbe
Therefore, make sure that during the transport of the PC in a car, the mainboard is at the
w w w. c o n r a d . c o m
bottom.
When dispatching the PC the CPU cooler has to be removed to avoid damages!
Version 05/06
Disposal
At the end of its service life, dispose of the product in accordance with the valid legal
regulations.
These operating instructions are published by Conrad Electronic GmbH,
Klaus-Conrad-Straße 1, D-92240 Hirschau/Germany.
These operating instructions reflect the current technical specifications at time
of print. We reserve the right to change the technical or physical specifiations.
© 2006 by Conrad Electronic GmbH. Printed in Germany.
Werbung

Verwandte Anleitungen für ARCTIC COOLING Alpine 64

Inhaltszusammenfassung für ARCTIC COOLING Alpine 64
- Seite 1 Version 05/06 CPU Cooler Version 05/06 Bei einem Versand des Computers sollten Sie den CPU-Kühler ausbauen, um Schäden zu „Arctic Cooling Alpine 64“ vermeiden. ”Arctic Cooling Alpine 64” Disposal Best.-Nr. 99 90 45 Item No. 99 90 45...
- Seite 2 CPU koeler Version 05/06 bas ». Verwijderen centrale «Arctic Cooling Alpine 64» Lors de l´expédition de l´ordinateur, démontez le ventilateur de l´unité centrale afin d´éviter “Arctic Cooling Alpine 64” tout endommagement. N° de commande 99 90 45 Bestelnr.