Alesis DM6 Benutzerhandbuch
Drum module
Verfügbare Sprachen
Verfügbare Sprachen
Wichtiger Hinweis!
Sehr geehrte Kundin, sehr geehrter Kunde,
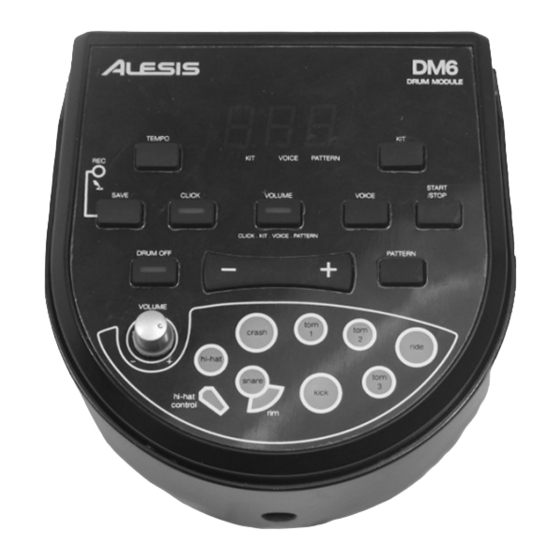
um die Triggereigenschaften des Kick Pedals vollständig zu aktivieren, überprüfen
Sie bitte die Position des „Kick Type"-Schalters auf der Rückseite des DM6-
Soundmoduls.
Je nach Stellung (s. Abb.) kann entweder ein Fußschalter oder ein Kick Pedal zum
Triggern von Sounds verwendet werden.
In Verbindung mit dem DM6-Kick-Pedal muss die rechte Schalterstellung, also „Pad"
gewählt werden.
Wir bitten um Beachtung
Ihr ALESIS-Team
Wichtiger Hinweis!
Sehr geehrte Kundin, sehr geehrter Kunde,
um die Triggereigenschaften des Kick Pedals vollständig zu aktivieren, überprüfen
Sie bitte die Position des „Kick Type"-Schalters auf der Rückseite des DM6-
Soundmoduls.
Je nach Stellung (s. Abb.) kann entweder ein Fußschalter oder ein Kick Pedal zum
Triggern von Sounds verwendet werden.
In Verbindung mit dem DM6-Kick-Padal muss die rechte Schalterstellung, also „Pad"
gewählt werden.
Wir bitten um Beachtung
Ihr ALESIS-Team
Inhaltsverzeichnis

Verwandte Anleitungen für Alesis DM6


Inhaltszusammenfassung für Alesis DM6
- Seite 1 Sehr geehrte Kundin, sehr geehrter Kunde, um die Triggereigenschaften des Kick Pedals vollständig zu aktivieren, überprüfen Sie bitte die Position des „Kick Type“-Schalters auf der Rückseite des DM6- Soundmoduls. Je nach Stellung (s. Abb.) kann entweder ein Fußschalter oder ein Kick Pedal zum Triggern von Sounds verwendet werden.
- Seite 2 DRUM MODULE MODULE OVERVIEW ::: ENGLISH ( 1-5 ) ::: VISTA DEL MÓDULO ::: ESPAÑOL ( 6 ) ::: CARACTERISTIQUES DU MODULE ::: FRANÇAIS ( 7 ) ::: OBERSEITE DER MODUL ::: DEUTSCH ( 8 ) ::: PANORAMICA DI MODULO ::: ITALIANO ( 9 ) :::...
-
Seite 11: Features Auf Der Vorderseite
FEATURES AUF DER VORDERSEITE VOLUME – Adjustiert die Master-Lautstärke des Moduls. VALUE +/- – Vermindert oder erhöht den Wert des entsprechenden Parameters. TEMPO / TAP – Aktiviert den Einstellmodus für das Tempo. PAD INDICATORS – Zeigt die derzeit gespielten Pads an. CLICK –... - Seite 14 PERFORMANCE ELECTRONIC DRUMSET ENGLISH ESPAÑOL FRANÇAIS DEUTSCH ITALIANO Coloque los soportes de la base (A) en el piso Placez les barres à la base du support (A) sur le plancher. Basisstützen (A) auf den Boden legen. Collocare i supporti della base (A) sul pavimento.
- Seite 15 PERFORMANCE ELECTRONIC DRUMSET ENGLISH BOX CONTENTS CONTENIDO DE LA CAJA CONNECTION DIAGRAM DIAGRAMA DE CONEXIÓN CONNECTING THE MODULE CONTENUE DE LA BOÎTE VERPACKUNGSINHALT After assembling the drum rack, pads, cymbals, and pedals, connect the cable snake (N) to the back of the module.