Herunterladen Inhalt Inhalt Diese Seite drucken

Werbung

Verfügbare Sprachen

Verfügbare Sprachen

LRF400
Laser Range Finder
2.1301
LRF1000
Laser Range Finder
2.1303
Operating instructions 3 - 9
Mode d´emploi 17 - 23
LRF600
Laser Range Finder
2.1302
Bedienungsanleitung 10 - 16
Manual de instrucciones 24 - 30

Werbung

Inhaltsverzeichnis
loading

Inhaltszusammenfassung für Walther LRF400

  • Seite 1 LRF400 Laser Range Finder 2.1301 LRF600 Laser Range Finder 2.1302 LRF1000 Laser Range Finder 2.1303 Operating instructions 3 - 9 Bedienungsanleitung 10 - 16 Mode d´emploi 17 - 23 Manual de instrucciones 24 - 30...
  • Seite 2 Safety instructions Sicherheitshinweise Consignes de sécurité Instucciones de seguridad Maintenance Pflege Entretien Cuidados Description Benennung Désignation des pièces Designacion Operation Bedienung Utilisation Reglaje...
  • Seite 3: Safety Instructions

    SaFEtY INStRUCtIONS CaUtION The color, surface finish, size and shape of the target all affect reflectivity and range. The brighter the color, the longer the range. Red is highly reflective, for example, and allows longer ranges than black color, which is the least reflective color.
  • Seite 4: Maintenance

    Standard mode in rain: 60 m Accuracy under normal weather conditions: ± 1 m ± 0.1%, ± 1° Display: LCD Power source: single 3V (CR2) battery Maximum laser output: 33 W Laser wavelength: 905 nm LRF400 LRF600 LRF1000 Distance Distance Distance...
  • Seite 5 DESCRIPtION Power ON / laser MODE button measurement Objektive Ocular Rubber eye Laser receiver lens (laser emission lens) Battery compartment MODE-button LRF800 LRF600 Horizontal distance Power ON / laser measurement...
  • Seite 6: Battery Change

    BattERY ChaNgE 1xCR2 Open battery compartment. Insert battery. Close battery compart- (Observe correct polarity!) ment. DISPLaY Reading Length Metres Degree Height Angle Yard Measurement Battery indicator quality...
  • Seite 7: Operation

    aDjUStINg Engage the device. Turn the ocular until the target is in focus. Centre the target in the circle. The rubber eye cup can be folded down for eyeglass wearers. OPERatION The object to be measured should be targeted at the circle center Distance indicated with 3 digits.
  • Seite 8: Measurement Functions

    MEaSUREMENt FUNCtIONS Press ON to turn on device. MODE- button Press the MODE button briefly to select between different functions: • Line-of-sight distance measurement • Height and horizontal distance measurement • Angle measurement Power will be turned off automatically after 15 seconds of non-use LINE-OF-SIght DIStaNCE MEaSUREMENt Press ON for 3 seconds:...
  • Seite 9 MEaSUREMENt FUNCtIONS hORIZONtaL DIStaNCE MEaSUREMENt Press MODE and change to horizontal distance mode, press ON for 3 seconds: Horizontal distance To switch between measurement units, press the MODE button and hold it for 3 seconds. hEIght MEaSUREMENt Press the MODE button briefly: To switch between measurement units, press the MODE button and hold it for 3 seconds.
  • Seite 10: Sicherheitshinweise

    SIChERhEItShINWEISE aChtUNg Lesen Sie zuerst die Bedienungsanleitung, bevor Sie das Gerät verwenden. Die Farbe, Oberfläche, Größe und Form des Zieles beeinflussen den Reflexionsgrad und somit die Reichweite. Je heller die Farbe, desto größer ist die Reichweite. So reflektiert z.B. rot sehr stark und erlaubt höhere Messweiten als schwarz.
  • Seite 11: Technische Daten

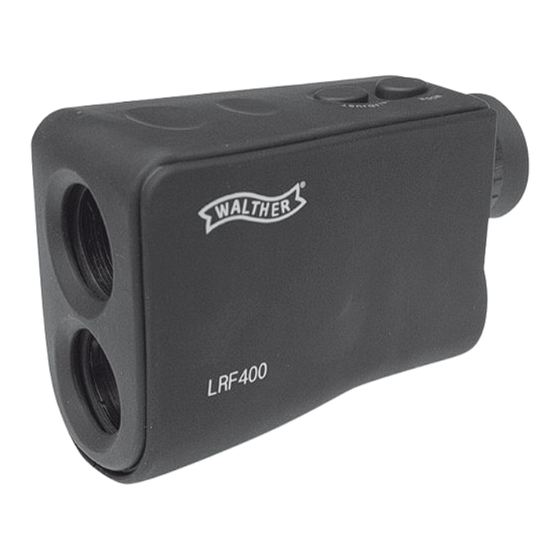
    Display: LCD Anzeige Energiequelle 1x Batterie 3V (CR2) Maximale Laser Energieausgabe: 33 W Laser Wellenlänge: 905 nm Distanzmessung: Distanzmessung: Distanzmessung: LRF400 LRF600 LRF1000 von 10 - 400 m von 10 - 600 m von 10 - 1000 m Abmessung: Abmessung:...
  • Seite 12 BENENNUNg Power-Taste ON / MODE-Taste Lasermessung Objektiv Okular Gummikappe Laser- Empfangslinse (Laser Emission) Batteriefach MODE-Taste LRF800 LRF600 Beeline/ waagerechte Grundlinie Power-Taste ON / Lasermessung...
  • Seite 13 BattERIEWEChSEL 1xCR2 Batteriefach öffnen Batterie einsetzen. Batteriefach schließen (auf Polarität achten!) DISPLaY Messwert Länge Meter Grad Höhe Winkel Yard Messqualität Batterieanzeige...
  • Seite 14: Bedienung

    jUStIERUNg Schalten Sie das Gerät ein. Verdrehen Sie das Okular so lange, bis sie ein scharfes Bild auf das Zielobjekt erhalten. Richten Sie das Zielobjekt in der Mitte des Kreises aus. Die Gummikappe ist für Brillenträger umstülpbar. BEDIENUNg Das zu messende Objekt muss in der Mitte des Kreises ausgerichtet sein.
  • Seite 15: Entfernungsmessung

    MESSFUNktIONEN Gerät einschalten - ON. MODE- taste Durch kurzes Drücken der MODE-Taste können Sie die verschiedenen Funktionen einstellen: • Entfernungsmessung • Höhen- und Grundlinienmessung • Winkelmessung. Das Gerät schaltet sich bei Nichtgebrauch nach 15 Sekunden automatisch ab. ENtFERNUNgSMESSUNg ON-taste 3 sek. drücken: Entfernung Entfernungsmessung in Meter: Halten Sie den MODE-Schalter 3 sec.
  • Seite 16: Senkrechte Höhenmessung

    MESSFUNktIONEN gRUNDLINIENMESSUNg MODE-taste drücken, in den Beeline-Modus wechseln, ON-taste 3 sek. drücken: Beeline / waagerechte Grundlinie Halten Sie die MODE-Taste 3 sec. gedrückt, damit Sie die Messeinheit umstellen können. SENkREChtE höhENMESSUNg MODE-taste kurz drücken: Halten Sie die MODE-Taste 3 sec. gedrückt, damit Sie die Messeinheit umstellen können.
  • Seite 17: Consignes De Sécurité

    CONSIgNES DE SéCURIté attENtION La couleur, la surface, la taille et la forme de l’objet visé influencent le facteur de réflexion et donc la portée. Plus l’objet est de couleur claire, plus la portée est grande. Ainsi, le rouge, qui réfléchit par exemple très fortement, permet des mesures à...
  • Seite 18: Entretien

    Écran : affichage à cristaux liquides Alimentation 1 pile 3V (CR2) Émission énergétique maximale du laser : 33 W Longueur d’onde du laser : 905 nm LRF1000 LRF400 LRF600 Mesure de distances : Mesure de distances : Mesure de distances : de 10 à...
  • Seite 19 DéSIgNatION Touche ON (marche) / Touche MODE mesure Objectif Oculaire Protection en caoutchouc Lentille de réception du laser (émission laser) Compartiment à piles Touche MODE LRF800 LRF600 Beeline/ligne de base horizontale Touche ON (marche) / mesure...
  • Seite 20 ChaNgEMENt PILES 1xCR2 Ouvrir le compartiment à pile. Mettre la pile en place. Fermer le compartiment (Veiller à respecter la à pile. polarité !) éCRaN Valeur mesurée longitud mètre altitude degré angle Yard Qualité de la Chargement de mesure la pile...
  • Seite 21 ajUStagE Mettez l’appareil en marche. Tournez l’oculaire jusqu’à obtention d’une image précise de l‘objet visé. Alignez l’objet visé sur le centre du cercle. La protection en caoutchouc peut être retroussée pour les personnes portant des lunettes. UtILISatION L’objet à mesurer doit être aligné au centre du cercle.
  • Seite 22: Fonctions De Mesure

    FONCtIONS DE MESURE Mettre l’appareil en marche – touche ON. MODE- taste En appuyant brièvement sur la touche MODE, vous pouvez régler les différentes fonctions : • mesure de la distance • mesure à l‘horizontale et en hauteur • mesure d’angle. Lorsque l’appareil n’est pas utilisé, celui-ci s’éteint automatiquement au bout de 15 secondes.
  • Seite 23 FONCtIONS DE MESURE MESURE hORIZONtaLE appuyer sur la touche MODE, passer en mode « Beeline », appuyer pendant 3 secondes sur la touche ON : Beeline/ligne de base horizontale Appuyez pendant 3 secondes sur le bouton MODE pour changer l’unité de mesure. MESURE VERtICaLE DE La haUtEUR appuyer brièvement sur la touche MODE Appuyez pendant 3 secondes sur le bouton...
  • Seite 24 INStUCCIONES DE SEgURIDaD ¡atENCIóN! El color, la superficie, el tamaño y la forma del blanco influyen en el grado de reflexión y, con ello, en el alcance. Cuanto más claro es el color, tanto mayor es el alcance. Así, por ejemplo, el rojo refleja muy fuerte y permite mayores alcances de medición que el negro.
  • Seite 25: Especificaciones

    Exactitud bajo condiciones meteorológicas normales: ± 1 m ± 0,1%, ± 1° Display: Pantalla LCD Fuente de energía: 1 pila 3V (CR2) Energía de salida máxima del láser: 33 W Longitud de onda del láser: 905 nm LRF400 LRF600 LRF1000 Medición de la distancia: Medición de la distancia: Medición de la distancia:...
  • Seite 26 DESIgNaCION Botón Power ON / Botón MODE medición por láser Objektivo Ocular Capuchón de goma Lente de recepción del láser (emisión de láser) Cubierta de pilas Botón MODE LRF800 LRF600 Beeline / línea horizontal Botón Power ON / medición por láser...
  • Seite 27: Cambio De La Pila

    CaMBIO DE La PILa 1xCR2 Abra el compartimento de Coloque la pila. Cierre el compartimento la pila. (Observe la polaridad de la pila correcta de la pila) DISPLaY Valor medido longitud Metro Grado altitud angular Yarda Calidad de la Indicador de medición la pila...
  • Seite 28 REgLajE Encienda el dispositivo. Gire el ocular hasta obtener una imagen nítida del blanco. Posicione el blanco en el centro del círculo. Si usa gafas, puede girar el capuchón de goma. ajUStE El objeto a medirse debe posicionarse en el centro del círculo La distancia se indica con tres cifras.
  • Seite 29: Funciones De Medición

    FUNCIONES DE MEDICIóN Encienda el dispositivo pulsando el botón ON. MODE- taste Pulse brevemente el botón MODE para ajustar las distintas funciones: • Medición de la distancia • Medición de las líneas de base horizontal y vertical • Medición del ángulo. El dispositivo se apaga automáticamente si no se usa durante 15 segundos.
  • Seite 30 FUNCIONES DE MEDICIóN MEDICIóN hORIZONtaL Pulse el botón MODE para pasar al modo de medición horizontal, pulse el botón ON durante 3 segundos: Beeline / línea horizontal Mantenga pulsado el botón MODE durante 3 segundos para cambiar la unidad de medida. MEDICIóN DE La aLtURa Pulse brevemente el botón MODE: Mantenga pulsado el botón MODE durante 3...
  • Seite 31 PRODUktREIhE LRF400 Laser Range Finder 2.1301 LRF600 Laser Range Finder 2.1302 LRF1000 Laser Range Finder 2.1303...
  • Seite 32 LAser MAGNIFICATION CLAss We reserve the right to make color and design changes and technical improve- ments. No responsibility is accepeted for printing errors or incorrect information. Änderungen in Farbe und Design, sowie technische Verbesserungen, Druckfehler und Irrtum vorbehalten. Alle Angaben ohne Gewähr.

Diese Anleitung auch für:

Lrf600Lrf1000

Inhaltsverzeichnis