Ibanez GU40 Bedienungsanleitung
Guitar & bass auto tuner
Quicklinks
GUITAR & BASS AUTO TUNER
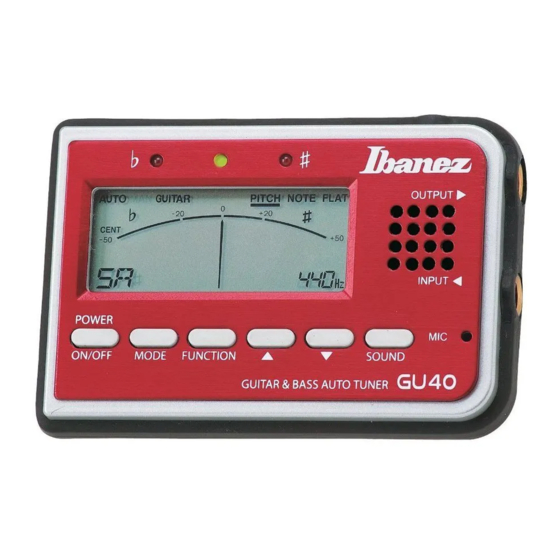
instrument matches the displayed note. The red LED at
the left will light if your instrument is flat, and the red LED
at the right will light if your instrument is sharp.
GU40
Tuning Procedure
OWNER'S MANUAL
For accurate tuning
• Don't use this tuner near sound equipment such as
radios or televisions.
Caution
• When tuning an electric guitar/bass, use a moderate
volume for best tuning results.
• In order to tune strings faster, mute all strings by hand
1 To avoid short circuit, electric shock, or malfunction
after you've finished tuning each string.
Do not disassemble or attempt to repair this unit.
Do not place this unit in locations of high temperature or
Tuning in Auto mode
high humidity (such as nearby heating equipment, in
1. Electric instruments: Connect the output of your
direct sunlight, in a bathroom, or on a wet floor).
instrument to the input jack of the tuner.
Do not place this unit where it will be subjected to heavy
Acoustic instruments: Use the internal mic.
vibration.
2. When you turn on the power, the GU40 is automatically
Do not place this unit in dusty or dirty locations.
set to MODE=AUTO GUITAR and PITCH=440 Hz.
Do not operate this unit with wet hands.
3. Change the PITCH and FLAT settings if desired.
2 To avoid damage
4. If you're tuning a bass guitar, use the MODE button to
Do not apply excessive force to the switches or other
select AUTO BASS.
controls.
5. If the pitch of the string is more than
Do not drop this unit.
from the correct pitch, tune the string until the correct
3 Cleaning
note name appears in the LCD and one of the tuning
Do not use thinner, alcohol, or other solvents to clean this
guide LEDs is lit.
unit.
When the pitch of the string is within
4 To prevent battery failure
correct pitch, tune the string to make the needle stop
Remove the battery if you won't be using this unit for an
at the "0" position.
6. When the tuner needle stops at "0," the green LED in
extended time.
the center will light. Tuning is complete.
Tuning in Manual mode
Features and Functions
1. Electric instruments: Connect the output of your
instrument to the input jack of the tuner.
Acoustic instruments: Use the internal mic.
2. When you turn on the power, the GU40 is automatically
set to MODE=AUTO GUITAR and PITCH=440 Hz.
3. Change the PITCH and FLAT settings if desired.
4. Use the MODE button to select MAN. GUITAR or MAN.
BASS.
Use the FUNCTION button to select NOTE, and use the
LMbuttons to select the note that you want to tune.
5. If the pitch of the string is more than
from the correct pitch, tune the string until the correct
note name appears in the LCD and one of the tuning
guide LEDs is lit.
When the pitch of the string is within
correct pitch, tune the string to make the needle stop
at the "0" position.
6. When the tuner needle stops at "0," the green LED in
the center will light. Tuning is complete.
Tuning by Sound
1. When you press the SOUND button, MODE will be set
to MAN. GUITAR or MAN.BASS, FUNCTION will be set
to NOTE, the NOTE indication will be 5A (GUITAR) or
3A (BASS), and that pitch will be sounded.
2. Tune your instrument to match the pitch you hear from
1 POWER button
the GU40's internal speaker.
Turns the power on/off.
3. Change the NOTE or FLAT settings accordingly.
If you leave the power turned on for approximately twenty
minutes, it will turn off automatically.
2 MODE button
Installing/replacing the batteries
Switches the tuning mode. Each time you press the MODE
button, the tuning mode will cycle between the following
settings.
AUTO GUITAR - MAN.GUITAR - AUTO BASS - MAN.BASS
3 FUNCTION button
Select the type of adjustment you want to make: PITCH,
NOTE, or FLAT.
(You can select NOTE only if you're in MAN. (manual)
tuning mode.)
4 LM buttons
Adjust the parameter you've selected using the
FUNCTION button.
i) PITCH: Reference pitch setting (calibration)
Adjust the reference pitch (A4) in the range of 435~445
Hz (1 Hz steps).
ii) NOTE: Note setting
When in MAN. (manual) mode, select the note to which
you want to tune, from the following choices.
Specifications
NOTE: 6E, 5A, 4D, 3G, 2B, 1E, 7B (electric guitar,
acoustic guitar) 4E, 3A, 2D, 1G, HC, LB (bass guitar)
iii) FLAT: Flat setting
Modes: Auto Tuning and Manual Tuning modes
Adjust the flatted tuning relative to the displayed
Tuning range: A0 (27.50 Hz) ~ C8 (4,186.00 Hz)
note.You can tune to a flatted tuning from one to five
Tuning notes: 5A, 4D, 3G, 2B, 1E, 7B, 6E
semitones below the displayed note.
(electric guitar, acoustic guitar)
5 SOUND button
3A, 2D, 1G, HC, LB, 4E
Sounds a reference tone from the internal speaker. This
(electric bass, acoustic bass)
lets you tune while comparing the output sound of your
Flat tuning: 1~ 5 semitones
±
instrument to the reference tone.
Accuracy:
1 cent or less
You can use the FUNCTION button and the LM buttons
Calibration: 435 Hz ~ 445 Hz
to specify the note and flatted setting for the reference
Indicators: LCD and LEDs
tone.
Input: Internal mic, INPUT jack
Note) When using the SOUND output, the PITCH is fixed
Output: Internal speaker, OUTPUT jack
at 440 Hz. This cannot be changed.
Power supply: Two AAA batteries (3V)
6 Liquid Crystal Display (LCD)
Dimensions: 109 (W) x 73 (D) x 20 (H) mm
Weight: 120 g (including batteries)
* Design and specifications are subject to change without
notice for improvement of the product.
* When you turn the power on, the LCD will show the
following settings.
MODE = AUTO GUITAR
FUNCTION = PITCH
PITCH = 440 Hz
a MODE: AUTO GUITAR, MAN GUITAR, AUTO BASS,
MAN BASS
b NOTE: MAN.GUITAR 6E, 5A, 4D, 3G, 2B, 1E, 7B
MAN.BASS 4E, 3A, 2D, 1G, HC, LB
c FUNCTION: PITCH, NOTE, FLAT
d #/ : When the tuning is correct, the needle will stop in
the center, and the " " and "#" indications will
both appear. The " " indication appears if your
instrument is flatter than the displayed note, and
the "#" indication appears if your instrument is
sharper.
e : Indicates the flatted tuning setting.
f Reference pitch: Indicates the currently-specified
reference pitch.
7 INPUT jack
You can connect your instrument to this input jack.
This is to certify that Guitar & Bass Tuner GU40 is in
If you're tuning an electric guitar, acoustic-electric guitar,
conformity with : Council Directive 2004/108/EC (EMC
or electric bass, connect the output of your instrument to
Directive)
the GU40's INPUT jack.
Applicable Standards :
However in this case, you won't be able to use the GU40's
EN 55013:2001+A1,2003+A2:2006
internal mic.
Electromagnetic Compatibility-Generic emission
8 OUTPUT jack
standard.
This jack directly outputs the signal that is being input.
Part 1 :
You can connect this jack to your amp. However to
Residential, commercial and light industry.
prevent hum or other noise while you're performing, turn
off the power of the tuner.
EN 55020:2007
9 MICROPHONE
Electromagnetic Compatibility-Generic immunity
Use the internal mic when you want to tune an instrument
standard.
that has no pickup, such as an acoustic guitar.
Part 1 :
However, the internal mic cannot be used if a plug is
Residential, commercial and light industry.
inserted in the INPUT jack.
0 Tuning guide LEDs
The green LED in the center will light when your
AUTOMATISCHES STIMMGERÄT FÜR GITARRE UND BASS
GU40
BEDIENUNGSANLEITUNG
Vorsicht
1 Um Kurzschlüsse, elektrische Schläge oder
Funktionsstörungen zu vermeiden
Nehmen Sie das Gerät nicht auseinander und versuchen Sie
nicht, es zu reparieren.
Platzieren Sie dieses Gerät nicht an extrem heißen oder
feuchten Orten (zum Beispiel in der Nähe von Heizungen, in
direktem Sonnenlicht, im Bad oder auf einem feuchten
Fußboden).
Setzen Sie dieses Gerät keinen starken Erschütterungen aus!
±
Platzieren Sie dieses Gerät nicht an staubigen oder
50 cents away
schmutzigen Orten!
Bedienen Sie dieses Gerät nicht mit nassen Händen!
2 Um Beschädigungen zu vermeiden
±
Üben Sie keine übermäßigen Druck auf die Schalter oder
50 cents of the
andere Bedienungselemente aus.
Lassen Sie dieses Gerät nicht fallen!
3 Reinigung
Verwenden Sie zum Reinigen keine Lösungsmittel, Alkohol oder
andere Reinigungsmittel.
4 Um Schäden an der Batterie zu vermeiden
Nehmen Sie die Batterie heraus, wenn Sie das Gerät längere
Zeit nicht benutzen.
Merkmale und Funktionen
±
50 cents away
±
50 cents of the
1 POWER-Taste
Schaltet das Gerät ein und aus.
Wenn Sie das Gerät etwa zwanzig Minuten eingeschaltet
lassen, schaltet es sich automatisch aus.
2 MODE-Taste
Schaltet den Tuning-Modus um. Mit jedem Drücken auf die
MODE-Taste schaltet der Tunig-Modus zwischen den folgenden
1. Pull the tab of the
beiden Einstellungen um.
battery cover.
AUTO GUITAR - MAN.GUITAR - AUTO BASS - MAN.BASS
3 FUNCTION-Taste
2. Lift the battery cover
Wählt die Art der Einstellungen, die Sie vornehmen möchten:
with the tab.
PITCH, NOTE oder FLAT. (NOTE können Sie nur dann wählen,
3. Replace the batteries
wenn sich das Gerät im Modus MAN. (manueller Tuning-Modus)
and put the battery
befindet.
4 LM-Tasten
cover back.
Stellen den Parameter ein, den Sie mit der FUNCTION-T aste
ausgewählt haben.
i) PITCH: Einstellung der Referenztonhöhe (Kalibrierung) Stellt
die Referenztonhöhe (A4) im Bereich von 435~445 Hz ein (in
Schritten von 1 Hz).
ii) NOTE: Noteneinstellung
Wählen Sie im MAN.- Modus (manuell) aus folgenden
Möglichkeiten die Note aus, die Sie stimmen möchten.
NOTE: 6E, 5A, 4D, 3G, 2B, 1E, 7B (E-Gitarre,
akustische Gitarre) 4E, 3A, 2D, 1G, HC, LB(Bassgitarre)
iii) FLAT: Tiefalteration
Stellen Sie die Verminderung relativ zur angezeigten Note
ein.Sie können eine Alteration von einem bis zu
fünf Halbtönen unter der angezeigten Note einstellen.
5 SOUND-Taste
Es erklingt ein Referenzton aus dem eingebauten Lautsprecher.
Dadurch können Sie stimmen, indem Sie die Tonhöhe Ihres
Instrumentenklanges mit der des Referenztons vergleichen.
Mit der FUNCTION-Taste und den LM-Tasten können Sie die
Note und die Tiefalteration für den Bezugston einstellen.
Hinweis) Bei Verwendung der SOUND-Ausgabe ist die Tonhöhe
(PITCH) auf 440 Hz festgelegt. Dies kann nicht geändert
werden.
6 Flüssigkristallanzeige (LCD)
* Wenn Sie das Gerät einschalten, erscheinen im LCD die
folgenden Einstellungen.
MODE = AUTO GUITAR
FUNCTION = PITCH
PITCH = 440 Hz
a MODE: AUTO GUITAR, MAN GUITAR, AUTO BASS, MAN
BASS
b NOTE: MAN.GUITAR 6E, 5A, 4D, 3G, 2B, 1E, 7B
MAN.BASS 4E, 3A, 2D, 1G, HC, LB
c FUNCTION: PITCH, NOTE, FLAT
d #/ : Wenn die Stimmung richtig ist, stoppt die Nadel in der
Mitte, und beide Anzeigen " " und "#" leuchten auf.
Die Anzeige " " erscheint, wenn Ihr Instrument tiefer
als die angezeigte Note gestimmt ist, und die Anzeige
"#" erscheint, wenn Ihr Instrument höher gestimmt ist.
e : Zeigt die Einstellung der Tiefalteration an.
f Bezugstonhöhe: Zeigt die aktuell eingestellte
Bezugstonhöhe an.
7 INPUT-Buchse
An dieser Buchse können Sie Ihr Instrument anschließen.
Wenn Sie eine E-Gitarre, eine akustisch-elektrische Gitarre oder
einen E-Bass stimmen möchten, verbinden Sie den Ausgang
Ihres Instruments mit der Eingangsbuchse INPUT des GU40.
In diesem Fall lässt sich das eingebaute Mikrofon des GU40 nicht
benutzen.
8 OUTPUT-Buchse
Diese Buchse gibt das Signal genauso aus, wie es empfangen
wurde. Sie können an dieser Buchse Ihren Verstärker
anschließen. Um jedoch während des Spiels Brummen oder
Rauschen zu vermeiden, schalten Sie das Stimmgerät aus.
9 MICROPHONE
Bentzen Sie das interne Mikrofon, wenn Sie ein akustisches
ACCORDEUR AUTOMATIQUE POUR GUITARE ET BASSE
Instrument ohne Tonabnehmer stimmen möchten, z. B. eine
akustische Gitarre.
Das eingebaute Mikro kann nicht benutzt werden, wenn ein
Stecker in der Buchse INPUT eingesteckt wurde.
0 Stimm-LEDs
Die grüne LED in der Mitte leuchtet auf, wenn Ihr Instrument auf
MANUEL DE I'UTILISATEUR
die angezeigte Note gestimmt ist. Die rote LED links leuchtet
auf, wenn Ihr Instrument zu tief gestimmt ist, die rote LED
rechts leuchtet auf, wenn es zu hoch gestimmt ist.
Attention
Stimmen
1 Pour éviter des courts-circuits, des électrocutions ou des
dysfonctionnements :
Für präzises Stimmen beachten
N'essayez jamais de démonter ou réparer cet appareil.
• Verwenden Sie das Stimmgerät möglichst nicht in
Evitez de placer cet appareil dans des endroits soumis à une
unmittelbarer Nähe möglicher Störquellen wie Radios oder
chaleur ou une humidité excessive (p. ex. près d'un radiateur,
Fernsehgeräten.
en plein soleil, dans une salle de bains ou sur un sol humide).
• Spielen Sie für beste Ergebnisse beim Stimmen einer E-
Evitez de soumettre cet appareil à de fortes vibrations.
Gitarre oder eines E-Basses mit verringerter Lautstärke.
Evitez de placer cet appareil dans des endroits poussiéreux ou
• Um die jeweils nächste Saite schneller stimmen zu können,
sales.
sollten Sie zuvor nachklingende Saiten mit der Hand
N'utilisez pas cet appareil avec des mains humides.
abdämpfen.
2 Pour éviter des dommages
Automatisches Stimmen in der Betriebsart AUTO
N'appliquez pas trop de pression sur les commutateurs et autres
1. Elektrische Instrumente: Verbinden Sie den Ausgang Ihres
commandes.
Instruments mit der Eingangsbuchse des Stimmgerätes.
Ne laissez pas tomber cet appareil.
Akustische Instrumente: Benutzen Sie das eingebaute
3 Nettoyage
Mikrofon.
N'utilisez pas de détergent, de benzène ou d'autres solvants
2. Nach dem Einschalten befindet sich das GU40 automatisch
pour nettoyer cet appareil.
im Modus "AUTO GUITAR" und die Tonhöhe (PITCH) ist auf
4 Pour économiser la pile
440 Hz eingestellt.
Si vous n'utilisez pas cet appareil pendant une période
3. Nehmen Sie die gewünschten Einstellungen für PITCH und
prolongée, retirez la pile.
FLAT vor.
4. Wenn Sie eine Bassgitarre stimmen möchten, wählen Sie
Fonctions de l'accordeur
mit der Taste MODE die Einstellung "AUTO BASS".
5. Wenn die Höhe der zu stimmenden Saite mehr als 50 Cents
von der korrekten Höhe abweicht, stimmen Sie die Saite, bis
der richtige Notenname in der Anzeige erscheint und eine
der Stimm-LEDs aufleuchtet.
Wenn die Höhe der zu stimmenden Saite weniger als 50
Cents von der korrekten Höhe abweicht, stimmen Sie die
Saite, bis die Nadel an der "0"-Stellung stoppt.
6. Wenn die Nadel des Stimmgeräts bei "0" stoppt, leuchtet
zusätzlich die grüne LED in der Mitte auf. Der Stimmvorgang
ist beendet.
Manuelles Stimmen in der Betriebsart MANUAL (MAN.)
1. Elektrische Instrumente: Verbinden Sie den Ausgang Ihres
Instruments mit der Eingangsbuchse des Stimmgerätes.
Akustische Instrumente: Benutzen Sie das eingebaute
Mikrofon.
2. Nach dem Einschalten befindet sich das GU40 automatisch
im Modus "AUTO GUITAR" und die Tonhöhe (PITCH) ist auf
440 Hz eingestellt.
3. Nehmen Sie die gewünschten Einstellungen für PITCH und
FLAT vor.
4. Wählen Sie mit der MODE-Taste die Betriebsart MAN.
GUITAR oder MAN. BASS.
Wählen Sie mit der FUNCTION-Taste die Einstellung NOTE aus,
1 Bouton POWER
und verwenden Sie die LM-Tasten zur Auswahl der zu
Permet de mettre l'appareil sous/hors tension.
stimmenden Note.
Si vous laissez l'appareil sous tension pendant environ 20
5. Wenn die Höhe der zu stimmenden Saite mehr als 50 Cents
minutes, il se met automatiquement hors tension.
von der korrekten Höhe abweicht, stimmen Sie die Saite bis
2 Bouton MODE
der richtige Notenname in der Anzeige erscheint und eine
Permet de sélectionner le mode d'accord. Chaque fois que
vous appuyez sur le bouton MODE, le mode d'accord bascule
der Stimm-LEDs aufleuchtet.
Wenn die Höhe der zu stimmenden Saite weniger als 50
entre les deux réglages suivants.
AUTO GUITAR - MAN. GUITAR - AUTO BASS - MAN.BASS
Cents von der korrekten Höhe abweicht, stimmen Sie die
3 Bouton FUNCTION
Saite, bis die Nadel an der "0"-Stellung stoppt.
Permet de sélectionner le type de réglage souhaité : PITCH,
6. Wenn die Nadel des Stimmgeräts bei "0" stoppt, leuchtet
NOTE ou FLAT. (Vous ne pouvez sélectionner NOTE que si le
zusätzlich die grüne LED in der Mitte auf. Der Stimmvorgang ist
mode d'accord MAN. (manuel) est défini.)
beendet.
4 Boutons LM
Stimmen nach Referenzton
Permettent de régler le paramètre sélectionné à l'aide du
1. Wenn Sie die SOUND-Taste drücken, wird die Betriebsart
bouton FUNCTION.
(MODE) auf MAN, GUITAR oder MAN.BASS eingestellt,
i) PITCH : Réglage du diapason de référence (calibrage)
Réglez le diapason de référence (A4) dans une plage de 435
FUNCTION auf NOTE, die NOTE-Anzeige ist 5A (GUITAR)
à 445 Hz (par pas de 1 Hz).
oder 3A (BASS), und es erklingt ein Ton mit dieser Tonhöhe.
ii) NOTE : Réglage de la note
2. Stimmen Sie Ihr Instrument nach Gehör so, dass dessen
En mode MAN. (manuel), sélectionnez la note à accorder à
Tonhöhe mit dem Ton aus dem Lautsprecher des GU40
partir des options suivantes.
übereinstimmt.
NOTE : 6E (mi 6eme), 5A (la), 4D (ré), 3G (sol) 2B (si), 1E (mi
3. Ändern Sie die Einstellungen bei NOTE oder FLAT wie
1ere), 7B (si) (guitare électrique, guitare acoustique)
gewünscht.
4E (mi), 3A (la), 2D (ré), 1G (sol), HC (do aigu), LB (si
grave)(guitare basse)
iii) FLAT : Réglage bémol
Einsetzen/Wechseln der Batterien
Accordage plus bas par rapport à la note affichée. Vous
pouvez sélectionner un accordage d'un à cinq demi-tons
1. Ziehen Sie an der Lasche
plus bas que la note affichée.
der
5 Bouton SOUND
Batteriefachabdeckung.
Emet une tonalité de référence à partir du haut-parleur interne.
2. Heben Sie die
Vous pouvez régler l'accord en comparant le son émis par votre
Batteriefachabdeckung an
instrument à la tonalité de référence.
Vous pouvez utiliser les boutons FUNCTION et LM pour spécifier
der Lasche an.
la note et le réglage plus bas pour l'accordage de référence.
3. Tauschen Sie die
Batterien aus und setzen
Remarque : Lorsque vous utilisez la sortie SOUND, le réglage
PITCH est défini sur 440 Hz. Vous ne pouvez pas le modifier.
Sie die
6 Ecran à cristaux liquides (LCD)
Batteriefachabdeckung
wieder auf.
Technische Daten
Betriebsarten: automatisches und manuelles Stimmen (AUTO und
MAN)
Stimmbereich: A0 (27,50 Hz) ~ C8 (4.186,00 Hz)
Stimmnoten: 5A, 4D, 3G, 2B, 1E, 7B, 6E
(elektrische/akustische Gitarre)
3A, 2D, 1G, HC, LB, 4E
(elektrischer/akustischer Bass)
Tiefalterationsmodus: 1~5 Halbtöne
Genauigkeit: ±1 Cent oder weniger
Kalibrierung: 435 Hz ~ 445 Hz
Anzeigen: LCD und LEDs
Eingang: Internes Mikro, INPUT-Buchse
* Lorsque vous mettez l'appareil sous tension, l'écran LCD
Ausgang: Eingebauter Lautsprecher, OUTPUT-Buchse
Stromversorgung: Zwei AAA-Batterien (3 V)
affiche les réglages suivants.
MODE = AUTO GUITAR
Abmessungen: 109 (B) x 73 (T) x 20 (H) mm
FUNCTION = PITCH
Gewicht: 120 g (mit Batterien)
PITCH = 440 Hz
* Ausführung und Technische Daten können sich aus Gründen
a MODE : AUTO GUITAR, MAN. GUITAR, AUTO BASS, MAN.
der Weiterentwicklung des Produkts ohne Ankündigung
BASS
ändern.
b NOTE : MAN. GUITAR 6E, 5A, 4D, 3G, 2B, 1E, 7B
MAN. BASS 4E, 3A, 2D, 1G, HC, LB
c FUNCTION : PITCH, NOTE, FLAT
d #/ : Lorsque l'accordage est correct, l'aiguille s'arrête au
milieu de l'écran et les indications " " et "#" s'affichent.
L'indication " " s'affiche si votre instrument est plus
bas que la note affichée. L'indication "#" s'affiche si
votre instrument est plus haut.
e
: Indique que le réglage de l'accordage est trop bas.
f Diapason de référence : Indique le diapason de référence
Hiermit wird die Konformität des Gitarren- & Bass-Stimmgeräts
GU40 mit der EU-Richtlinie 2004/108/EC bestätigt.
7 Prise INPUT
Vous pouvez brancher votre instrument à cette prise d'entrée.
Relevante Vorschriften:
Si vous accordez une guitare électrique, électro-acoustique ou
EN 55013:2001+A1,2003+A2:2006
une basse électrique, branchez la sortie de votre instrument à
Elektromagnetische Kompatibilität – allgemeiner
la prise INPUT du GU40.
Emissionsvorschriften.
Toutefois, dans ce cas, vous ne pouvez pas utiliser le
Teil 1:
microphone interne du GU40.
Haushaltsgeräte, gewerbliche und leichtindustrielle
8 Prise OUTPUT
Ausrüstung.
Cette prise retransmet directement le signal de l'instrument.
Vous pouvez brancher votre amplificateur à cette prise. Veillez
EN 55020:2007
toutefois à mettre l'accordeur hors tension pour éviter les
Elektromagnetische Kompatibilität – allgemeine
bourdonnements ou autres bruits pendant que vous jouez.
Verträglichkeitsvorschriften.
9 MICROPHONE
Teil 1:
Utilisez le microphone interne lorsque vous souhaitez accorder
Haushaltsgeräte, gewerbliche und leichtindustrielle Ausrüstung.
un instrument sans micro comme une guitare acoustique.
Vous ne pouvez toutefois pas utiliser le microphone interne si
GU40
un instrument est branché à la prise INPUT.
0 Témoins de référence pour l'accordage
Le témoin vert au centre s'allume lorsque votre accordage
correspond à la note affichée. Si la note est trop basse, le
témoin rouge de gauche s'allume. Si elle est trop haute, le
témoin rouge de droite s'allume.
Procédure d'accordage
Pour accorder votre instrument avec précision
• Evitez d'utiliser cet accordeur à proximité d'un poste de
radio ou de télévision.
• Lorsque vous accordez une guitare/basse électrique, réglez
le volume de façon modérée pour obtenir un accordage
précis.
• Pour accorder les cordes plus vite, atténuez le son de
toutes les cordes avec la main après avoir accordé chacune
d'elles.
Accordage en mode automatique
1. Instruments électriques : Branchez la sortie de votre
instrument à la prise d'entrée de l'accordeur.
Instruments acoustiques : Utilisez le microphone interne.
2. Lorsque vous mettez le GU40 sous tension, il sélectionne
automatiquement MODE=AUTO GUITAR et PITCH=440 Hz.
3. Modifiez les réglages PITCH et FLAT le cas échéant.
4. Si vous accordez une guitare basse, utilisez le bouton
MODE pour sélectionner AUTO BASS.
5. Si la tonalité de la corde est supérieure à ±50 cents par
rapport à la tonalité juste, accordez la corde jusqu'à ce que
le nom de la note correcte s'affiche sur l'écran LCD et que
l'un des témoins s'allume.
Lorsque la tonalité de la corde se trouve à moins de ±50
cents de la tonalité correcte, accordez la corde jusqu'à ce
que l'aiguille s'arrête sur la position "0".
6. Lorsque l'aiguille de l'accordeur s'arrête sur "0", le témoin
vert au milieu s'allume. L'accordage est terminé.
Accordage en mode manuel
1. Instruments électriques : Branchez la sortie de votre
instrument à la prise d'entrée de l'accordeur.
Instruments acoustiques : Utilisez le microphone interne.
2. Lorsque vous mettez le GU40 sous tension, il sélectionne
automatiquement MODE=AUTO GUITAR et PITCH=440 Hz.
3. Modifiez les réglages PITCH et FLAT le cas échéant.
4. Utilisez le bouton MODE pour sélectionner MAN. GUITAR ou
MAN. BASS.
Le bouton FUNCTION permet de sélectionner NOTE. Les
boutons LM permettent de sélectionner la note à accorder.
5. Si la tonalité de la corde est supérieure à ±50 cents par
rapport à la tonalité juste, accordez la corde jusqu'à ce que
le nom de la note correcte s'affiche sur l'écran LCD et que
l'un des témoins s'allume.
Lorsque la tonalité de la corde se trouve à moins de ±50
cents de la tonalité correcte, accordez la corde jusqu'à ce
que l'aiguille s'arrête sur la position "0".
6. Lorsque l'aiguille de l'accordeur s'arrête sur "0", le témoin
vert au milieu s'allume. L'accordage est terminé.
Accordage avec notes pilotes
1. Lorsque vous appuyez sur le bouton SOUND, MODE est
défini sur MAN. GUITAR ou MAN. BASS, FUNCTION est
défini sur NOTE, NOTE indique 5A (GUITAR) ou 3A (BASS) et
la tonalité sélectionnée retentit.
2. Accordez votre instrument selon la tonalité qui retentit du
haut-parleur interne du GU40.
3. Modifiez les réglages NOTE ou FLAT en conséquence.
Installation/remplacement des piles
1. Tirez sur la languette du
couvercle.
2. Soulevez le couvercle à
l'aide de la languette.
3. Remplacez les piles et
refermez le couvercle.
Fiche technique
Modes : Accordage automatique et Accordage manuel
Fréquences reconnues : A0 (27,50 Hz) ~ C8 (4 186 Hz)
Notes d'accordage :
5A, 4D, 3G, 2B, 1E, 7B, 6E
(guitare électrique, guitare acoustique)
3A, 2D, 1G, HC, LB, 4E
(basse électrique, basse acoustique)
Accordage bémol : 1~5 demi-tons
Précision : ±1 cent ou moins
Calibrage : 435 Hz ~ 445 Hz
Témoins : écran LCD et témoins
Entrée : microphone interne, prise INPUT
Sortie : haut-parleur interne, prise OUTPUT
Alimentation : deux piles de type AAA (3V)
Dimensions : 109 (L) x 73 (P) x 20 (H) mm
Poids : 120 g (piles comprises)
* Les caractéristiques et la présentation sont susceptibles
d'être modifiées sans avis préalable pour l'amélioration du
produit.
Par la présente, nous certifions que l'accordeur pour Guitar
actuellement spécifié.
& Bass Tuner GU40 se conforme à: Directive du Conseil
2004/108/EC (directive EMC)
Normes étant d'application :
EN 55013:2001+A1,2003+A2:2006
Compatibilité électromagnétique – norme générale
d'émission.
Partie 1:
Résidentiel, commercial, industrie légère.
EN 55020:2007
Compatibilité électromagnétique – norme générale
d'immunité.
Partie 1:
Résidentiel, commercial, industrie légère.

Verwandte Anleitungen für Ibanez GU40


Inhaltszusammenfassung für Ibanez GU40
- Seite 1 Bezugstonhöhe: Zeigt die aktuell eingestellte You can connect your instrument to this input jack. This is to certify that Guitar & Bass Tuner GU40 is in Par la présente, nous certifions que l’accordeur pour Guitar Hiermit wird die Konformität des Gitarren- & Bass-Stimmgeräts actuellement spécifié.
- Seite 2 Residential, commercial and light industry. Tuttavia, il microfono interno non può essere usato se jack Sin embargo, en tal caso no podrá utilizar el micrófono interno del GU40. Apartado 1 : 8 Toma de salida (OUTPUT) è inserito nel jack INPUT.