Herunterladen Inhalt Inhalt Diese Seite drucken
McCulloch GBV 325 Bedienungsanleitung
Vorschau ausblenden Andere Handbücher für GBV 325:
Inhaltsverzeichnis

Werbung

Verfügbare Sprachen
  • DE

Verfügbare Sprachen

  • DEUTSCH, seite 28
Operator's manual
Manuel d'utilisation
Bedienungsanweisung
r'
Please read the operato
s manual carefully and make sure you understand the instructions before using the machine.
Lire attentivement et bien assimiler le manual d'utilisation avant d'utiliser la machine.
Lesen Sie die Bedienungsanweisung sorgfältig durch med und machen Sie sich mit dem Inhalt vertraut,
bevor Sie des Gerät benutzen.
Lea detenidament el manual de instrucciones y asegúrese de entender su contenido antes de utilizar la máquina.
Prima di usare la macchina, leggere per intero le istruzioni per l'uso e accertarsi di averne compreso il contenuto.
Neem de gebruiksaanwijzing grondig door en gebruik de machine niet voor u alles duidelijk heeft begrepen.
Manual de instrucciones
Istruzioni per l'uso
Gebruiksaanwijzing
GBV 325
GB (2 - 13)
FR (14 - 27)
DE (28 - 42)
ES (43 - 56)
IT (57 - 70)
NL (71 - 84)

Werbung

Inhaltsverzeichnis
loading

Inhaltszusammenfassung für McCulloch GBV 325

  • Seite 1 Manual de instrucciones Istruzioni per l’uso Manuel d’utilisation Bedienungsanweisung Gebruiksaanwijzing GBV 325 r’ Please read the operato s manual carefully and make sure you understand the instructions before using the machine. GB (2 - 13) Lire attentivement et bien assimiler le manual d’utilisation avant d’utiliser la machine.
  • Seite 2: Inhaltsverzeichnis

    Lowering fuel consumption, emissions and noise levels are of top priority to us, as is improving safety and user-friendliness. We certainly hope that you will be satisfied with your McCulloch product, as it is designed to be your companion for a long time. By following this operators manual’s advice on usage, service, and maintenance, its lifespan can be extended.
  • Seite 3: Identification Of Symbols

    IDENTIFICATION OF SYMBOLS WARNING: This blower Use unleaded or quality can be dangerous! Careless leaded petrol and two or improper use can stroke oil. cause serious or even fatal injury. WARNING: The blower may throw Read and understand the objects at high velocity that can instruction manual before ricochet and hit the operator.
  • Seite 4 GENERAL SAFETY PRECAUTIONS PLAN AHEAD This garden blower/vacuum is only designed for blowing away or removal of leaves and other debris on the ground. WARNING: This machine produces Inspect unit before each use for worn, loose, an electromagnetic field during operation. Under missing, or damaged parts.
  • Seite 5: Safety Notice

    Use only recommended McCulloch replace- damage in the fingers, hands, and joints of peo- ment parts; use of any other parts may void ple prone to circulation disorders or abnormal your warranty and cause damage to your unit.
  • Seite 6: Assembly

    ASSEMBLY CARTON CONTENTS 4. Slide the lower blower tube onto the upper blower tube. Check carton contents against the following list. 5. Turn the lower blower tube clockwise until S Blower a click is felt to secure the lower blower S Upper blower tube tube to the upper blower tube.
  • Seite 7 ASSEMBLY Groove Slot 5. Push the upper vacuum tube into the vac- uum inlet. Turn the tube counterclockwise until a click is felt to secure the tube to the blower unit. 5. Insert the elbow tube into the blower outlet. Make sure elbow tube rib is aligned with the blower outlet groove.
  • Seite 8: Operation

    ASSEMBLY 2. Remove the vacuum tubes by turning the tubes clockwise. 3. Close the vacuum inlet cover and make sure it is latched closed. 4. Reinstall the blower tubes (see BLOWER TUBE ASSEMBLY). SHOULDER STRAP ADJUSTMENT WARNING: While vacuuming debris, hold the unit with the muffler side facing away from your body and clothes (see OPERAT- ING POSITION).
  • Seite 9 OPERATION ratio is obtained by mixing 5 liters of unleaded STARTING POSITION petrol with 0,125 liter of oil. DO NOT USE automotive oil or marine oil. These oils will cause engine damage. When mixing fuel, follow Blower instructions printed on oil container. Once oil is added to petrol, shake container momentarily to assure that the fuel is thoroughly mixed.
  • Seite 10: Maintenance

    OPERATION 4. Pull starter rope handle sharply until engine There is a simplified start reminder (with sounds as if it is trying to start, but do not pull illustrations to describe each step) loc- rope more than 6 times. ated on the back of the blower. 5.
  • Seite 11: Carburetor Adjustments

    MAINTENANCE A dirty air filter decreases engine perform- CHECK MUFFLER MOUNTING ance and increases fuel consumption and SCREWS harmful emissions. Always clean after every Once each year, ensure muffler mounting 5 hours of operation or yearly, whichever screws are secure and tightened properly to comes first.
  • Seite 12: Storage

    STORAGE INTERNAL ENGINE WARNING: Prepare unit for storage at S Remove spark plug and pour 1 teaspoon of end of season or if it will not be used for 30 days 2-cycle engine oil (air cooled) through the or more. spark plug opening.
  • Seite 13: Declaration Of Conformity

    Community, declare that the garden blower/vacuum model McCulloch GBV 325 with serial numbers dating from 2012 and onwards (the year is clearly stated on the rating plate, followed by the serial number), comply with the requirements of the COUNCIL’S DIRECTIVES: of 17 May 2006 “relating to machinery”...
  • Seite 14: Introduction

    McCulloch travaille continuellement au développement de ses produits et se réserve le droit d’en modifier, entre autres, la conception et l’aspect sans préavis.
  • Seite 15: Explication Des Symboles

    EXPLICATION DES SYMBOLES AVERTISSEMENT ! Ce Utilisez de l’essence sans plomb ou souffleur peut être dangereux ! de l’essence avec plomb de très Une utilisation imprudente ou haute qualité et une huile deux incorrecte peut provoquer des temps. blessures graves ou mortelles. AVERTISSEMENT ! Le souffleur peut Lisez très attentivement le projeter violemment des objets pouvant...
  • Seite 16 INSTRUCTIONS GÉNÉRALES DE SÉCURITÉ Faites- -le aller et venir lentement sur les Ne mettez pas de carburant lorsque matériaux que vous voulez aspirer. Évitez l’appareil est en marche ou moteur est faire entrer votre appareil dans un tas de chaud. déchets pour ne pas le bloquer.
  • Seite 17: Consignes De Sécurité

    N’utilisez que les pièces de rechange maison etc. Veillez à toujours prendre une recommandées par McCulloch ; l’utilisation position ferme et équilibrée. de toute autre pièce ne serait pas garantie Ne placez jamais d’objets à l’intérieur du et pourrait endommager votre appareil.
  • Seite 18: Description Des Pièces

    DESCRIPTION DES PIÈCES DESCRIPTION DES PIÈCES 1. Gâchette d’accélération Tube de soufflage supérieur 2. Interrupteur STOP 10. Tube de soufflage inférieur 3. Démarreur 11. Buse haute vitesse 4. Levier de l’étrangleur 12. Tube coudé 5. Bouchon du carburant 13. Sac de l’aspirateur 6.
  • Seite 19 MONTAGE 2. Fixez les tubes en tournant le boulon dans MONTAGE DE L’ASPIRATEUR le sens horaire. MONTAGE DU SAC DE 3. Alignez les fentes du tube de soufflage L’ASPIRATEUR inférieur sur les languettes du tube de 1. Ouvrez la fermeture- -éclair du sac et soufflage supérieur.
  • Seite 20 MONTAGE Sortie d’air du Fermoir souffleur Fermoir 6. Alignez l’extrémité oblique tube Couvercle d’arrivée d’air de l’aspirateur d’aspiration inférieur, comme illustré. Poussez le tube d’aspiration inférieur dans le tube d’aspiration supérieur jusqu’à ce que le 2. Inclinez légèrement le manche du tournevis tube inférieur soit solidement rentré...
  • Seite 21: Fonctionnement

    MONTAGE AJUSTEMENT DE LA BANDOU- - LIÈRE AVERTISSEMENT: Quand vous aspirez des déchets, tenez toujours l’appareil avec le silencieux orienté du côté opposé à votre corps et vos vêtements. (Consultez POSITION DE FONCTIONNEMENT). 1. Passez la bandoulière par dessus votre tête et mettez- -la sur votre épaule gauche.
  • Seite 22 FONCTIONNEMENT CARBURANT AVANT DE DÉMARRER LE MOTEUR AVERTISSEMENT: AVERTISSEMENT: Retirez Vous DEVEZ lentement le bouchon avant de rajouter du vous assurer que les tubes sont bien fixés carburant dans l’appareil. avant d’utiliser l’appareil. Ce moteur est certifié pour fonctionner avec Carburant : ecartez- -vous au moins de 3 de l’essence sans plomb.
  • Seite 23 FONCTIONNEMENT 7. Lorsque le moteur part, permettez- -lui de marcher pendant 10 secondes, puis amenez le levier d’étranglement en position «RUN» (étranglement nul). Permettez à votre appareil de fonctionner 30 secondes FULL HALF supplémentaires position «RUN» CHOKE CHOKE CHOKE (étranglement nul) avant de relâcher la REMARQUE : gâchette d’accélération.
  • Seite 24: Entretien

    ENTRETIEN 5. Mettez quelques gouttes d’huile sur le filtre, AVERTISSEMENT: serrez le filtre pour répartir l’huile. Ne touchez le 6. Remplacez les pièces. silencieux que si le moteur et le silencieux sont froids. Un silencieux chaud peut REMPLACEZ LA BOUGIE occasionner des brûlures sérieuses.
  • Seite 25: Rangement

    ENTRETIEN Réglage du ralenti Vis de ralenti Laissez le moteur tourner au ralenti. Ajustez la vitesse jusqu’à ce que le moteur tourne sans caler (ralenti trop lent). S Tournez la vis de réglage au ralenti dans le sens des aiguilles d’une montre pour augmenter la vitesse du moteur.
  • Seite 26: Tableau De Dépannage

    TABLEAU DE DÉPANNAGE AVERTISSEMENT: Toujours arrêtez l’unité et débranchez la bougie d’allu- mage avant d’exécuter n’importe lequel des remèdes recommandés ci- -dessous sauf pour les remèdes qui nécissitent que l’appareil soit en fonctionnement. PROBLÈME CAUSE REMEDE Le moteur 1.Le moteur est noyé. 1.Voir «Instructions de démarrage».
  • Seite 27: Caractéristiques Techniques

    Nous, Husqvarna AB, SE- - 561 82 Huskvarna, Suède, Tél: +46- -36- -146500, en tant que représentant agréé dans la Communauté, déclarons que le souffleur/aspirateur modèle McCulloch GBV 325 à partir des numéros de série de l’année de fabrication 2012 et ultérieurement (l’année est indiquée en clair sur la plaque d’identification et suivie d’un numéro de série), sont conformes aux dispositions des DIRECTIVES DU CONSEIL:...
  • Seite 28: Einleitung

    EINLEITUNG Sehr geehrter Kunde, Vielen Dank, dass Sie sich für ein Produkt von McCulloch entschieden haben. Sie sind damit Teil einer langen Erfolgsgeschichte, denn die McCulloch Corporation begann bereits während des 2. Weltkriegs mit der Herstellung von Triebwerken. 1949 brachte McCulloch die erste leichte, von nur einer Person zu bedienende Kettensäge auf den Markt –...
  • Seite 29: Erklärung Der Symbole

    ERKLÄRUNG DER SYMBOLE ACHTUNG! Laubsauger sind gefährlich! Unachtsamkeit Verwenden Sie unverbleites oder oder unsachgemäße qualitativ hochwertiges verbleites Verwendung können schwere Benzin sowie Öl für Zweitaktmotoren. oder tödliche Verletzungen zur Folge haben. ACHTUNG! Der Laubbläser kann Ge- Lesen Sie vor Inbetriebnahme genstände mit großer Kraft heraussch- des Laubsaugers das leudern, die zurückprallen können.
  • Seite 30: Vorbereitende Massnahmen

    SICHERHEITSHINWEISE Die optimale Saugleistung erzielen Sie bei Beim Umgang mit Treibstoff und beim Betrieb einer hohen Geschwindigkeit. des Laubsaugers darf nicht geraucht werden. Bewegen Sie das Saugrohr während des Vergewissern Sie sich, ob das Gerät korrekt Saugvorgangs langsam über das zu montiert ordnungsgemäßem entfernende Material vor und zurück.
  • Seite 31: Ordnungsgemässe Wartung

    Saugrohr. Halten Sie das Gerät immer so, Verwenden Sie ausschließlich die von daß das austretende Sauggut nicht auf McCulloch empfohlenen Ersatzteile. Durch Personen, Tiere, Glas und feste Objekte wie den Einsatz anderer Ersatzteile könnte Ihr Bäume, Autos, Mauern usw. gerichtet ist. Der Garantieanspruch verfallen und das Gerät...
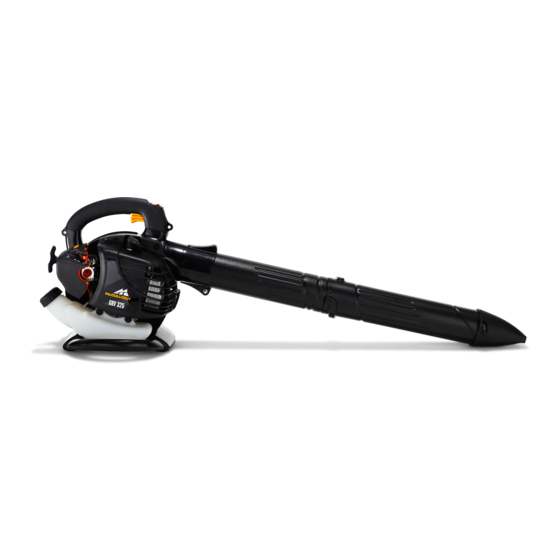
  • Seite 32: Beschreibung Der Geräteteile

    BESCHREIBUNG DER GERÄTETEILE BESCHREIBUNG DER GERÄTETEILE 1. Gashebel Oberes Blasrohr 2. STOP- -Schalter 10. Unteres Blasrohr 3. Primer 11. Hochgeschwindigkeits- -Blasdüse 4. Startgashebel 12. Verbindungsrohr 5. Treibstofftankdeckel 13. Fangsack 6. Startergriff 14. Oberes Saugrohr 7. Saugrohrgriff 15. Unteres Saugrohr 8. Zündkerze 16.
  • Seite 33 MONTAGE 3. Drehen Sie die Düse nach rechts, bis sie mit Gebläseauslass einem Klicken fest auf dem unteren Blasrohr einrastet. MONTAGE DES SAUGBETRIEB MONTAGE DES FANGSACKS 1. Öffnen Reißverschluß Einkerbung Fangsacks, legen Führung Verbindungsrohr ein. 2. Schieben Sie das schmale Ende des 2.
  • Seite 34 MONTAGE 6. Ordnen Sie das abgeschrägte Ende des Laschenbereich Gebläse- Saugrohrs laut Abbildung an. Schieben Sie auslass das untere in das obere Saugrohr, bis das untere Saugrohr fest im oberen Saugrohr sitzt (ca. 7 cm). Laschen- bereich Ansaugöffnungabdeckung Abgeschrägtes Ende 2.
  • Seite 35: Betrieb

    MONTAGE EINSTELLUNG DES SCHULTER- - RIEMENS ACHTUNG: Betreiben Sie das Gerät beim Saugen immer so, dass der Auspuff von Körper und Kleidung fern gehalten wird (siehe BETRIEBSPOSITION). 1. Stecken Sie den Kopf durch den Schultergurt und legen Sie den Gurt auf Ihre linke Schulter.
  • Seite 36 BETRIEB GERÄT BETANKEN ANHALTEN DES GERÄTS Lassen Sie den Gashebel los. ACHTUNG: Entnehmen Sie den Drücken Sie den STOPP- -Schalter in die Benzintankdeckel vorsichtig für STOPP- -stellung, bis der Motor stehen bleibt. Brennstoffzugabe. STARTEN DES GERÄTS Das Gerät ist für den Betrieb mit bleifreiem VOR DEM STARTEN Benzin zugelassen.
  • Seite 37: Einen Warmen Motor Starten

    BETRIEB Choke in die Position RUN (Choke aus) bringen. Lassen Sie das Gerät noch 30 Sekunden in der Position RUN laufen, bevor Sie den Gashebel loslassen. HINWEIS: Wenn der Motor abstirbt, FULL HALF während der Chokehebel sich in der CHOKE CHOKE CHOKE RUN- -Position befindet, bringen Sie den...
  • Seite 38: Wartung

    WARTUNG HINWEIS: Stellen Sie den Choke auf die ACHTUNG: Berühren Sie niemals Position RUN, bevor die Auspuffanlage, außer, wenn Motor und Luftfilterabdeckung öffnen. Auspuff kalt sind. Die Berührung eines 2. Drücken Sie die Taste (siehe Abbildung), heißen Auspuffs kann zu ernsthaften um den Luftfilterabdeckung zu öffnen.
  • Seite 39 WARTUNG PRÜFUNG DER Lassen Sie das Gerät im Leerlauf laufen. Justieren Sie die Leerlaufgeschwindigkeit, HALTESCHRAUBEN DER damit die Maschine läuft, ohne zu stoppen SCHALLDÄMPFER (Leerlaufgeschwindigkeit zu niedrig). Prüfen einmal Jahr, S Drehen Schraube für Halteschrauben der Schalldämpfer sicher Leerlaufgeschwindigkeit im Uhrzeigersinn, fest angezogen sind,...
  • Seite 40: Fehlerbehebungstabelle Vorsicht

    FEHLERBEHEBUNGSTABELLE VORSICHT!: Die Zündkerze ist vor Wartungsarbeiten zu entfernen, außer bei Vergasereinstellungen. MÜHE GRUND LÖSUNG 1. Motor geflutet. 1. Siehe ”Startanweisungen”. Motor startet 2. Benzintank leer. 2. Füllen Sie den Tank mit der korrekten nicht. Brennstoffmischung. 3. Zündkerze zündet nicht. 3.
  • Seite 41: Konformitätserklärung

    Vertreter Gemeinschaft, daß Laubbläser/- -sauger der Modelle McCulloch GBV 325 ab Seriennummer des Baujahrs 2012 aufwärts (die Jahreszahl wird im Klartext auf dem Typenschild angegeben, mitsamt einer nachfolgenden Seriennummer), den Vorschriften folgender RICHTLINIE DES RATES entsprechen: vom 17. Mai 2006 “Maschinen- -Richtlinie” 2006/42/EG;...
  • Seite 42: Technische Daten

    TECHNISCHE DATEN MODELL: GBV 325 MOTOR Motorhubraum, cm Maximale Maschinenleistung, nach ISO 8893, kW 0,75 Leerlauf +/- - 400, U/min 3700 Katalysatorschalldämpfer ZÜNDANLAGE Zündkerze Champion RCJ- -6Y Elektrodenabstand, mm KRAFTSTOFF- - UND SCHMIERSYSTEM Tankfassungsvermögen, cm GEWICHT Mit Rohr, bei leerem Tank, kg GERÄUSCHEMISSIONEN...
  • Seite 43: Introducción

    INTRODUCCIÓN Apreciado cliente, Gracias por elegir un producto McCulloch. Desde ahora forma parte de una historia que se inició hace mucho tiempo: McCulloch Corporation empezó a fabricar motores durante la II Guerra Mundial. Cuando McCulloch presentó su primera motosierra ligera de uso individual en 1949, marcó...
  • Seite 44: Identificación De Symboles

    IDENTIFICACIÓN DE SYMBOLES ¡Este ADVERTENCIA: Utilice gasolina sin plomo o de gran soplador puede resultar calidad y aceite para motores de peligroso! Su uso dos tiempos. imprudente o inadecuado puede ocasionar lesiones graves e incluso mortales. ADVERTENCIA: El soplador de ho- Lea atentamente este manual jas puede despedir objetos con de instrucciones antes de...
  • Seite 45: Antes De Comenzar

    INSTRUCCIONES GENERALES DE SEGURIDAD Haga un barrido lateral y repetido sobre el Asegúrese de que el aparato se encuentre material al aspirar. Evite meter el aparato apropiadamente armado y en buenas condiciones de funcionamiento. dentro de las pilas de basura ya que se puede tapar y ahogar el motor.
  • Seite 46 Pise siempre sobre Utilice solamente recambios recomendados suelo firme y mantenga el equilibrio en todo por McCulloch; el uso de cualquier pieza de momento. otro fabricante puede anular la garantía y Nunca deje objetos en el interior de los tubos averiar la unidad.
  • Seite 47: Identificación (¿Qué Es Qué?)

    IDENTIFICACIÓN (¿QUÉ ES QUÉ?) DESCRIPCIÓN DE COMPONENTES 1. Palanca del acelerador Tubo de soplador superior 2. Interruptor STOP 10. Tubo de soplador inferior 3. Bombeador 11. Boquilla de alta velocidad 4. Palanca del estrangulador 12. Tubo acodado 5. Tapón de combustible 13.
  • Seite 48 ENSAMBLAJE ENSAMBLAJE DE ASPIRADOR Salida del soplador ENSAMBLAJE DE LA BOLSA DE ASPIRADOR 1. Abra el cierre de cremallera de la bolsa de aspirador e inserte el tubo acodado. Resalte 2. Empuje el extremo pequeño del tubo Acanaladura acodado a través de la pequeña abertura de la bolsa.
  • Seite 49 ENSAMBLAJE Salida del 6. Alinee el extremo inclinado del tubo de Zona del seguro soplador aspirador inferior como se indica en la figura. Introduzca el tubo de aspirador inferior en el tubo de aspirador superior hasta que quede firmemente encajado en su interior (7 cm aproximadamente).
  • Seite 50: Funcionamiento

    ENSAMBLAJE AJUSTE DE LA BANDA DEL HOMBRO ADVERTENCIA: Sujete el aparato con el lado del silenciador alejado de su cuerpo y de su ropa mientras se encuentre aspirando los escombros (vea la sección POSICION DE USO). 1. Pasando la banda del hombro sobre su cabeza, colóquela en su hombro izquierdo.
  • Seite 51 FUNCIONAMIENTO instrucciones de seguridad, no llene el aparato combustible absorba una gran cantidad de con combustible. Póngase en contacto con el humedad, lo que provoca la separación del distribuidor autorizado del servicio. aceite y el combustible. PARADA DEL MOTOR SUMINISTRO DE COMBUSTIBLE Suelte el acelerador.
  • Seite 52: Arranque Del Motor En Caliente

    FUNCIONAMIENTO 7. Una vez el motor esté encendido, déjelo funcionar por 10 segundos, luego mueva la palanca del cebador a RUN. Deje la aparato funcionando por otros 30 segundos en RUN AVISO: antes de soltar el acelerador. Si el FULL HALF motor deja de funcionar en la posición de CHOKE...
  • Seite 53: Mantenimiento

    MANTENIMIENTO contrario, podría crear un riesgo de incendio ADVERTENCIA: o producir emanaciones perjudiciales. Evite el contacto 3. Lave el filtro con agua y jabón. con el silenciador a no ser que el motor y el 4. Deje secar el filtro. silenciador se encuentren fríos.
  • Seite 54: Almacenamiento

    MANTENIMIENTO AJUSTE AL CARBURADOR Tornillo de ajuste de la marcha lenta carburador sido ajustado cuidadosamente en la fábrica. Posiblemente sea necesario hacer ajustes si se nota cualquiera de las siguientes condiciones: S El motor no funciona en marcha lenta cuando se suelta el acelerador. Marcha Lenta Deje el motor en marcha lenta.
  • Seite 55: Tabla Diagnostica

    TABLA DIAGNOSTICA ADVERTENCIA: Siempre apague el aparato y desconecte la bujía antes de hac- er cualquiera de las reparaciones recomendadas a continuación que no requieran que la unidad esté en operación. SINTOMA CAUSA SOLUCION 1.Vea las “Instrucciones de Arranque”. El motor no 1.El motor se encuentra se pone en ahogado.
  • Seite 56: Especificaciones De Técnicas

    Comunidad, declara que la soplador/aspirador de hojas modelo McCulloch GBV 325 u a partir del número de serie del año 2012 en adelante (el año se indica claramente en la placa de identificación, seguido del número de serie), cumple con lo establecido por las estipulaciones de la DIRECTIVA DEL CONSEJO: 2006/42/CE, “referente a máquinas”, del 17 de Mayo de 2006.
  • Seite 57 INTRODUZIONE Alla gentile clientela, Grazie per aver scelto un prodotto McCulloch. Siete così entrati a far parte di una storia cominciata molto tempo fa, quando McCulloch Corporation iniziò la produzione di motori durante la Seconda guerra mondiale. Nel 1949, quando McCulloch presentò la prima motosega leggera manovrabile da una sola persona, si verificò...
  • Seite 58: Norme Generali Di Sicurezza

    SIMBOLI UTILIZATTI AVVERTENZA! Il soffiatore Utilizzare benzina verde o benzina può essere pericoloso! L’uso super di qualità e olio per motore a incauto o errato può due tempi. provocare lesioni gravi o mortali AVVERTENZA! La spazzafoglie può Leggere ed essere certi di urtare violentemente oggetti che possono aver capito bene le istruzioni rimbalzare, causando seri danni agli...
  • Seite 59 NORME GENERALI DI SICUREZZA PROGRAMMARE LE OPERAZIONI USARE L’UNITÀ IN CONDIZIONI DI SICUREZZA AVVERTENZA: Questa macchina AVVERTENZA: Spegnere il motore genera un campo elettromagnetico durante il prima di aprire il copertura della presa d’aria funzionamento che in determinate circostanze dell’aspiratore. È necessario spegnere il motore può...
  • Seite 60 Usare solo parti di ricambio consigliate Un sistema antivibrazione non garantisce che dalla McCulloch; l’uso di altre parti di tali problemi vengano evitati. Coloro che ricambio può rendere nulla la garanzia e utilizzano utensili a motore in modo continuato e provocare danni all’unità.
  • Seite 61: Identificazione Delle Parti

    IDENTIFICAZIONE DELLE PARTI IDENTIFICAZIONE DELLE PARTI 1. Levetta del gas Tubo superiore del soffiatore 2. Interruttore STOP 10. Tubo inferiore del soffiatore 3. Pulsante iniettore 11. Ugello ad alta velocità 4. Levetta dell’aria 12. Tubo a gomito 5. Tappo del carburante 13.
  • Seite 62 MONTAGGIO 2. Fissare i tubi girando il bullone in senso Tubo a gomito Nervatura orario. 3. Allineare gli incavi nel tubo soffiatore inferiore con le linguette nel tubo soffiatore superiore. Tubo superiore del soffiatore Apertura della cerniera lampo Tubo inferiore Piccola apertura del soffiatore NOTA:...
  • Seite 63 MONTAGGIO 3. Tenere aperto il copertura di entrata dell’aspiratore finché è stato installato il tubo di aspiratore superiore. Tubo superiore Tubo inferiore dell’aspiratore dell’aspiratore Copertura entrata aspiratore COME CONVERTIRE L’APPARECCHIO DA ASPIRATORE A SOFFIATORE Entrata aspiratore AVVERTENZA: 4. Allineare linguette all’interno Quando si soffiano dell’entrata dell’aspiratore con gli incavi...
  • Seite 64 UTILIZZO POSIZIONE OPERATIVA Dopo aver usato soffiatori ed altre apparecchiature, PULIRE! Smaltire i detriti Protezione dell’udito Protezione dell’udito in recipienti per rifiuti. PRIMA DI AVVIARE IL MOTORE Protezione degli AVVERTENZA: Prima di iniziare, occhi accertarsi di leggere le informazioni sul carburante incluse nelle norme di sicurezza.
  • Seite 65: Arresto Del Motore

    UTILIZZO ARRESTO DEL MOTORE Rilasciare la levetta del gas. Spingere mantenere premuto l’interruttore STOP in posizione STOP finché il motore non si spegne. FULL HALF AVVIO DEL MOTORE CHOKE CHOKE CHOKE PRIMA DI AVVIARE IL MOTORE AVVERTENZA: È NECESSARIO accertarsi che i tubi siano ben fissati prima di usare l’unità.
  • Seite 66 UTILIZZO Sul bordo posteriore della macchina è completamente premuto fino a che il presente un’indicazione di avviamento motore funzioni regolarmente. semplificata che descrive per immagini le 3. Tirare la manopola del dispositivo di singole fasi. avviamento energicamente, ma non più di 6 volte.
  • Seite 67: Sostituzione Della Candela

    MANUTENZIONE SOSTITUZIONE DELLA CANDELA REGOLAZIONI DEL CARBURATORE Sostituire la candela ogni anno per assicurare Il carburatore è stato attentamente regolato in che il motore parta facilmente e funzioni fabbrica. Le regolazioni al regime minimo meglio. Regolare la distanza degli elettrodi possono rendersi necessarie se si nota una della candela a 0,025 poll.
  • Seite 68: Superfici Esterne

    CONSERVAZIONE MOTORE INTERNO AVVERTENZA: Preparare l’unità per S Togliere la candela e versare un cucchiaino di riporla alla fine della stagione o quando non olio per motori a due tempi (raffreddato ad verrà usata per un mese o più. aria) attraverso l’apertura di alloggiamento S Fare raffreddare il motore, quindi bloccare della candela.
  • Seite 69 TABELLA DI SOLUZIONE DEL PROBLEMI AVVERTENZA: Sempre arresti l’unità e disinserisca la spina della scintilla prima dell’effettuazione delle c’è ne delle soluzioni suggerite qui sotto tranne le soluzioni che richiedono il funzionamento dell’unità. PROBLEMI CAUSA SOLUZIONE 1.Motore ingolfato. 1.Vedere le istruzioni di avviamento. Il motore no 2.Serbatoio combustibile vuoto.
  • Seite 70: Dichiarazione Di Conformità

    +46- -36- -146500, in qualità di rappresentanti autorizzati all’interno della Comunità, dichiara che le soffiatore/aspiratore da giardino modello McCulloch GBV 325 a partire dai numeri di serie del 2012 (l’anno viene evidenziato nel marchio di fabbrica ed è seguito da un numero di serie) sono conformi alle disposizioni delle DIRETTIVA DEL CONSIGLIO: del 17 Maggio 2006 “sulle macchine”...
  • Seite 71 INLEIDING Beste klant, Hartelijk dank dat u voor een McCulloch- -product hebt gekozen. U maakt hierdoor deel uit van een verhaal dat lang geleden begon, toen de McCulloch Corporation tijdens de Tweede Wereldoorlog startte met de productie van motoren. In 1949 introduceerde McCulloch zijn eerste lichte eenmanskettingzaag, waarna houtbewerking nooit meer hetzelfde zou zijn.
  • Seite 72: Algemene Veiligheidsinstructies

    IDENTIFICATIE VAN SYMBOLEN WAARSCHUWING! Deze Gebruik ongelode benzine of gelode blower kan gevaarlijk zijn! benzine van hoge kwaliteit en Onzorgvuldig of oneigenlijk tweetaktolie. gebruik kan ernstige of zelfs dodelijke ongelukken tot gevolg hebben. Alvorens de blower te WAARSCHUWING! De bladblazer kan gebruiken dient u de voorwerpen met geweld wegslingeren, gebruikershandleiding te...
  • Seite 73 ALGEMENE VEILIGHEIDSINSTRUCTIES Beweeg langzaam vooruit en achteruit over Vul de brandstoftank niet bij terwijl de motor het materiaal bin het stofzuigen. Duw het loopt of heet. apparaat niet in een hoop afval, aangezien Vermijd morsen van brandstof of olie. dit het apparaat verstopt kan doen raken. Verwijder gemorste brandstof alvorens de Voor het beste resultaat moet de motor te starten.
  • Seite 74: Extra Aandacht

    Gebruik alleen de reserve- -onderdelen die solide objecten zoals bomen, auto’s, muren, enz. De kracht van lucht kan ervoor zorgen door McCulloch worden aanbevolen, het gebruik van andere onderdelen kan uw dat stenen, stof of takken kunnen worden garantie...
  • Seite 75 IDENTIFICATIE (WAT IS WAT?) WAT IS WAT? 1. Gashendel Bovenste blower- -buis 2. STOP- -schakelaar 10. Onderste blower- -buis 3. Ontstekingsknop 11. Hogesnelheids mondstuk 4. Chokehendel 12. Elleboogbuis 5. Brandstofdop 13. Vacuümzak 6. Startkoord 14. Bovenste deel vacuüm- -buis 7. Vacuümhandgreep 15.
  • Seite 76 MONTEREN DE VACUÜM ASSEMBLAGE Uitlaatstuk VACUÜMZAK ASSEMBLEREN 1. Open de ritssluiting op de vacuümzak en breng de elleboogbuis aan. 2. Druk het smalle uiteinde van de elleboogbuis door de kleine opening in de zak. Groef Elleboogbuis 2. Zet de buisen vast door de bout met de klok mee te draaien.
  • Seite 77 MONTEREN Vergrendelgebied Uitlaatstuk Vergren- delgebied Deksel Aanzuigopening 6. Lijn het schuine uiteinde van de onderste vacuüm- -buis uit zoals afgebeeld. Druk de onderste vacuüm- -buis in de bovenste vacuüm- -buis tot de onderste vacuüm- -buis 2. Beweeg handvat stevig vast zit in de bovenste vacuüm- -buis schroevendraaier voorzichtig naar voren om (ongeveer 7 cm).
  • Seite 78 MONTEREN AFSTELLEN VAN SCHOUDERDRAA- GRIEM WAARSCHUWING: Tijdens het vacuümen van afval moet het apparaat zodanig worden vastgehouden zodat de geluiddemper weg van uw lichaam en kleding wijst (zie de BEDIENINGSPOSITIE). 1. Plaat de schouderdraagriem voor de vacuümzak over uw linkerschouder. 2.
  • Seite 79 BEDIENING MOTOR VAN BRANDSTOF UW MOTOR STOPPEN Laat de gashendel los. VOORZIEN Druk de STOP schakelaar in de STOP WAARSCHUWING: stand en houd hem ingedrukt tot de motor Verwijder de afslaat. brandstofdop langzaam bij het opvullen met brandstof. UW MOTOR STARTEN Deze motor is gecertificeerd voor het gebruik VOORDAT U DE MOTOR START van loodvrije benzine.
  • Seite 80 BEDIENING 7. Nadat de motor gestart is moet u hem 10 seconden lang laten draaien, en daarna de choke op CHOKE AF (RUN). Laat het apparaat 30 seconden lang op de CHOKE AF (RUN)- -stand lopen, voordat de FULL HALF regelkleptrekker wordt losgelaten.
  • Seite 81 ONDERHOUD 2. Open het luchtfilter deksel op de knop te WAARSCHUWING: drukken (zie afbeelding). Verwijder het Verwijder de luchtfilter. brandstofdop langzaam bij het opvullen met brandstof. LET OP: U mag het filter niet reinigen in CONTROLEER OP LOSSE benzine ander ontvlambaar oplosmiddel.
  • Seite 82 ONDERHOUD S Draai de schroef voor stationair lopen rechtsom motorsnelheid verhogen als de motor afslaat. S Draai de schroef voor stationair lopen linksom om de motorsnelheid te verlagen. Schroef voor stationaire snelheid Bevestigings- schroeven CARBURATOR AFSTELLEN De carburator is zorgvuldig op de fabriek ingesteld.
  • Seite 83 PROBLEMEN OPLOSSEN- -TABEL WAARSCHUWING: Koppel de bougie los alvorens u onderhoud pleegt, behalve bij het afstellen van de carburator. PROBLEEM REDEN OPLOSSING 1.Motor verzopen. De motor start 1.Zie de “Start Instructies.” 2.Brandstoftank leeg. 2.Tank opvullen met juiste niet. brandstofmengsel. 3.Bougie vonkt niet. 3.Nieuwe bougie inzetten.
  • Seite 84: Verklaring Van Conformiteit

    EC- - verklaring van conformiteit (Alleen van toepassing binnen Europa) De ondergetekende, Husqvarna AB, SE- - 561 82 Huskvarna, Zweden, Telefoon: +46- -36- -146500, verklaart hierbij dat de model tuinbladblazer McCulloch GBV 325 met een serienummer uit 2012 en verder (het jaar met daaropvolgend het serienummer wordt duidelijk...
  • Seite 85 -- 85 --...
  • Seite 86 -- 86 --...
  • Seite 87 -- 87 --...
  • Seite 88 Original instructions Instrucciones originales Instructions d’origine Istruzioni originali Originele instructies Originalanweisungen...

Inhaltsverzeichnis