Watercool MO-RA3 Montageanleitung
Inhaltsverzeichnis
MO-RA3 Radiator
Montageanleitung /
Assembly Instructions
1
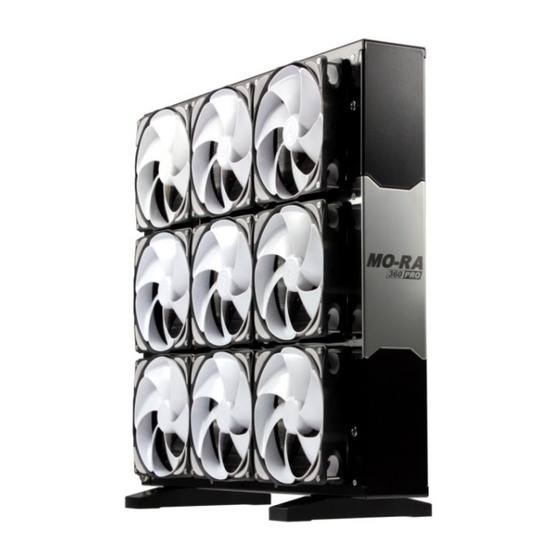
1. Beschreibung
Der
MO-RA3
ist
tauscher, konzipiert zur Abfuhr von großen
Wärme-mengen. In Verbindung mit langsam
drehenden Lüftern entfaltet der MO-RA3 sein
volles Potential.
Eine farbige Montageanleitung im PDF-
Format finden Sie im Servicebereich unserer
Homepage unter www.watercool.de
Die Installation erfolgt auf eigene Gefahr.
Das Nichtbeachten der Montageanleitung
kann das Produkt beschädigen. Die Firma
Watercool übernimmt keinerlei Haftung bei
Beschädigungen an der Hardware.
ein
High-End-Wärme-
1. Description
The MO-RA3 is a high-end heat exchanger
designed to dissipate large quantities of heat.
The MO-RA3 unfolds its full potential in
combination
with
You
will
find
instructions in .pdf format in the service
section of our homepage www.watercool.de
Installation at your own risk. Disregard of
the installation instructions might damage the
radiator. Watercool will not assume any liability
for damage inflicted to the hardware.
low-rpm
fans.
coloured
installation
Inhaltsverzeichnis

Inhaltszusammenfassung für Watercool MO-RA3
- Seite 1 Assembly Instructions 1. Beschreibung 1. Description MO-RA3 High-End-Wärme- The MO-RA3 is a high-end heat exchanger tauscher, konzipiert zur Abfuhr von großen designed to dissipate large quantities of heat. Wärme-mengen. In Verbindung mit langsam The MO-RA3 unfolds its full potential in drehenden Lüftern entfaltet der MO-RA3 sein...
-
Seite 2: Technische Daten
Es ist möglich, den MO-RA3 passiv (ohne It is possible to operate the MO-RA3 passive Lüfter) sowie aktiv (mit Lüfter) zu betreiben. (without fans) as well as active (with fans). In Beim passiven Betrieb sollte die abzuführende... -
Seite 3: Montage Der Lüfter
RA3 liegen 30 mm lange Schrauben für screws for fans of 25 mm height. Lüfter mit einer Gesamthöhe von 25 mm bei. To convert the MO-RA3 360 to a different fan Um den MO-RA3 360 auf eine andere size, the pre-installed fan bracket has to be Lüftergröße umzurüsten muss die bereits... -
Seite 4: Vorbereitung Für 120Mm Lüfter
Haltelöchern ziehen. Der 180mm Lüftersteg the 180 mm fan bracket is fitted to the central wird dann auf dieselbe Weise in die mittleren mounting holes using the same method. Löcher geklemmt. Zusätzlich müssen die vier Additionally, the four fan mounts have to be Lüfterhalterungen entfernt werden. -
Seite 5: Montage Der Standfüße
(sold separately) erhältlich) The optionally offered feet enable upright, Mit Hilfe der optional angebotenen Standfüße freestanding operation of the MO-RA3 (see the kann der MO-RA3 auch stehend (wie in der following picture). The feet are installed using Abbildung) betrieben werden. - Seite 6 (M4x20) allow (M4x20) kann der MO-RA3 an eine gerade installation of the MO-RA3 on a flat surface Fläche (z.B Gehäusewand) montiert werden. (e.g. a PC case). On the sides of the heat An den Seiten des Radiators befinden sich exchanger you may find four M4 threads.
- Seite 7 In die M4 Gewinde des MO-RA3 dürfen Only screws with a maximum thread nur Schrauben mit einer Gewindelänge von length of 8 mm may be screwed into the M4 max. 8mm geschraubt werden threads of the MO-RA3. 6. Tipps zur Entlüftung 6.
-
Seite 8: Überprüfen Der Montage Und Dichtheitstest
kann entsprechenden Bedienungs- anleitungen entnommen werden. 7. Überprüfen der Montage und 7. Test of installation and leak Dichtheitstest tightness Nach Abschluss Montage eine After installation, a check and test run must be Überprüfung und Probelauf unerlässlich. Ein performed! tightness test should Dichtheitstest sollte...