Inhaltsverzeichnis
Werbung
Verfügbare Sprachen
Verfügbare Sprachen
Quicklinks
Werbung
Kapitel
Inhaltsverzeichnis

Verwandte Anleitungen für Schmidt Bender 1,1-4x20 PM ShortDot

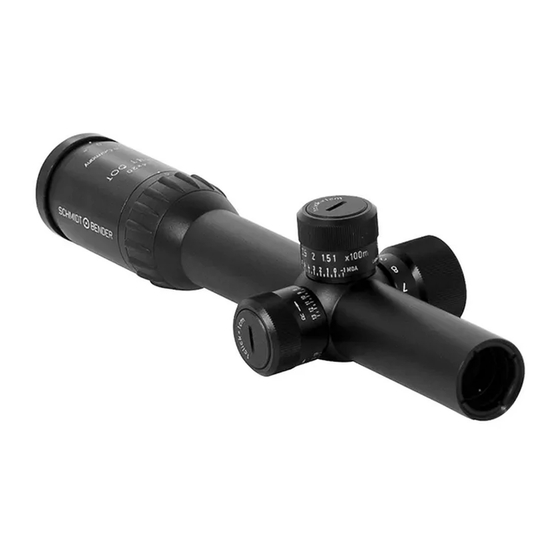
Inhaltszusammenfassung für Schmidt Bender 1,1-4x20 PM ShortDot
- Seite 1 PM-Modelle Bedienungsanleitung Operating Instructions Mode d´emploi...
-
Seite 7: Inhaltsverzeichnis
1. Sicherheitshinweise ........2 2. Bedienung ......... 2 2.1 Einstellen der Bildschärfe mit dem Dioptrieausgleich am Okular 2 2.2 Höhen- und Seitenschnellverstellung . -
Seite 8: Sicherheitshinweise
Schmidt & Bender gratuliert Ihnen zum Erwerb Ihres neuen PM-Zielfernrohres Zielfernrohre der Modellreihe PM wurden für die besonderen Anforderungen des schnellen Schießens auf kurze Distanzen sowie das präzise Schießen auf mittlere Distanzen entwickelt. Sie dienen in Qualität und Funktion, oftmals ausgesprochen schwieriger und verantwortungsvoller Aufgaben. -
Seite 9: Ermitteln Der Individuellen Kompensationswerte
Zum Verdrehen der Schnellverstellung heben Sie die Stellkappe leicht gegen eine Federkraft an und drehen Sie in die gewünschte Position. Beim Loslassen der Stellkappe wird diese durch die Feder wieder herabgedrückt und arretiert. 2.4 Ermitteln der individuellen Kompensationswerte Durch Schießen auf die entsprechenden Entfernungen und Eintragen der jeweiligen Rastwerte in eine Tabelle können Sie Ihre individuelle Geschoßbahnkompensation selbst erstellen. -
Seite 10: Bedienung Des Arretierbaren Beleuchtungsturms
dem Einsatz Ihr Leuchtabsehen wieder auszuschalten. Sollte Ihnen dies trotzdem passieren, schaltet ein Mikrochip die Beleuchtung nach 6 h auto- matisch ab. 2.7 Bedienung des arretierbaren Beleuchtungsturms Bei dieser Variante der Beleuchtungseinstellung ist die jeweils ein- gestellte Rastposition gegen unbeabsichtigtes Verdrehen gesichert (Abbildung 3). -
Seite 11: Vormontage Und Vorbereitung Zum Einschießen
Um den Höhenverstellweg in vollem Umfang nutzbar zu machen ist es bei den PM-Modellen unerlässlich, bereits werksseitig das Absehen außerhalb der optisch/mechanischen Mitte zu justieren (Abbildung 7). Der Büchsenmacher ist deshalb gefordert, den von uns am Zielfernrohr voreingestellten Wert an der Zielfernrohrmontage anzupassen. Das bedeutet, das Zielfernrohr muss mit entsprechender Vorneigung auf die Waffe montiert werden (Abbildung 8). -
Seite 12: Demontage Und Montage Der Stellkappen Bei Arretierbaren Höhen- Und Seitenelevationen
Verwahren Sie während des Einschießens alle entfernten Bauteile an einem sauberen Ort. Schmutz an den Bauteilen kann die Funktion beeinträchtigen oder zu Undichtigkeiten führen. Sie können die Waffe nun wie in Punkt 3.2.3 beschrieben einschießen und anschließend diesen Abschnitt mit der Montage der Stellkappe fortsetzen. Montage der Stellkappe nach dem Einschießen Setzen Sie die Stellkappe auf den Stellturm. -
Seite 13: Wartung Und Pflege
Zielfernrohr an. Richten Sie mithilfe der Waffenauflage die Waffe so aus, dass das Absehen erneut auf der Zielmarke liegt (Abbildung 11). Bei ruhig liegender Waffe drehen Sie nun mithilfe einer Münze die Adapter der Höhen- bzw. Seitenelevation bis das Absehen auf dem Einschussloch liegt (Abbildung 12). - Seite 14 1. Safety instructions ........9 2. The scope in use ........9 2.1 Adjusting the image focus with the diopter adjustment of the eyepiece .
-
Seite 15: Safety Instructions
Schmidt & Bender congratulates you for purchasing your new PM-scope The scopes of the Schmidt & Bender PM series are designed to meet the uni- que challenges of quick shooting at short and middle distances. They serve with high quality and functionality in extremely difficult und responsible actions. -
Seite 16: Determining Individual Values For Bullet Drop Compensation
2.4 Determining individual values for bullet drop compensation By shooting at varying distances and recording the corresponding click values in a table you can make your own individual bullet drop compensation charts. In contrast to the common technique of calibrating adjustment turrets to ”predetermined”... -
Seite 17: Using The Locking Illumination Control
2.7 Using the Locking illumination control In this variation of the illumination turret the turret is protected in the chosen setting against unintentional movement of the turret (see picture 3). To rotate the turret pull the turret against the spring force and rotate it to the desired position. -
Seite 18: Preliminary Mounting And Preparation For Sighting In
As a consequence the gunsmith is obliged to consider the preset position of the reticle in the elevation range when mounting the scope to the firearm (see picture 8). With this setup the full elevation range is usable in one direction. Determining the correct forward angle The necessary forward angle is depending on the used type of elevation adjustment. -
Seite 19: Sighting In Scope And Rifle
Removing the turret ring Unlock the turret cap [1] using a coin and remove it. Remove the spring [2] and the turret ring. In case the inner click ring [4] was not removed toget- her with the turret ring remove it as well. The point of impact can now be changed by rotating the adapter [5] using a coin. - Seite 20 before cleaning them, this helps with the cleaning process. Coarse im- purities can either be cleaned using the cleaning liquid included in the cleaning kit or with lukewarm, surface tension removed water. Avoid dry rubbing on the outside optical surfaces because this can harm the valuable coatings.
- Seite 21 1. Conseils de sécurité ....... . . 16 2. Utilisation de la lunette ......16 2.1 Réglage de dioptrie sur l'oculaire .
-
Seite 22: Conseils De Sécurité
Félicitation pour l’achat de votre nouvelle lunette de visée de type «PM» Les lunettes de visée de la série PM de Schmidt & Bender sont conçues pour atteindre les exigences requises pour le tir rapide sur des petites et moyennes distances. -
Seite 23: Vérouillage Des Tourelles Verticale Et Horizontale
2.3 Vérouillage des tourelles verticale et horizontale Dans cette variation des réglages vertical et horizontal, les tourelles sont «verrouillées» dans la position choisie, protégées des mouve- ments non-souhaités des tourelles (voir fig. 10). Pour faire pivoter une tourelle verrouillée, tirez vers le haut la tourelle à contre sens de la force du ressort, dans la direction désirée. -
Seite 24: Utilisation Du Réglage Lumineux Vérouillable
léger tour du réglage lumineux, à mi-chemin entre le réglage pré- cédant et le prochain réglage (voir fig 2). Dans cette position intermédiaire, les clics sont moins accessibles et l’interrupteur est coupé (mode stand by). Immédiatement avant de tirer, l’éclairage peut être remis dans sa position précédente, et le réticule s’éclairera dans l’intensité... -
Seite 25: Réglage Vertical Et De L'angle Avant
3.1 Réglage vertical et de l'angle avant Les lunettes de visée PM sont conçues pour le tir à courte et moyenne dis- tance. Dans cette situation, l’ajustement vertical est utilisé pour compenser le trajet de la balle. Dans les lunettes de chasse, le réticule est généralement centré mécanique- ment et au niveau de l’optique, afin d’obtenir le même réglage symétrique dans toutes les directions et de rendre le montage de la lunette sur l’arme plus facile (voir fig. -
Seite 26: Assemblage Et Désassemblage Des Anneaux De Tourelle Sur Les Tourelles Vérouillables
Enlèvement de l’anneau de la tourelle Déverrouillez le cache tourelle (1) en utilisant une pièce de monnaie. Enlevez l’anneau (2). Le point d’impact peut maintenant être changé en faisant une rotation de l’adaptateur (5) en utilisant une pièce de monnaie. Stockez toutes les pièces enlevées dans un endroit propre, lors de la visée. -
Seite 27: Maintenance Et Entretien
Si possible, utilisez un repère ajustable pour l’arme. Placez la lunette sur le repère, visez le centre de la cible et tirez un coup. Analysez le point d’im- pact à travers la lunette. Si nécessaire, réajustez la lunette de manière à ce que le réticule soit pointé au centre de la cible de nouveau (voir figure 11). -
Seite 28: Abmaßtabelle Der Pm-Zielfernrohre
5. Abmaße der PM-Zielfernrohre/Dimensions of the PM scopes/Dimensions des lunettes PM Modell Model Modèle 1,1 – 4 x 20 PM ShortDot 1,5 – 6x 20 PM FlashDot... -
Seite 29: Technische Daten Pm-Zielfernrohre
6. Technische Daten / Technical data of PM scopes/ Données techniques des lunettes PM Modell 1,1-4x20 PM 1,5-6x20 PM Model ShortDot FlashDot Modèle Vergrößerung Magnification 1,1 x – 4 x 1,5 x – 6 x Grossissement Sehfeld (m/100m) Field of view (m/100m) 32 –... - Seite 30 Einheit Dimension Dimension cm/100m 100,00 10,00 2,50 15,00 10,00 10,00 2,50 1,25 in/100yd 36,00 3,60 0,90 5,40 3,60 3,60 0,90 0,45 MilDot Einheit Dimension Dimension cm/100m 100,00 6,00 0,68 2,00 10,00 10,00 in/100yd 36,00 2,16 0,24 0,72 3,60 3,60...
-
Seite 31: Garantie- Und Werksbescheinigung
Garantie-und Werksbescheinigung Die TÜV Cert-Zertifizierungsstelle der TÜV Anlagentechnik GmbH (Unter- nehmensgruppe TÜV Rheinland Berlin Brandenburg) bescheinigt gemäß TÜV Cert-Verfahren, dass das Unternehmen Schmidt & Bender GmbH & Co. KG, Biebertal, Deutschland für den Geltungsbereich Konstruktion, Herstellung, Vertrieb und Service feinmechanisch-optischer Geräte Hauptprodukt: Zielfernrohre, ein Qualitätsmanagementsystem eingeführt hat und an- wendet;... -
Seite 32: Warranty Certificate
Warranty Certificate We hereby certify that our Quality Management System has been approved by Unternehmensgruppe TÜV Rheinland Berlin Brandenburg to the following Quality Management Standard: The TÜV Cert Certification Body of TÜV Anlagentechnik GmbH (Unternehmensgruppe TÜV Rheinland Berlin Brandenburg) certifies in accordance with TÜV Cert procedures that Schmidt &... -
Seite 33: Certificat De Garantie
Certificat de garantie Nous certifions par la présente que notre système de Management de la qualité a été approuvé par le groupe Unternehmensgruppe TÜV Rheinland Berlin Brandenburg selon le standard de management par la qualité du: Bureau TÜV Cert de Certification de TÜV Anlagentechnik GmbH (Unter- nehmensgruppe TÜV Rheinland Berlin Brandenburg) certifie en accord avec les procédures TÜV Cert que Schmidt &... - Seite 34 Schmidt & Bender GmbH & Co. KG • Am Grossacker 42 • D-35444 Biebertal Tel. +49 (0) 64 09-81 15-0 • Fax +49 (0) 64 09-81 15-11 info@schmidt-bender.de • www.schmidt-bender.de...