KNEX Education 77053 Handbuch
Inhaltsverzeichnis
Quicklinks
Education®
STEM Building Solution
La Solution de STEM
SIMPLE AND COMPOUND
MACHINES
MACHINES SIMPLES ET
COMPOSÉS
16
Models!
Modéles!
education.com
9
+
77053
AGE/ÂGE
ALTER/LEEFTIJD
WARNING:
CHOKING HAZARD - Small parts.
Not for children under 3 years.
ATTENTION :
RISQUE D'ÉTOUFFEMENT. Pièces de petite taille.
Ne convient pas aux enfants de moins de 3 ans.
L
E
Z
‡
C
B
A
E
D
Download the Educational Guide
www.knex.com/eduproducts/77053
Télécharger Guide Pédagogique
Download die Pädagogischer Führer
Downloaden Onderwijs Gids
E
L
X
S
SCIENCE
LA SCIENCE
L
E
T
E
M
TECHNOLOGY
ENGINEERING
MATH
TECHNOLOGIE
INGÉNIERIE
MATHÉMATIQUES
Inhaltsverzeichnis

Inhaltszusammenfassung für KNEX Education 77053
- Seite 1 77053 AGE/ÂGE ALTER/LEEFTIJD WARNING: Download the Educational Guide CHOKING HAZARD - Small parts. www.knex.com/eduproducts/77053 Not for children under 3 years. Télécharger Guide Pédagogique ATTENTION : Download die Pädagogischer Führer Downloaden Onderwijs Gids RISQUE D’ÉTOUFFEMENT. Pièces de petite taille. Ne convient pas aux enfants de moins de 3 ans.
-
Seite 2: Inhaltsverzeichnis
(English) Levers/Leviers/Sonnenaufgänge/Hefboom WARNING: CHOKING HAZARD – Small Parts. Not for children under 3 years ....5 Hammer/Marteau/Hammer/Hamer WARNING: Not suitable for children under 18 months. Long cord/Long chain. Strangulation hazard. - Seite 3 Lis les instructions attentivement et positionne exactly as they are shown. les horizontalement ou verticalement, en suivant exactement les illustrations. Educational Guide Guide Pédagogique Download the Educational Guide - www.knex.com/eduproducts/77053 Télécharger Guide Pédagogique - www.knex.com/eduproducts/77053...
- Seite 4 ‘klik’ hoort. Let goed op de instructies en plaats und positioniere die Verbindungsstücke genau ze horizontaal en verticaal, precies zoals wordt wie in der Abbildung. getoond. Pädagogischer Führer Onderwijs Gids Download die Pädagogischer Führer - www.knex.com/eduproducts/77053 Downloaden Onderwijs Gids - www.knex.com/eduproducts/77053...
-
Seite 5: Levers/Leviers/Sonnenaufgänge/Hefboom Hammer/Marteau/Hammer/Hamer
Hammer Hammer Marteau Hamer ©2014 K’NEX Limited Partnership Group and its licensors. All rights reserved. © 2014 K’NEX Limited Partnership Group et ses concédants de licence. Tous droits réservés. ©2014 K’NEX-Limited Partnership Group und deren Lizenzgeber. Alle Rechte vorbehalten. ©2014 K’NEX Commanditaire vennootschap Groep en haar licentiegevers. -
Seite 6: Balance/Balance/Ausgewogenheit/Balans
Balance Ausgewogenheit Balance Balans © 2014 K’NEX Limited Partnership Group and its licensors. All rights reserved. © 2014 K’NEX Limited Partnership Group et ses concédants de licence. Tous droits réservés. ©2014 K’NEX-Limited Partnership Group und deren Lizenzgeber. Alle Rechte vorbehalten. ©2014 K’NEX Commanditaire vennootschap Groep en haar licentiegevers. - Seite 7 Education ™...
- Seite 8 Education ™...
- Seite 9 (EN) Use a book to hold the model in place. (FR) Utilise un livre pour maintenir le modèle à plat. (DE) Verwenden Sie ein Buch, um das Modell in Position zu halten. (NL) Een boek voor het model. Education ™...
-
Seite 10: Nutcracker/Casse-Noix/Nussknacker/Notekraker
Nutcracker Nussknacker Casse-noix Notekraker © 2014 K’NEX Limited Partnership Group and its licensors. All rights reserved. © 2014 K’NEX Limited Partnership Group et ses concédants de licence. Tous droits réservés. ©2014 K’NEX-Limited Partnership Group und deren Lizenzgeber. Alle Rechte vorbehalten. ©2014 K’NEX Commanditaire vennootschap Groep en haar licentiegevers. -
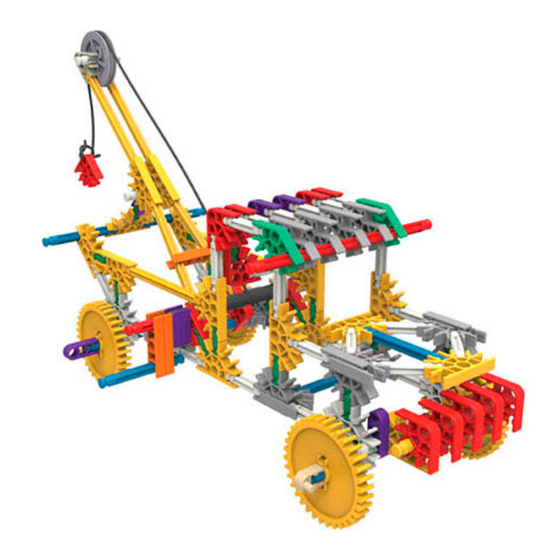
Seite 11: Tow Truck/Dépanneuse/Abschleppfahrzeug/Takelwagen
Tow Truck Abschleppfahrzeug Dépanneuse Takelwagen ©2014 K’NEX Limited Partnership Group and its licensors. All rights reserved. © 2014 K’NEX Limited Partnership Group et ses concédants de licence. Tous droits réservés. ©2014 K’NEX-Limited Partnership Group und deren Lizenzgeber. Alle Rechte vorbehalten. ©2014 K’NEX Commanditaire vennootschap Groep en haar licentiegevers. - Seite 12 Education ™...
- Seite 13 (EN) First attach the string to the red rod with the tan connector. Then turn the crank and wind the string. (FR) Commence par attacher le fil à la tige rouge avec le connecteur beige. Puis tourne la manivelle et enroule le fil. (DE) Befestigen Sie zuerst die Schnur in der roten Stange mit dem beigen Verbindungsstück.
-
Seite 14: Block & Tackle/Palan À Moufles/Block Und Gerät/Blok En Aan Te Pakken
Block & Tackle Block und Gerät Palan à Moufles Blok en aan te pakken © 2014 K’NEX Limited Partnership Group and its licensors. All rights reserved. © 2014 K’NEX Limited Partnership Group et ses concédants de licence. Tous droits réservés. ©2014 K’NEX-Limited Partnership Group und deren Lizenzgeber. - Seite 15 Education ™...
- Seite 16 (EN) Use a book to hold the model in place. (FR) Utilise un livre pour maintenir le modèle à plat. (DE) Verwenden Sie ein Buch, um das Modell in Position zu halten. (NL) Een boek voor het model. (EN) Tie the string to the purple connector. Put it through the hole in yellow connector.
- Seite 17 (EN) Do not cut the string. (FR) Ne coupe pas le fil. (DE) Schneiden Sie die Schnur nicht durch. (NL) Knip niet de string. (EN) Put the string back through hole of the yellow connector. Put the string through the hole of the other purple connector. Pull the string to operate model.
-
Seite 18: Elevator/Releveur/Aufzug/Lift
Elevator Aufzug Releveur Lift © 2014 K’NEX Limited Partnership Group and its licensors. All rights reserved. © 2014 K’NEX Limited Partnership Group et ses concédants de licence. Tous droits réservés. ©2014 K’NEX-Limited Partnership Group und deren Lizenzgeber. Alle Rechte vorbehalten. ©2014 K’NEX Commanditaire vennootschap Groep en haar licentiegevers. - Seite 19 Education ™...
- Seite 20 Education ™...
- Seite 21 (EN) Use a blue rod to pin the string into the white connectors. Then loop it over the top back pulley. (FR) Utilise une tige bleu pour enfiler le fil dans les connecteurs blanche. Puis fais passer le fil en boucle au-dessus de la poulie arrière.
- Seite 22 (EN) Do not cut the string. ( FR) Ne coupe pas le fil. (DE) Schneiden Sie die Schnur nicht durch. (EN) Loop the string over the front (NL) Knip niet de string. top pulley, and then under the bottom pulley. ( FR) Fais passer le fil en boucle au-dessus de la poulie avant, puis au-dessous...
-
Seite 23: Schroevedraaier
Screwdriver Schraubendreher Tournevis Schroevedraaier © 2014 K’NEX Limited Partnership Group and its licensors. All rights reserved. © 2014 K’NEX Limited Partnership Group et ses concédants de licence. Tous droits réservés. ©2014 K’NEX-Limited Partnership Group und deren Lizenzgeber. Alle Rechte vorbehalten. ©2014 K’NEX Commanditaire vennootschap Groep en haar licentiegevers. -
Seite 24: Paddle Wheel Boat/Paddle Bateau De Roue
(EN) CAUTION: Rubber Bands can cause injury from snap-back, breaking, or loss of control. While assembling Paddle Wheel Boat Schaufelrad Boot models shown in instructions, hold rubber band tightly, and do not overstretch. Use Rubber Bands only as shown in these instructions. DO NOT USE FRAYED OR TORN RUBBER BANDS. CAUTION: Keep Rubber Paddle Bateau de Roue Scheprad Boot Bands away from face and eyes. - Seite 26 (EN) Loop one end of the rubber band over the purple connector in the center of the axle as shown. Turn the paddle wheels toward you so that the rubber band completely winds around the axle once. Release the paddle wheel boat and observe what happens. Repeat, increasing the number of times the rubber band wraps around the axle with each trial.
-
Seite 27: Sawmill/Scierie/Sägewerk/Zaagmolen
Sawmill Sägewerk Scierie Zaagmolen © 2014 K’NEX Limited Partnership Group and its licensors. All rights reserved. © 2014 K’NEX Limited Partnership Group et ses concédants de licence. Tous droits réservés. ©2014 K’NEX-Limited Partnership Group und deren Lizenzgeber. Alle Rechte vorbehalten. ©2014 K’NEX Commanditaire vennootschap Groep en haar licentiegevers. - Seite 28 Education ™...
- Seite 29 Education ™...
-
Seite 30: Dump Truck/Camion À Benne/Kipper/Kiepauto
Dump Truck Kipper Camion à Benne Kiepauto © 2014 K’NEX Limited Partnership Group and its licensors. All rights reserved. © 2014 K’NEX Limited Partnership Group et ses concédants de licence. Tous droits réservés. ©2014 K’NEX-Limited Partnership Group und deren Lizenzgeber. Alle Rechte vorbehalten. ©2014 K’NEX Commanditaire vennootschap Groep en haar licentiegevers. - Seite 31 Education ™...
-
Seite 32: Archimedes' Screw/Vis D'archimède/Schraube Von Archimede/Schroef Van Archimedes
Archimedes’ Screw Schraube von Archimede Vis d’Archimède Schroef van Archimedes ©2014 K’NEX Limited Partnership Group and its licensors. All rights reserved. © 2014 K’NEX Limited Partnership Group et ses concédants de licence. Tous droits réservés. ©2014 K’NEX-Limited Partnership Group und deren Lizenzgeber. Alle Rechte vorbehalten. ©2014 K’NEX Commanditaire vennootschap Groep en haar licentiegevers. - Seite 33 Education ™...
- Seite 34 (EN) Use a Ping-Pong ball (not included) or a ball of similar size. (FR) Utilise une balle de ping-pong (non jointe) ou une balle de taille similaire. (DE) Verwenden Sie einen Ping-Pong-Ball (nicht enthalten) oder eine Kugel von ähnlicher Größe. (NL) Gebruik een Ping-Pong bal (niet inbegrepen) of een bal van vergelijkbare grootte.
-
Seite 35: Conveyor Belt/Bande Transporteuse/Förderband/Transportband
Conveyor Belt Förderband Bande Transporteuse Transportband ©2014 K’NEX Limited Partnership Group and its licensors. All rights reserved. © 2014 K’NEX Limited Partnership Group et ses concédants de licence. Tous droits réservés. ©2014 K’NEX-Limited Partnership Group und deren Lizenzgeber. Alle Rechte vorbehalten. - Seite 36 (EN) Attach all the chain links in the same direction. (FR) Fixez tous les maillons de la chaîne dans la même direction. (DE) Installieren Sie alle Kettenglieder in der gleichen Orientierung. (NL) Bevestig alle schakels in dezelfde richting. Education ™...
- Seite 37 Education ™...
-
Seite 38: Rack & Pinion/Engrenage À Crémaillère
Rack and Pinion Zahnstangen und Ritzel Engrenage à Crémaillère Rondsel en tandheugel ©2014 K’NEX Limited Partnership Group and its licensors. All rights reserved. © 2014 K’NEX Limited Partnership Group et ses concédants de licence. Tous droits réservés. ©2014 K’NEX-Limited Partnership Group und deren Lizenzgeber. Alle Rechte vorbehalten. ©2014 K’NEX Commanditaire vennootschap Groep en haar licentiegevers. -
Seite 40: Crank Fan/Ventilateur/Lüfter/Zwengel Ventilator
Crank Fan Lüfter Ventilateur Zwengel ventilator © 2014 K’NEX Limited Partnership Group and its licensors. All rights reserved. © 2014 K’NEX Limited Partnership Group et ses concédants de licence. Tous droits réservés. ©2014 K’NEX-Limited Partnership Group und deren Lizenzgeber. Alle Rechte vorbehalten. ©2014 K’NEX Commanditaire vennootschap Groep en haar licentiegevers. - Seite 41 (EN) Make sure the 2 gears mesh. (FR) Surveille l’engrènement. (DE) Sicherstellen, dass die 2 Zahnräder verzahnen. (NL) Zorg ervoor dat de 2 tandwielen aangrijpen. Education ™...
- Seite 42 (EN) Pull off the fan blades and the yellow (DE) Ziehen Sie die Lüfterblätter und den connector to install a different gear set. gelben Stecker an einen anderen Radsatz installieren. (FR) Retirez les pales du ventilateur et le connecteur jaune à installer un (NL) Trek aan de ventilatorschoepen af en ensemble d’engrenage différent.
-
Seite 43: Carousel/Carrousel/Karussell/Draaimolen
Carousel Karussell Carrousel Draaimolen (EN) This model spins slowly. (FR) Rotations lentement. (DE) Dieses Modell dreht sich langsam. (NL) Dit model draait langzaam. (EN) Make sure the 2 gears mesh. (FR) Surveille l’engrènement. (DE) Sicherstellen, dass die 2 Zahnräder verzahnen. (NL) Zorg ervoor dat de 2 tandwielen aangrijpen. - Seite 44 (EN) This model spins fast. (FR) Ce modèle tourne rapidement. (DE) Dieses Modell dreht sich schnell. (NL) Dit model draait snel. (EN) Make sure the 2 gears mesh. (FR) Surveille l’engrènement. (DE) Sicherstellen, dass die 2 Zahnräder verzahnen. (NL) Zorg ervoor dat de 2 tandwielen aangrijpen.
- Seite 46 Education ™...
- Seite 47 Education ™...
-
Seite 48: Transmission/Transmission/Getriebe/Transmissie
Transmission Getriebe Transmission Transmissie © 2014 K’NEX Limited Partnership Group and its licensors. All rights reserved. © 2014 K’NEX Limited Partnership Group et ses concédants de licence. Tous droits réservés. ©2014 K’NEX-Limited Partnership Group und deren Lizenzgeber. Alle Rechte vorbehalten. ©2014 K’NEX Commanditaire vennootschap Groep en haar licentiegevers. - Seite 49 Education ™...
- Seite 50 Education ™...
- Seite 51 (EN) Neutral (EN) 1. Position the yellow rod between the 2 orange connectors for (FR) Neutre neutral. 2. Turn the long gray rod with one hand to see the result. (DE) Leerlauf (FR) 1. Placer la tige jaune entre les connecteurs orange sombres pour (NL) Neutraal neutre.
- Seite 52 Data Harvest Group Ltd. 1 Eden Court, Leighton Buzzard, Bedfordshire, LU7 4FY United Kingdom 17 70 5 3 -V 3 - 0 7/14 P.O. Box 700, Hatfield, PA 19440-0700 phone/téléphone : 1525 373 666 1-888-ABC-KNEX (USA /Canada/EE.UU.) www.knexeducation.com abcknex@knex.com facebook.com/buildknex...