Herunterladen Inhalt Inhalt Diese Seite drucken
Zehnder ComfoConnect KNX C Betriebsanleitung
Vorschau ausblenden Andere Handbücher für ComfoConnect KNX C:
Inhaltsverzeichnis

Werbung

Verfügbare Sprachen
  • DE

Verfügbare Sprachen

  • DEUTSCH, seite 22
ComfoConnect KNX C
Handleiding
Manual
Betriebsanleitung
Manuel
Manuale
Instrukcja obsługi
Heating
Cooling
Fresh Air
Clean Air

Werbung

Inhaltsverzeichnis

Fehlerbehebung

loading

Inhaltszusammenfassung für Zehnder ComfoConnect KNX C

  • Seite 1 ComfoConnect KNX C Handleiding Manual Betriebsanleitung Manuel Manuale Instrukcja obsługi Heating Cooling Fresh Air Clean Air...
  • Seite 2: Voorwoord

    "het apparaat". Het apparaat wordt voortdurend of verwijderd van het apparaat. verder ontwikkeld en verbeterd. Hierdoor bestaat de mogelijkheid dat het apparaat enigszins afwijkt van de omschrijvingen. In de documenten van Zehnder komen de volgende pictogrammen voor: Symbool Betekenis Punt van aandacht.
  • Seite 3: Inhaltsverzeichnis

    Inhoudsopgave Voorwoord ................................... 2 Inleiding ..................................4 Gebruik van de ComfoConnect KNX C ........................... 4 2.1 Led-activiteit tijdens normaal gebruik ........................5 2.2 Reset ..................................5 2.3 Fabrieksinstellingen resetten ........................... 5 2.4 Firmware update ..............................5 Garantie ..................................5 Technische specificaties ............................... 6 Installatie ..................................
  • Seite 4: Inleiding

    Naverwarmer Verbindt ComfoNet met het internet en de ComfoControl App voor het monitoren van de ventilatie-unit en firmware ComfoControl App updates van de ventilatie-unit en ComfoConnect KNX C. ComfoSwitch C ComfoConnect KNX C ComfoCool Q Er kan slechts één ComfoConnect KNX C worden...
  • Seite 5: Led-Activiteit Tijdens Normaal Gebruik

    Zehnder ComfoControl van de Apple App Store of Google Play Store voor het uitvoeren van een firmware update. Volg de instructies op de app voor het updaten van de ComfoConnect KNX C. De firmware kan niet via KNX worden geüpdatet. NL - 5...
  • Seite 6: Technische Specificaties

    4 Technische specificaties Elektrisch Nominale ingangsspanning +12 V DC Ingangsspanningsbereik +12 V DC ± 20% Nominale ingangsstroom 0,02 A Elektrische scheiding 1500 V AC (60 sec) Nominaal stroomverbruik (ComfoNet) 0,25 W Maximaal stroomverbruik (ComfoNet) 0,5 W Maximale doorlusstroom 3,20 A Nominale stroom KNX bus 12 mA Omgeving...
  • Seite 7: Installatie

    2. Download de Zehnder KNX bibliotheek van de plaatselijke veiligheidsvoorschriften in acht. website van uw land. Zie achterpagina. 2. Monteer de ComfoConnect KNX C op de wand, bij 3. Zet de ventilatie-unit verder in bedrijf zoals voorkeur dicht bij de ventilatie-unit.
  • Seite 8: Groepsobjecten

    6.1 Groepsobjecten De groepsobjecten die zijn aangeduid met ‘(set)’ zijn write-only objecten voor de besturing van de ComfoConnect KNX C en/of de ventilatie-unit. Alle andere objecten (zonder ‘(set)’) zijn read-only objecten die de huidige waarde lezen. Standaard worden de write-only objecten geflagd met C-WTUI en de read-only objecten met CR-T--. In het geval van een I (Read On Init) flag, ook de T (Transmit) flag instellen.
  • Seite 9 8 rooms) Dit object moet worden verbonden met een KNX sensor die in een slaapkamer is bevestigd. Afhankelijk van het gemeten CO 2 -niveau zorgt de ComfoConnect KNX C ervoor dat de ventilatie- CO 2 sensor bedroom (set) unit een minimale ventilatiestand heeft.
  • Seite 10: Parameters

    Voor groepsobjecten die niet in onderstaande tabel zijn weergegeven, maakt het niet uit of de Automatische of Handmatige bediening is ingeschakeld. Het wel of niet inschakelen van de Automatische bediening kan niet op de ventilatie-unit worden geconfigureerd; de ComfoConnect KNX C doet eventuele wijzigingen teniet.
  • Seite 11: Onderhoud

    De lampjes van de ComfoConnect KNX C branden niet na een firmware-update. Controleer of de ComfoConnect KNX C stroom heeft. Voer een volledige reset naar fabrieksinstellingen uit als het probleem aanhoudt. Houdt hiervoor de knoppen factory reset en prog. mode ingedrukt.
  • Seite 12: Electrical Dangers

    The unit is subject to continuous development and unit”) before connecting up or removing something improvement. Thus the unit may be slightly different from the unit. from the given descriptions. The next pictograms are used in the Zehnder documents: Symbol Meaning Point of interest.
  • Seite 13 Table of Contents Foreword ..................................12 Introduction ................................14 Using the ComfoConnect KNX C ..........................14 2.1 LED behavior during normal use ........................... 15 2.2 Reset .................................. 15 2.3 Factory Reset ..............................15 2.4 Firmware update ..............................15 Guarantee .................................. 15 Technical Specifications ..............................
  • Seite 14: Introduction

    Connects ComfoNet to the Internet and the ComfoControl App, for monitoring the ventilation unit and firmware ComfoControl App ComfoSwitch C updates of the ventilation unit and ComfoConnect KNX C. ComfoCool Q ComfoConnect KNX C There can only be one ComfoConnect KNX C connected...
  • Seite 15: Led Behavior During Normal Use

    ComfoConnect LAN C and using the ‘Zehnder obligation to alter previously delivered products. ComfoControl’ App from the Apple App Store or Google Play Store. Follow the instructions on the App to update the ComfoConnect KNX C. The firmware cannot be updated via KNX. EN - 15...
  • Seite 16: Technical Specifications

    4 Technical Specifications Electrical Nominal input voltage +12 V DC Input voltage range +12 V DC ± 20% Nominal input current 0.02 A Electrical separation 1500 V AC (60 sec) Nominal power consumption (ComfoNet) 0.25 W Maximum power consumption (ComfoNet) 0.5 W Maximum loop-through current 3.20 A...
  • Seite 17: Installation

    2. Download the Zehnder KNX library from your local safety regulations. country website. See back page. 2. Mount the ComfoConnect KNX C on the wall, 3. Complete commissioning of the ventilation unit as preferably near the ventilation unit. described in its manual.
  • Seite 18: Group Objects

    6.1 Group Objects The group objects that are indicated with ‘(set)’ are write-only objects to control the ComfoConnect KNX C and/or the ventilation unit. All other objects (without ‘(set)’) are read-only objects to retrieve the current value. The default flags of the write-only objects are C-WTUI and the default flags for read-only objects are CR-T--.
  • Seite 19 This object has to be connected to a KNX sensor that is mounted in a bedroom. Depending on the measured CO 2 level, the ComfoConnect KNX C forces the ventilation unit to run at a minimum CO 2 sensor bedroom (set) ventilation preset.
  • Seite 20: Parameters

    Group objects that are not mentioned in the table below, behave identically regardless whether Auto mode is set or not. Whether Auto mode is enabled or not, cannot be configured on the ventilation unit; the ComfoConnect KNX C will override any change. Object...
  • Seite 21: Maintenance

    After a firmware update, all LEDs of the ComfoConnect KNX C remain off. Make sure the ComfoConnect KNX C has power. If the problem still persists, a full factory reset can be performed. For this, press and hold both the factory reset button and the programming mode button.
  • Seite 22: Vorwort

    Stromzufuhr zum ComfoAir Q, Comfo Vent Q verbessert. Daher kann sich das Gerät von den oder AERISnext (im Folgenden als „Lüftungsgerät“ angegebenen Beschreibungen leicht unterscheiden. bezeichnet) unterbrechen. In den Zehnder-Dokumenten finden Sie folgende Piktogramme: Symbol Bedeutung Wichtiger Hinweis. Risiko einer Beeinträchtigung der Leistung oder Schaden am Lüftungssystem.
  • Seite 23 Inhalt Vorwort ..................................22 Einleitung ................................... 24 Betrieb des ComfoConnect KNX C ..........................24 2.1 LED-Anzeige bei Normalbetrieb ..........................25 2.2 Reset .................................. 25 2.3 Werkseinstellungen zurücksetzen ......................... 25 2.4 Firmware-Update ..............................25 Garantie ..................................25 Technische Spezifikationen............................26 Installation .................................. 27 Inbetriebnahme ................................
  • Seite 24: Einleitung

    ComfoSwitch C werden. Zusätzlich sind hiermit auch Firmwareupdates ComfoCool Q durchführbar. ComfoConnect KNX C ComfoSense C ComfoSense C Es kann jeweils nur ein ComfoConnect KNX C an Display ComfoNet angeschlossen werden. KNX-System RFZ & RFZ & RF-Timer 2 Betrieb des ComfoConnect KNX C...
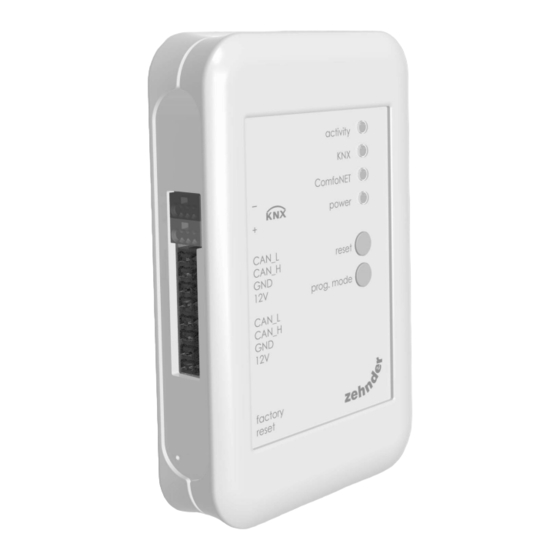
  • Seite 25: Led-Anzeige Bei Normalbetrieb

    ComfoConnect LAN-C Modul in Verbindung mit der Zehnder „ComfoControl APP“ (Erhältlich im Apple App-Store oder Google Play Store). Befolgen Sie die Anweisungen der App für ein Update des ComfoConnect KNX C. Ein Update der Firmware über KNX ist nicht möglich. DE - 25...
  • Seite 26: Technische Spezifikationen

    4 Technische Spezifikationen Elektrisch Nenneingangsspannung +12 V DC Eingangsspannungsbereich +12 V DC ± 20 % Nenneingangsstrom 0,02 A Schutztrennung 1500 V AC (60 Sek.) Nennleistungsaufnahme (ComfoNet) 0,25 W Maximale Leistungsaufnahme (ComfoNet) 0,5 W Maximaler Loop-through-Strom 3,20 A Nennstrom KNX-Bus 12 mA Umgebung Betriebstemperatur -20 °C bis +60 °C...
  • Seite 27: Installation

    Stromzufuhr zum Lüftungsgerät. Beachten Sie herunter und installieren Sie es stets die vor Ort geltenden Sicherheitsvorschriften 2. Laden Sie die Zehnder KNX-Bibliothek von Ihrer 2. Montieren Sie den ComfoConnect KNX C an einer Länder-Website herunter (Siehe Rückseite des Wand möglichst nahe am Lüftungsgerät Dokuments) 3.
  • Seite 28: Gruppenobjekte

    Bei den mit „set“ gekennzeichneten Gruppenobjekten handelt es sich um „Nur Schreib“-Objekte (write-only) zur Steuerung des ComfoConnect KNX C und/oder des Lüftungsgeräts. Alle anderen Objekte (ohne die Kennzeichnung „set“) sind „Nur Lesen“-Objekte (read-only) zum Abruf des aktuellen Werts. Die Standard-Flags der Write-only- Objekte sind C-WTUI, die Standard-Flags der Read-only-Objekte sind CR-T--.
  • Seite 29 9.008 8 rooms) Dieses Objekt muss an einen KNX-Sensor angeschlossen werden, der in einem Schlafzimmer montiert ist. Je nach dem gemessenen CO 2 -Wert schaltet der ComfoConnect KNX C das CO 2 sensor bedroom (set) Lüftungsgerät forciert in eine Mindest-Lüftungsvoreinstellung (up to 8 rooms) �...
  • Seite 30: Parameter

    Gruppenadressen mit einer durchschnittlichen Übertragungsrate. Wird dieser Wert überschritten, kann dies zu einer niedrigeren Latenz beim Update der Gruppenobjekte des ComfoConnect KNX C (und damit des Lüftungsgeräts) führen, und eine Überlastung des Bus eintreten, wenn sowieso schon ein starker Betrieb herrscht. Wird der Wert unterschritten, bleibt der Verkehr durch das Gerät niedrig, mit einer möglicherweise...
  • Seite 31: Wartung

    Das Lüftungsgerät reagiert nicht auf die Reset-Taste gedrückt und losgelassen werden. Der Einstellungen und das Statusobjekt hat den Wert ComfoConnect KNX C schaltet sich dann in den Update-Modus. Versuchen Sie erneut, ein Firmware- Es wurde eine inkompatible Firmware-Version Update durchzuführen.
  • Seite 32: Avant-Propos

    L'unité peut donc être sensiblement au raccordement ou au retrait de tout élément de différente des descriptions indiquées. l'unité. Les pictogrammes suivants sont utilisés dans les documents Zehnder : Symbole Signification Point d'intérêt. Risque de compromettre la performance du système de ventilation ou de l'endommager.
  • Seite 33 Table des matières Avant-propos : ................................32 Introduction ................................34 Utilisation du ComfoConnect KNX C ..........................34 2.1 Comportement des voyants lumineux lors d'une utilisation normale ................. 35 2.2 Réinitialisation ..............................35 2.3 Réinitialisation des paramètres d'usine ........................35 2.4 Mise à jour de micrologiciel ..........................35 Garantie ..................................
  • Seite 34: Introduction

    ComfoSwitch C de ventilation et du ComfoConnect KNX C. ComfoCool Q ComfoConnect KNX C ComfoSense C ComfoSense C Il ne peut y avoir qu'un seul ComfoConnect KNX C connecté au ComfoNet. Display La configuration KNX. RFZ & RFZ & RF-Timer...
  • Seite 35: Comportement Des Voyants Lumineux Lors D'une Utilisation Normale

    « Zehnder ComfoControl » de l'Apple App Store ou Google Play Store. Suivez les instructions contenues dans l'application pour mettre à jour le ComfoConnect KNX C. Le micrologiciel ne peut pas être mis à jour via KNX. FR - 35...
  • Seite 36: Spécifications Techniques

    4 Spécifications techniques Données électriques Tension d'entrée nominale +12 V CC Plage de tension d'entrée +12 V CC ± 20 % Courant d'entrée nominal 0,02 A Séparation électrique 1 500 V CA (60 sec.) Puissance nominale absorbée (ComfoNet) 0,25 W Puissance maximale absorbée (ComfoNet) 0,5 W Courant de boucle maximal 3,20 A Courant de bus KNX nominal...
  • Seite 37: Installation

    Internet de votre pays. Voir dernière page. matière de sécurité. 3. Terminez la mise en service de l'unité de 2. Effectuez le montage du ComfoConnect KNX C ventilation comme indiqué dans son manuel. sur le mur, de préférence à proximité de l'unité de 4.
  • Seite 38: Objets De Groupe

    Les objets de groupe qui sont indiqués avec la mention « (réglé) » sont des objets en écriture seule pour contrôler le ComfoConnect KNX C et / ou l'unité de ventilation. Tous les autres objets (sans la mention « (réglé) » sont des objets en lecture seule pour récupérer la valeur actuelle. Les flags par défaut des objets en écriture seule sont C-WTUI et les flags par défaut pour les objets en lecture seule sont CR-T--.
  • Seite 39 Cet objet doit être connecté à un capteur KNX qui est monté dans une chambre. En fonction du niveau de CO 2 mesuré, le ComfoConnect KNX C force l'unité de ventilation à se mettre sur une CO 2 sensor bedroom (set) position de ventilation minimale.
  • Seite 40: Paramètres

    Les objets de groupe qui ne sont pas mentionnés dans le tableau ci-dessous se comportent de la même manière, indépendamment du fait que Mode auto soit actif ou non. L'activation ou non du Mode auto ne peut pas être configurée sur l'unité de ventilation ; le ComfoConnect KNX C annulera toute modification. Objet Mode auto désactivé...
  • Seite 41: Maintenance

    à jour de micrologiciel, il est L'unité de ventilation ne réagit pas aux réglages possible de forcer le ComfoConnect KNX C à passer et l'objet État indique la valeur 40. en mode mise à jour Pour cela, appuyez sur le Une version incompatible de micrologiciel d'unité...
  • Seite 42: Introduzione

    ComfoConnect KNX come a “l'unità”. L'unità è AERISnext (di seguito “l'unità di ventilazione”). soggetta a sviluppi e miglioramenti continui e potrebbe pertanto presentare lievi modifiche rispetto alle descrizioni qui riportate. Nella documentazione di Zehnder si utilizzano i seguenti pittogrammi: Simbolo Significato Punto di interesse.
  • Seite 43 Sommario Introduzione ................................42 Introduzione ................................44 Utilizzo del ComfoConnect KNX C ..........................44 2.1 Comportamento LED durante il normale utilizzo ..................... 45 2.2 Reset .................................. 45 2.3 Ripristino impostazioni di fabbrica ......................... 45 2.4 Aggiornamento firmware ............................45 Garanzia ..................................45 Specifiche tecniche ..............................
  • Seite 44: Introduzione

    ComfoConnect ComfoCool Q KNX C. ComfoSense C ComfoSense C ComfoConnect KNX C Display Un solo ComfoConnect KNX C può essere collegato al ComfoNet. RFZ & RFZ & Installazione KNX RF-Timer 2 Utilizzo del ComfoConnect KNX C...
  • Seite 45: Comportamento Led Durante Il Normale Utilizzo

    È possibile aggiornare il firmware collegando un precedentemente forniti. ComfoConnect LAN C e utilizzando l'app "Zehnder ComfoControl" scaricata dall'Apple App Store o da Google Play Store. Per aggiornare il ComfoConnect KNX C seguire le istruzioni sull'app. Il firmware non può...
  • Seite 46: Specifiche Tecniche

    4 Specifiche tecniche Elettriche Tensione nominale d'ingresso +12 V DC Gamma della tensione d'ingresso +12 V DC ± 20% Corrente nominale d'ingresso 0,02 A Isolamento elettrico 1500 V AC (60 sec) Consumo corrente nominale (ComfoNet) 0,25 W Consumo corrente massima (ComfoNet) 0,5 W Corrente massima loop-through 3,20 A...
  • Seite 47: Installazione

    1. Scollegare l'unità di ventilazione dalla rete 1. Scaricare e installare ETS5 dal sito www.knx.org. elettrica prima di installare qualsiasi dispositivo. 2. Scaricare la libreria KNX Zehnder dal nostro sito Rispettare sempre le norme di sicurezza locali. internet in versione locale. Vedere l'ultima pagina.
  • Seite 48: Oggetti Di Gruppo

    6.1 Oggetti di gruppo Gli oggetti di gruppo indicati con "(impostato)" sono oggetti di sola scrittura che controllano il ComfoConnect KNX C e/o l'unità di ventilazione. Tutti gli altri (senza "(impostato)") sono oggetti di sola lettura che consentono di recuperare il valore attuale. I flag (contrassegni) di default degli oggetti di sola scrittura sono C-WTUI e quelli per gli oggetti di sola lettura sono CR-T--.
  • Seite 49 Questo oggetto deve essere collegato a un sensore KNX montato in una stanza che non sia una camera da letto. A seconda del livello di CO 2 misurato, il ComfoConnect KNX C forza l'unità di CO 2 sensor room (set) ventilazione su una preimpostazione di ventilazione minima.
  • Seite 50: Parametri

    Oggetti di gruppo non citati nella tabella sottostante si comportano nello stesso identico modo a prescindere che la modalità automatica sia impostata o meno. Non è possibile configurare sull'unità di ventilazione l'abilitazione o meno della modalità automatica; il ComfoConnect KNX C prevarrà su qualsiasi modifica.
  • Seite 51: Manutenzione

    Premere e rilasciare il tasto reset. Rilasciare qualsiasi altro tasto. Il firmware e le impostazioni vengono cancellate e il ComfoConnect KNX C si riavvia in modalità aggiornamento. Successivamente, è necessario un aggiornamento del firmware e una configurazione del KNX con ETS.
  • Seite 52: Przedmowa

    Zagrożenia elektryczne Przedmowa Podczas wykonywania czynności instalacyjnych lub konserwacyjnych występuje zagrożenie porażeniem Przed rozpoczęciem eksploatacji urządzenia prądem elektrycznym. Należy stosować się do należy dokładnie zapoznać się z treścią przepisów dotyczących bezpieczeństwa zawartych niniejszego dokumentu. w niniejszej instrukcji obsługi. Niestosowanie się do przepisów dotyczących bezpieczeństwa, ostrzeżeń, Z pomocą...
  • Seite 53 Spis treści Przedmowa ................................52 Wprowadzenie ................................54 Korzystanie z ComfoConnect KNX C ..........................54 2.1 Status wskaźnika diodowego LED podczas normalnego użytkowania ..............55 2.2 Resetowanie ............................... 55 2.3 Wyzerowanie do ustawień fabrycznych ......................... 55 Aktualizacja oprogramowania układowego ......................55 Gwarancja ..................................
  • Seite 54: Wprowadzenie

    Konfiguracja KNX RFZ i RFZ i timer RF timer RF 2 Korzystanie z ComfoConnect KNX C Opis Złącze magistrali KNX-TP Połączenie główne* do ComfoNet z zasilaniem +12V DC Połączenie pomocnicze* do ComfoNet z zasilaniem +12V Przycisk wyzerowania do ustawień fabrycznych do przywracania wszystkich ustawień...
  • Seite 55: Status Wskaźnika Diodowego Led Podczas Normalnego Użytkowania

    2.4 Aktualizacja oprogramowania układowego wcześniej dostarczonych produktach. Aktualizację oprogramowania można przeprowadzić poprzez podłączenie ComfoConnect LAN C i użycie aplikacji „Zehnder ComfoControl” ze sklepu Apple App Store lub Google Play. Postępować zgodnie z instrukcjami aplikacji, aby zaktualizować ComfoConnect KNX C. Oprogramowania układowego nie można zaktualizować...
  • Seite 56: Specyfikacje Techniczne

    4 Specyfikacje techniczne Dane elektryczne Nominalne napięcie wejściowe +12 V DC (Napięcie stałe 12 V) Zakres napięcia wejściowego +12 V DC ± 20% Nominalne natężenie wejściowe 0,02 A Separacja elektryczna 1500 V AC (60 sek.) Nominalny pobór prądu (ComfoNet) 0,25 W Maksymalny pobór prądu (ComfoNet) 0,5 W Maksymalne natężenie prądu obwodowego...
  • Seite 57: Montaż

    1. Pobrać ETS5 ze strony www.knx.org i 1. Przed przystąpieniem do montażu odłączyć zainstalować. zasilanie jednostki wentylacyjnej. Należy zawsze 2. Pobrać bibliotekę KNX Zehnder z krajowej strony przestrzegać lokalnych przepisów dotyczących internetowej. Patrz ostatnia strona. bezpieczeństwa. 3. Uruchomienie jednostki wentylacyjnej jest w pełni 2.
  • Seite 58: Obiekty Grupowe

    6.1 Obiekty grupowe Obiekty grupowe, które są oznaczone symbolem „(set)” [ustawianie] to obiekty tylko do zapisu służące do sterowania urządzeniem KNX ComfoConnect C i/lub jednostką wentylacyjną. Wszystkie pozostałe obiekty (bez oznaczenia symbolem „(set)” [ustawianie]) to obiekty tylko do odczytu służące do pobierania aktualnej wartości. Domyślne flagi obiektów tylko do zapisu to C-WTUI, a domyślne flagi obiektów tylko do odczytu to CR-T--.
  • Seite 59 (up to 8 rooms) Ten obiekt musi być podłączony do czujnika KNX, który jest zamontowany w innym pomieszczeniu niebędącym sypialnią. W zależności od zmierzonego poziomu CO 2 , ComfoConnect KNX C zmusza CO 2 sensor room (set) jednostkę wentylacyjną do ustawienia minimalnej nastawy wentylacji.
  • Seite 60: Parametry

    Tego, czy tryb automatyczny jest włączony, czy nie, nie można skonfigurować w jednostce wentylacyjnej; ComfoConnect KNX C zastępuje wszelkie zmiany. Obiekt Tryb automatyczny wyłączony (KNX ma pełną...
  • Seite 61: Konserwacja

    Jednostka wentylacyjna nie reaguje na układowego, można wymusić tryb aktualizacji w ustawienia, a obiekt stanu ma wartość 40. ComfoConnect KNX C. W tym celu należy nacisnąć Wykryto niezgodną wersję oprogramowania i przytrzymać przycisk trybu programowania układowego modułu wentylacyjnego. Sprawdzić, oraz nacisnąć...
  • Seite 62 Tel.: 0900 555 19 37 (€ 0.10 a minute, NL only) E-mail: office@wernig.at Fax: (038) 422 56 94 Internet: www.zehnder.nl Polska (Poland) E-mail: ventilatie@zehnder.nl Zehnder Polska Sp. z o.o. Tel.: +48 (0) 71 367-64-24 België (Belgium) Internet: www.zehnder.pl Zehnder Group Belgium NV/SA E-mail: info@zehnder.pl Tel.: +32 (0)15-28 05 10...

Inhaltsverzeichnis