Beamz 150.491 Gebrauchsanleitung
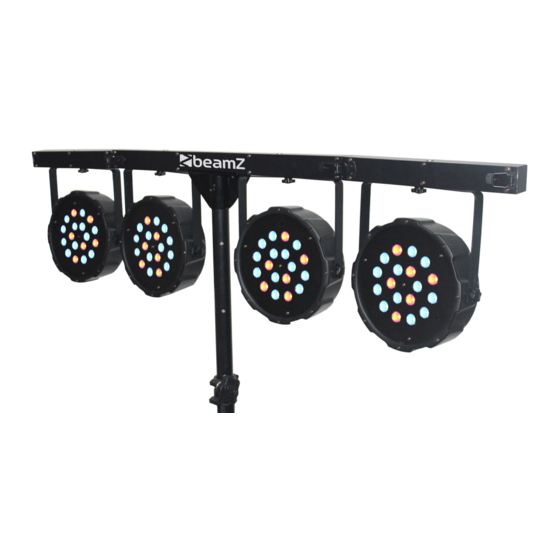
Led parbar 4way kit 18x1w rgb leds dmx

Verwandte Anleitungen für Beamz 150.491


Inhaltszusammenfassung für Beamz 150.491
- Seite 1 LED PARBAR 4Way Kit 18x1W RGB LEDS DMX Ref. nr.: 150.491 INSTRUCTION MANUAL GEBRUIKSAANWIJZING GEBRAUCHSANLEITUNG MANUAL DE INSTRUCCIONES MANUEL D'INSTRUCTIONS V1.1...
- Seite 12 DEUTSCH Vielen Dank für den Kauf dieses Beamz gerat. Nehmen Sie sich einen Augenblick Zeit, um diese Anleitung sorgfältig durchzulesen, damit sie die Möglichkeiten, die unser Produkt bietet, sofort voll ausnutzen können. Lesen Sie erst die Anleitung vollständig vor der ersten Inbetriebnahme durch. Befolgen Sie die Anweisung, da sonst jeglicher Garantieanspruch verfällt.
-
Seite 13: Auspacken
AUSPACKEN Packen Sie das Gerät sofort nach Empfang aus und prüfen Sie den Inhalt. Wenn Teile fehlen oder beschädigt sind, benachrichtigen Sie sofort den Spediteur und bewahren Sie die Verpackung auf. Falls ein Gerät ins Werk zurückgeschickt werden muss, ist es wichtig, dass es in der Originalverpackung versandt wird. Das Gerät darf nicht in Betrieb genommen werden, nachdem es von einem kalten in einen warmen Raum gebracht wurde. -
Seite 14: Die Bedienung
DIE BEDIENUNG Die LED 18x1Watt FlatPAR RGB IR DMX verfügt über vier Betriebsarten: A. DMX-Modus B. Handbetrieb-Modus C. Auto-Modus D. Master / Slave-Modus Nachdem Sie Ihre gewünschte Modus ausgewählt haben, müssen Sie mit "ENTER" bestätigen. A. DMX-MODUS Mit diesen Modi können Sie jeden FlatPar einzeln mit einem Standard DMX-512-Controller steuern. Drücken Sie die "MENU"... -
Seite 15: Fernbedienung
Einstellungen MASTER FLATPAR Unter der Einstellung für nur FlatPar mit eingebauten IR-Sensor! Drücken Sie "MENU" bis "IrOn" oder "IrOF" im Display erscheint . Drücken Sie die " " order " " taste zu wählen "IrOn". Bestätigen Sie die Einstellung mit "ENTER" -Taste. -
Seite 16: Dmx-512 Anschluss
DMX-512 ANSCHLUSS Wenn Sie einen standard Controller verwenden, können Sie den DMX-Ausgang des Controllers direkt mit dem DMX-Eingang des ersten Gerätes der DMX-Kette verbinden. Verbinden Sie immer einen Ausgang mit dem Eingang des nächsten Gerätes bis alle Geräte angeschlossen sind. Sollen DMX-Controller mit 5-polige XLR-Ausgängen angeschlossen werden, müssen 5-polige nach 3-polige Adapter verwendet werden.