Herunterladen Inhalt Inhalt Diese Seite drucken

YAKUMO QuickStick Basic Handbuch

Usb dvb-t empfänger
Inhaltsverzeichnis

Werbung

Verfügbare Sprachen
  • DE

Verfügbare Sprachen

  • DEUTSCH, seite 1
Handbuch
Manual
D
GB
F
E
I
Yakumo QuickStick
Yakumo QuickStick
Yakumo QuickStick
Yakumo QuickStick
Basic DVB-T
USB DVB-T Empfänger

Werbung

Inhaltsverzeichnis
loading

Inhaltszusammenfassung für YAKUMO QuickStick Basic

  • Seite 1 Handbuch Manual Yakumo QuickStick Yakumo QuickStick Yakumo QuickStick Yakumo QuickStick Basic DVB-T USB DVB-T Empfänger...
  • Seite 2 Yakumo QuickStick Basic DVB-T Handbuch Urheberrechtshinweis © Copyright 2004. Alle Rechte vorbehalten------- Der Hersteller behält sich das Recht zu Modifizierungen der Produktangebote oder der Spezifikationen ohne Vorbenachrichtigung vor. Jede Vervielfältigung dieser Anleitung –auch auszugsweise und in irgendeinem Format –bedarf der vorherigen ausdrücklichen schriftlichen Genehmigung der ----------...
  • Seite 3: Inhaltsverzeichnis

    Inhaltsverzeichnis Kapitel 1 Einführung des Yakumo QuickStick Basic DVB-T ..........3 Kapitel 2 Einführung der Installation ..................3 2.1 Systemvoraussetzungen ................... 3 2.2 Installationsvorgang ....................4 Kapitel 3: Anleitung zur Installation..................4 3.1 Installation der Anwendung ..................4 3.2 Anschluss des Gerätes.................... 11 3.3 Treiberinstallation ....................
  • Seite 4: Kapitel 1 Einführung Des Yakumo Quickstick Basic Dvb-T

    Kapitel 1 Einführung des Yakumo QuickStick Basic DVB-T Einführung Der Yakumo QuickStick Basic DVB-T ist mit dem DVB-T-Protokoll für die Anwendung mit dem Desktop-PC oder Laptop-PC vollständig kompatibel. Das kompakte Design mit der hohen Geschwindigkeit der USB2.0-Schnittstelle ermöglicht es, dass Sie die digitalen TV-Programme überall genießen können!
  • Seite 5: Installationsvorgang

     Den DirectX 9.0 installieren und das System neustarten. (Falls es bereits in Ihrem Computer installiert ist können Sie zum nächsten Schritt gehen.)  Den Yakumo QuickStick Basic DVB-T an Ihren Computer anschließen  Den Treiber installieren  Die DTV-Anwendung installieren ...
  • Seite 6 Lesen Sie den Lizenzvertrag durch und wählen Sie danach “ Ich stimme diesem Lizenzvertrag zu” a u s . Zum Fortsetzen auf “ Weiter” klicken. Die Benutzerinfos in der Spalte eingeben. Zum Fortsetzen auf “ Weiter” klicken.
  • Seite 7 Die Seriennummer des Produktes eingeben und zum Fortsetzen auf “ Weiter” klicken. Eine Sprachversion auswählen und zum Fortsetzen auf “ Weiter” klicken.
  • Seite 8 Dieses Fenster ist die Original-Einstellungsroute und der Ordnername. Er kann je nach Bedarf abgeändert werden. Zum Fortsetzen auf “ Weiter” klicken. Dieses Fenster ist das Symbol der Originalverknüpfung und des voreingestellten Zugriffsordners. Der Ordnername kann abgeändert oder dem vorhandenen Ordner zugeordnet werden.
  • Seite 9 Sicherstellen, dass die Route und der Ordnername richtig sind. Zum Fortsetzen auf “ Weiter” klicken. Wählen Sie “ Ja, den Computer jetzt neu starten” a u s . Zum Fortsetzen auf “ Beenden” klicken.
  • Seite 10 10. A u f “ Fertig” klicken. Der Computer wird automatisch neugestartet. Die Installation der Anwendung ist erfolgreich abgeschlossen. Lesen Sie den Lizenzvertrag durch und wählen Sie danach “ Ich stimme den Bedingungen des Vertrags zu” . Zum Fortsetzen auf “ Weiter” klicken.
  • Seite 11 Zum Fortsetzen auf “ Weiter” klicken. Auf “ Fertig stellen” klicken. Die Installation des DirectX 9.0 ist nun angeschlossen. Ihr Computer wird automatisch neugestartet.
  • Seite 12: Anschluss Des Gerätes

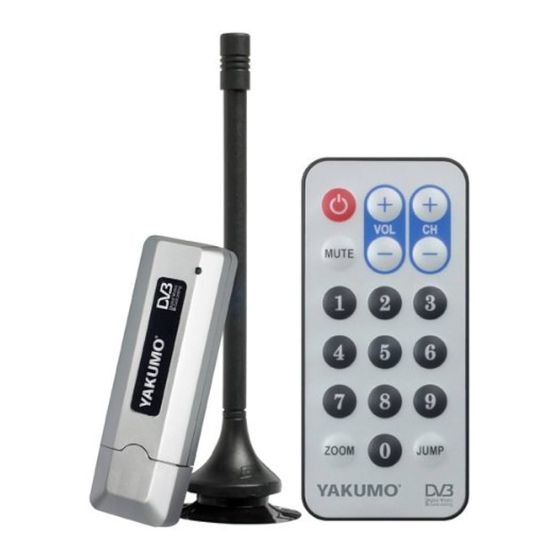
    3.2 Anschluss des Gerätes Den IEC-Anschluss an die Antenne anschließen. Den IEC-Anschluss an den Yakumo QuickStick Basic DVB-T anschließen. Den Yakumo QuickStick Basic DVB-T an die USB-Schnittstelle an Ihrem Computer anschließen.
  • Seite 13: Treiberinstallation

    USB-Schnittstelle an Ihrem Computer benötigen Sie eventuell ein längeres USB-Kabel. 3.3 Treiberinstallation Sicherstellen, dass der Yakumo QuickStick Basic DVB-T am Computer angeschlossen ist, bevor Sie mit dem Installieren des Treibers beginnen. Der Computer erkennt die neue Hardware und das Fenster Assistent für das Suchen neuer Hardware erscheint.
  • Seite 14 Wählen Sie “ Diese Quellen nach dem zutreffendsten Treiber durchsuchen” a u s . Zum Suchen nach dem Standort des Treibers im CD-ROM-Verzeichnis klicken Sie auf “ Weiter” . Choose『\DTV_Driver』. Zum Fortsetzen auf “ Installation fortsetzen” klicken.
  • Seite 15 Zum Fortsetzen auf “ Fertig stellen” klicken. Wählen Sie “ Software von einer Liste oder bestimmten Quelle installieren (für fortgeschrittene Benutzer)” aus und danach zum Fortsetzen auf “ Weiter” klicken.
  • Seite 16 Wählen Sie “ Diese Quellen nach dem zutreffendsten Treiber durchsuchen” a u s . Zum Suchen nach dem Standort des Treibers im CD-ROM-Verzeichnis klicken Sie auf “ Weiter” . Choose『\DTV_Driver』. Zum Fortsetzen auf “ Installation fortsetzen” klicken.
  • Seite 17 Z u m B e e n d e n k l i c k e n S i e a u f “ Fertig stellen” . Nachprüfen, ob die Produkttreiber richtig installiert sind. Auf Start klicken und danach auf Arbeitsplatz rechtsklicken.
  • Seite 18 10. Auf der Hardware-Kartei klicken Sie auf “ Geräte-Manager. Gehen Sie danach zur “ Sound-, Video- und Game-Controllers” -Kategorie. Auf der Liste erscheint eventuell “ Digital-TV Receiver” . Falls dies nicht auf der Liste aufgeführt ist installieren Sie die Treiber erneut.
  • Seite 19: Kapitel 4: Einführung Der Dtv-Software/Des Systems

    Kapitel 4: Einführung der DTV-Software/des Systems Die DVB-Tplayer-Software ist sehr leistungsstark. Damit können Sie leicht den hochqualitativen Digitalklang und die visuellen Effekte genießen. Nicht nur können TV-Programme empfangen werden, sondern sie kann auch zur sofortigen Videaufzeichnung (DVR) oder zur Videoaufzeichnung je nach Zeiteinstellung benutzt werden.
  • Seite 20 Die RF-Frequenz auswählen. Sie können eine der folgenden auswählen. (1) Land/Region: Wählen Sie das Land/die Region aus, in dem/der Sie sich befinden. (2) Alle: Wählen Sie diese Option aus, falls Ihr Standort auf der Liste unter Land/Region nicht aufgeführt ist. (3) Bereich: Hier bestimmen Sie Ihren eigenen Frequenzbereich.
  • Seite 21: Einstellung Der Aufzeichnung

    Kanal-/Frequenzsortierung Nach dem Abtasten kann die Option der Kanal-/Frequenzsortierung angewendet werden. Auf “ Programm” klicken. Das Programm wird dann durch die Kanalsortierung angezeigt. 2. Auf “ Freq” klicken. Sie wird dann durch die Frequenzsortierung angezeigt. Weiter können Sie auf der Kanalliste die Prioritäten setzen. Klicken Sie einfach auf einen Kanal und ziehen Sie diesen zum gewünschten Standort (hinauf oder hinunter).
  • Seite 22 Zielordner abspeichern möchten richten Sie den Pfad je nach Ihrer Bevorzugung ein. Nach dem Beenden der oben beschriebenen Einstellung klicken Sie auf “ ” auf dem Bedienfeld, wenn Sie die Digitalprogramme anschauen. Wenn Sie mit dem Aufzeichnen beginnen erscheint die Uhr links auf dem Bedienfeld in roter Farbe.
  • Seite 23 Beim Erscheinen des Fensters Record Input (Aufzeichnung eingeben) befolgen Sie die nachstehende Anleitung. 1. Einen Kanal auswählen. 2. Die Start- und Endzeit der Aufzeichnung eingeben. 3. Eventuell stehen die Optionen zum Eingeben des Datums zur Verfügung: einmal, täglich und ein bestimmter Tag. 4.
  • Seite 24: Einstellung Der Anzeige

    4.3 Einstellung der Anzeige Im Fenster zum Einstellen der Anzeige können die Helligkeit, der Kontrast und die Sättigung je nach Bedarf eingestellt werden. Ziehen Sie den Mauskursor zum Ausführen der Einstellungen. Zum Wiederherstellen der ursprünglichen Einstellungen klicken Sie auf『Reset』(Rücksetzen). 4.4 Einstellung der Aufnahme Sie können ein Bild aufnehmen und abspeichern.
  • Seite 25: Einstellung Der Zeitverschiebung

    4.5 Einstellung der Zeitverschiebung Wenn Sie beim Ansehen des laufenden Programms unterbrochen werden, können Sie auf die Time-Shift-Taste drücken, und so die zeitversetzte Aufnahmefunktion starten. Wenn Sie dann zurückkommen, verschieben Sie die Scrollleiste des Bedienfelds, die den Aufnahmestatus anzeigt, so, dass das Gerät das Programm wieder an der Stelle wiedergibt, an der Sie die Time-Shift-Taste gedrückt haben.
  • Seite 26: Kapitel 5: Einführung Der Dtv-Software

    Kapitel 5: Einführung der DTV-Software 5.1 Bedienfeld Funktionen der Symbole Symbol Funktion Symbol Funktion Vollschirm Play (Abspielen) Löschen einer verkehrten Rückwärtsspulen, Vorwärtsspulen Kanalnummer mit DEL Voransicht mehrerer Kanäle Stopp Kanal auf und ab Pause Kanalabruf Videoaufzeichnung Persönliche Auswahl Fotoaufnahme Zeitverschiebung Stumm Gespeicherte Datei öffnen Bildschirm minimieren...
  • Seite 27: Rechtsklick-Menü Und Zugriffstasten Auf Der Tastatur

    5.2 Rechtsklick-Menü und Zugriffstasten auf der Tastatur Klicken Sie mit der rechten Maustaste, wenn die DTV-Anwendungssoftware wiedergegeben wird. Danach erscheint das Menü mit den Funktionen und Tastatur-Zugriffen wie folgt: Anzeige der Funktion Schnell- Funktionsbeschreibung Link Playback (Wiedergabe) Enter Zum Wiedergeben des Programms (Eingabe) Pause (Pause) Space...
  • Seite 28 Display ratio Anzeigeverhältnis zwischen 4:3 oder 16:9 wählen (Anzeigeverhältnis) Image size (Bildgröße) Zum Wählen der Bildgröße zwischen 60%, 100%, 150% Full screen (Vollschirm) Umschalten zum Vollschirm oder zum Fenster Increase volume Lautstärke erhöhen (Lautstärke auf) Decrease volume Lautstärke reduzieren (Lautstärke ab) Close to bar (Zum Balken Ctrl+Z Das Bedienfeld zum Balken schließen...
  • Seite 29: Funktionen

    D i e “ Te l e t e x t ” -Anwendung ist ein einfacher Teletext-Browser. Zum Starten dieser Funktion klicken Sie auf auf dem Bedienfeld. Sie funktioniert nur, wenn der Yakumo QuickStick Basic DVB-T in Betrieb ist. Elektronischer Programmführer (EPG) Klicken Sie auf auf dem Bedienfeld, um zum elektronischen Programmführer, der vom...
  • Seite 30: Weitere Funktionen

    5.4 Weitere Funktionen ※ Stumm-Anzeige (Mute): b e i m K l i c k e n a u f “ Mu t e ” ( S t u mm) l e u c h t e t 『 』 auf dem Bedienfeld auf.
  • Seite 31 ※ Teletext: Dies ist eine Anwendung mit Text und Ziffern bei der Funkübertragung. Die Informationen können Sie vom Kanalanbieter erhalten. Zum Starten dieser Funktion klicken 』. Sie auf『 P+/ P- Gehe zur nächsten/vorherigen Seite. Gehe zu den nächsten/vorherigen 10 Seiten. F+/ F- Gehe zu den nächsten/vorherigen 100 Seiten.
  • Seite 32: Einführung Der Fernbedienfunktion

    5.5 Einführung der Fernbedienfunktion Anwendungsprogramm Ein und Aus Lautstärkeregler Kanalsteuerung Stumm-Modus (Mute) Zifferneingabe Kanal zurück Vollschirm...
  • Seite 33: Kapitel 6 Fehlersuche

    Sekunden betragen muss. Den Yakumo QuickStick Basic DVB-T an einen anderen USB-Port des PC’ s a n s c h l i e ß e n . 3. Unter Windows kann der Treiber für den Yakumo QuickStick Basic DVB-T nicht gefunden werden a.
  • Seite 34 Drücken auf die Tasten des Fernbediengeräts. Das Fenster des Yakumo QuickStick Basic DVB-T muss d a s “ Fo k u s ” -Fenster sein, damit das Gerät die Kommandos vom Fernbediengerät empfangen kann. Klicken Sie auf den Untertitel des Fensters des Yakumo QuickStick Basic DVB-T und versuchen Sie es danach erneut.
  • Seite 35: Service Und Gewährleistung

    Service und Gewährleistung Service Bei technischen Problemen mit Ihrem Yakumo Produkt wenden Sie sich an die Hotline 0 18 05/ 92 58 66 (12 Cent/Minute bei einem Anruf aus dem Festnetz der Deutschen Telekom). Rufen Sie aus dem europäischen Ausland an, wählen Sie bitte folgende Rufnummer: 00 800 / 92 58 66 00.
  • Seite 36 Yakumo QuickStick Basic DVB-T Manual Copyright Notice © Copyright 2004. All rights reserved. ---------- reserves the right to modify product offerings or specifications without advance notice. No part of this publication may be produced in any format without the express written permission of ---------- Trademark Notice ※...
  • Seite 37 2.1 System Requirement ....................3 Chapter 3: How to Install......................4 3.1 Install DTV application.....................4 3.2 Connect Yakumo QuickStick Basic DVB-T to your computer ......11 3.3 Install Driver ......................12 Chapter 4: DTV Software/ System Introduction ..............18 4.1 Setup of the Digital Broadcasting program ............18 4.2 Recording Setting....................21...
  • Seite 38: Chapter 1: Introduction

    Chapter 1: Introduction Introduction The Yakumo QuickStick Basic DVB-T is fully compatible with DVB-T protocol for your desktop PC or laptop use. Its tiny size design with high speed USB2.0 interface let you enjoy digital TV programs anywhere! It is also a Digital Video Recorder that you may record your favorite DVB TV programs on your hard disc either real time or scheduling.
  • Seite 39: Chapter 3: How To Install

    Important Notice: "All channels are subject to coverage and may be changed from time to time. Reception may depend on the type and condition of your existing aerial. Aerial upgrade may be required. Please confirm coverage in your area." We strongly recommend that you install an outdoors antenna when you use the DTV receiver indoors.
  • Seite 40 Please read the license agreeme n t c a r e f u l l y t h e n s e l e c t “ I agree to the terms of this license agreement” . C l i c k “ Next” t o c o n t i n u e . F i l l i n u s e r ’...
  • Seite 41 E n t e r p r o d u c t ’ s s e r i a l n u mb e r a n d c l i c k “ Next” t o c o n t i n u e . Select a language edition.
  • Seite 42 This window is the original setting route and folder name. You may change it according to p e r s o n a l r e f e r e n c e . C l i c k “ Next” t o c o n t i n u e . This window is the original shortcut icon and pre-setting shortcut folder.
  • Seite 43 P l e a s e ma k e s u r e t h e r o u t e a n d f o l d e r n a me i s c o r r e c t . C l i c k “ Next” t o c o n t i n u e . P l e a s e c h e c k “...
  • Seite 44 10. C l i c k “ Finish” a n d c o mp u t e r w i l l b e r e s t a r t e d a u t o ma t i c a l l y . T h e a p p l i c a t i o n i n s t a l l a t i o n i s d o n e successfully.
  • Seite 45 12. C l i c k “ Next” t o c o n t i n u e . 13. C l i c k “ Finish” a n d D i r e c t X 9 . 0 c installation is done. Your computer will be restarted automatically.
  • Seite 46: Connect Yakumo Quickstick Basic Dvb-T To Your Computer

    3.2 Connect Yakumo QuickStick Basic DVB-T to your computer Connecting IEC connector to antenna. Connecting the antenna to the Yakumo QuickStick Basic DVB-T. Connecting the Yakumo QuickStick Basic DVB-T to USB interface on your computer.
  • Seite 47: Install Driver

    Basic DVB-T and USB interface on your computer. 3.3 Install Driver Please make sure you have connected the Yakumo QuickStick Basic DVB-T to your computer before you move to driver installation. Computer will detect the new hardware and Found New Hardware Wizard window will be...
  • Seite 48 P l e a s e s e l e c t “ Search for the best driver in these locations” . Y o u ma y c l i c k “ Browse” t o f i n d the driver location on CD-R O M d i r e c t o r y .
  • Seite 49 C l i c k “ Finish” t o c ontinue. P l e a s e s e l e c t “ Install from a list or specific location (Advanced)” t h e n c l i c k “ Next” t o continue.
  • Seite 50 P l e a s e s e l e c t “ Search for the best driver in these locations” . Y o u ma y c l i c k “ Browse” t o f i n d the driver location on CD-ROM directory.
  • Seite 51 C l i c k “ Finish” t o e x i t . You may double check if the product drivers are installed properly. Please press Start then right click My Computer. C l i c k “ Properties” .
  • Seite 52 10. C l i c k “ Device Manager” f r o m Hardware t a b . F i n d “ Sound, video and game controllers” c a t e g o r y a n d y o u ma y s e e “ Digital-TV Receiver” o n t h e l i s t . I f y o u d o n o t s e e i t . P l e a s e g o back and install the drivers again.
  • Seite 53: Chapter 4: Dtv Software/ System Introduction

    Chapter 4: DTV Software/ System Introduction DVB-Tplayer Software is very powerful. You can easily enjoy the high quality digital sound and visual effect. Not only it provides the TV program, you can also use it to do the instant digital video recording (DVR) and Scheduling Recording.
  • Seite 54 Choose RF Frequency. You may select one of the following. (1) Country/ Area: You may choose the location where you are. (2) All: If you can not find your location list in Country/ Area list, you may select this option. (3) Range: You may define your own frequency range.
  • Seite 55 Channel/ Frequency Sorting You may use channel/ frequency sorting option after scan. C l i c k o n “ Program” a n d i t w i l l b e s h o w n b y c h a n n e l s o r t i n g . 2.
  • Seite 56: Recording Setting

    4.2 Recording Setting There are two ways of recording: one is real time recording, and another is scheduling recording. Real time recording: when you record the program under the real time mode, the recorded file will be saved to the default destination folder at C:\Program Files\DTV\DVB-T USB 2.0\Capture\Video.mpg.
  • Seite 57 When Record Input Window pups up, please follow the instructions below. 1. Choose a channel. 2. Set recording start time and end time. 3. You may have date setting options which are once, everyday and one specific day. 4. Mute speakers when recording is available when checked. 5.
  • Seite 58 Note: A t t h e s a me p e r i o d o f t i me , y o u c a n ’ t r e c o r d t w o p r o g r a ms f r o m d i f f e r e n t f r e q u e n c i e s . Please be aware of the capacity of the recording device.
  • Seite 59: Display Setup

    4.3 Display setup On the display setup window, you can adjust the brightness, contrasting, and fullness based on your own preference. Drag the mouse cursor to do the adjustments. If you want to go back to the original setting, click『Reset』. 4.4 Capture setup You may capture image and save it.
  • Seite 60: Time Shift Setup

    4.5 Time shift Setup If you need to leave in the middle of a program, you may start recording function by clicking the Time-Shift button on real time. When you return, just move the scroll bar which indicates recording status on the panel to playback the program you pre-record. The system will continually record the program when you play until the time limit you set.
  • Seite 61: Chapter 5: Dtv Software Introduction

    Chapter 5: DTV Software Introduction 5.1 Control Panel Icon Functions Icon Function Icon Function Full screen play Delete error channel number Rewind, fast-forward Multi-channel Preview Stop Channel up and down Pause Channel recall Video Recording My favorite Photo capture Time shift Mute Minimize screen Open saving file...
  • Seite 62: Right Click Menu And Keyboard Shortcuts

    5.2 Right Click Menu and Keyboard Shortcuts Click the right button of the mouse when DTV application software is in playback. You will see the function and keyboard shortcuts menu, as following: Function display Fast-link Function description Playback Enter Playback program Pause Space Pause the playing...
  • Seite 63: Functions

    T h e a p p l i c a t i o n “ T e l e t e x t ” i s a s i mp l e t e l e t e x t b r o w s e r . T o s t a r t t h i s f u n c t i o n , c l i c k o n on the control panel. It only works when Yakumo QuickStick Basic DVB-T is running.
  • Seite 64: More Functions

    5.4 More Functions ※ Mute display :Wh e n y o u c l i c k “ Mu t e ” b u t t o n , 『 』will light up on the control panel. ※ Signal display :I n t h e s e t t i n g me n u “ G e n e r a l ” , choose「refresh RF information 」. Move the cursor to 『...
  • Seite 65 ※ Teletext :It is an application of words and numbers broadcasting. You may receive program 』to start this function. information from channel provider. Select『 P+/ P- Go to next/ previous page. Go to next/ previous 10 pages. F+/ F- Go to next/ previous 100 pages. M+/ M- Back to default setting Show subtitle...
  • Seite 66: Introduction Of Remote Control Function

    5.5 Introduction of remote control function Application Program On and Off. Volume Control Channel Control Mute Mode Number Input Channel Return Full Screen...
  • Seite 67: Chapter 6 Trouble Shooting

    2. Windows cannot find Yakumo QuickStick Basic DVB-T a. Check if Yakumo QuickStick Basic DVB-T is connected to your PC. b. Before you launch Yakumo QuickStick Basic DVB-T, please wait for at least 3 seconds when device is just plugged into the USB interface.
  • Seite 68 Yakumo QuickStick Basic DVB-T window must b e t h e “ f o c u s ”...
  • Seite 69: Service And Warranty

    Service and Warranty Service In case of technical problems with your Yakumo product, contact our hotline on 00 800 / 92 58 66 00. Warranty If you think that you need to make a claim on your Yakumo product under the warranty, call the hotline on 00 800 / 92 58 66 00.
  • Seite 70 Yakumo QuickStick Basic DVB-T Manuel Note du Copyright © Copyright 2004. Tous droits réservés. ---------- se réserve le droit de modifier les présentations ou les spécifications du produit sans préavis. Aucune partie de cette publication ne peut être reproduite quel que soit le format sans la permission écrite préalable de ---------- Note des Marques de Fabrique ※...
  • Seite 71 Table des Matières Chapitre 1 Présentation du Yakumo QuickStick Basic DVB-T.......... 3 C h a p i t r e 2 P r é s e n t a t i o n d e l ’ I n s t a l l a t i o n ................3 2.1 Exigences du Système...................
  • Seite 72: Chapitre 1 Présentation Du Yakumo Quickstick Basic Dvb-T

    Chapitre 1 Présentation du Yakumo QuickStick Basic DVB-T Présentation Le Yakumo QuickStick Basic DVB-T est entièrement compatible avec le protocole DVB-T pour votre PC de bureau ou portable. Sa taille réduite et son interface USB2.0 grande vitesse vous permet de profiter partout des programmes TV numériques ! Il s’...
  • Seite 73: Etapes D' Installation

    2.2 Etapes d’ Installation  Installez DirectX 9.0 et relancez votre système (s’ il est déjà installé dans votre système, veuillez passer cette étape.)  Connectez le Yakumo QuickStick Basic DVB-T à votre ordinateur  Installez le Pilote  Installez l’ application TNT ...
  • Seite 74 Veuillez lire avec pré c a u t i o n l ’ accord de licence, puis sélectionnez “ J ’ a c c e p t e l e s t e r me s d e la licence” . Cliquez ensuite sur “ Suivant” pour continuer. Remplissez les informations personnelles dans la colonne.
  • Seite 75 Entrez le numéro sériel du produit et cliquez sur “ Suivant” pour continuer. Sélectéonnez une langue et cliquez sur “ Suivant” pour continuer.
  • Seite 76 Cette fenêtre est la piste d’ installation par défaut et le nom du dossier. Vous pouvez les changer pour votre préférence personnelle. Cliquez sur “ Suivant” pour continuer. Cette fenê t r e e s t l ’ icône de raccourci et le dossier de raccourci par défaut. Vous pouvez changer le nom du dossier ou désigner un autre dossier existant.
  • Seite 77 Cliquez sur “ Suivant” pour continuer. Veuillez cocher la case “ Oui, redémarrer maintenant” . Cliquez sur “ Terminer” pour terminer.
  • Seite 78 10. Cliquez sur “ Terminer” et l’ ordinateur se relancera automatiquement. L’ installation de l’ application est maintenant terminée. Veuillez lire l’ accord de licence avec précaution et sélectionnez ensuite “ J ’ a c c e p t e l e s termes de la licence”...
  • Seite 79 Cliquez sur “ Suivant” pour continuer. Cliquez sur “ Terminer” et l’ installation de DirectX 9.0 est alors terminée. Votre ordinateur sera relancé automatiquement.
  • Seite 80: Equipment Connection

    3.2 Equipment Connection Connecter le Connecteur IEC à l ’ antenne. Connecter le Connecteur IEC au Récepteur de Type Stylo Connecter le Récepteur de Type Stylo à l ’ Interface USB sur votre Ordinateur.
  • Seite 81: Installer Le Pilote

    Récepteur de Type Stylo et l ’ Interface USB sur votre Ordinateur. 3.3 Installer le Pilote Veuillez vous assurer d’ avoir connecté le Yakumo QuickStick Basic DVB-T à votre ordinateur avant de passer à l ’ installation du pilote. L’ ordinateur détectera le nouveau matériel et la fenêtre Assistant Matériel détecté va apparaître.
  • Seite 82 Veuillez sélectionner “ Rechercher le meilleur pilote dans ces emplacements.” . Vous pouvez cliquer sur “ Suivant” pour trouver l’ emplacement du pilote dans le répertoire du CD-ROM. Choisissez『\DTV_Pilote』. Cliquez sur “ Continuer” pour continuer.
  • Seite 83 Cliquez sur “ Terminer” pour terminer. Veuillez sélectionner “ Installer à partir d’ une liste ou d’ un emplacement spécifié (utilisateurs expérimentés)” puis cliquez sur “ Suivant” pour continuer.
  • Seite 84 Veuillez sélectionner “ Rechercher le meilleur pilote dans ces emplacements.” . Vous pouvez cliquer sur “ Suivant” pour trouver l’ emplacement du pilote dans le répertoire du CD-ROM. Choisissez『\DTV_Pilote』. Cliquez sur “ Continuer” pour continuer.
  • Seite 85 Cliquez sur “ Terminer” pour terminer. Vous pouvez vérifier si les pilotes du produit sont bien installés. Veuillez presser sur Démarrer puis cliquez sur Mon Ordinateur. Cliquez sur “ Propriétés” .
  • Seite 86 10. Cliquez sur “ Gestionnaire des Périphériques” depuis la languette Matériel. Cherchez “ Contrôleurs de son, vidéo et jeux” et vous pourrez voir “ Digital-TV Receiver” dans la liste. Sinon, veuillez revenir en arrière pour installer de nouveau les pilotes.
  • Seite 87: Chapitre 4: Présentation Du Logiciel/Système Tnt

    Chapitre 4: Présentation du Logiciel/Système TNT Le Logiciel DVB-Tplayer est très puissant. Vous pouvez profiter facilement d’ un son et d’ effets visuels numériques de grande qualité. Non seulement il offre des programmes TV, vous pouvez aussi l’ utiliser pour effectuer un enregistrement vidéo numérique instantané (DVR) et un enregistrement programmé.
  • Seite 88 Choisissez la Fréquence Radio. Vous pouvez effectuer une des sélections suivantes. (1) Pays/ Zone: Vous pouvez choisir l’ emplacement où vous vous trouvez. (2) Tout: Si vous n’ arrivez pas à trouver votre emplacement dans la liste Pays/ Zone, vous pouvez sélectionner cette option. (3) Portée: Vous pouvez définir votre portée de fréquence.
  • Seite 89: Programmation D' Enregistrement

    4.2 Programmation d’ Enregistrement Il y a deux faç o n s d ’ enregistrer: la premiè r e e s t l ’ enregistrement en temps réel et la seconde est la programmation horaire. Enregistrement en temps réel: lorsque vous enregistrez le programme dans le mode temps réel, le fichier sera sauvegardé...
  • Seite 90 souhaitez arrê t e r l ’ enregistrement, veuillez presser le bouton “ ” . Enregistrement Horaire: Veuillez choisir Setup. Sélectionnez la languette Enregistrer et cochez la case Activer la Programmation. Cliquez deux fois sur la colonne Chaîne dans la section Enregistrement Programmé.
  • Seite 91: Programmation D' Affichage

    Note: Au même moment, vous ne pouvez pas enregistrer deux programmes depuis des fréquences différentes. Veuillez faire attention à la capacité de l’ appareil d’ enregistrement. De longues heures d’ enregistrement risquent d’ excéder la capacité du disque dur. 4.3 Programmation d’ Affichage Dans la fenêtre de programmat i o n d ’...
  • Seite 92: Programmation De Capture

    4.4 Programmation de Capture Vous pouvez capturer l’ image et la sauvegarder. Lorsque le programme TV s’ affiche, vous pouvez cliquer sur le bouton . L’ image est alors capturée et sauvegardée. Vous pouvez cliquer sur pour trouver et obtenir votre fichier d’ image. 4.5 Programmation de la Fonction Temps Réel Si vous avez besoin de quitter en plein milieu du programme, vous pouvez commencer l’...
  • Seite 94: Chapitre 5: Présentation Du Logiciel Tnt

    Chapitre 5: Présentation du Logiciel TNT 5.1 Panneau de Contrôle Fonctions des Icônes Icône Fonction Icône Fonction Plein écran lecture EFF - Effacer le numéro de Retour, avance chaîne d'erreur Prévisualisation de chaînes Arrêt multiples Chaîne (+)/(-) Pause Rappel de chaîne Enregistrement vidéo Mes favoris Capture photo...
  • Seite 95: Menu Clique Droit Et Raccourcis Du Clavier

    5.2 Menu Clique Droit et Raccourcis du Clavier Cliquez avec le bouton droit de la souris lorsque l’ application TNT se trouve dans le mode de lecture. Vous verrez le menu des fonctions et des raccourcis du clavier, comme suit: Affichage des fonctions Lien Description des fonctions...
  • Seite 96: Fonctions

    L’ a p p l i c a t i o n “ T élétexte” est un navigateur de télétexte simple. Pour lancer cette fonction, cliquez dans le panneau de contrôle. Elle ne fonctionne que lorsque le Yakumo QuickStick Basic DVB-T USB est actif.
  • Seite 97: Plus De Fonctions

    5.4 Plus de Fonctions ※ Silence:Lorsque vous cliquez sur le bouton “ Silence” , 『 』s’ illuminera sur le panneau de contrôle. ※ Signal:Dans le menu “ G énér a l ” , c h o isissez「renouveler les info FR 」. Bougez le curseur vers 『...
  • Seite 98 ※ Télétexte:Il s’ agit d’ une application de diffusion de mots et de chiffres. Vous pouvez 』 recevoir les informations du programme depuis votre fournisseur. Sélectionnez『 pour lancer cette fonction. Aller à la page suivante/précédente. P+/ P- F+/ F- Aller aux 10 pages suivantes/précédentes. M+/ M- Aller aux 100 pages suivantes/précédentes.
  • Seite 99: Présentation De La Fonction De Télécommande

    5.5 Présentation de la fonction de télécommande Marche/Arrê t d u p r o g r a mme d ’ application. Contrôle du Volume Contrôle de chaîne Mode de Silence Entrée de Nombres Retour de chaîne Plein écran...
  • Seite 100: Chapitre 6 Dépannage

    5. Impossible de voir une chaî n e d e p r o g r a mme d u r a n t l ’ auto scanning. (1) Vérifiez la connexion de câble entre le Yakumo QuickStick Basic DVB-T et l ’ antenne.
  • Seite 101 (1) La fenêtre du Yakumo QuickStick Basic DVB-T doit ê t r e l a f e n ê t r e “ f o c u s ” pour recevoir l’ entrée de la télécommande. Vous pouvez cliquer sur la légende de la fenêtre du Yakumo QuickStick Basic DVB-T, puis essayer de nouveau.
  • Seite 102: Service Technique Et Garantie

    S i v o u s a v e z d e s q u e s t i o n s d ’...
  • Seite 103 Yakumo QuickStick Basic DVB-T Manual Aviso del Derecho del Autor © Copyright 2004. Todo derecho reservado. ---------- reserva el derecho a modificar products o especificaciones sin aviso. No parte de esta publicación puede ser producida en ningún formato sin el permiso escrito de ---------- Aviso de Marca Registrada ※...
  • Seite 104 Índice de Materia Capítulo 1 Yakumo QuickStick Basic DVB-T Introducción......3 Capítulo 2 Instalación ..................3 2.1 R ..................3 EQUISITOS DEL SISTEMA 2.2 P ..................4 ASOS DE LA INSTALACIÓN Capítulo 3: ¿Cómo Instalar?................4 3.1 I ..................4 NSTALAR LA PLICACIÓN...
  • Seite 105: Capítulo 1 Yakumo Quickstick Basic Dvb-T Introducción

    Capítulo 1 Yakumo QuickStick Basic DVB-T Introducción Introducción El Yakumo QuickStick Basic DVB-T es completamente compatible con el protocolo DVB-T para su PC sobremesa o notebook. De tamaño reducido y con entreface USB2.0 de alta velocidad, Ud. puede gozar de programas de TV digitales dondequiera! Es tambié...
  • Seite 106: Asos De La Instalación

    2.2 Pasos de la instalación  Instalar el DirectX 9.0 y reiniciar su sistema. (Si su computadora está instalada ya, podrá saltar al próximo paso.)  Conectar el Yakumo QuickStick Basic DVB-T a su computadora.  Instalar el Controlador.  Instalar la aplicación DTV.
  • Seite 107 F a v o r l e e r e l a c u e r d o d e l i c e n c i a c u i d a d o s a me n t e p a r a l u e g o s e l e c c i o n a r “ Acepto los términos de este acuerdo de licencia”...
  • Seite 108 E n t r a r e l n ú me r o s e r i a l d e l p r o d u c t o y h a c e r c l i q u e e n “ Siguiente” p a r a c o n t i n u a r . S e l e c c i o n e l a e d i c i ó...
  • Seite 109 Esta pantalla indica la ruta de programación original con el nombre de la carpeta. Ud. podrá c a mb i a r l o a s u r e f e r e n c i a p e r s o n a l . H a c e r c l i q u e e n “ Siguiente” p a r a c o n t i n u a r . Esta pantalla indica el icono de acceso rápido original con la carpeta de acceso rápido programado.
  • Seite 110 Favor estar seguro de que la ruta y el nombre de la carpeta sea correcto. Hacer clique en “ Siguiente” p a r a c o n t i n u a r . F a v o r s e l e c c i o n a r “ S í , r e i n i c i a mi c o mp u t a d o r a a h o r a ” . H a c e r c l i q u e e n “ Terminar” p a r a continuar.
  • Seite 111 10. H a c e r c l i q u e e n “ Terminar” y l a c o mp u t a d o r a s e r á r e i n i c i a d a s ó l a . L a i n s t a l a c i ó n d e aplicación está...
  • Seite 112 12. H a c e c l i q u e e n “ Siguiente” p a r a c o n t i n u a r . 13. H a c e c l i q u e e n “ Finalizar” y l a i n s t a l a c i ó n d e l D i r e c t X 9 . 0 e s tá lista. Su computadora será reiniciada sóla.
  • Seite 113: Conexión Del Equipo

    3.2 Conexión del Equipo Conexión del conector IEC a la antena. Conexión del conector IEC al Yakumo QuickStick Basic DVB-T. Conexión del Yakumo QuickStick Basic DVB-T al entreface USB en su computadora.
  • Seite 114: Nstalar El Controlador

    QuickStick Basic DVB-T y el entreface USB en su computadora. 3.3 Instalar el Controlador Favor estar seguro de que Ud. ha conectado el Yakumo QuickStick Basic DVB-T a su computadora antes de pasar a la instalación del controlador. La computadora detectará el nuevo hardware y la pantalla Asistente para el nuevo hardware encontrado s e a s o ma r á...
  • Seite 115 F a v o r s e l e c c i o n a r “ Buscar el controlador más adecuado en estas ubicaciones” . U d . p o d r á h a c e r c l i q u e e n “ Siguiente” p a r a e n c o n t r a r l a u b i c a c i ó n d e l c o n t r o l a d o r e n e l d i r e c t o r i o de CD-ROM.
  • Seite 116 H a c e c l i q u e e n “ Finalizer” p a r a c o n t i n u a r . F a v o r s e l e c c i o n a r “ Instalar desde una lista o ubicación específica (avanzada)” y h a c e c l i q u e e n “...
  • Seite 117 F a v o r s e l e c c i o n a r “ Buscar el controlador más adecuado en estas ubicaciones” . U d . p o d r á h a c e r c l i q u e e n “ Siguiente” p a r a e n c o n t r a r l a u b i c a c i ó n d e l c o n t r o l a d o r e n e l d i r e c t o r i o de CD-ROM.
  • Seite 118 H a c e r c l i q u e e n “ Finalizar” p a r a s a l i r . Ud. puede hacer doble revisión si los controladores del producto están bien instalados. Favor apretar Inicio y luego hacer clique derecho en Mi Computadora. Hacer clique en “...
  • Seite 119 10. H a c e r c l i q u e e n “ A d mi n i s t r a d o r d e A p a r a t o ” d e l a t a b l a H a r d w a r e . E n c u e n t r e l a c a t e g o r í a “...
  • Seite 120: Capítulo 4: Introducción Al Software/Sistema Dtv

    Capítulo 4: Introducción al Software/Sistema DTV El software DVB-T player es muy poderoso. Ud. puede gozar de efectos de sonido y visual digital de alta calidad. Ello no solamente proporciona programas de TV, Ud. puede usarlo también para instante grabación video digital (DVR) y Grabación Programada. Con la ayuda de la operación de Time Shift, Ud.
  • Seite 121 Seleccionar Frecuencia RF. Ud. podrá seleccionar uno de los siguientes. (1) País/Área: Ud. puede seleccionar la ubicación en que esté Ud.. (2) Todo: Si Ud. no puede encontrar su lista de ubicaciones en la lista de País/Área, Ud. puede seleccionar esta opción. (3) Esfera: Ud.
  • Seite 122: Rogramación De Grabación

    Surtido de Canal/Frecuencia Ud. puede usar la opción de surtido de chanal/frecuencia luego de escandir. H a c e r c l i q u e e n “ P r o g r a ma ” y a p a r e c e r á c o n e l s u r t i d o d e c a n a l . 2.
  • Seite 123 L u e g o d e c o mp l e t a r c o n l a p r o g r a ma c i ó n d e a r r i b a , U d . p u e d e h a c e r c l i q u e e n “ ”...
  • Seite 124 Cuando aparece la pantalla Input Grabación, favor seguir las instrucciones dadas a continuación. 1. Seleccionar un canal. 2. Programar tiempo de inicio y término de la grabación. 3. Ud. tendrá opciones de programación de fechas que son de una vez, todos los días y un día específico.
  • Seite 125: Istema Del Monitor

    4.3 Sistema del Monitor En la pantalla de sistema del monitor, Ud. puede ajustar de brillo, contraste y plenitud a base de su propia preferencia. Arrastra el curso del mouse para los ajustes. Si Ud. desea volver al sistema original, hace clique en『Resetear』. 4.4 Sistema de captación Ud.
  • Seite 126: Istema De Cambio De Tiempo

    4.5 Sistema de cambio de tiempo Si Ud. neecesita dejar el programa sin completar, podrá iniciar la función de grabación haciendo clique en el botón de Cambio de Tiempo en tiempo real. Cuando Ud. vuelva, todo lo que necesita es mover la barra de desplazamiento que indica estado de grabación en el panel para tocar el programa grabado.
  • Seite 127: Capítulo 5: Introducción Al Software Dtv

    Capítulo 5: Introducción al Software DTV 5.1 Control Panel Funcciones de Iconos Función Función Icono Icono Pantalla compoleta Tocar BOR-Borrar número de canal Bobionar, adelante rápido erróneo Revista de multi-canal Pare Canal arriba y abajo Pausa Llamado a canal Grabación video Mis favoritos Captación de fotos Cambio de tiempo...
  • Seite 128: Clique Derecho En El Menú Y Accesos Rápidos Al Teclado

    5.2 Clique derecho en el menú y accesos rápidos al teclado Hace clique en la tecla derecha del mouse cuando toca el software de aplicación DTV. Ud. verá el menú de la función y los acccesos rápidos al teclado, como a continuación: Función Enlace rápido Descripción...
  • Seite 129: Uncionrs

    L a a p l i c a c i ó n “ T e l e t e x t o ” e s u n s i mp le lector de teletextos. Para iniciar esta función, hace clique en el panel de control. Ello solamente funciona cuando el Yakumo QuickStick Basic DVB-T está...
  • Seite 130: Más Funciones

    5.4 Más Funciones ※ Mu d o : C u a n d o U d . h a c e c l i q u e e n “ Mu d o ” , 『 』se iluminará en el panel de control. ※...
  • Seite 131 ※ Teletexto: Esta est una aplicación de radiodifusión de palabras y números. Ud. recibirá 』para iniciar esta información de programas del proveedor de canal. Seleccione『 función. P+/ P- Pasar a la siguiente/previa página. F+/ F- Pasar a las 10 siguientes/previas páginas. M+/ M- Pasar a las 100 siguientes/previas páginas.
  • Seite 132: Ntroducción Of Remote Control Funcción

    5.5 Introducción of remote control funcción Programa de Aplicación Prendido o Apagado Control de volumen Control de canal Modo Mudo Input de Número Volver al Canal Pantalla Completa...
  • Seite 133: Capítulo 6 Fallas Y Soluciones

    6. Cuando la caja de diálogo está con error o la pantalla se pone negra Esto podría resultar de caja calidad de signo y el Yakumo QuickStick Basic DVB-T no recibe sufiecientes datos de programa o sía recibe datos equivocados. Favor revisar la conexión entre la caja Yakumo QuickStick Basic DVB-T y la antena.
  • Seite 134 La pantalla del Yakumo QuickStick Basic DVB-T d e b e s e r e l “ f o c o ”...
  • Seite 135: Servicio De Asistencia Y Garantía

    RMA por teléfono, puesto que si no la mercancía será rechazada o se devolverá intacta. Yakumo le ofrece una garantía de 2 años a partir de la fecha de la factura. En caso de fallo, en principio el comprador sólo tiene derecho a la reposición del producto. La reposición del producto implica la reparación o la entrega de un producto de repuesto.
  • Seite 136 Yakumo QuickStick Basic DVB-T Manuale Copyright © Copyright 2004. Tutti i diritti riservati. --------- si riserva il diritto di modificare I prodotti offerti o le specifiche senza preavviso. Non è consentito riprodurre, in qualsivoglia formato, nessuna parte della presente pubblicazione senza il permesso scritto di -----------.
  • Seite 137 Indice Capitolo 1 Introduzione lo Yakumo QuickStick Basic DVB-T Introduzione..... 3 Capitolo 2 Introduzi o n e a l l ’ i n s t a l l a z i o n e ................3 2.1 Requisiti di sistema ....................3 2 .
  • Seite 138: Capitolo 2 Introduzi O N E A L L ' I N S T A L L A Z I O N E

    Introduzione Introduzione Lo Yakumo QuickStick Basic DVB-T DVB-T USB è pienamente compatibile con il protocollo DVB-T per uso con desktop PC o laptop. Il design ultrasottile con interfaccia USB2.0 a alta velocità consente di seguire i programmi della TV digitale da qualsiasi postazione! È...
  • Seite 139: Capitolo 3: C O Me E S E G U I R E L ' I N S T A L L A Z I O N E

    2.2 P a s s i d a e s e g u i r e p e r l ’ i n s t a l l a z i o n e  Installare DirectX 9.0 e riavviare il computer. (Se sul computer è già stato installato, è possibile passare al passo successivo.)  Collegare lo Yakumo QuickStick Basic DVB-T al computer.  Installare il driver.  Installare il programma DTV.
  • Seite 140 Leggere con attenzione il contratto di licenza e poi s e l e z i o n a r e “ Accetto i termini di q u e s t ’ accordo di licenza” . F a r e c l i c s u “ Avanti” per proseguire. I n s e r i r e l e i n f o r ma z i o n i r e l a t i v e a l l ’...
  • Seite 141 Digitare il numero di serie del prodotto e fare c l i c s u “ Avanti” per proseguire. Selezionare l ’ ingua e fare clic s u “ Avanti” per proseguire.
  • Seite 142 Questa finestra mostra il percorso originale d ’ installazione e il nome della cartella. Queste informazioni possono essere modificate. Fare cl i c s u “ Avanti” per proseguire. Q u e s t a f i n e s t r a mo s t r a l ’ i c o n a p e r i l c o l l e g a me n t o r a p i d o e l a c a r t e l l a e l a c a r t e l l a c o n i l collegamento rapido alle impostazioni predefinite.
  • Seite 143 Controllare che il percorso e il nome della cartella siano corretti. Fare c l i c s u “ Avanti” per proseguire. S e l e z i o n a r e “ Sì. Riavviare il computer ora” . F a r e c l i c s u “ Fine” per proseguire.
  • Seite 144 10. Fare c l i c s u “ Fine” e il computer viene riavviato automaticamente. L ’ i n s t a l l a z i o n e d e l l ’ a p p l i c a z i o n e è s t a t a c o mp l e t a t a c o n s u c c e s s o . Leggere attentamente il contratto di licenza e poi s e l e z i o n a r e “...
  • Seite 145 Fare cli c s u “ Avanti” per proseguire. Fare cl i c s u “ Fine” p e r c o mp l e t a r e l ’ i n s t a l l a z i o n e d i DirectX 9.0. Il computer viene riavviato automaticamente.
  • Seite 146: Connessione Apparecchiatura

    Collegare il connettore IEC a l l ’ antenna. Collegare il connettore IEC lo Yakumo QuickStick Basic DVB-T Collegare lo Yakumo QuickStick Basic DVB-T a l l ’ i n t e r f a c c i aUSB del computer.
  • Seite 147: Installare Il Driver

    (Opzionale) Potrebbe essere necessario utilizzare un cavo USB più lungo per effettuare la connessione tra lo Yakumo QuickStick Basic DVB-T e l ’ i n t e r f a c c i aUSB del computer. 3.3 Installare il driver Controllare di aver collegato il sintonizzatore DTV per USB al computer prima di passare a l l ’...
  • Seite 148 Selezionare “ Ricerca il miglior driver disponibile in questi percorsi” . Fare clic su “ Avanti” per trovare il driver nella directory del CD-ROM. Selezionare 『\DTV_Driver』. Fare cli c s u “ Continua” per proseguire.
  • Seite 149 Fare clic su “ Fine” per proseguire. Selezionare “ Installa da un elenco o percorso specifico(per utenti esperti)” e poi fare clic s u “ Avanti” per proseguire.
  • Seite 150 S e l e z i o n a r e “ Ricerca il miglior driver disponibile in questi percorsi” . Fare clic su “ Avanti” per trovare il driver nella directory del CD-ROM. Selezionare 『\DTV_Driver』. Fare clic su “ Continua” per proseguire.
  • Seite 151 Fare cl i c s u “ Fine” per uscire. Si deve eseguire un doppio controllo per verificare che i driver del prodotto sono stati installati correttamente. Premere Start/Avvio e poi fare clic con il tasto destro su Risorse del computer.
  • Seite 152 10. F a r e c l i c s u “ Gestione periferiche” nella scheda Hardware. Trovare la categoria “ Controller audio, video e giochi” d o v e è p o s s i b i l e v e d e r e “ Digital-TV Receiver” . Se non è p r e s e n t e n e l l ’...
  • Seite 153: Capitolo 4: Introduzione Al Software/ Sistema Dtv

    Capitolo 4: Introduzione al Software/ Sistema DTV Il software DVB-Tplayer è molto potente. Consente di vedere in manera ottimale audio digitale di elevata quaità e effetti video. Oltre alla visione di programmi televisivi, il software può essere utilizzato per registrazioni di video digitali instantanee (DVR) e per registrazioni programmate. Grazie alla funzione Time Shift, non perderete nessun appuntamento televisivo.
  • Seite 154 Selezionare la RF frequency (Frequenza RF). È possibile selezionare una delle opzioni seguenti. (1) Country/ Area (Nazione/Area): è possibile selezionare il luogo dove ci si trova. (2) All (Tutte): Se la locaità dove ci si trova non è presente in n e l l ’...
  • Seite 155 Ordinamento canali/frequenze Una volta completata la ricerca dei canali, è possibile riordinare I canali/le frequenze. 1. F a r e c l i c s u “ Program” ( P r o g r a mma ) p e r v i s u a l i z z a r e l ’ o r d i n a me n t o p e r c a n a l e . 2.
  • Seite 156: Impostazioni Per Le Registrazioni

    4.2 Impostazioni per le registrazioni È possibile effettuare registrazioni in due modi: in tempo reale e programmando le registrazioni. Registrazione in tempo reale: quando si registra un programma in tempo reale, il file registrato viene salvato nella cartella di destinazione: C:\Program Files\DTV\DVB-T USB 2.0\Capture\Video.mpg.
  • Seite 157 Quando viene visualizzata la finestra per le registrazioni, seguire le istruzioni presentate di seguito. 1. Selezionare un canale. 2. I mp o s t a r e l ‘ o r a d i i n i z i o e f i n e d e l l a r e g i s t r a z i o n e . 3.
  • Seite 158 Nota: Non è possibile registrare contemporaneament due programmi provenienti da frequenze differenti. Fare attenzione allo spazio libero sulla periferica di registrazione. Registrazioni di lunga durata potrebbero superare la capacità del disco rigido.
  • Seite 159: Configurazione Del Display

    4.3 Configurazione del display Dalla finestra per la configurazione del display è possibile regolare la luminosità, il contrasto e il colore come desiderato. Trascinare il cursore per poter effettuare le regolazioni. Per ripristinare le impostazioni originali fare clic su 『Reset』. 4.4 Configurazione della modalità...
  • Seite 160: Configurazione Di Time Shift

    4.5 Configurazione di Time shift È possibil effettuare registrazioni n tempo reale facendo clic sul tasto Time-Shift, in particolare se dovete uscire mentre state guardando un programma che non volete perdere. Al vostro rientro, è sufficiente spostare la barra di scorrimento presente sul pannello per poter riprodurre il programma che avete registrato.
  • Seite 161: Capitolo 5: Introduzione Al Software Dtv

    Capitolo 5: Introduzione al software DTV 5.1 Pannello di controllo Funzione delle icone Icona Funzione Icona Funzione A tutto schermo Play ELIM - Elimina canale errato Rewind, fast-forward Anteprima multicanale Stop Canale + e - Pausa Richiamo canale Registrazione video Preferiti Cattura foto Mute...
  • Seite 162: Menu Clic Destro E Tasti Rapidi

    5.2 Menu clic destro e tasti rapidi F a r e c l i c s u l t a s t o d e s t r o d e l mo u s e q u a n d o l ’ a p p l i c a z i o n e D T V è i n r i p r o d u z i o n e . V e n g o n o visualizzati i seguenti menu con i comandi rapidi da tastiera e le funzioni Funzione Comando...
  • Seite 163 schermo) Increase volume Aumenta il volume (Aumenta il volume) Decrease volume Diminuisce il volume (Diminuisce il volume) Close to bar (Riduce Ctrl+Z Chiude il pannello di controllo e lo riduce nella barra nella barra) About (Informazioni) Ctrl+A Visualizza informazioni sulla versione di DTV Help (Guida) Guida in linea Close (Chiudi)
  • Seite 164: Funzioni

    5.3 Funzioni Channel Title Display (Visualizzazione titolo canale) Il nome del canale corrente viene visuaizzato nel pannello di controllo nella lingua assegnata dal gestore del servizio. Video Recording (Registrazione video) È possibile registrare video facendo clic su . È anche possibile programmare delle r e g i s t r a z i o n i n e l l a s c h e r ma t a “...
  • Seite 165: Altre Funzioni

    5.4 Altre funzioni ※ Mute display (Visualizzazione del mute):Q u a n d o s i f a c l i c s u l t a s t o “ Mu t e ” , 『 』si illumina sul pannello di controllo. ※...
  • Seite 166 registrazione viene visualizzata. ※ Teletext (Televideo):S i t r a t t a d i u n ’ a p p l i c a z i o n e p e r l a t r a s mi s s i o n e d i p a r o l e e c i f r e . È possibile ricevere informazioni dal gestore del servizio per i canale interessato.
  • Seite 167: Introduzione Alle Funzioni Del Telecomando

    5.5 Introduzione alle funzioni del telecomando Attiva/disattiva applicazione Controllo del volume Controllo canali Modalità mute Inserire numero Ritorno canali A tutto schermo...
  • Seite 168: Capitolo 6 Ricerca Dei Guasti

    3 secondi. Collegare lo Yakumo QuickStick Basic DVB-T a u n ’ a l t r a p o r t a U S B d e l P C . 3. Impossibile trovare il driver del Yakumo QuickStick Basic DVB-T con Windows a.
  • Seite 169 La finestra del Yakumo QuickStick Basic DVB-T d e v e e s s e r e l a f i n e s t r a “ p r i n c i p a l e ”...
  • Seite 170: Assistenza E Garanzia

    (6 mesi). In caso di quesiti tecnici, visitare il sito Yakumo a l l ’ i n d i r i z z o www.yakumo.com o inviare u n ’ e -mail a: info@yakumo.com.
  • Seite 171 yakumo.com...

Inhaltsverzeichnis