Herunterladen Inhalt Inhalt Diese Seite drucken

Werbung

Verfügbare Sprachen
  • DE

Verfügbare Sprachen

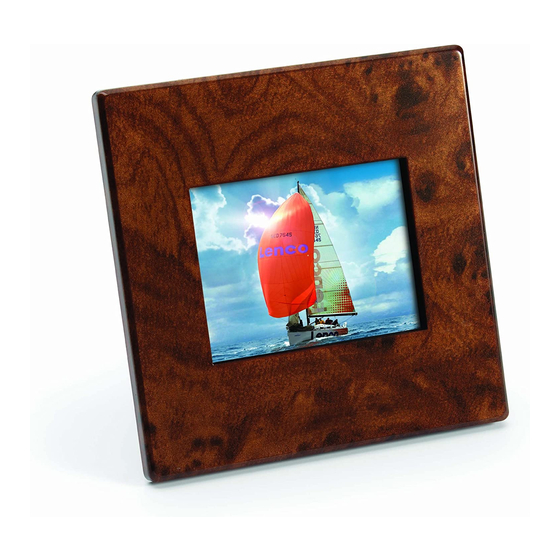
DIGITAL PHOTO FRAME
DF-241

Werbung

Inhaltsverzeichnis
loading

Inhaltszusammenfassung für LENCO DF-241

  • Seite 1 DIGITAL PHOTO FRAME DF-241...
  • Seite 2: Inhaltsverzeichnis

    Table of Contents Table of Contents...............1 ENGLISH................2-11 DEUTSCH................12-21 Español................22-31 NEDERLANDS..............32-41 FRANCAIS................42-51...
  • Seite 3: Digital Photo Frame

    Microsoft OS UserManual ENGLISH DIGITAL PHOTO FRAME Read First Quick Installation Guide SYSTEM REQUIREMENTS: Windows 98 / 2000 / ME / XP / Vista INSTALLATION PROCEDURE: ** Important: Install application software before connect device to PC. ** 1. Disconnect device USB cable from PC if it is connected. 2.
  • Seite 4: Important Safety Instructions

    Introduction This Digital Photo Frame is a stand-alone device that is designed to transfer and store images from a PC and then display the images. Using the application software supplied with this device, you can organize,edit, enhance and download the image in your PC to this device using USB. Important Safety Instructions WARNING: This device will be fully charged after two hours charging through USB...
  • Seite 5 Placing the Photo Viewer 1. Press down the locking tab and pull away the main unit from the frame to separate the main unit. ----------------- ------------------------------------------------ 2. Press down the left end of the rod, and grab the other end to remove the rod from the main unit.
  • Seite 6: Charging The Battery

    Installing the Software / Hardware IMPORTANT : You must install the software to your computer before connecting the device to your computer for the first time. 1. Insert the CD-ROM and run the file Photo Viewer SETUP; follow the onscreen instructions. 2.
  • Seite 7 Downloading Photos from Your Computer to Photo Frame Attention: You must connect the Photo Viewer to the PC before launching the software. 1. Insert one end of the USB Cable into USB on your computer's USB port and the other end into the Photo Viewer. USB on computer Mini B on Photo Album USB Cable...
  • Seite 8 Click to rotate your photos Click to post photos in Preview Area to Collection Panel. - Preview Area. - Collection Panel. - Number of photos on Collection Panel. - Maximum number of photos can be stored in the Photo Frame.
  • Seite 9 4. Browse your computer for photo(s) you want to download. The selected photo is displayed in the Preview Area. Note: The Photo Frame reads JPG/ BMP/ TIF/ GIF/ PNG images. 5. If the photo is too big, a red box appears on the photo, and you can click the red box and mover around the box to crop the photo.
  • Seite 10 Using the Function Keys 1. Monitor /MODE 3. Previous Image Delete images 4. Next Image Delete all Images. 5. Mini USB Connection Electromagnetic Emissions Statement...
  • Seite 11 Using the Photo Viewer Press and hold /MODE for about 4 seconds to turn the unit on. Press and hold again /MODE for about 4 seconds to turn the unit off. Note: You need to turn off the slideshow before you can turn off the Photo Viewer.
  • Seite 12 Troubleshooting for Installation If the device displays error message “Device not connected” during installation, follow these steps to resolve: A. For Software issues (Photo Viewer software can not launch) 1. Re-insert and launch the installation CD and choose “Remove” or “Uninstall”...
  • Seite 13: Deutsch

    DEUTSCH Microsoft OS UserManual DIGITALER BILDERRAHMEN Bitte lesen! Kurzinstallationsanleitung SYSTEMANFORDERUNGEN Windows 98 / 2000 / ME / XP/ Vista SOFTWAREINSTALLATION: ** Wichtig: Installieren Sie die Software, bevor Sie das Gerät an einen PC anschließen. ** 1. Trennen Sie das Gerät vom USB-Kabel ab, wenn es an einen PC angeschlossen ist.
  • Seite 14: Einleitung

    Einleitung Dieses digitale Fotoalbum ist ein eigenständiges Gerät, auf das Sie Bilder vom PC kopieren und dann damit betrachten können. Benutzen Sie die mitgelieferte Software zum Verwalten, Bearbeiten, Verbessern und Kopieren der Bilder vom PC auf das Gerät. Dieses Fotoalbum kann tausende von Fotos speichern Wichtige Sicherheitshinweise WARNUNG:...
  • Seite 15: Aufstellung

    Aufstellung Der Fotorahmen kann entweder im Hochformat (vertikal) oder im Querformat (horizontal) aufgestellt werden. 1. Drücken Sie die Sperrlasche nach unten und ziehen Sie das Gerät aus dem Rahmen heraus. ----------------- ------------------------------------------------ 2. Drücken Sie das linke Ende der Stange nach unten und ziehen Sie die sie am anderen Ende heraus.
  • Seite 16: Software- Und Hardwareinstallation

    Software- und Hardwareinstallation WICHTIG: Sie müssen die Software auf Ihrem Computer installieren, bevor Sie das Gerät das erste Mal am Computer anschließen. 1. Legen Sie die CD-ROM ein und starten Sie das Programm SETUP. EXE. Folgen Sie dann einfach den Bildschirmanweisungen. 2.
  • Seite 17 Kopieren von Fotos von Ihrem Computer auf den Fotorahmen Achtung: Sie müssen den Fotobetrachter an den PC anschließen, bevor Sie die Software starten. 1. Verbinden Sie das eine Ende des USB-Kabels mit dem USB- Anschluss Ihres Computers und das andere Ende mit dem Fotobetrachter.
  • Seite 18 Klicken Sie hier zum Drehen Ihrer Fotos. Klicken Sie hier, um die Fotos vom Vorschaubereich zum Auswahlfenster zu kopieren. - Vorschaubereich - Auswahlfenster - Anzahl der Fotos im Auswahlfenster - Maximale Anzahl der Fotos, die auf dem Fotorahmen gespeichert werden können.
  • Seite 19 4. Suchen Sie nach Fotos auf Ihrem Computer, die Sie auf dem Fotorahmen kopieren wollen. Die markierten Fotos werden im Vorschaubereich abgebildet. Hinweis: Das Gerät unterstützt JPG-, BMP-, TIF-, FIF- und PNG- Bilder. 5. Wenn die Fotos zu groß sind, erscheint ein roter Kasten auf dem Fotos.
  • Seite 20: Benutzung Der Funktionstasten

    Benutzung der Funktionstasten 1. Monitor /MODE 3. Voriges Bild Bilder löschen 4. Nächstes Bild Alle Bilder löschen 5. Mini-USB-Anschluss Erklärung zu elektromagnetischer Strahlung Dieses Gerät erfüllt die Anforderungen des Paragrafen 15 der FCC-Verordnung und die Anforderungen des CE-Standards. Zum Betrieb des Geräts müssen folgende Bedingungen erfüllt sein: (1) Das Gerät darf keine schädigenden Störstrahlungen verursachen.
  • Seite 21: Ein-/Ausschalten Des Fotorahmens

    Ein-/Ausschalten des Fotorahmens Halten Sie die /MODE-Taste für 4 Sekunden gedrückt, um das Gerät einzuschalten. Um das Gerät wieder auszuschalten, halten Sie bitte die /MODE-Taste erneut für 4 Sekunden gedrückt. Hinweis: Bevor Sie das Gerät ausschalten können, müssen Sie die Diashow stoppen.
  • Seite 22 Fehlerbehebung IWenn während der Installation die Fehlermeldung „Device not connected“ erscheint, gehen Sie bitte auf folgendende Weise vor, um das Problem zu beheben: A.Softwareproblem (die Photo Viewer Software kann nicht gestartet werden) 1. Legen Sie die Installations-CD erneut ein und wählen Sie im Installationsmenü...
  • Seite 23: Requisitos Del Sistema

    Español Manual de Usuario Microsoft PORTARETRATO DIGITAL Lea Primero Guía rápida de instalación REQUISITOS DEL SISTEMA 1.Windows 98/2000/ME/XP/VISTA PROCEDIMIENTO DE INSTALACIÓN: Importante: instale el software de aplicación antes de conectar el dispositivo al PC. 1. Desconecte el cable USB del PC si está conectado. 2.
  • Seite 24 INTRODUCCIÓN Este álbum de fotos digitales es un dispositivo que ha sido diseñado para transferir y almacenar imágenes desde un PC y luego poder visualizar las imágenes. Usando el software de la aplicación proporcionado con este dispositivo, puede organizar, editar, mejorar y descargar sus imágenes en su PC hasta el dispositivo usando el USB.
  • Seite 25 Colocar el Álbum de Fotos El marco de fotos puede ser colocado verticalmente o (retrato) o de horizontalmente (paisajes). 1. Pulse la lengüeta de bloqueo y tire de la unidad principal del marco para separar la unidad principal. ----------------- ------------------------------------------------ 2.
  • Seite 26 INSTALACIÓN DEL SOFTWARE /HARDWARE IMPORTANTE: tiene que instalar el software en su ordenador antes de conectar el dispositivo a su ordenador por la primera vez. 1. Inserte el CD-ROM y ejecute el archivo SETUP.EXE, siga las instrucciones en la pantalla. 2.
  • Seite 27 Escargar fotos desde su pc al Álbum de fotos digitales Attención: debe conectar su Photo Viewer a un PC antes de ejecutar el software. 1. Inserte una extremidad del cable USB en el puerto USB de su ordenador y la otra extremidad a Photo Viewer. USB en su ordenador Min i B on Album de Fotos USB Cable...
  • Seite 28 Haga clic para girar sus fotos Haga clic para mostrar las fotos en un Área Previa a su Panel de Colección. - Área Previa. - Panel de Colección. Número de fotos en Panel de Colección. Número máximo de fotos que pueden ser guardadas en su Marco de Fotos.
  • Seite 29 4. Explore su ordenador para descargar la(s) foto(s) deseada(s). Se visualiza la foto seleccionada en el Área Previa. Nota: El marco de fotos lee imágenes JPG/ BMP/ TIF/ GIF/ PNG. 5. Si la foto es demasiado grande, aparecerá un cuadro rojo en la foto, y puede hacer clic en el cuadro rojo y desplazarse alrededor del cuadro rojo para trabajar con la foto.
  • Seite 30: Usar Las Teclas De Función

    Usar las teclas de función 1.Pantalla /MODE 3. Imagen anterior Eliminar imágenes 4. Imagen siguiente Eliminar todas las imágenes. 5.Conexión mini USB DECLARACIÓN DE EMISIONES ELECTROMAGNÉTICAS Este aparato cumple con la Parte 15 de las normas de la FCC y CE. El funcionamiento está sujeto a las condiciones siguientes: (1)Este aparato no debería causar interferencias dañinas.
  • Seite 31 Usar el Photo Viewer Pulse y mantenga pulsando /MODE durante 4 segundos para encender la unidad. Pulse y mantenga pulsando de nuevo /MODE durante 4 segundos para apagar la unidad. Nota: necesita apagar el slideshow o Visualización automática de fotos presentación antes para apagar el Photo Viewer (Visualizador de fotos).
  • Seite 32 Guía de problemas y soluciones para la instalación Si el dispositivo muestra el mensaje de error “Device not connected” (dispositivo no conectado) durante la instalación, siga los pasos siguientes: A. Para problemas de Software (el software de Photo Viewer no puede ejecutarse) 1.
  • Seite 33: Installatieprocedure

    Microsoft OS Gebruiksaanwijzing NEDERLANDS DIGITALE FOTOALBUM Lees Eerst Snelle Installatiegids DIGITALE FOTOALBUM Windows 98 / 2000 / ME / XP / Vista INSTALLATIEPROCEDURE: ** Belangrijk: Installeer applicatiesoftware vóór aansluiten op de PC. ** 1. Ontkoppel de USB-kabel van de PC (indien aangesloten). 2.
  • Seite 34 Introductie Dit Digitale Fotoalbum is een 'stand-alone' apparaat, dat plaatjes van een PC kan opslaan, en vervolgens weergeven. Met de meegeleverde software kunt u plaatjes bewerken, organiseren en mooier maken, en via de USB downloaden naar dit apparaat. U kunt op dit Fotoalbum duizenden foto's opslaan Belangrijke Veiligheidsvoorschriften WAARSCHUWING:...
  • Seite 35 Het Fotoframe Neerzetten De Fotolijst kan verticaal (portret)en horizontaal (landschap) neergezet worden. 1. Druk de borglip naar beneden en trek het apparaat en de lijst uit elkaar. ----------------- ------------------------------------------------ 2. Druk het linker eind van het staafje naar beneden en grijp het andere eind om het staafje van het apparaat te verwijderen.
  • Seite 36 De Software/Hardware Installeren BELANGRIJK: Installeer eerst de software, vóór u het apparaat voor de eerste keer op de computer aansluit. 1. Plaats de CD-ROM erin, en start het programma SETUP.EXE; volg de instructies op het scherm. 2. Het programma 'Photo Viewer wordt op uw PC geïnstalleerd en een snelkoppeling verschijnt op het bureablad.
  • Seite 37 Foto's van uw Computer naar uw Fotolijst Downloaden Let op: u moet de Fotokijker op de PC aansluiten, vóór u de software start. 1. Steek één eind van de USB-kabel in de USB-poort van uw computer, en het andere eind in de USB-aansluiting van uw Fotokijker. USB op computer Mini B op Fotoalbum USB Cable...
  • Seite 38 Klik hierop om uw foto's te roteren. Klik hierop om foto's in het Voorvertoongebied ('Preview area) naar het Collectiescherm ('Collection') te brengen. Voorvertoongebied ('Preview area') Collectiescherm ('Collection') Aantal foto's op het Collectiescherm ('Collection') Maximum aantal foto's dat op de Fotolijst opgeslagen kan worden...
  • Seite 39 Blader op uw computer naar foto('s) die u wilt downloaden.De geselecteerde foto wordt getoond in het Voorvertoongebied ('Preview Area'). Let op: de Fotolijst leest JPG/ BMP/ TIF/ GIF/ PNG plaatjes. 5. Als de foto t e groot is, dan verschijnt een rood vak op de foto. U kunt op het rode vak klikken en het heen en weer bewegen om een gedeelte van de foto af te snijden.
  • Seite 40 De Functieknoppen Gebruiken 1. Scherm /MODE 3. Vorige Plaatje Wis Plaatjes Volgende Plaatje Wis alle Plaatjes 5. Mini USB Aansluiting Verklaring Betreffende Elektromagnetische Emissies...
  • Seite 41 De Fotolijst Aan/Uit Zetten Houd /MODUS zo'n 4 seconden ingedrukt om het apparaa t aan te zetten. Houd /MODUS nogmaals zo'n 4 seconden ingedrukt om het apparaat weer uit te zetten. Let op: u moet de fotopresentatie uitzetten, voor u de Fotolijst uit kunt zetten.
  • Seite 42 Problemen bij de Installatie Oplossen Volg deze stappen, als het apparaat bij de installatie de foutmelding “Device not connected” toont: A. Bij problemen met de software (U kunt de Photo Viewer software niet starten) 1. Plaats de installatie CD er opnieuw in en kies “Remove” of “Uninstall” uit het menu.
  • Seite 43: Francais

    S.E.Microsoftft Manuel d'utilisation FRANCAIS CADRE PHOTO DIGITAL premier A lire en Guide d'installation rapide CONFIGURATION SYSTEME REQUISE: Windows 98 / 2000 / ME / XP/Vista INSTALLATION: ** Important: Installez le logiciel fourni avec l'appareil avant de raccorder celui-ci à votre ordinateur. ** 1.
  • Seite 44: Consignes De Sécurité Importantes

    Introduction Ce cadre photo numérique est un périphérique autonome conçu pour transférer et stocker des images à partir d'un ordinateur ainsi que de les afficher. En utilisant le logiciel fourni avec cet appareil, vous pouvez organiser, modifier, améliorer et transférer les images de votre ordinateur sur cet appareil via USB.
  • Seite 45 Installation du cadre photo Le cadre photo peut être positionné verticalement (portrait) ou horizontalement(paysage). 1. Appuyez sur la touche de verrouillage et tirez l unité principale pour détacher celle-ci du cadre. ----------------- ------------------------------------------------ 2. Appuyez sur l'extrémité gauche de la tige, et tenez l'autre extrémité...
  • Seite 46 Installation du logiciel / pilote IMPORTANT: Vous devez d'abord installer le logiciel sur votre ordinateur avant de raccorder le cadre photo à celui-ci. 1. Insérez le CD-ROM et double cliquez sur le fichier SETUP.EXE; suivez les instructions affichées à l'écran. 2.
  • Seite 47 Transférer des photos sur le cadre photo numérique à partir de l'ordinateur Attention: Raccordez le cadre photo à votre ordinateur avant de lancer le logiciel. 1. Raccordez une extrémité du câble USB à un port USB de votre ordinateur, et l'autre extrémité au cadre photo. Port USB de l'ordinateur Port mini USB du cadre photo Câble USB...
  • Seite 48 Cliquez pour effectuer une rotation sur image Cliquez pour transférer une image en cours de prévisualisation vers la fenêtre Collection. - Espace de prévisualisation. - Fenêtre Collection. - Nombre de photos de la fenêtre Collection. - Nombre maximal de photos pouvant être stockées sur le cadre photo...
  • Seite 49 4. Parcourez les dossiers de votre ordinateur pour rechercher des photos à transférer.La photo sélectionnée est affichée dans l'espace de prévisualisation.Remarque: Le cadre photo prend en charge les formats de fichiers image suivants : JPG / BMP / TIF / GIF / PNG. 5.
  • Seite 50: Fonctionnement Des Touches

    Fonctionnement des touches 1. Ecran / MODE 3. Image précédente Supprimer les images 4. Image suivante Supprimer toutes les images. 5. Connecteur Mini USB Déclaration sur les emissions électromagnetiques Cet équipement est conforme à la partie 15 des règlements de la FCC et de la CE. L'utilisation de l'appareil est soumise aux deux conditions.
  • Seite 51: Visionner Des Photos

    Mise en marche/arrêt du cadre photo Appuyez et maintenez enfoncée la touche / MODE pendant 4 secondes pour mettre l'appareil en marche. Appuyez et maintenez enfoncée la touche à nouveau / MODE pendant 4 secondes pour éteindre l'appareil Remarque: vous devez désactiver le Diaporama avant d'éteindre le cadre photo.
  • Seite 52 Résolution des problèmes survenant lors de l'installation Lorsque l'écran affiche un message d'erreur “Périphérique non connecté” durant l'installation, suivez les étapes suivantes pour résoudre ce problème: A. Problèmes avec le logiciel (impossible de lancer le logiciel Photo Viewer) 1. Réinsérez et lancez à nouveau le CD d'installation et sélectionnez “Supprimer”...
  • Seite 53 If at any time in the future you should need to dispose of this product please note that: Waste electrical products should not be disposed of with household waste. Please recycle where facilities exist. Check with your Local Authority or retailer for recycling advice.

Inhaltsverzeichnis