Fabbster 11-1 Aufbauanleitung

Inhaltszusammenfassung für Fabbster 11-1
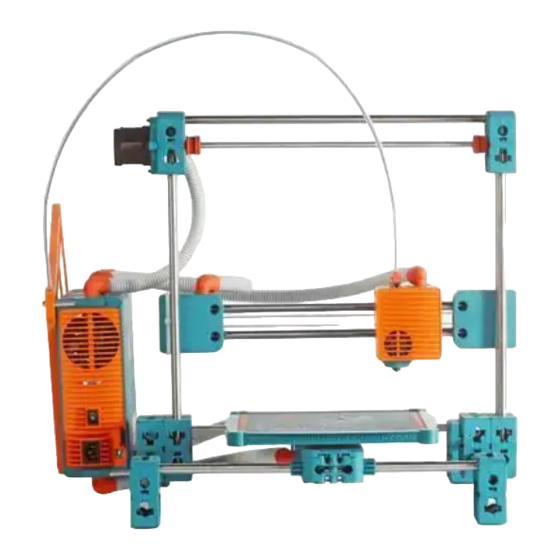
- Seite 1 Aufbauanleitung Assembly instruction Sicherheitshinweise auf den letzten Seiten beachten! Note safety guidelines on the last pages!
- Seite 2 parts 1x clippers 1x scraper 1x allen key big 5466 5473 1x allen key small 160x screw M5x30 160x nut M5 5467 5471 5471 2x screw 2x screw 20x screw M3x6 M5x70 M5x60 5478 5459 5472 4x distance piece M5x50 4x belt 2x pulley 5461...
- Seite 3 parts 5475 5475 6194 10x linear bearings 8x screw M3x16 4x motor Nema 17 5477 5503 5504 11x radial bearing 2x center gear 6x planet gear 5505 5507 6278 2x planet carrier 2x gear box drive shaft connector 5522 6277 5559 1x multipurpose 1x tube adaptor...
- Seite 4 parts 5535 5712 5457 1x corrugated pipe 520mm 4x screw M5x40 30x cassette 6082 6081 5533 1x corrugated 1x corrugated 1x corrugated pipe 300mm pipe 280mm pipe 350mm 5534 5464 6031 8x long frame rod 1x thin transmission rod 1x corrugated pipe 360mm 5772 5846...
-
Seite 5: General Instructions
General Instructions Schrauben nicht fixieren bis dieses Symbol auftaucht: Davor nur mit 2,5-3 Umdrehungen ansetzen! Do not fix the screws unless you see this symbol: Until then just tighten the screws with 2,5-3 turns! Vor jedem Schritt die Teile bereitlegen. Preposition the parts before beginning each step. - Seite 6 parts needed in step 5457 5459 5475 2x pulley 2x motor Nema 17 2x cassette 5467 8x screw M3x6...
- Seite 7 Mind the cable orientation! ~ 2mm HINT: Push the motor on a flat surface to mount the pulley.
- Seite 8 parts needed in step 5467 5522 5475 2x multipurpose 8x screw M3x6 2x motor Nema 17 grease 5507 5505 5504 2x gear box 2x planet carrier 6x planet gear 5503 2x center gear...
- Seite 9 Grease HINT: Use the planet carrier as a tool to push down the center gear. Rough side of planetary gears facing planet carrier, smooth side facing up!
- Seite 10 5457 5473 12x cassette 96x nut M5 Insert 8 nuts per cassette HINT: If the nuts don’t clamp use a piece of tape!
- Seite 11 parts needed in step 5457 1x cassette 1x motor cassette 2x cassettes with nuts 5475 5477 5461 3x linear bearings 1x deflection pulley 2x radial bearing 5465 5478 5466 2x short slide rod 16x screw M5x30 1x belt...
- Seite 13 parts needed in step 5457 1x cassette 1x motor cassette 2x cassettes with nuts 5475 5477 5461 7x linear bearings 1x deflection pulley 2x radial bearing 5465 5478 5466 2x short slide rod 16x screw M5x30 3x belt...
- Seite 15 150N-200N 15kg-20kg Tension the belt! Belts should vibrate 2-3sec when plucked...
- Seite 16 parts needed in step 5457 5466 5473 2x cassette 2x screw M5x30 2x nut M5 5477 2x radial bearing...
- Seite 17 0,5cm 0,5cm Caution: Screws only needed for fabbster 11.1 - not for fabbsterG! 0,5cm...
- Seite 18 parts needed in step 5457 5464 1x long frame rod 1x cassette 2x cassettes with nuts 5477 5458 5461 1x deflection pulley 3x radial bearing 2x ferrule 6017 5465 5466 1x short slide rod 16x screw M5x30 1x hex pulley...
- Seite 20 parts needed in step 5457 5464 1x long frame rod 1x cassette 2x cassettes with nuts 6018 5477 5458 1x gearbox adapter 3x radial bearing 2x ferrule 5465 5461 5466 2x short slide rod 12x screw M5x30 1x deflection pulley...
- Seite 22 parts needed in step 5457 5466 5458 32x screw M5x30 4x ferrule 4x cassette 4x cassettes with nuts...
- Seite 24 12cm 12cm 11 11...
- Seite 26 parts needed in step 6194 5466 5473 8x screw M5x30 1x screw M5x45 9x nut M5 1x motor with planetary gearbox...
- Seite 28 parts needed in step 6082 5466 5473 1x corrugated 3x screw M5x30 pipe 300mm 3x nut M5 6000 90° pipe bracket...
- Seite 29 Fold motor cable and run through corrugated pipe: 3x 20cm...
- Seite 30 5464 2x long frame rod Tension the belt! Belts should vibrate 2-3sec when plucked 150N-200N 15kg-20kg HINT: Press on the rod from above while pulling the cassette up to tension the belt.
- Seite 31 5472 5466 2x distance piece 2x screw M5x30 M5x50 Remove nuts before installing distance pieces!
- Seite 32 parts needed in step 6081 5466 5473 1x corrugated 4x screw M5x30 pipe 350mm 4x nut M5 6000 6068 5877 90° pipe bracket 1x B/R cable heating 670mm 1x B/W Temp sensor cable (platform) 5457 5461 From Step 4 1x belt stopper 2x cassette 5877 1x BLU/R cable heating 670mm...
- Seite 33 TAPE IS USEFUL...
- Seite 34 parts needed in step 5466 5473 5458 4x screw M5x30 2x ferrule 4x nut M5 5464 1x long frame rod...
- Seite 35 13,5cm 18,5cm...
- Seite 36 parts needed in step 5466 5473 5458 4x screw M5x30 2x ferrule 4x nut M5 5464 1x long frame rod...
- Seite 37 18,5cm 13,5cm...
- Seite 38 Tension the belt!
- Seite 39 parts needed in step 6016 6015 6031 1x thin transmission rod 2x stabilization bracket 2x stabilization socket 6085 6194 8x nut M3 8x screw M3x16...
- Seite 40 Fix only screws on left bracket!
- Seite 41 5464 2x long frame rod Insert lateral rod Move right bracket to the outside Move X-axis up to adjust the distance between upper cassettes!
- Seite 42 23-26 parts needed in steps 5457 5461 1x motor with 1x belt stopper 2x cassette planetary gearbox 6346 5492 5501 1x B/W cable temp. sensor 960mm 1x fan 1x nozzle unit vers. II 5712 5493 5473 1x screw M5x40 1x B/R cable heating 860mm 8x nut M5 6063 6367...
- Seite 43 Detailed Steps on next pages 5466 3x screw M5x30 5471 2x screw M5x70 5712 1x screw M5x40 5471 2x screw M5x60...
- Seite 44 Run cables through corrugated pipe first!
- Seite 46 6367 LABEL/STICKER ON BACKSIDE OF FAN FACES NOZZLE!
- Seite 47 5472 5779 5466 2x distance piece 2x screw M5x30 M5x50 1x e-box boards...
- Seite 48 parts needed in step 6063 6251 6074 2x rocker switch 2x end switch 1x cassette cover...
- Seite 50 5534 6000 Open screws to insert 1x corrugated 90° pipe bracket 90°-Adapter! pipe 360mm TAPE IS USEFUL Fold motor cable and run through corrugated pipe: 3x 20cm...
- Seite 51 parts needed in step 6063 6251 6074 1x rocker switch 1x end switch 1x cassette cover...
- Seite 53 parts needed in step 6000 5533 1x corrugated 90° pipe bracket pipe 280mm...
- Seite 54 Fold motor cable and run through corrugated pipe: 3x 20cm...
- Seite 55 parts needed in step 5773 5715 5777 4x clamping bar 1x inlay 1x platform carrier 6194 4x screw M5x45...
- Seite 56 Heated Build Platform:...
- Seite 57 power supply Nozzle Gen II: Reversed Polarity Driver-Board Z-motor Y-motor X-motor Extr.-motor...
-
Seite 58: Control Board
Control-Board Extruder FabbsterG Version II power supply 5V6 5V7 5V8 Platform Platform temp. heating 1 sensor Platform heating 2 Extr.- heating Extr.-fan... - Seite 59 INSTALL SOFTWARE! Visit wiki.fabbster.com to download instructions and software. Connect fabbster via USB and switch it on while running Netfabb.
- Seite 60 Please make sure all installation tests were successful before moving on!
- Seite 61 parts needed in step 5712 5780 5559 4x screw M5x40 7x cover disk 1x e-box power supply 5472 5473 5466 4x distance piece 2x screw M5x30 M5x50 2x nut M5 6277 1x tube adaptor...
- Seite 63 5846 LIKE Sticks ABS 2x 100g 1x feeding tube...
-
Seite 64: Sicherheitshinweise
Ausbildung auf Seite XX. Eltern haften für ihre Kinder! – Der fabbster ist auf einem stabilen Tisch von ausreichender Größe und Tragfähigkeit mit rutschfester Oberfläche aufzustellen. Vorteilhaft kann die Verwendung einer rutschfesten Unterlage bzw. das Fixieren der Maschine am Tisch sein. - Seite 65 Sicherheitshinweise INBETRIEBNAHME und BETRIEB – Die Maschine darf nicht unbewacht betrieben werden. – Die Maschine darf nur in bestimmungsgemäßem Zustand (ohne Schäden, insbesondere nur mit vollständig intaktem Steuergehäuse/Elektronikbox) betrieben werden. – Durch die frei zugänglichen, beweglichen Maschinenteile (Extruder, Bauplattform) besteht prinzipiell die Gefahr des Quetschens von Körperteilen.
-
Seite 66: Safety Guidelines
The fabbster is to be set up on a solid table of sufficient size and loading capacity. The use of a non-slip underlay or fixating the machine on the table can be advantageous. The fabbster is to be set up in a way that guarantees adequate lighting conditions and ergonomic working height for the assembly. - Seite 67 Safety guidelines ACTIVATION and OPERATION – The machine must not be operated unattended. – The machine is only to be operated in the intended condition (undamaged, with fully intact electronics / electronic-box). – Due to freely accessible, moving parts of the machine (extruder, building platform) there is some sort of danger of injuries inflicted by crushing.