Inhaltsverzeichnis
Werbung
Verfügbare Sprachen
Verfügbare Sprachen
Quicklinks
Please read these instructions carefully before using this
Il est recommandé de lire attentivement ce manuel avant d'utiliser
l'appareil et de le conserver pour consultation ultérieure.
For USA and Puerto Rico assistance, please call: 1-800-211-PANA(7262) or,
contact us via the web at: http://www.panasonic.com/contactinfo
For Canadian assistance, please call: 1-800-99-LUMIX (1-800-995-8649)
Pour de I'aide, composez le 1-800-99-LUMIX ( 1-800-995-8649 )
PP
E
Operating Instructions
Model No.
Modèle
product, and save this manual for future use.
Manuel d'utilisation
Marine Case
Boîtier marin
DMW-MCFT5
VQT4V83
F0113KN0
Werbung
Kapitel
Inhaltsverzeichnis

Verwandte Anleitungen für Panasonic DMWMCFT5E


Inhaltszusammenfassung für Panasonic DMWMCFT5E
- Seite 1 For USA and Puerto Rico assistance, please call: 1-800-211-PANA(7262) or, contact us via the web at: http://www.panasonic.com/contactinfo For Canadian assistance, please call: 1-800-99-LUMIX (1-800-995-8649) Pour de I’aide, composez le 1-800-99-LUMIX ( 1-800-995-8649 )
-
Seite 2: Inhaltsverzeichnis
Operating Instructions Marine Case Thank you for purchasing Panasonic product. Please read these instructions carefully before using this product, and save this manual for future use. Contents Getting Started Before Use ....................... 3 Accessories...................... 5 Components..................... 6 Preparation What is the O-ring? ..................7 Setting the O-ring..................... -
Seite 3: Before Use
You can enjoy taking pictures underwater at depths up to 45 m/148 feet. • In the case of water leakage due to insufficient care, Panasonic is in no way liable for damage to any products (digital camera, batteries, card etc.) inside this Case, photography costs or any other expenses. -
Seite 4: Using The Case In High Or Low Temperatures
∫ Using the Case in high or low temperatures • If you open or close the Case where it is humid or hot and then move to a place that is cold or dive underwater, condensation may appear inside the Case, the glass surface may become cloudy and the digital camera may be damaged. -
Seite 5: Accessories
Accessories When you first open the package, check that the Case and all the accessories are included and that there has been no damage to the Case or any of the accessories during distribution or transportation. If you find something unusual, consult your dealer before using the Case. Do not use any accessories except those specified below. -
Seite 6: Components
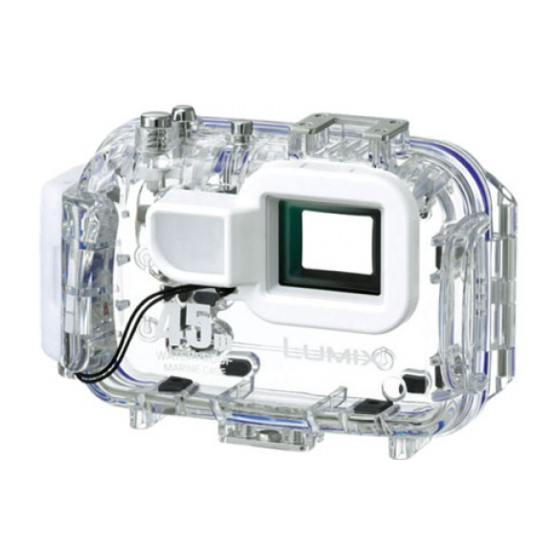
Components Shutter Button 1 Motion Picture Button Camera ON/OFF button Mounting shoe for INON Inc., ¢1 external strobe Front Case Diffuser (supplied) Front Glass Zoom Button ¢2 Button operation section (Read the operating instructions of the digital camera for details about each button operation.) Rear Case Buckle... -
Seite 7: What Is The O-Ring
What is the O-ring? • The O-ring is a waterproofing packing used for underwater cameras, watches and diving equipment. • The O-ring keeps the Case waterproof by sealing the gap between the rear case and the front case. ∫ How the O-ring keeps the Case waterproof Rear Case Digital Camera O-ring... -
Seite 8: Setting The O-Ring
Setting the O-ring Be sure to set the O-ring before attaching a digital camera. Thoroughly wash and dry your hands before handling the O-ring. Place the O-ring where there is no sand or dust. Loosen the O-ring with your fingers to remove it. •... - Seite 9 Check the O-ring. • Check that there is no dirt, sand, hair, dust, salt crystals, lint or grease on the O-ring. If you find any of these, remove them with a soft, dry cloth. 1 Dirt 3 Hair 5 Salt crystals 2 Sand 4 Dust 6 Lint...
- Seite 10 Apply the grease (supplied). Apply O-ring grease to clean the surface of the O-ring and replenish the oil. • Apply a rice-grain size of grease (supplied) evenly to the O-ring with the tip of your finger. (Do not apply the grease with paper or a cloth. The fibers from the paper or cloth may stick to the O-ring.) •...
- Seite 11 Inspect the O-ring one last time. Check the following one more time: • There is no dirt sticking to the O-ring. • The O-ring has not come out. • The O-ring is not twisted. • There are no scratches or squashed parts on the O-ring. Thoroughly wipe any grease off your hands with a dry cloth.
-
Seite 12: Checking The Case Is Waterproof
Checking the Case is Waterproof After setting the O-ring, check that no water leaks into the Case by submerging it in a water tank, bath tub etc. for about 3 minutes before attaching a digital camera. • Do not use the Case in water over 40 °C/104 °F. The heat may damage the Case or cause water leakage. -
Seite 13: Attaching The Digital Camera
Attaching the Digital Camera Read the notes on page 15 before attaching the digital camera. Turn off the digital camera and remove the strap from it. Push 2 up with your finger while sliding 1 to open the buckle. Attach the digital camera to the Case. Be careful of the direction and insert the digital camera into the Case as shown in the illustration. - Seite 14 Insert the silica gel (supplied). • If the air temperature is high and the water temperature is low, condensation may appear inside the Case. To prevent condensation, insert silica gel (supplied) inside the Case in advance. To prevent the Case from becoming fogged up, insert the silica gel about 1 to 2 hours before using the Case.
- Seite 15 • Check that the buckle is closed firmly. Do not insert the strap etc. in the buckle. After you have attached the digital camera, check one more time that no water leaks into the Case. (P12) Notes • Be careful not to get the shading hood dirty with fingerprints etc. •...
-
Seite 16: Taking Pictures
Taking Pictures ∫ Be sure to check the following before entering the water Check the following before diving. • Is there sufficient remaining battery power? • Is there sufficient memory in the card? • Is the O-ring fitted evenly into the O-ring groove? •... -
Seite 17: Tips For Taking Pictures In The Water
Tips for Taking Pictures in the Water It is recommended to use the Recording Mode (Advanced Underwater) appropriate for underwater when recording underwater. It may not be possible to record images with intended brightness or color depending on the recording conditions (depth/weather/subject), so try using following functions together. -
Seite 18: After Use
After Use After you have finished taking pictures, follow the steps below. Submerge the Case in fresh water for about 30 minutes or more without removing the digital camera to remove any salt crystals etc. • Press all the operation buttons etc. on the Case to wash away any seawater. - Seite 19 Open the rear of the case to remove the digital camera. After thoroughly wiping your hands, apply your finger as shown in the illustration and take out the digital camera. Remove the O-ring from the Case and check that there is no dirt etc.
-
Seite 20: Cleaning And Storing
Cleaning and Storing Wash the outside of the Case with water. • Wash the outside of the Case until it is clean. (P18) • Confirm that the O-ring is set securely, be sure to close the Case, and then wash only the outside with water. •... -
Seite 21: Caution For Use
• Thoroughly wash any grease on your hands. – Do not allow the grease on your hands to come into contact with your mouth or eyes. • If water leaks into the case, stop using it immediately. – This may cause an electric shock, burning or a fire. –... - Seite 22 • Do not use the O-ring grease other than the supplied O-ring grease. Surface of the O-ring will deteriorate, causing a water leak. • The O-ring comes into contact with the sides of the Case making the Case waterproof. Do not knock, insert foreign materials (dirt, sand, hair etc.) or scratch the O-ring or sides of the Case.
-
Seite 23: Specifications
Refer to the operating instructions, catalogue, website etc. of the digital camera ¢ for the latest information on models that can be used. Panasonic Consumer Marketing Company of North America, Division of Panasonic Corporation of North America One Panasonic Way, Secaucus, NJ 07094 Panasonic Canada Inc. - Seite 24 Manuel d’utilisation Boîtier marin Merci d’avoir arrêté votre choix sur un produit Panasonic. Il est recommandé de lire attentivement ce manuel avant d’utiliser l’appareil et de le conserver pour consultation ultérieure. Table des matières Mise en route Avant utilisation....................25 Accessoires....................
-
Seite 25: Avant Utilisation
FRANÇAIS Avant utilisation • Ce boîtier marin est conçu pour un appareil photo numérique Panasonic. Vous pouvez prendre des photos sous l’eau à une profondeur allant jusqu’à 45 m/148 pieds. • Dans le cas d’une infiltration d’eau provoquée par un manque de précautions, Panasonic n’est responsable en aucune manière des dommages subis par les... - Seite 26 ∫ Utilisation du boîtier à haute ou à basse température • Si vous ouvrez ou fermez le boîtier dans un endroit chaud et humide, puis que vous vous déplacez vers un endroit froid ou que vous plongez sous l’eau, de la condensation peut apparaître à...
-
Seite 27: Accessoires
Accessoires Lorsque vous ouvrez l’emballage pour la première fois, vérifiez bien qu’il contient le boîtier et tous les accessoires et que ceux-ci n’ont pas été endommagés lors du transport. Si vous constatez quelque chose d’anormal, consultez votre revendeur avant d’utiliser le boîtier. N’utilisez aucun autre accessoire que ceux indiqués ci-dessous. -
Seite 28: Composants
Composants Déclencheur 1 Touche d’images animées Touche ON/OFF de l’appareil photo Griffe porte-accessoires stroboscopique externe de INON ¢1 Inc. Couvercle avant Diffuseur (fourni) Verre avant Touche du zoom ¢2 Touches de fonctionnement (Reportez-vous au manuel d’utilisation de l’appareil photo numérique pour plus de détails sur chaque touche de fonctionnement.) Couvercle arrière Loquet de verrouillage... -
Seite 29: Qu'est-Ce Qu'un Joint Torique
Qu’est-ce qu’un joint torique? • Un joint torique est une garniture étanche utilisée pour les appareils photo, montres ou équipements de plongée. • Le joint torique rend le boîtier étanche en scellant l’espace entre sa partie avant et arrière. ∫ Comment le joint torique rend-il le boîtier étanche? Couvercle arrière Appareil photo numérique Joint torique... -
Seite 30: Mise En Place Du Joint Torique
Mise en place du joint torique Assurez-vous de mettre le joint torique en place avant d’installer l’appareil photo numérique. Lavez et séchez vos mains avec soin avant de manipuler le joint torique. Placez le joint torique dans un endroit sans sable ni poussière. Desserrez le joint torique avec vos doigts pour l’enlever. - Seite 31 Vérifiez le joint torique. • Vérifiez l’absence de saleté, sable, cheveux, poussière, cristaux de sel, fibre ou graisse sur le joint torique. Si vous trouvez un de ces éléments, retirez-le avec un chiffon sec et doux. 1 Saleté 3 Cheveux 5 Cristaux de sel 2 Sable 4 Poussière...
- Seite 32 Appliquez la graisse (fournie). Appliquez la graisse pour joint torique pour nettoyer sa surface et le lubrifier. • Appliquez uniformément et du bout du doigt une quantité de graisse (fournie) de la dimension d’un grain de riz sur le joint torique. (N’appliquez pas la graisse à...
- Seite 33 Vérifiez le joint torique une dernière fois. Vérifiez les point suivants encore une fois: • Qu’il n’y ait pas de saleté collée sur le joint torique. • Que le joint torique ne sorte pas de son logement. • Que le joint torique n’est pas tordu. •...
-
Seite 34: Vérification De L'étanchéité Du Boîtier
Vérification de l’étanchéité du boîtier Après la mise en place du joint torique, vérifiez l’absence d’infiltrations d’eau dans le boîtier en l’immergeant dans un bassin d’eau, une baignoire, etc. pendant environ 3 minutes ou plus avant d’installer l’appareil photo numérique. •... -
Seite 35: Mise En Place De L'appareil Photo Numérique
Mise en place de l’appareil photo numérique Lisez la section nota à la page 37 avant de mettre l’appareil photo numérique en place. Mettez l’appareil photo hors marche et retirez la dragonne de l’appareil. Appuyez sur 2 avec votre doigt tout en faisant glisser 1 pour ouvrir le loquet. - Seite 36 Insérez le gel de silice (fourni). • Si la température de l’air est élevée et si la température de l’eau est basse, de la condensation peut apparaître à l’intérieur du boîtier. Pour éviter une telle situation, placez au préalable le gel de silice (fourni) dans le boîtier.
- Seite 37 • Vérifiez que le loquet est correctement fermé. Ne coincez pas la dragonne, etc. dans le loquet. Après avoir installé l’appareil photo, vérifiez une fois de plus l’absence d’infiltration d’eau dans le boîtier. (P34) Nota • Faites attention de ne pas salir le protecteur d’objectif avec des traces de doigts, etc. •...
-
Seite 38: Prises De Vues
Prises de vues ∫ Avant d’entrer dans l’eau, faites les vérifications suivantes Vérifiez les point suivants avant de plonger. • Reste-t-il suffisamment d’énergie dans la batterie? • Y a-t-il suffisamment d’espace mémoire sur la carte? • Est-ce que le joint torique est correctement mis en place dans sa rainure? •... -
Seite 39: Conseils Pour La Prise De Vue Dans L'eau
Conseils pour la prise de vue dans l’eau Il est recommandé d’utiliser le mode d’enregistrement (Mode sous-marin avancé) approprié à la prise de vue sous-marine lors d’un enregistrement sous l’eau. Selon les conditions d’enregistrement (profondeur/climat/sujet), il pourrait ne pas être possible d’enregistrer des images avec la luminosité ou la couleur souhaitée;... -
Seite 40: Après Utilisation
Après utilisation Après avoir fini de prendre des photos, suivez les étapes suivantes. Immergez le boîtier dans de l’eau douce pendant environ 30 minutes ou plus sans retirer l’appareil photo afin d’enlever tous les cristaux de sel, etc. • Appuyez sur toutes les touches de fonctionnement, etc. du boîtier afin d’enlever toute l’eau de mer. - Seite 41 Ouvrez le couvercle arrière pour retirer l’appareil photo numérique. Séchez vos mains avec soin et utilisez votre doigt, tel qu’illustré, pour retirer l’appareil photo numérique. Retirez le joint torique du boîtier et vérifiez qu’il n’y ait aucune saleté, etc. dans la rainure. Vérifiez qu’il n’y ait aucune éraflure, etc.
-
Seite 42: Nettoyage Et Rangement
Nettoyage et rangement Lavez l’extérieur du boîtier avec de l’eau. • Lavez l’extérieur du boîtier jusqu’à ce qu’il soit propre. (P40) • Vérifiez que le joint torique est bien installé, assurez-vous de fermer le boîtier, puis lavez seulement l’extérieur avec de l’eau. •... -
Seite 43: Mises En Garde
• Si quelque chose d’anormal survient en utilisant le boîtier sous l’eau, veuillez suivre toutes les procédures nécessaires et les consignes de décompression lors de votre remontée. – Si vous remontez trop rapidement, vous pouvez subir la maladie des caissons. •... - Seite 44 • Le joint torique entre en contact avec les côtés du boîtier et le rend hermétique. Ne cognez pas, n’introduisez aucun corps étranger (saleté, sable, cheveux, etc.) et n’éraflez pas le joint torique ou les côtés du boîtier. • Utilisez le bout de vos doigts pour retirer le joint torique. N’utilisez pas d’objet pointu, car cela peut érafler le joint torique.
-
Seite 45: Spécifications
Reportez-vous au manuel d’utilisation, au catalogue, au site Internet, etc., de ¢ l’appareil photo numérique pour les informations les plus récentes au sujet des modèles qui peuvent être utilisés. Panasonic Canada Inc. 5770 Ambler Drive Mississauga, Ontario L4W 2T3 (905) 624-5010 www.panasonic.ca... - Seite 46 Bedienungsanleitung Unterwassergehäuse Vielen Dank für Ihren Kauf dieses Panasonic-Produkts. Bitte lesen Sie diese Anleitung vor der Inbetriebnahme dieses Produkts aufmerksam durch, und bewahren Sie dieses Handbuch für spätere Bezugnahme griffbereit auf. Inhalt Erste Schritte Vor der Verwendung ..................47 Zubehör......................49 Bauteile ......................
-
Seite 47: Vor Der Verwendung
Sie können bis zu einer Wassertiefe von 45 m Spaß an Unterwasseraufnahmen haben. • Beim Eindringen von Wasser aufgrund Nachlässigkeit haftet Panasonic in keiner Weise für Schäden an jeglichen im Gehäuse enthaltenen Produkten (Digitalkamera, Batterien, Karte, etc.), Kosten für Fotografien oder sonstige Aufwendungen. -
Seite 48: Verwendung Des Gehäuses Bei Hohen Oder Niedrigen Temperaturen
∫ Verwendung des Gehäuses bei hohen oder niedrigen Temperaturen • Wenn Sie das Gehäuse an feuchten oder heißen Orten öffnen und dann an einen kühlen Ort oder unter Wasser bringen, kann es im Inneren des Gehäuses zu Kondensation kommen, die Glasfläche sich trüben und die Digitalkamera beschädigt werden. -
Seite 49: Zubehör
Zubehör Beim ersten Öffnen der Verpackung überprüfen, ob das Gehäuse und alle Zubehörteile enthalten sind und dass keine Versand- oder Transportschäden am Gehäuse oder an jeglichen Zubehörteilen vorliegen. Bei Unregelmäßigkeiten wenden Sie sich vor der Verwendung des Gehäuses an Ihren Händler. Verwenden Sie keine anderen Zubehörteile als die unten aufgeführten. -
Seite 50: Bauteile
Bauteile Auslösetaste 1 Taste fur Videos ON/OFF-Schalter der Kamera Zubehörschuh für externes ¢1 Blitzgerät von INON Inc. Vorderes Gehäuse Diffusor (beiliegend) Vordere Glasscheibe Zoom-Taste ¢2 Funktionstastenbereich (Lesen Sie die Bedienungsanleitung zur Digitalkamera für Details zu jeder Tastenfunktion.) Hinteres Gehäuse Schnalle Sperrfreigabe-Schalter Riemenöse (zum Anbringen des in der Lieferung enthaltenen... -
Seite 51: Was Ist Der O-Ring
Was ist der O-Ring? • Der O-Ring ist eine wasserdichte Dichtung, die für Unterwasserkameras, Uhren und Tauchausrüstungen verwendet wird. • Der O-Ring erhält das Gehäuse wasserdicht, indem er den Zwischenraum zwischen dem hinteren und vorderen Gehäuseteil abdichtet. ∫ Wie der O-Ring das Gehäuse wasserdicht erhält Hinteres Gehäuse Digital-Kamera O-Ring... -
Seite 52: Einsetzen Des O-Rings
Einsetzen des O-Rings Setzen Sie vor dem Anbringen einer Digitalkamera unbedingt zuerst den O-Ring ein. Waschen und trocknen Sie Ihre Hände vor der Handhabung des O-Rings gründlich. Den O-Ring an einem sand- und staubfreien Ort einsetzen. Den O-Ring zum Entfernen mit den Fingern lösen. •... - Seite 53 Prüfen des O-Rings. • Kontrollieren Sie, dass kein Schmutz, Sand, keine Haare, Salzkristalle, Fusseln oder altes Fett auf dem O-Ring vorhanden sind. Stellen Sie dies fest, diese mit einem weichen, trockenen Tuch entfernen. 1 Schmutz 3 Haare 5 Salzkristalle 2 Sand 4 Staub 6 Fusseln •...
- Seite 54 Tragen Sie das Fett auf (beiliegend). Reinigen Sie die Oberfläche des O-Rings mit Fett für Dichtungsringe und schmieren Sie ihn. • Tragen Sie eine reiskorngroße Fettmenge (beiliegend) gleichmäßig mit der Fingerkuppe auf den O-Ring auf. (Tragen Sie das Fett nicht mit Papier oder Stoff auf.
- Seite 55 Letzte Überprüfung des O-Rings. Überprüfen Sie Folgendes erneut: • Dass kein Schmutz am O-Ring haftet. • Dass der O-Ring nicht heraustritt. • Dass der O-Ring nicht verdreht ist. • Es sind keine Kratzer oder Quetschungen am O-Ring vorhanden. Wischen Sie sämtliches Fett mit einem trockenen Tuch von den Händen.
-
Seite 56: Kontrollieren, Dass Das Gehäuse Wasserdicht Ist
Kontrollieren, dass das Gehäuse wasserdicht ist Nach dem Einsetzen des O-Rings überprüfen, dass kein Wasser in das Gehäuse eindringt, indem Sie es 3 Minuten lang in einen Wassertank, eine Badewanne, etc. Eintauchen, bevor Sie die Digitalkamera anbringen. • Das Gehäuse nicht in Wasser mit einer Temperatur über 40 °C verwenden. Die Wärme kann das Gehäuse beschädigen oder zum Eindringen von Wasser führen. -
Seite 57: Anbringen Der Digitalkamera
Anbringen der Digitalkamera Lesen Sie die Hinweise auf Seite 59, bevor Sie die Digitalkamera anbringen. Schalten Sie die Digitalkamera aus und entfernen Sie den Riemen. Drücken Sie 2 mit dem Finger nach oben, während 1 zum Öffnen der Schnalle verschoben wird. Die Digitalkamera am Gehäuse anbringen. - Seite 58 Legen Sie das Kieselgel ein (beiliegend). • Bei hoher Luft- und niedriger Wassertemperatur kann im Inneren des Gehäuses Kondensation auftreten. Um Kondensation zu verhindern, legen Sie vorher das mitgelieferte Kieselgel ins Gehäuse. Um ein Beschlagen des Gehäuses zu vermeiden, das Kieselgel ca.1 bis 2 Stunden vor dem Verwenden des Gehäuses einlegen.
- Seite 59 • Kontrollieren Sie, ob die Schnalle fest verschlossen ist. Nicht den Gurt usw. in die Schnalle einführen. Nach dem Anbringen der Digitalkamera ein weiteres Mal überprüfen, ob kein Wasser in das Gehäuse eindringt. (S56) Hinweise • Achten Sie darauf, dass die Schattenblende nicht durch Fingerabdrücke usw. schmutzig wird. •...
-
Seite 60: Aufnahme Von Bildern
Aufnahme von Bildern ∫ Prüfungen vor der Verwendung im Wasser Vor dem Tauchen Folgendes überprüfen. • Verbleibt ausreichend Batterieleistung? • Ist ausreichend Speicher auf der Karte? • Ist der O-Ring gleichmäßig in die Nut des O-Rings eingesetzt? • Haben Sie kontrolliert, dass kein Wasser in das Gehäuse eindringt? •... -
Seite 61: Tipps Zur Aufnahme Von Bildern Im Wasser
Tipps zur Aufnahme von Bildern im Wasser Es wird empfohlen, den für Unterwasser geeigneten Aufnahmemodus (Erweit. Unterwassermodus) zur Aufnahme unter Wasser zu verwenden. Es ist unter Umständen nicht möglich, Bilder mit der vorgesehenen Helligkeit oder Farbe aufzunehmen, je nach Aufnahmebedingungen (Tiefe/Wetter/Motiv). Versuchen Sie daher, die folgenden Funktionen zusammen zu verwenden. -
Seite 62: Nach Gebrauch
Nach Gebrauch Nach der Bildaufnahme die folgenden Schritte ausführen. Das Gehäuse ca. 30 Minuten oder mehr in Süßwasser tauchen, ohne die Digitalkamera zu entfernen, um jegliche Salzkristalle, etc. zu entfernen. • Alle Bedienknöpfe etc. auf dem Gehäuse drücken, um jegliches Salzwasser zu entfernen. - Seite 63 Die Geräterückseite öffnen, um die Digitalkamera zu entfernen. Trocknen Sie sich zunächst sorgfältig die Hände, setzen Sie dann den Zeigefinger wie in der Abbildung zu sehen ein und nehmen Sie die Digitalkamera heraus. Den O-Ring aus dem Gehäuse entfernen und sicherstellen, dass keine Rückstände, o.ä.
-
Seite 64: Reinigung Und Aufbewahrung
Reinigung und Aufbewahrung Die Außenseite des Gehäuses mit Wasser abwaschen. • Die Außenseite des Gehäuses mit Wasser sauberwaschen. (S62) • Überprüfen Sie, dass der O-Ring sicher eingesetzt ist, vergewissern Sie sich, dass das Gehäuse geschlossen ist, und reinigen Sie dann nur die Außenseite mit Wasser. •... -
Seite 65: Bei Der Aufnahme Von Bildern Mit Blitzlicht
• Gerät Wasser in das Gehäuse, unterbrechen Sie die Verwendung umgehend. – Dies kann sonst zu einem Stromschlag, Verbrennungen oder Brand führen. – Verständigen Sie Ihren Händler. • Bei unvorhergesehenen Ereignissen während des Gebrauchs des Gehäuses unter Wasser halten Sie sich beim Auftauchen bitte an alle vorgeschriebenen Vorgehensweisen und Richtlinien zum Druckausgleich. -
Seite 66: Zur Wartung
• Der O-Ring kommt mit den Geräteseiten in Kontakt und macht das Gehäuse wasserdicht. Nicht gegen den O-Ring oder die Geräteseiten stoßen, Fremdmaterialien hineingeraten lassen (Schmutz, Sand, Haar, etc.) oder den O-Ring oder die Seiten des Gehäuses verkratzen. • Verwenden Sie die Fingerspitzen, um den O-Ring zu entfernen. Verwenden Sie keine spitzen Gegenstände, da diese den O-Ring verkratzen könnten. -
Seite 67: Zur Aufbewahrung Und Inspektion Nach Der Benutzung
∫ Zur Aufbewahrung und Inspektion nach der Benutzung • Die Digitalkamera stets aus dem Gehäuse nehmen. • Vergewissern Sie sich, dass kein Schmutz oder Staub am O-Ring haftet. • Entfernen Sie zur Aufbewahrung die Schnalle, damit das Unterwassergehäuse nicht wasserdicht geschlossen wird. •... - Seite 68 Instrucciones de funcionamiento CARCASA SUBMARINA Gracias por comprar un producto Panasonic. Lea cuidadosamente estas instrucciones antes de usar este producto, y guarde este manual para usarlo en el futuro. Indice Primeros pasos Antes del uso ....................69 Accesorios ..................... 71 Componentes....................
-
Seite 69: Antes Del Uso
Puede gozar de la toma de imágenes submarinas a una profundidad hasta 45 m. • En el caso de infiltración debida a escaso cuidado, Panasonic no se responsabiliza por los daños padecidos por cualquier producto (cámara digital, baterías, tarjeta, etc.) que quepa en este estuche, los costes fotográficos o cualquier otros gastos. - Seite 70 ∫ Uso del estuche a altas o bajas temperaturas • Si abre o cierra el estuche donde haya humedad o calor y luego va a un lugar frío o bien va a bucear, podría tener lugar condensación dentro del estuche, ponerse empañada la superficie del cristal y dañarse la cámara digital.
-
Seite 71: Accesorios
Accesorios Cuando antes abre el paquete, asegúrese de que estén incluidos tanto el estuche como todos los accesorios y de que ambos no hayan padecido daño alguno durante la distribución o el transporte. En el caso de que encontrase algo insólito, llame a su comerciante antes de utilizar el estuche. -
Seite 72: Componentes
Componentes Botón del obturador 1 Botón de imagen en movimiento Botón ON/OFF de la cámara Zapata de montaje para INON Inc., ¢1 strobe externo Estuche delantero Difusor (suministrada) Cristal delantero Botón del zoom Sección de funcionamiento de ¢2 botones (Lea las instrucciones de funcionamiento de la cámara digital para los detalles acerca de cada botón de funcionamiento.) -
Seite 73: Qué Es El Anillo Tórico
Qué es el anillo tórico? ¿ • El anillo tórico es una junta hermética utilizada para cámaras, reloj submarinos y otros dispositivos de buceo. • El anillo tórico mantiene lo impermeable del estuche cerrando la holgura entre su parte trasera y la delantera. ∫... -
Seite 74: Ajuste Del Anillo Tórico
Ajuste del anillo tórico Tenga cuidado de poner el anillo tórico antes de unir una cámara digital. Limpie a fondo y seque sus manos antes de manejar el anillo tórico. Coloque dicho anillo en un lugar donde no haya arena ni polvo. Afloje el anillo tórico con sus dedos para quitarlo. - Seite 75 Controle el anillo tórico. • Compruebe que en el anillo tórico no haya suciedad, arena, pelo, polvo, cristales de sal, hilas o grasa vieja. En el caso de que los encontrase, sáquelos con un trapo blanco y seco. 1 Suciedad 3 Pelo 5 Sal 2 Arena...
- Seite 76 Aplique la grasa (suministrada). Aplique grasa al anillo tórico para limpiar la superficie del mismo y rellene el aceite. • Con la punta de su dedo aplique uniformemente en el anillo tórico grasa (suministrada) que tenga un tamaño de un grano de arroz. (No aplique la grasa usando papel o un trapo ya que las fibras de éstos podrían pegarse al anillo tórico.) •...
- Seite 77 Controle el anillo tórico una última vez. Compruebe lo siguiente una vez más: • No haya suciedad pegada al anillo tórico. • El anillo tórico no salga. • El anillo tórico no esté torcido. • No haya ningún arañazo ni partes apretadas en el anillo tórico. Saque todo indicio de grasa de sus manos con un paño seco, Luego lávela bien con agua dulce.
-
Seite 78: Control De Lo Impermeable Del Estuche
Control de lo impermeable del estuche Después de colocar el anillo tórico, compruebe que no haya infiltración de agua dentro del estuche sumergiendo éste último en un tanque de agua, una bañera etc. durante alrededor de 3 minutos antes de unirlo a la cámara digital. -
Seite 79: Unión De La Cámara Digital
Unión de la cámara digital Lea las notas de la página 81 antes de unir la cámara digital. Apague la cámara digital y saque la correa. Empuje hacia arriba 2 con su dedo, mientras hace deslizar 1 para abrir la hebilla. Una la cámara digital al estuche. - Seite 80 Inserte el silicagel (suministrado). • Si la temperatura del aire es alta y la del agua es baja, puede tener lugar condensación dentro del estuche. Para evitar condensación, antes meta el silicagel (suministrado) dentro del estuche. Para evitar que se forme neblina en el estuche, inserte el silicagel cerca de 1 a 2 horas antes de utilizar el estuche.
- Seite 81 • Compruebe que la hebilla esté cerrada firmemente. No inserte la correa etc. en la hebilla. Después de unir la cámara digital, compruebe una vez más que no haya infiltración de agua en el estuche. (P78) Notas • Tenga cuidado de que la visera de sombra no se ensucie con huellas dactilares, etc. •...
-
Seite 82: Sacar Imágenes
Sacar imágenes ∫ Tenga cuidado de comprobar lo siguiente antes de entrar en el agua Compruebe lo siguiente antes de bucear. • ¿Queda bastante carga en la batería? • ¿Queda bastante memoria en la tarjeta? • ¿El anillo tórico está aplicado de manera uniforme dentro de su ranura? •... -
Seite 83: Consejos Para Sacar Imágenes En El Agua
Consejos para sacar imágenes en el agua Se recomienda usar el Modo de grabación (Modo submarino avanzado) adecuado para debajo del agua cuando graba bajo el agua. Posiblemente no se puedan grabar imágenes con el brillo y color deseados según las condiciones de grabación (profundidad/clima/sujeto), por lo tanto intente usar las siguientes funciones juntas. -
Seite 84: Después Del Uso
Después del uso Después de terminar la toma de las imagines, siga los pasos a continuación. Sumerja el estuche en agua fresca durante 30 minutos o más sin quitar la cámara digital para sacar los cristales de sal etc. • Pulse todos los botones operacionales etc. - Seite 85 Abra la parte trasera del estuche para quitar la cámara digital. Después de limpiarse con esmero las manos, aplique su dedo de la manera mostrada en la figura y saque fuera la cámara digital. Quite el anillo tórico del estuche y compruebe que no haya suciedad etc.
-
Seite 86: Limpieza Y Almacenamiento
Limpieza y almacenamiento Lave la parte externa del estuche con agua. • Lave la parte externa del estuche hasta que esté limpia. (P84) • Confirme que el anillo tórico se fije de forma segura, asegúrese de cerrar el estuche, y luego lave el exterior con agua. •... -
Seite 87: Precauciones Para El Uso
• Por si se filtra agua en el estuche, deje de usarlo de inmediato. – Eso puede causar una descarga eléctrica, una quemadura o un incendio. – Llame a su comerciante. • Si ocurre algo anómalo mientras que está utilizando el estuche sumergido en el agua, cuando sube siga todos los necesarios procedimientos y líneas de guía para la descompresión. - Seite 88 • El anillo tórico toca los lados del estuche volviendo éste último impermeable. No golpee, haga entrar material extraño (suciedad, arena o pelo etc.) ni arañe el anillo tórico ni los lados del estuche. • Use las puntas de sus dedos para quitar el anillo tórico. No utilice objetos puntiagudos ya que eso podría arañar el anillo tórico.
-
Seite 89: Especificaciones
∫ Acerca del almacenamiento y de la inspección después del uso • Siempre tenga la cámara digital fuera del estuche. • Ponga cuidado en que no haya suciedad ni polvo pegados en el anillo tórico. • Al guardarlo, retire la hebilla para de manera que el estuche marino no se cierre herméticamente. - Seite 90 Istruzioni d’uso CUSTODIA SUBACQUEA Grazie per aver acquistato un prodotto Panasonic. Leggere attentamente queste istruzioni prima di utilizzare il presente prodotto, e conservare questo manuale per usi futuri. Indice Per iniziare Prima dell’uso ....................91 Accessori ....................... 93 Componenti....................94 Preparazione Cosa é...
-
Seite 91: Prima Dell'uso
Consente di riprendere immagini sott’acqua a profondità fino a 45 m. • In caso di infiltrazioni d’acqua dovute a negligenza da parte dell’utente, Panasonic non può essere ritenuta responsabile dei danni ai prodotti (fotocamera digitale, batterie, scheda ecc.) inseriti nella custodia, dei costi fotografici o di ogni altra spesa. -
Seite 92: Utilizzo Della Custodia In Condizioni Di Bassa O Alta Temperatura
∫ Utilizzo della custodia in condizioni di bassa o alta temperatura • Se si apre o si chiude la custodia in un ambiente umido o caldo e poi si passa in un posto freddo o ci si immerge sott’acqua, all’interno della custodia può formarsi della condensa, la superficie del vetro può... -
Seite 93: Accessori
Accessori Quando si apre la confezione per la prima volta, controllare che siano presenti la custodia e tutti gli accessori, e che non abbiano subito danni durante la distribuzione o il trasporto. Se si riscontra qualche anomalia, contattare il rivenditore prima di utilizzare la custodia. -
Seite 94: Componenti
Componenti Pulsante di scatto otturatore 1 Pulsante immagine in movimento Pulsante ON/OFF della fotocamera Connettore per flash stroboscopico ¢1 esterno di INON Inc. Copertura anteriore Diffusore (in dotazione) Vetro anteriore Pulsante zoom ¢2 Funzionamento dei pulsanti (Per ulteriori informazioni sul funzionamento di ciascun pulsante leggere le istruzioni per l’uso della fotocamera digitale.) -
Seite 95: Cosa É Un O-Ring
Cosa é un O-ring? • L’O-ring è una guarnizione impermeabile utilizzata per fotocamere, orologi e attrezzature subacquee. • L’O-ring mantiene l’impermeabilità della custodia sigillando lo spazio tra la copertura posteriore e quella anteriore. ∫ Come l’O-ring mantiene l’impermeabilità della custodia Copertura posteriore Fotocamera digitale O-ring... -
Seite 96: Preparazione Dell'o-Ring
Preparazione dell’O-ring Ricordarsi di preparare l’O-ring prima di inserire la fotocamera digitale nella custodia. Lavare e asciugare accuratamente le mani prima di toccare l’O-ring. Tenere l’O-ring lontano dalla sabbia e dalla polvere. Allentare l’O-ring con le dita per rimuoverlo. • Allentare l’O-ring con la punta di due dita, quindi sollevare la parte allentata. - Seite 97 Controllare l’O-ring. • Controllare che non vi siano sporcizia, sabbia, capelli, polvere, cristalli di sale, fili di tessuto o residui di grasso sull’O-ring. Se si riscontra la presenza di quanto sopra, rimuoverlo con un panno asciutto e morbido. 1 Sporcizia 3 Capelli 5 Cristalli di sale 2 Sabbia...
- Seite 98 Applicare il grasso (in dotazione). Applicare del grasso per O-ring per pulire la superficie dell’O-ring e reintegrare l’olio. • Applicare uniformemente una quantità di grasso (in dotazione) delle dimensioni di un chicco di riso sull’O-ring con la punta di un dito. (Non utilizzare della carta o un panno per applicare il grasso.
- Seite 99 Controllare un’ultima volta l’O-ring. Ricontrollare che: • All’O-ring non sia rimasta attaccata della sporcizia. • L’O-ring non sia fuoriuscito dall’alloggiamento. • L’O-ring non sia torto. • Non vi siano graffi o ammaccature sull’O-ring. Rimuovere completamente ogni traccia di grasso dalle mani con un panno asciutto, quindi lavare accuratamente in acqua corrente.
-
Seite 100: Controllo Dell'impermeabilità Della Custodia
Controllo dell’impermeabilità della custodia Dopo aver installato l’O-ring, controllare che non vi siano infiltrazioni d’acqua immergendo la custodia in una vasca per circa 3 minuti prima di inserirvi una fotocamera digitale. • Non utilizzare la custodia in acqua a temperatura superiore a 40 °C. Il calore può danneggiare la custodia o causare infiltrazioni. -
Seite 101: Inserimento Della Fotocamera Digitale
Inserimento della fotocamera digitale Leggere le note a pagina 103 prima di installare la fotocamera digitale. Spegnere la fotocamera digitale e rimuovere la cinghia. Spingere 2 verso l’alto con un dito, e contemporaneamente far scorrere 1 per aprire la fibbia. Inserire la fotocamera digitale nella custodia. - Seite 102 Inserire il silica gel (in dotazione). • Se la temperatura dell’aria è elevata e quella dell’acqua è bassa, all’interno della custodia può formarsi della condensa. Per evitare la formazione di condensa, inserire in anticipo il silica gel (in dotazione) all’interno della Custodia. Per evitare che la custodia si appanni, inserire il silica gel circa 1 o 2 ore prima dell’uso.
- Seite 103 • Controllare che la fibbia sia ben chiusa. Non inserire la cinghia ecc. nella fibbia. Dopo aver inserito la fotocamera digitale, ricontrollare che non vi siano infiltrazioni d’acqua nella custodia. (P100) Note • Fare attenzione a non sporcare la pellicola antiriflesso con ditate o altro. •...
-
Seite 104: Ripresa Di Immagini
Ripresa di immagini ∫ Ricordarsi di controllare quanto segue prima di entrare in acqua Prima di immergersi controllare quanto segue. • La carica residua della batteria è sufficiente? • La memoria residua della scheda è sufficiente? • L’O-ring è inserito in maniera uniforme nell’apposito alloggiamento? •... -
Seite 105: Consigli Per La Ripresa Di Immagini In Acqua
Consigli per la ripresa di immagini in acqua Quando si effettuano riprese subacquee si consiglia di utilizzare la modalità registrazione appropriata (Modalità subacquea avanzata). In determinate condizioni di ripresa (che dipendono dalla profondità/dal tempo atmosferico/dal soggetto) è possibile che non si riesca a ottenere immagini che abbiano la luminosità... -
Seite 106: Dopo L'uso
Dopo l’uso Al termine delle riprese, attenersi alla seguente procedura. Immergere la custodia in acqua dolce per circa 30 minuti o più senza rimuovere la fotocamera digitale, per eliminare eventuali cristalli di sale, ecc. • Premere tutti i pulsanti operativi sulla custodia per eliminare l’eventuale acqua di mare. - Seite 107 Aprire la copertura posteriore per rimuovere la fotocamera digitale. Dopo aver accuratamente asciugato le mani, mettere il dito come indicato nell’illustrazione ed estrarre la fotocamera digitale. Rimuovere l’O-ring dalla custodia e controllare che non vi sia sporcizia nell’alloggiamento dell’O-ring. Controllare che non vi siano graffi ecc. sull’O-ring mentre si applica il grasso.
-
Seite 108: Pulizia E Custodia
Pulizia e custodia Lavare l’esterno della custodia con acqua. • Lavare l’esterno della custodia finché non risulta pulito. (P106) • Controllare che la guarnizione sia installata saldamente, chiudere la Custodia, quindi lavare solo l'esterno con acqua. • Rimuovere l’eventuale sporcizia all’interno della custodia con un panno morbido inumidito. -
Seite 109: Precauzioni Per L'uso
• Se l’acqua dovesse penetrare nella custodia, smettere immediatamente di utilizzarla. – In caso contrario si rischia di prendere la scossa o di ustionarsi, oppure può verificarsi un incendio. – Consultare il rivenditore. • Se si verifica qualche anomalia mentre si utilizza la custodia sott’acqua, seguire tutte le procedure necessarie e le istruzioni per la decompressione durante la risalita. - Seite 110 • L’O-ring aderisce ai lati della custodia, rendendola impermeabile. Non urtare, contaminare con corpi estranei (sporcizia, sabbia, capelli, ecc.) o graffiare l’O-ring o i lati della custodia. • Utilizzare la punta delle dita per rimuovere l’O-ring. Non utilizzare un oggetto appuntito, perché...
-
Seite 111: Specifiche
∫ Custodia e ispezione dopo l’uso • Rimuovere sempre la fotocamera digitale dalla custodia. • Accertarsi che non vi sia sporcizia o polvere attaccata all’O-ring. • Quando si ripone la custodia, rimuovere la fibbia in modo che la custodia subacquea non resti chiusa ermeticamente. •... - Seite 112 使用說明書 防水盒 感謝您購買 Panasonic 產品 。 使用本產品前請仔細閱讀這些說明 , 並保留本手冊供日後使用 。 目錄 開始使用 用前須知 ............113 附件 ............115 部件 ............116 準備 什麼是 O 形環? ..........117 安裝 O 形環 ............118 盒子的防水檢查 ..........122 安裝數位相機 ............ 123 操作 拍攝圖片 ............126 水中拍攝圖片的技巧...
-
Seite 113: 用前須知
中 文 用前須知 • 此防水盒被設計用於 Panasonic 的數位相機 。 可以享受在水下 45 m 的深度內拍攝圖片的樂趣 。 • 由於不適當的管理而造成漏水的情況下 , Panasonic 公司不對該盒中任何產品 (數位 相機 、 電池 、 卡等) 的損壞 、 攝影成本或者任何其它費用負責 。 • Panasonic 公司同樣不對意外事故造成的傷害和財產損失進行補償 。 • 請閱讀數位相機的使用說明書 。 • 在安裝數位相機之前 , 將盒子浸到水中約 3 分鐘或更長的時間 , 以便檢查是否漏水 。... - Seite 114 ∫ 在高溫或低溫環境下使用盒子 • 如果在潮濕或炎熱的地方打開或關閉盒子後 , 將盒子移到寒冷處或者潛入水下 , 在盒 子內部可能會生成水汽凝結 , 玻璃表面可能會變得模糊不清並且數位相機可能會損 壞 。 • 如果突然將盒子從水下或寒冷的地方移向暖和的地方 , 玻璃表面會變得模糊不清 。 拍 攝圖片前請等待直到盒子溫度接近空氣溫度 。 ∫ 關於準備 • 請勿在水滴飛濺或沙子可能進入盒子的地方打開或關閉盒子 。 建議在室內打開或關 閉盒子 。 • 請在濕氣少的室內更換電池 、 卡等 , 安裝數位相機 。 • 如果必須在潛水地打開或關閉盒子以更換電池或卡 , 請務必按照下列步驟進行操作 。 –...
- Seite 115 附件 當第一次打開包裝時 , 請檢查盒子和所有的附件 , 確定它們沒有在銷售或運輸時 受到任何損壞 。 若發現某些不尋常處 , 請在使用盒子前與經銷商聯繫 。 請勿使用除以下那些指定附件以外的任何附件 。 更換用 O 形環 硅膠 (乾燥劑) VMG1798 (1 g/5 片 ) VZG0371 在專用聚酯袋中 已預先安裝在本機上一 個 。 潤滑油 (用於 O 形環) 手腕帶 VZG0372 VFC4190 擴散器 / 連接繩 VYK3E56 •...
- Seite 116 部件 快門鍵 1 動態影像按鈕 相機 ON/OFF 按鈕 用於 INON Inc. 的外部閃光燈的配 ¢1 件冷靴 前封蓋 擴散器 (提供) 前玻璃 變焦按鈕 ¢2 按鈕操作部分 (有關每各按鈕的操作詳情 , 請閱讀 數位相機的使用說明書 。 ) 後封蓋 盒扣 鎖定解除桿 背帶孔 (用於安裝附帶的掛帶和擴散器) ¢1 這是專門用於由 INON Inc. 製造的外部閃光燈的配件冷靴 。 關於相容的閃光燈 , 請諮詢 INON Inc. 。 http://www.inon.jp/ ¢2 根據所使用的數位相機不同...
-
Seite 117: 什麼是 O 形環
什麼是 O 形環? • O 形環是一種防水密封墊 , 可用於水下照相機 、 手錶或潛水設備 。 • O 形環通過密封在後封蓋和前封蓋之間的縫隙 , 從而保持盒子的防水性能 。 ∫ O 形環如何使盒子防水 後封蓋 數位相機 O 形環 前封蓋 膠脂物接觸到盒子邊緣使盒子防水 , 並且阻止水從縫隙進入盒子 。 O 形環 O 形環 當周圍的水壓擠壓 O 形環時 , O 形環的表面擴張 , 使得盒子密封得更嚴密 。 O 形環通過與盒子邊緣均勻地接觸... -
Seite 118: 安裝 O 形環
安裝 O 形環 在安裝數位相機前 , 請務必安裝 O 形環 。 在觸摸 O 形環前 , 請將手洗淨並擦干 。 請在沒有砂粒或灰塵的地方放置 O 形環 。 用手指將 O 形環鬆開 , 然後取下 。 • 用兩手指的指尖鬆開部分的 O 形環 , 然後將鬆開的部分抬起 。 請小心不要讓 指甲擦傷 O 形環 。 O 形環 O 形環 注意... - Seite 119 檢查 O 形環 。 • 請檢查 O 形環上是否有髒物 、 砂粒 、 毛髮 、 灰塵 、 鹽粒 、 棉絨或以前的潤滑油 。 如果有的話 , 可以用乾軟布將其擦掉 。 1 髒物 3 毛髮 5 鹽粒 2 砂粒 4 灰塵 6 棉絨 • O 形環上可能有無法看到的髒物 。 用手指在 O 形環上擦拭以檢查是否有髒 物...
- Seite 120 塗抹潤滑油 (提供) 。 • 為了清潔 O 形環的表面和補油 , 請塗抹 O 形環潤滑油 。 • 請用指尖將一塊米粒大小的潤滑油 (提供) 均勻地塗抹在 O 形環上 。 ( 請勿用紙或布塗抹潤滑油 。 紙或布的纖維可能會沾附在 O 形環上 。 ) • 如果 O 形環上的潤滑油過多 , 髒物和灰塵會附著在上面 , 從而導致漏水 。 因此 , 請用手指和拇指的指肚捏著 O 形環 , 輕輕擦去多餘的潤滑油 。 •...
- Seite 121 最後檢查 O 形環 。 請再次檢查下列各項 : • O 形環上是否沾有髒物 。 • O 形環是否露出 。 • O 形環是否扭曲 。 • O 形環上沒有劃痕或壓壞的部分 。 用乾布徹底擦掉手上的潤滑油 , 然後用清水徹底洗淨 。 關上盒扣 。 • 檢查 O 形環的外部表面和前盒上的盒扣是否附有外來物 , 然後關閉盒子 。 注意 • 為了使盒子保持完全密封 , 請勿擦傷 O 形環與盒子邊緣相接觸的表面 。 •...
-
Seite 122: 盒子的防水檢查
盒子的防水檢查 裝好 O 形環後 , 請在將數位相機裝入盒子前檢查盒子是否有可能漏水 , 方法是將 盒子沉入水槽或浴盆等容器中大約 3 分鐘 。 • 請勿在溫度高於 40 C 的水中使用此盒子 。 該溫度可能會損壞盒子或者導致漏水 。 • 在將數位相機裝入盒子後 , 請進行同樣的測試 。 (P125) 注意 • 如果在它被浸在水中時會從盒中產生氣泡或當您將它從水中拿出時盒子內部有水 , 則說明漏水 。 在這種情況下 , 請向經銷商諮詢 。 • 在使用盒子並且數位相機被浸入水中時 , 如果發生漏水 , 請立刻取下電池 。 如果附近 有火... -
Seite 123: 安裝數位相機
安裝數位相機 在安裝數位相機之前 , 請閱讀第 125 頁的注意事項 。 關閉數位相機 , 取下手腕帶 。 在滑動 1 的同時 , 用手指上推 2 打開盒扣 。 將數位相機裝入盒子 。 請注意方向 , 將數位相機如圖所示裝入盒子 。 前封蓋 • 請確認數位相機的表面上和盒子內部沒有殘留的水 。 • 請注意不要夾住遮光罩 1 。 (TCH) VQT4V83... - Seite 124 插入硅膠 (提供) 。 • 如果氣溫高水溫低 , 盒子內部可能會出現水汽凝結 。 為了防止水汽凝結 , 請 預先將硅膠 (提供) 插入到盒子內部 。 為了防止盒子霧化 , 請在使用盒子前插 入硅膠約 1 到 2 小時 。 • 要一直使用新硅膠 。 硅膠 數位相機 • 當插入硅膠時 , 請將硅膠如下圖所示弄彎 , 然後將其插入盡可能得深 。 如果 在硅膠沒有完全插入的情況下就關上盒子 , 則由於硅膠被夾在 O 形環內而 導致漏水...
- Seite 125 • 檢查盒扣是否牢固地關上 。 請勿將掛帶等夾在盒扣中 。 裝入數位相機後 , 請再次檢查盒子是否漏水 。 (P122) 注意 • 請注意不要用指印等弄髒遮光罩 。 • 再次檢查 O 形環是否均勻地安裝在 O 形環槽中 。 • 請盡可能避免在沙子多 、 灰塵大 、 以及潮濕或多雨的地方打開或關閉盒子 。 • 如果由於濕氣進入防水盒而導致濕度突然改變 , 則防水盒內部可能會出現水汽凝結 。 • 為防止水汽凝結 , 請將數位相機放置在盡可能乾燥的地方 。 此外 , 請在插入之前確認 矽膠...
-
Seite 126: 拍攝圖片
拍攝圖片 ∫ 入水前請務必檢查下列各項 請在潛水前檢查下列各項 。 • 剩餘電池電量足夠用嗎? • 記憶卡的容量足夠嗎? • O 形環均勻地安裝到 O 形環槽中了嗎? • 已經檢查過沒有水漏入盒子嗎? • 盒扣牢固地關上了嗎? ∫ 拍攝圖片 打開相機 。 設定為 [進階潛水模式 ] 。 瞄準想對焦的目標 , 將其置於 LCD 顯示屏上的 AF 區域中 。 固定焦點進行拍攝 。 有關 [進階潛水模式] 設定或固定焦點的詳情 , 請參閱數位相機的使用說明書 。 注意... -
Seite 127: 水中拍攝圖片的技巧
水中拍攝圖片的技巧 在水中拍攝時 , 建議使用適合於水中的拍攝模式 (進階潛水模式) 。 根據拍攝條件 (深度 / 天氣 / 被攝物體) , 可能無法以想要的亮度或顏色拍攝影 像 , 因此請試著與以下功能一起使用 。 白平衡精細調整 顏色偏紅 、 偏藍 (進階潛水模式) • 可以調整紅色或藍色的色調 。 曝光補償 (適用於帶有曝光補償功能的機型) • 可以調整亮度 。 太亮 / 太暗 自動曝光包圍功能 (適用於帶有自動曝光包圍功能的機型) • 一次可以以不同的曝光拍攝多張影像 。 要拍攝快速移動的被攝物體等 , 建議使用連拍功能 。 注意... -
Seite 128: 使用後
使用後 完成拍攝後 , 請按照下列步驟進行操作 。 不要取出數位相機 , 將盒子浸沒在清水中約 30 分鐘或更長時間 以清除所有的鹽粒等 。 • 按下所有盒子上的操作鍵等以將海水清洗乾淨 。 如果鍵子等上的鹽粒沒有 清除乾淨 , 鹽粒會硬化 , 鍵子將會無法操作 。 • 不要用傾洩的水或有壓力的水等 , 這可能導致漏水 。 請用沒有沾有鹽粒的乾布將水擦去 , 然後將盒子完全擦乾 。 • 請勿將此盒子暴露在直射的陽光下使其晒乾 。 這可能導致盒子退色或損壞 , 或者加速 O 形環的老化 。 VQT4V83 (TCH) - Seite 129 打開後封蓋取出數位相機 。 在將手徹底擦乾後 , 請將手指如圖所示放置然後取出數位相機 。 從盒子中取出 O 形環 , 並檢查 O 形環槽中沒有廢物等 。 當塗抹潤滑油時 , 檢查 O 形環上沒有擦傷 。 注意 取出數位相機時 , 請注意以下幾點 。 • 用清潔的雙手取下相機 。 (請用清水洗手 , 然後完全擦乾 。 ) • 徹底擦乾身體和頭髮上的水 。 (特別要注意衣袖里的水 。 ) (TCH) VQT4V83...
-
Seite 130: 清潔與存放
清潔與存放 用水沖洗盒子的外部 。 • 用水沖洗盒子的外部直到乾淨 。 (P128) • 請確認 O 形環是否被牢牢地安裝 , 務必關上盒子 , 然後用水只沖洗外面 。 • 用濕軟布擦去盒子內部的任何髒物 。 在室溫下徹底晾乾後存放盒子 。 注意 • 不要用傾洩的水沖洗盒子 , 因為這可能導致漏水 。 用水沖洗盒子前 , 應先取出數位相 機 。 • 存放時 , 請勿將數位相機留在盒子里 。 • 請從防水盒上取下 O 形環存放起來 , 使其不會變乾 。 有關詳情 , 請參閱第 132 頁 。 要長時間存放時... - Seite 131 • 如果盒子中冒煙或異常發熱 、 出現氣味或響聲 , 請立即停止使用 。 – 這可能導致電擊 、 燒傷或起火 。 – 從盒子中取出數位相機 , 然後迅速從數位相機中取出電池 。 – 請與經銷商聯繫 。 • 漏水後打開盒子時請多加小心 。 – 漏入的水可能噴出或者後封蓋可能會翻轉 。 • 請勿將此盒子放在溫度高的地方 。 – 當盒子暴露在海灘 、 船上等直射的陽光下 , 或者當盒子被放置在夏天密閉的汽車內 時 , 其內部的溫度會特別得高 。 該溫度可能會損壞盒子或其內部部件 。 –...
-
Seite 132: 使用注意事項
使用注意事項 ∫ 處理 O 形環 • 請勿用酒精 、 稀釋劑或化學清洗劑清洗 O 形環 。 這樣將加速 O 形環的損壞或老化 。 • 如果長時間不使用盒子 , 請將 O 形環從 O 形環槽中取出 , 塗上薄薄一層潤滑油 (提 供) , 放在專用聚酯袋中 , 然後將其存放在陰涼避光的地方以防止表面損壞 。 當再次 使用 O 形環時 , 請徹底檢查是否有擦傷或者裂紋 。 •... - Seite 133 ∫ 關於使用後的存放和檢查 • 請從盒子中取出數位相機 。 • 確保 O 形環上沒有沾上髒物或灰塵 。 • 存放時 , 請取下搭釦使得潛水盒不會密閉不透氣 。 • 我們建議在購買後每3年檢查一次盒子 。 檢查包括拆卸和清洗盒子 、 檢查所有的部件 、 如果需要請進行修理 、 以及使用與購買前進行盒子防水檢查相同的流體靜力學測試 設備檢查盒子的防水性能 。 客戶必須支付所有運費 。 • 請勿拆除任何部件 , 或者使用使用說明書中沒有指定的附件 , 並且不要修改盒子 。 如 果盒子不能正常工作 , 請與經銷商聯繫 。 規格...
- Seite 134 Инструкция по эксплуатации БОКС ДЛЯ ПОДВОДНОЙ СЪЕМКИ Благодарим за приобретение продукции Panasonic. Перед использованием этого изделия, пожалуйста, внимательно прочитайте данные инструкции и сохраните это руководство для дальнейшего использования. Содержание Перед началом эксплуатации Перед использованием................135 Принадлежности ..................137 Составные части ..................138 Подготовка...
-
Seite 135: Перед Использованием
(цифровой камере, батарейкам, картам памяти и т.д.), находящимся внутри футляра, за стоимость фотографий и за любые другие расходы. • Кроме того, компания Panasonic не выплачивает компенсации за несчастные случаи, повлекшие за собой причинение травм или материальные убытки. • Изучите руководство по эксплуатации цифровой камеры. - Seite 136 ∫ Использование футляра при высоких или низких температурах • Если открыть или закрыть футляр в условиях высокой влажности или температуры, а затем поместить его в прохладные условия или погрузить под воду, внутри футляра может начаться конденсация, поверхность стекла может запотеть, а цифровая камера может получить повреждения. •...
-
Seite 137: Принадлежности
Принадлежности При первом открытии упаковки убедитесь, что в ней присутствует футляр и все принадлежности. Проверьте, чтобы футляр и принадлежности не были повреждены при пересылке или транспортировке. При обнаружении чего-либо необычного, перед тем как начать пользоваться футляром, обратитесь к дилеру. Используйте только аксессуары, описанные ниже. Замена... -
Seite 138: Составные Части
Составные части Кнопка затвора 1 Кнопка видеосъемки Кнопка ON/OFF камеры Установочный башмак для INON Inc., выносной импульсной ¢1 вспышки Передняя часть футляра Диффузор (входит в комплект поставки) Переднее стекло Кнопка масштабирования Раздел об использовании ¢2 кнопок (Информацию об использовании каждой кнопки см. в инструкциях по эксплуатации... -
Seite 139: Что Такое Уплотнительное Кольцо
Что такое уплотнительное кольцо? • Уплотнительное кольцо – это влагоизоляционное уплотнение, которое применяется в подводных камерах, часах и снаряжении для подводного плавания. • Уплотнительное кольцо обеспечивает водонепроницаемость футляра за счет герметизации стыка между задней и передней частью футляра. ∫ Каким образом уплотнительное кольцо обеспечивает водонепроницаемость? Задняя... -
Seite 140: Установка Уплотнительного Кольца
Установка уплотнительного кольца Перед установкой цифровой камеры не забудьте установить уплотнительное кольцо. Перед работой с уплотнительным кольцом тщательно вымойте и высушите руки. Устанавливайте кольцо в условиях отсутствия песка и пыли. Для снятия уплотнительного кольца ослабьте его пальцами рук. • Ослабьте кольцо кончиками пальцев рук, а затем поднимите ослабленную... - Seite 141 Проверка уплотнительного кольца. • Убедитесь, что на уплотнительном кольце нет грязи, песка, волос, пыли, кристаллов соли, ворса или старой смазки. При обнаружении любого загрязнения удалите его мягкой сухой тканью. 1 Грязь 3 Волосы 5 Кристалл соли 2 Песок 4 Пыль 6 Ворс...
- Seite 142 Нанесите смазку (входит в комплект поставки). Нанесите смазку для уплотнительного кольца, чтобы очистить поверхность уплотнительного кольца, и добавьте масло. • Кончиком пальца равномерно нанесите на уплотнительное кольцо смазку, которая (входит в комплект поставки), примерно в объеме рисового зерна. (Не наносите смазку с помощью бумаги или ткани. Волокна...
- Seite 143 Проверьте уплотнительное кольцо еще раз. Еще раз проверьте, чтобы: • к кольцу не прилипла грязь. • кольцо не вышло из паза. • кольцо не было перекручено. • на уплотнительном кольце нет царапин либо вмятин. Тщательно удалите смазку с рук с помощью сухой ткани, после...
-
Seite 144: Проверка Водонепроницаемости Футляра
Проверка водонепроницаемости футляра После установки уплотнительного кольца перед установкой цифровой камеры проверьте, что вода не попадает в футляр, погрузив футляр в бак с водой, ванну или другую емкость с водой примерно на 3 минуты. • Не используйте футляр в воде с температурой выше 40 °C. Высокая температура... -
Seite 145: Установка Цифровой Камеры
Установка цифровой камеры До установки цифровой камеры прочитайте примечания на стр. 147. Выключите цифровую фотокамеру и снимите с нее ремешок. Для открытия защелки поднимите деталь 2 пальцем, перемещая деталь 1. Установите цифровую камеру в футляр. Осторожно вставьте цифровую камеру в футляр в указанном направлении... - Seite 146 Вставьте силикагель (входит в комплект поставки). • При высокой температуре воздуха и низкой температуре воды внутри футляра может начаться конденсация. Во избежание образования конденсата предварительно поместите силикагель (входит в комплект поставки) внутрь футляра. Для предотвращения образования тумана в футляре вставьте силикагель...
- Seite 147 • Убедитесь, что защелка плотно закрыта. Не вставляйте в защелку ремень и т.д. После установки цифровой камеры еще раз проверьте, что в футляр не попадает вода. (P144) Примечания • Постарайтесь не загрязнить бленду отпечатками пальцев и т. д. • Еще раз проверьте, что уплотнительное кольцо равномерно распределено по пазу. •...
-
Seite 148: Съемка
Съемка ∫ Перед погружением в воду обязательно проверьте следующее. Перед погружением проведите следующие проверки. • Достаточна ли оставшаяся емкость батарейки? • Если ли на карте памяти свободное место достаточного объема? • Равномерно ли установлено уплотнительное кольцо в пазе? • Проверен ли футляр на водонепроницаемость? •... -
Seite 149: Советы По Съемке Под Водой
Советы по съемке под водой Для съемки под водой рекомендуется использовать соответствующий режим записи (Дополнительный подводный режим). В зависимости от условий съемки (глубина/погода/объект), возможно, не получится записать изображения с нужной яркостью или цветом, поэтому постарайтесь одновременно использовать следующие функции. Точная настройка баланса белого Цвет... -
Seite 150: После Использования
После использования После съемки выполните следующие операции. Погрузите футляр в пресную воду не менее чем на 30 минут, не вынимая цифровую камеру. Это необходимо для удаления кристаллов соли и т.д. • Чтобы смыть морскую воду, нажмите все кнопки на футляре. Если... - Seite 151 Чтобы вынуть цифровую камеру, откройте заднюю часть футляра. Тщательно вытрите руки, после чего при помощи пальца извлеките цифровую камеру, как показано на рисунке. Снимите уплотнительное кольцо с футляра и убедитесь, что в пазе кольца нет грязи и других инородных частиц. Нанесите...
-
Seite 152: Очистка И Хранение
Очистка и хранение Промойте наружную поверхность футляра водой. • Дочиста вымойте наружную поверхность футляра. (P150) • Убедитесь, что уплотнительное кольцо установлено надежно, закройте футляр, а затем промойте его только снаружи водой. • Вытрите грязь внутри футляра с помощью влажной мягкой ткани. Перед... -
Seite 153: Обращение И Уход
Обращение и уход • Не оставляйте футляр в местах, где он может упасть. – Падение футляра на голову или ногу может нанести травму и стать причиной неисправности футляра. • Не вносите изменений в футляр. – При попадании воды в цифровую камеру вследствие внесения изменений в футляр... - Seite 154 • Будьте осторожны при открытии футляра после попадания в него воды. – Попавшая в футляр вода может вырваться, а задняя часть футляра может отскочить. • Не оставляйте футляр в местах с высокой температурой. – Температура в футляре становится очень высокой, особенно если оставить футляр...
-
Seite 155: Предосторожности При Использовании
Предосторожности при использовании ∫ Обращение с уплотнительным кольцом • Не используйте спирт, растворители или химические моющие средства для очистки уплотнительного кольца. Эти вещества могут нанести повреждения уплотнительному кольцу или ухудшить его свойства. • Если футляр не будет использоваться в течение длительного времени, извлеките... - Seite 156 ∫ Уход • Не используйте перечисленные ниже химические вещества для очистки, предотвращения ржавления, предотвращения запотевания или ремонта. Непосредственное их нанесение на футляр (с помощью пульверизатора или другими методами) может привести к появлению трещин на футляре. Химические вещества, Предостережения запрещенные к использованию...
-
Seite 157: Технические Характеристики
∫ Хранение и проверка после использования • Всегда вынимайте камеру из футляра. • Убедитесь, что на уплотнительном кольце нет грязи или пыли. • При хранении снимите пряжку, чтобы морской футляр не был герметично закрыт. • Рекомендуется провести проверку футляра спустя примерно 3 года после покупки. - Seite 158 VQT4V83...
- Seite 159 VQT4V83...
- Seite 160 Panasonic Corporation Web Site: http://panasonic.net Panasonic Corporation 2013...