Herunterladen Diese Seite drucken

Werbung

Verfügbare Sprachen
  • DE

Verfügbare Sprachen

  • DEUTSCH, seite 6
http://www.icybox.de
IB-RD2253-U31
Manual IB-RD2253-U31
External RAID System for 2x 2.5" SATA SSD or HDD
Handbuch IB-RD2253-U31
Externes RAID System für 2x 2,5" SATA SSDs oder Festplatten

Werbung

loading

Inhaltszusammenfassung für Icy Box IB-RD2253-U31

  • Seite 1 IB-RD2253-U31 Manual IB-RD2253-U31 External RAID System for 2x 2.5" SATA SSD or HDD Handbuch IB-RD2253-U31 Externes RAID System für 2x 2,5" SATA SSDs oder Festplatten...
  • Seite 2 IB-RD2253-U31 Manual IB-RD2253-U31 ............4-5 Handbuch IB-RD2253-U31.............6-7 Manuel IB-RD2253-U31 ............8-9 Manuale IB-RD2253-U31 ............10-11 Manual IB-RD2253-U31 ............12-13 Handboek IB-RD2253-U31 ............14-15 Instrukcja IB-RD2253-U31 ............16-17 Manuální IB-RD2253-U31 ............18-19 Kézi IB-RD2253-U31 .............20-21 εγχειρίδιο IB-RD2253-U31 .............22-23...
  • Seite 3: Front View

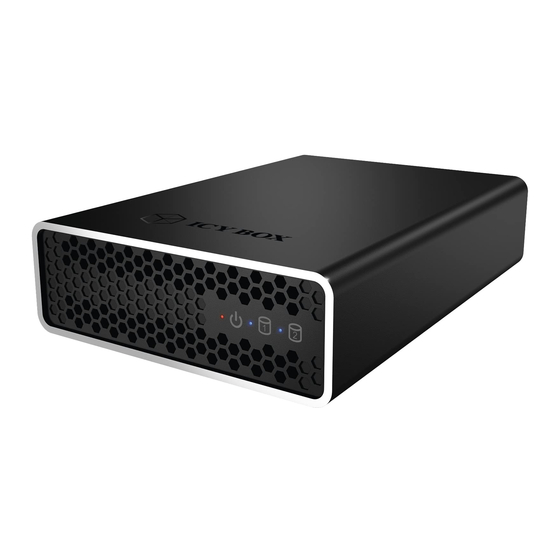
    IB-RD2253-U31 Front view 1. Power LED 2. HDD 1 3. HDD 2 Rear view 1. RAID Mode switch / RAID Modusschalter 2. RAID confirmation button (RESET) RAID Bestätigungstaste (RESET) 3. USB 3.1 (Gen 2) interface (Type-B) USB 3.1 (Gen 2) Anschluss (Type-B) 4. DC Power in / Stromanschluss 5. Power switch / An-/Ausschalter HDD 1 and HDD 2 information at the HDD tray!
  • Seite 4: Package Content

    IB-RD2253-U31 Main Features • External RAID System for 2x 2.5‘‘ SATA SSD or HDD • RAID Level: RAID 0, 1, LARGE, SINGLE • Interface of device: USB 3.1 (Gen 2), Type-B • Transfer rate: up to 10 Gbit/s • Datatransfer up to 780 MB/s or more (under RAID 0 mode with SSDs, depending on hardware) Package content IB-RD2253-U31, USB 3.1 (Gen 2) cable (Type B to Type-A), 5 V Power supply, Screwdriver and set of screws, Manual Drive installation Application Before operating the enclosure with the installed HDDs/SSDs with the computer you need to make sure that: •...
  • Seite 5 1. Check the HDD LED and replace the faulty drive. You can add a file to your hard drive and the cor- responding HDD LED will be solid blue light, indicating the defective drive (see picture as above to identify the HDD inside the tray). 2. For RAID 1: just exchange the defective HDD and power on the IB-RD2253-U31, the RAID array will be rebuilt automatically. During this process, both blue LEDs will glow very slowly (dark-bright interplay). Rebuilding the RAID array can take several hours, depending on the drive capacity. Please await the end of the rebuild process before switch off the device. After the rebuild process has been finished both LEDs are lighted up continuously in blue.
  • Seite 6: Verpackungsinhalt

    IB-RD2253-U31 Hauptmerkmale • Externes RAID System für 2x 2,5‘‘ SATA SSDs oder Festplatten • RAID Level: RAID 0, 1, LARGE, SINGLE • Datenschnittstelle: USB 3.1 (Gen 2), Type-B • Datenübertragungsrate: bis zu 10 Gbit/s • Extrem schnelle Datenübertragungsgeschwindigkeit bis zu 780 MB/s oder mehr (im RAID 0 Modus mit SSDs, Hardwareabhängig) Verpackungsinhalt IB-RD2253-U31, USB 3.1 (Gen 2) Kabel (Type B zu Type-A), 5 V Netzteil, Schraubendreher und Schraubenset, Handbuch Laufwerkseinbau Verwendung Bevor Sie das Gerät mit den installierten Laufwerken mit dem Computer verwenden können, stellen Sie sicher, dass folgendes erledigt ist: • Auswahl der gewünschte RAID Funktion (siehe unten) •...
  • Seite 7 4. SINGLE Wie LARGE ist er kein wirklicher RAID Modus. Das heißt, dass beide Festplatten als eigenständige Festplat- ten mit ihrem jeweils eigenen Inhalt in das System eingebunden werden. Einstellung des RAID Modus ACHTUNG: Das Einstellen oder Ändern des RAID Modus benötigt das Formatieren der Laufwerke. Da- durch werden alle Daten auf den zu formatierenden Laufwerken gelöscht. Führen Sie unbedingt vorher ein Backup Ihrer gesamten Daten aus. 1. Schalten Sie die IB-RD2253-U31 ein 2. Auswahl der gewünschte RAID Funktion mittels DIP Schalter (weiße Farbe zeigt die Schalterposition an) 3. Halten Sie anschließend die "Reset" Taste an der Rückseite für etwa 5 Sekunden gedrückt um die Einstellung zu übernehmen. 4. Schließen Sie die Einrichtung der Laufwerke unter der Datenträgerverwaltung Ihres Betriebssystems ab (initialisieren und formatieren) Hinweis: Damit Ihr Computer auf Laufwerke größer 2 TB zugreifen kann, müssen Ihre Hardware und das Betriebssystem diese Funktion unterstützen.
  • Seite 8 IB-RD2253-U31 Installation du lecteur des disques durs Application Avant de brancher sur l‘ordinateur le boîtier comportant les disques durs installés, vous devez vous assurer que : • vous avez défini la fonction RAID de la manière requise • branchez le câble d‘interface • raccorder l‘adaptateur secteur au boîtier et à la prise secteur •...
  • Seite 9 1. Observez les LED HDD et remplacez le disque en défaut. La LED correspondante est allumée en bleu de manière fixe, indiquant ainsi le disque défectueux. 2. En RAID 1, remplacez simplement le disque défectueux et remettez en marche le IB-RD2253-U31, la matrice RAID sera reconfigurée automatiquement. Durant ce processus, les LED clignote très lentement. La reconfiguration de la matrice RAID peut prendre plusieurs heures suivant la capacité des disques. Attention : n‘appuyez pas le bouton " RAID Reset " sous peine de voir toutes les données perdues.
  • Seite 10 IB-RD2253-U31 Installazione del disco rigido Applicazione Prima di applicare al computer l‘enclosure con i dischi rigidi installati, è necessario eseguire quanto segue: • Impostare la funzione RAID richiesta. • Applicare Il cavo di interfaccia. • Connettere l‘adattatore di alimentazione all‘enclosure e alla presa di corrente. • Inserire l‘alimentazione.
  • Seite 11 1. Controllare il LED HDD e sostituire il disco rigido guastatosi. Il LED corrispondente si accende perma- nentemente di luce blu, indicando il disco rigido difettoso. 2. Per il RAID 1, sostituire l‘HDD difettoso e accendere l‘IB-RD2253-U31: la ricostruzione dell‘array RAID avviene automaticamente. Durante questo processo, il LED lampeggia molto lentamente. La ricostruzione dell‘array RAID dura alcune ore, a seconda della capacità...
  • Seite 12 IB-RD2253-U31 Instalación de la unidad Aplicación Antes de conectar la caja con las unidades de disco instaladas al ordenador, asegurarse de: • haber ajustado la función RAID del modo necesario • conectar el cable de la interfaz • conectar el adaptador de corriente a la caja y la toma de alimentación •...
  • Seite 13 1. Comprobar el LED de la unidad de disco y sustituir la unidad de disco defectuosa. La luz del LED correspondiente será una luz azul fija indicando la unidad de disco defectuosa. 2. Para RAID 1, basta con cambiar la unidad de disco defectuosa y conectar el IB-RD2253-U31 para que el sistema RAID se reconstruya automáticamente. Durante el proceso, la luz del LED parpadeará muy len- tamente.
  • Seite 14 IB-RD2253-U31 Installatie station Toepassing Voordat u de behuizing met de geïnstalleerde HDD‘s in de computer plugt, moet u controleren of: • u de RAID-functie correct hebt ingesteld • de interfacekabel inpluggen • de voedingsadapter in de behuizing en het stopcontact steken • de stroomtoevoer inschakelen...
  • Seite 15 1. Controleer het HDD LED-lampje en vervang het defecte station. Het corresponderende LED-lampje is blauw, wat duidt op een defect station. 2. Vervang voor RAID 1 gewoon de defecte HDD en schakel de IB-RD2253-U31 in. Het RAID-bereik wordt automatisch opnieuw opgebouwd. Tijdens dit proces knippert het LED-lampje heel langzaam. Het op- nieuw opbouwen van het RAID-bereik kan enkele uren duren, afhankelijk van de capaciteit van het station.
  • Seite 16 IB-RD2253-U31 Instalacja napędu Zastosowanie Przed podłączeniem do obudowy z zainstalowanymi dyskami twardymi do komputera należy się upewnić, że: • Funkcja RAID została ustawiona w wymagany sposób. • Podłączyć kabel interfejsu. • Podłączyć adapter zasilający do obudowy i gniazdka elektrycznego. • Włączyć zasilanie.
  • Seite 17 IB-RD2253-U31 Ustawianie trybu RAID Uwaga: Podczas ustawiania/zmiany trybu RAID napędy muszą zostać ponownie sformatowane. Wszystkie dane zostaną utracone. 1. Ustawić przełącznik RAID i wybrać preferowany tryb RAID. 2. Wcisnąć przycisk "RAID Reset" z tyłu na 5 sekund, aby potwierdzić ustawienie. 3. Dokończyć ustawianie w programie do zarządzania dyskami dostępnym w systemie. Uwaga: W celu ustawienia w komputerze dostępu do pojemności powyżej 2TB zarówno sprzęt, jak i SO muszą charakteryzować się pojemnością pozwalającą na obsługę dużych pojemności. 4. Gotowe. Wymiana dysków twardych Jeżeli napęd nie działa, odpowiednia dioda HDD LED (1 lub 2) świeci na niebiesko w sposób ciągły. W takim przypadku dysk twardy nie jest już dostępny. Jeżeli tylko jeden dysk jest uszkodzony i tryb RAID jest ustawiony w pozycji RAID 1, dostęp do danych będzie nadal możliwy, ale w celu prawidłowego tworzenia kopii zapasowych oraz zapewnienia bezpieczeństwa danych zalecamy natychmiastową wymianę uszkodzonego dysku. 1. Należy sprawdzić kontrolkę LED HDD i wymienić uszkodzony dysk. Odpowiednia kontrolka LED będzie świecić w sposób ciągły na niebiesko, wskazując uszkodzony dysk. 2. W macierzy RAID 1 wystarczy wymienić uszkodzony dysk twardy i włączyć zasilanie urządzenia IB-RD2253-U31, macierz RAID zostanie odtworzona automatycznie. Podczas tej operacji dioda LED będzie...
  • Seite 18 IB-RD2253-U31 Instalace diskových jednotek Používání Před připojením krytu s instalovanými jednotkami pevných disků k počítači nezapomeňte: • nastavit funkci RAID podle požadavků • zapojit kabel rozhraní • zapojit napájecí adaptér do zdířky a poté do zásuvky • zařízení zapnout...
  • Seite 19 IB-RD2253-U31 Nastavení režimu RAID Upozornění: Při nastavení / změně režimu RAID je nutné diskové jednotky přeformátovat. Zároveň dojde ke ztrátě dat. 1. Nastavte přepínač RAID a vyberte si požadovaný režim RAID 2. Nastavení potvrdíte stisknutím "tlačítka resetování RAID" po dobu 5 sekund na zadní straně. 3. Dokončete nastavení v rámci správy diskových jednotek na vašem systému. Upozornění: Aby měl počítač přístup ke svazkům větším než 2 TB, musí hardware i operační systém mít kapa- citu nezbytnou pro podporu větších svazků. 4. Hotovo Výměna pevných disků Pokud dojde k poruše diskové jednotky, odpovídající LED kontrolka jednotky pevného disku (1 nebo 2) bude svítit modře, což znamená, že disk již nebude přístupný. Pokud je poškozená pouze jedna disková jednotka a režim RAID je nastavený na možnost RAID 1, budou data i nadále přístupná, ale důrazně doporučujeme vadnou diskovou jednotku vyměnit, abyste zajistili řádné zálo- hování a zabezpečení dat. 1. Zkontrolujte LED kontrolku jednotky pevného disku a vadný disk vyměňte. Příslušná kontrolka LED bude svítit modře a označuje vadnou diskovou jednotku. 2. V případě režimu RAID 1, stačí pouze vyměnit vadnou jednotku pevného disku a zapnout zařízení...
  • Seite 20 IB-RD2253-U31 A meghajtó beépítése Alkalmazás Mielőtt a merevlemezt tartalmazó eszközt a számítógéphez csatlakoztatná, győződjön meg az alábbiakról: • a RAID funkciót szükség szerint kell beállítani • csatlakoztassa az interfész kábelt • csatlakoztassa az eszköz áramellátását a fali aljzathoz • kapcsolja be az áramellátást...
  • Seite 21 IB-RD2253-U31 RAID mód beállítás Figyelem: A RAID mód beállítása/módosítása során a meghajtókat újra kell formázni, és minden rajtuk tárolt adat elveszik. 1. Állítsa be a RAID kapcsolót, és válassza ki a kívánt RAID módot 2. Nyomja meg 5 másodpercen keresztül a "RAID Reset" gombot a készülék hátoldalán, hogy megerősítse a beállítást. 3. Fejezze be a beállítást a rendszer Merevlemezkezelőjében. Figyelem! Ahhoz, hogy a számítógép hozzá tudjon férni a 2 TB-nál nagyobb merevlemezekhez, mind a hardver- nek, mind az operációs rendszernek képesnek kell lennie a nagy meghajtók kezelésére. 4. Kész A merevlemezek cseréje Egy merevlemez meghibásodása esetén az adott HDD LED (1 vagy 2) folyamatosan kéken világít; ebben az esetben az adott merevlemez nem érhető el. Amennyiben csak egy meghajtó hibásodik meg, és a RAID mód beállítása RAID 1, akkor az adatok továbbra is elérhetők, de javasoljuk, hogy a meghibásodott meghajtót azonnal cseréljék ki a biztonsági mentések megfelelő működése és az adatbiztonság szavatolása érdekében. 1. Ellenőrizze a HDD LED-et, és cserélje ki a meghibásodott meghajtót. Az adott LED folyamatosan kéken világít, jelezve a meghibásodott meghajtót.
  • Seite 22 IB-RD2253-U31 Εγκατάσταση προγράμματος οδήγησης Εφαρμογή Προτού συνδέσετε το περίβλημα με τους εγκατεστημένους σκληρούς δίσκους στον υπολογιστή σας, πρέπει να βεβαιωθείτε ότι: • έχετε καθορίσει τη λειτουργία RAID όπως απαιτείται • έχετε συνδέσει το καλώδιο της διεπαφής • έχετε συνδέσει το τροφοδοτικό στο περίβλημα και σε πρίζα ρεύματος. • έχετε ενεργοποιήσει την τροφοδοσία...
  • Seite 23 1. Ελέγξτε τη λυχνία LED της μονάδας σκληρού δίσκου και αντικαταστήστε την ελαττωματική μονάδα. Η αντίστοιχη λυχνία LED θα ανάψει με μπλε χρώμα, υποδηλώνοντας την ελαττωματική μονάδα. 2. Για RAID 1, απλώς αλλάξτε τον ελαττωματικό σκληρό δίσκο και ενεργοποιήστε το IB-RD2253-U31. Η συστοιχία RAID θα αναδομηθεί αυτόματα. Κατά τη διάρκεια αυτής της διαδικασίας, η λυχνία LED θα αναβοσβήνει πολύ αργά. Για την αναδόμηση της συστοιχίας RAID ενδέχεται να απαιτηθούν αρκετές ώρες, ανάλογα με τη...
  • Seite 24 © Copyright 2015 by RaidSonic Technology GmbH. All Rights Reserved The information contained in this manual is believed to be accurate and reliable. RaidSonic Technology GmbH assumes no responsibility for any errors contained in this manual. RaidSonic Technology GmbH reserves the right to make changes in the specifications and/or design of the above mentioned product without prior notice. The diagrams contained in this manual may also not fully represent the product that you are using and are there for illustration purposes only. RaidSonic Technology GmbH assumes no responsibility for any differences between the product mentioned in this manual and the product you may have.