Werbung
Verfügbare Sprachen
Verfügbare Sprachen
Quicklinks
9. Einstellen des Neigungswinkels
120°
Auf gewünschte Position stellen oder kippen
Wartung
• Überprüfen Sie in regelmäßigen Abständen (mindestens alle drei Monate), dass die Halterung fest
sitzt und sicher verwendet werden kann.
• Bei Rückfragen wenden Sie sich bitte an Ihren Händler
11
+3°
-3°
+15°
-15°
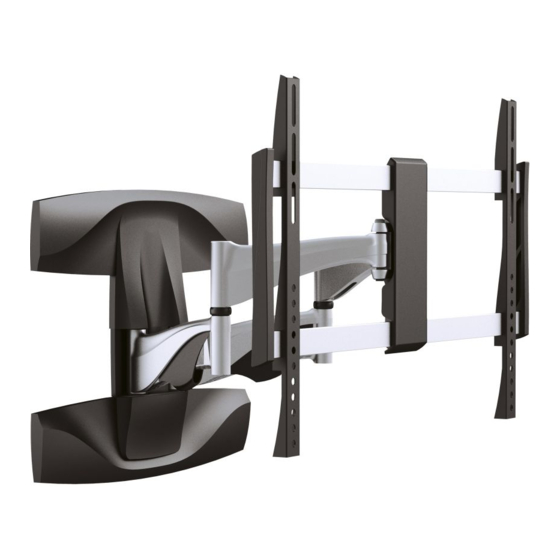
Voll bewegliche LED, LCD TV Wandhalterung
200x200/300x300
23110B
400x200/400x400
600x400
www.inline-info.de
INSTALLATIONSANLEITUNG
VORSICHT:
DAS ANGEGEBENE ZULÄSSIGE
GEWICHT NICHT ÜBERSCHREITEN, DA SONST
SCHWERE VERLETZUNGEN ODER SCHÄDEN
AUFTRETEN KÖNNEN!
70"
45kg
45kg
MAX
(99lbs)
(99lbs)
RATED
RATED
Werbung

Inhaltszusammenfassung für Inline 23110B
- Seite 1 DAS ANGEGEBENE ZULÄSSIGE GEWICHT NICHT ÜBERSCHREITEN, DA SONST SCHWERE VERLETZUNGEN ODER SCHÄDEN AUFTRETEN KÖNNEN! Auf gewünschte Position stellen oder kippen 200x200/300x300 70" 23110B 400x200/400x400 Wartung 45kg 45kg 600x400 • Überprüfen Sie in regelmäßigen Abständen (mindestens alle drei Monate), dass die Halterung fest...
- Seite 2 Checkliste der Komponenten HINWEIS: Vor Beginn von Zusammenbau und Montage bitte die gesamte Anleitung durchlesen. WICHTIG: Vergewissern Sie sich vor dem Einbau, dass Sie alle auf der Checkliste der Komponenten angegebenen Teile erhalten haben. Falls Einzelteile fehlen oder defekt sind, fordern Sie von Ihrem Händler Ersatz an. WARNUNG! •...
- Seite 3 (23.6") (24") Schrauben Sie Model die Wandplatte 23110B Der Pfeil auf der Platte nach oben zeigend. WARNUNG WARNUNG • Sorgen Sie dafür, dass die Montageschrauben in der Mitte der Wandbalken positioniert werden. Es wird dringend empfohlen, einen Balkenfinder zu verwenden Der Monteur muss sicherstellen, dass der Montageort das gemeinsame Gewicht der •...
- Seite 4 5. Installieren der Adapterplatte am TV 3. Einbau der Zierabdeckungen Oberkante des TV Bewegen Sie die Haltearme entsprechend der Montagegewinde am TV, verwenden Sie einen Schraubendreher, um die Schrauben zu fixieren. 5-1 Für Flachbildschirme 4. Entfernen der unteren Rändelschraube Hinweis: Plasma-TV nicht auf den Boden legen, hier die Halterungen in stehender Position des TV montieren!
- Seite 5 6. Fernseher an Wandhalterung aufhängen 5-2 Für TV mit versenkter Rückseite oder Zugriff auf A/V-Eingänge Obere Rändelschraube auf 4 mm Abstand zu Adapterhalterung lockern TV an Wandhalterung aufhängen Hinweis: Verwenden sie nur die für Ihren TV passenden Schrauben und (falls notwendig) Unterlegscheiben/Distanzringe.
- Seite 6 7. Kabelführung 8. Ausrichtung • Kabelabdeckungen nach Bedarf entfernen. Kabel an Ihren Fernseher anschließen und entlang der Arme führen. • Kabelabdeckungen wieder aufsetzen, damit die Kabel in Position gehalten werden. Je nach Gewicht des Bildschirms muss die Einstellschraube mit dem Sechskant-/Inbusschlüssel leicht gelöst oder angezogen werden.
- Seite 7 CAUTION: DO NOT EXCEED RATED LISTED WEIGHT. SERIOUS INJURY OR PROPERTY DAMAGE Adjust to the desired position or tilt. MAY OCCUR! 200x200/300x300 70" 23110B 45kg 45kg 400x200/400x400 Maintenance (99lbs) (99lbs) 600x400 • Check that the bracket is secure and safe to use at regular intervals(at least every three months).
- Seite 8 Component Checklist NOTE: Read the entire instruction manual before you start installation and assembly. IMPORTANT: Ensure that you have received all parts according to the component checklist prior to installation. If any parts are missing or faulty, telephone your local distributor for a replacement. WARNING •...
- Seite 9 2b. For Solid Brick and Concrete Mounting 1. Removing the Decorative Covers 60mm 60mm (2.4") (2.4") ø 10 ø 3/8" Mark the exact location of 2a. For Wood Stud Wall Mounting mounting holes 55mm 55mm (2.2") (2.2") ø 4 ø 3/16" Drill pilot holes Find and mark the exact location of mounting holes...
- Seite 10 5. Installing the Universal Adapter Plate 3. Installing the Decorative Covers Top of the TV. Adjust the brackets to align the mounting holes, using a philips screwdriver to tighten all screws on the brackets. 5-1 For Flat Back Screens 4. Removing the Lower Thumbscrew Note: Do not put a Plasma-TV on the floor! To mount the fixtures here in the standing position of the TV!
- Seite 11 6. Hooking the TV onto the Wall Mount 5-2 For Recessed Back Screens or to Access A/V Inputs Loosen the upper thumbscrew leaving a 4mm space to the adapter bracket. Hook the TV onto the wall mount Note: Choose the appropriate screws, washers and spacers (if necessary) according to the type of screen. ·...
-
Seite 12: Cable Management
7. Cable Management 8. Adjustment • Remove the cable covers as required, Connect the cables to your TV and route along the arms. • Re-attach the cable covers to hold the cables in place . Depending on the weight of the display, it is necessary to slightly loosen or tighten the adjustment screws using an Allen key.
