Inhaltsverzeichnis
Werbung
Verfügbare Sprachen
Verfügbare Sprachen
Quicklinks
Ce produit ne peut être utilisé que dans des locaux bien isolés ou de manière occasionnelle.
This product is only suitable for well insulated spaces or occasional use
Dieses Produkt ist nur für gut isolierte Räume oder für den gelegentlichen Gebrauch
geeignet.
Ten produkt jest odpowiedni tylko do sporadycznego użytku lub do stosowania w dobrze
izolowanych pomieszczeniach
Este producto está indicado únicamente en lugares abrigados o para una utilización puntual
Este produto é adequado apenas para espaços bem isolados espaços ou utilização
ocasional.
Il presente prodotto è adatto solo a ambienti correttamente isolati o ad un uso occasionale
RADIATEUR ELECTRIQUE
Notice d'utilisation et d'installation
ELECTRIC CONVECTOR
Operation manual
ELEKTRO-KONVEKTOR
Betriebsanleitung
GRZEJNIK ELEKTRYCZNY
Instrukcja obsługi
CONVECTORES ELÉCTRICOS
Manual de operación y mantenimiento
CONVECTORES ELÉCTRICOS
A instalacao eo usa
CONVETTORI ELETTRICI
Manuale d'uso
LEXIA
Mobile Euro Econom
Home solutios
FR
EN
DE
PL
ES
PT
IT
Werbung
Inhaltsverzeichnis

Verwandte Anleitungen für CHAUFFAGE FRANCAIS LEXIA Mobile Euro Econom

Inhaltszusammenfassung für CHAUFFAGE FRANCAIS LEXIA Mobile Euro Econom
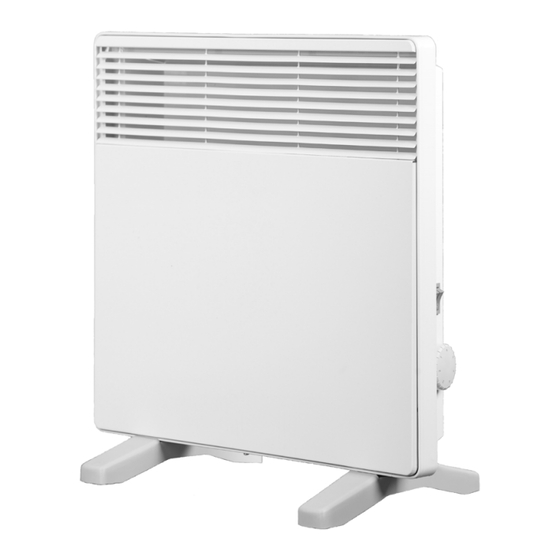
- Seite 1 Home solutios LEXIA Mobile Euro Econom RADIATEUR ELECTRIQUE Notice d’utilisation et d’installation Ce produit ne peut être utilisé que dans des locaux bien isolés ou de manière occasionnelle. ELECTRIC CONVECTOR Operation manual This product is only suitable for well insulated spaces or occasional use ELEKTRO-KONVEKTOR Betriebsanleitung Dieses Produkt ist nur für gut isolierte Räume oder für den gelegentlichen Gebrauch...
- Seite 3 Veuillez lire les instructions avant de commencer à installer le radiateur. Débranchez l'alimentation avant d'effectuer tout travail sur l'appareil de chauffage. Conservez ces instructions même une fois que vous avez installé votre appareil de chauffage. MISE EN GARDE ATTENTION : Certaines parties de ce produit peuvent devenir très chaudes et provoquer des brûlures.
- Seite 4 l'usager ne doivent pas être effectués par des enfants sans urveillance. -Cet appareil ne doit être branché ou raccordé, selon les règles et normes en application, que par une personne habilitée. -Si le câble d’alimentation est endommagé, il doit être remplacé...
-
Seite 5: Instructions Generales
- Utilisez ce convecteur sur une surface horizontale et stable, ou fixez-le au mur, selon le cas. AVERTISSEMENT : Pour réduire les risques d'incendie, maintenez les textiles, les rideaux ou tout autre matériau inflammable à une distance minimale de 1 m de la sortie d'air. AVERTISSEMENT : N'utilisez pas cet appareil de chauffage dans de petites pièces lorsqu'elles sont occupées par des personnes incapables de quitter la pièce par elles-mêmes, à... -
Seite 6: Données Techniques
DONNÉES TECHNIQUES - Tension d'alimentation nominale 230 V - Fréquence actuelle 50 Hz - Protégé contre les projections d'eau IP20 - Classe de protection contre les chocs électriques D'autres spécifications sont indiquées dans le tableau 1 Tableau 1 Modèle LEXIA 500W LEXIA 1000W LEXIA 1500W LEXIA 2000W LEXIA 2500W Puissance nominale, Ampérage nominal, A... - Seite 7 Tableau 2 Rated power, kW L, mm Figure 1 Figure 2 Figure 3 - fixez la supports de montage de n'importe quelle manière accessible, ayant assuré la fixation sûre du convecteur pendant toute la durée de fonctionnement ; - monter le convecteur sur les pattes d'accrochage. -Pour faire fonctionner le convecteur au sol, installez la poignée et les supports comme indiqué...
- Seite 8 1 - poignée du thermostat 2 - touches du régulateur de puissance (touche de l'interrupteur) FONCTIONNEMENT ATTENTION ! Il est interdit d’allumer et de faire fonctionner le convecteur sans le fixer au mur ou sans supports installés. -A la première mise en chauffe, une légère odeur peu apparaître correspondant à l’évacuation des éventuelles traces liées à...
- Seite 9 CONDITIONS DE GARANTIE Cette garantie est applicable pendant 2 ans à compter de la date d'achat d'origine et n'est valable que pendant 30 mois à compter de la date de fabrication. La garantie couvre l'échange ou la fourniture des pièces reconnues défectueuses, à l'exclusion de tous dommages et intérêts.
-
Seite 10: Safety Requirements
Please read the instructions before starting to install the heater. Disconnect the power before carrying out any work on the heater. Keep these instructions even once you have installed your heater. SAFETY REQUIREMENTS The appliance is not to be used by persons (including children) with reduced physical, sensory or mental capabilities, or lack of experience and knowledge, unless they have been given supervision or instruction, children being supervised not... - Seite 11 CAUTION — Some parts of this product can become very hot and cause burns. Particular attention has to be given where children and vulnerable people are present. WARNING: Children must not lean on the appliance. Under certain circumstances, there is a risk that its surface may cause burns to the skin of young children.
- Seite 12 - To place easily inflammable materials and objects close to the convector. - The heater should not be installed directly under a fixed mains power socket. - The heater should not be installed where the controls may be touched by a person using a bath or shower. - To touch a plug of a power cord and to convector with wet hands.
-
Seite 13: Technical Data
1 GENERAL INSTUCTIONS This appliance is intended for normal household use and not for use in commercial/industrial environment, in vehicles or on board ships or aircrafts. The convectors are equipped with a thermostat for setting and automatic maintaining the desired temperature in the room, with a system of the power step-by-step regulation, with a limiter of the leaving air (with a self-reset) and with system of the room protection from freezing (prevents freezing of the hot-water heating system with is not in use). - Seite 14 - execute on a wall a marking for fixing (see fig. 1, table 2); - fix the bracket in any accessible way, having provided reliable fastening of convector in all term of operation; - mount the convector on the hook-on brackets. Table 2 Rated power, kW L, mm...
- Seite 15 4.5 For using of the convector in mobile version set the supports and the handle as shown in Figure 4.1 – 4.4. Fig. 4.1 Fig. 4.2 Fig. 4.3 Fig. 4.4 For install the supports, convector put on a horizontal surface ground up. Observe the correct orientation relative to the convector when installing the supports.
-
Seite 16: Recommendations For Use
When the temperature in the room reaches the desired value (you can check the temperature by means of a thermometer) leave the control handle in this position. If the temperature does not suit you change the position of the control handle. This temperature will be automatically maintained in the room later on. - Seite 17 Information with regard to ecodesign requirements for electric local space heaters Regulation (EU) 2015/1188 LEXIA LEXIA LEXIA LEXIA LEXIA Model identifiers 500W 1000W 1500W 2000W 2500W Heat output Nominal heat output P Minimum heat output Pmin, kW 0,75 1,25 Maximum continuous heat output Pmax,c, kW Auxiliary electricity consumption At nominal heat output...
- Seite 18 Bitte lesen sie diese Anleitung bevor sie den Konvektor in Betrieb nehmen. Trennen sie das Gerät vor allen Arbeiten, die sie durchführen vom Strom. Bewahren sie diese Anleitung auch nach der Installation des Gerätes auf. Sicherheitsvoraussetzungen Lesen sie diese Betriebsanleitung sorgfältig bevor sie das Gerät in Betrieb nehmen.
-
Seite 19: Die Heizung Sollte Nicht Direkt Unter Einer Steckdose Installiert Werden
Stellen sie keinem Gegenstande auf das Gerät und legen sie kein Papier auf das Gerät. Heizung muss einer Elektrofachkraft, Übereinstimmung mit den örtlichen Vorschriften, installiert werden. Wenn das Stromkabel beschädigt ist, muss es von einer qualifizierten Person ausgetauscht werden. Alle Arbeiten am Inneren des Gerätes dürfen nur von einem zugelassenen Elektriker ausgeführt werden. - Seite 20 Allgemeine Instruktionen Dieses Gerät wurde entwickelt, um in Wohngebäuden installiert zu werden. Die Konvektoren sind mit einem Thermostat ausgestattet, um die gewünschte Temperatur einstellen und halten zu können. Das Gerat hat einen Überhitzungsschutz, der sich automatisch wieder zurückstellt und eine Frostschutzfunktion. Dieses Gerät ist nicht für den Einsatz in der verarbeitenden Industrie von leichtentzündlichen Materialen (Chemie-Industrie, Industrie mit entzündlicher Staubentwicklung und jegliche Art von entflammbarer Industrie) geeignet.
- Seite 21 Installieren sie den Konvektor nicht unter Zugluft, die die Einstellungen beeinflussen könnte, wie zum Beispiel unter einer Lüftungsanlage. 4.3. Der Konvektor sollte im jeweiligen Land nach der üblichen Gesetzgebung installiert werden. Überprüfen sie, ob das Netz am jeweiligen Ort mit den Angaben auf der Rückseite des Konvektors übereinstimmt.
- Seite 22 4.5 Für den Einsatz des Konvektors in mobiler Ausführung stellen Sie die Stützen und den Griff wie in den Abbildungen 4.1 – 4.4 gezeigt ein. Abbildung Abbildung Abbildung Abbildung Für die Montage der Stützen wird der Konvektor auf eine waagerechte, geschliffene Fläche gestellt.
-
Seite 23: Empfehlungen Zur Anwendung
5 Reihenfolge der Bedienung 5.1 Schließen sie den Konvektor an die Steckdose an. Betätigen sie den Schalter auf Position I (Taste des Leistungsregler Position I + II). Stellen sie das Thermostat auf den Skalenwert 6 ein. Warten sie ein paar Stunden, damit sich die Temperatur stabilisieren kann. Wenn die Temperatur im Raum den gewünschten Wert erreicht hat (sie können die Temperatur mit Hilfe eines Thermometers überprüfen), regulieren sie den Wert am Regler. - Seite 24 Umwelt und Entsorgung Bitte helfen Sie uns, die Umwelt zu schützen, indem Sie die Verpackung gemäß den nationalen Vorschriften für die Abfallbehandlung entsorgen. Produkte die mit diesem Symbol versehen sind, dürfen nicht in den Müll geworfen werden und müssen separat entsorgt werden. Die Entsorgung von diesen Produkten muss laut der Verordnung (DEE 2002/96 / CE) vorschriftsmäßig durchgeführt werden.
-
Seite 25: Bezpieczeństwo
UWAGA! Przed przystąpieniem do instalacji i eksploatacji urządzenia, należy zapoznać się z "Instrukcją obsługi" (dalej „instrukcja”). W związku z ciągle trwającymi pracami w celu poprawy jakości wyrobu, do projektu produktów mogą zostać wprowadzone zmiany, nieuwzględnione w niniejszej instrukcji, jednak nie pogarszające właściwości użytkowych produktu. BEZPIECZEŃSTWO Dzieci do lat 3 mogą... - Seite 26 OSTRZEŻENIE! W celu uniknięcia przegrzania nie wolno przykrywać grzejnika. OSTRZEŻENIE! Jeżeli przewód zasilający nieodłączalny ulegnie uszkodzeniu, to powinien on być wymieniony u wytwórcy lub u pracownika zakładu serwisowego albo przez wykwalifikowaną osobę w celu uniknięcia ryzyka. Przed podłączeniem grzejnika do gniazdka zasilania należy sprawdzić, czy przewód zasilający nie posiada uszkodzeń...
-
Seite 27: Uwagi Ogólne
Aby uniknąć poparzenia, nie należy dotykać nieosłoniętą ręką kratki wylotowej oraz powierzchni w jej otoczeniu podczas pracy grzejnika. NIE WOLNO: częściowo lub całkowicie blokować otworów ● wentylacyjnych w kratkach grzejnika; włączać grzejnika, jeśli został upuszczony; ● używać grzejnika, jeśli ma widoczne ślady uszkodzeń; ●... - Seite 28 - są wyposażone w termostat umożliwiający nastawienie i utrzymanie pożądanej temperatury w pomieszczeniu, w regulator stopniowego sterowania poboru mocy (lub bez regulatora), w funkcję ochrony przed przegrzaniem oraz ochrony pomieszczeń przed mrozem (w celu utrzymania temperatury w pomieszczeniu w zakresie od 5°C do 7°C, co zapobiega wychłodzeniu pomieszczenia przy...
- Seite 29 4.2 Należy określić miejsce, w którym grzejnik będzie eksploatowany. Nie powinno się stosować grzejnika w przeciągu, pod otworami wentylacyjnymi, w strefie bezpośredniego nasłonecznienia. 4.3 Należy sprawdzić, czy instalacja elektryczna wraz z zabezpieczeniami, do której będzie podłączony grzejnik jest przystosowana do prądu pobieranego przez urządzenie. Jeśli to konieczne, należy skontaktować...
- Seite 30 4.6 Poniższe rys. 4.1 – 4.4 przedstawiają prawidłowy sposób mocowania nóżek i rączki. Rys. 4.1 Rys. 4.2 Rys. 4.3 Rys. 4.4 Montaż nóżek przeprowadzamy na poziomej nawierzchni. Podczas instalowania nóżek należy zwrócić uwagę na ich prawidłową orientację względem konwektora oraz uważać, aby nie używać nadmiernej siły tak, by uniknąć zerwania zaczepów. Wsuń...
-
Seite 31: Tryb Pracy
5 TRYB PRACY Uwaga! Zabronione jest włączenie i eksploatacja grzejnika nie ustawionego na podłodze - na nóżkach lub kółkach lub nie przymocowanego do ściany. 5.1 Podłączanie grzejnika Przewód zasilający należy podłączyć do gniazdka sieciowego grzejnika. Pokrętło termostatu ustawia się na pozycji "MAX". Należy włączyć grzejnik przesuwając klawisz wyłącznika na pozycję... -
Seite 32: Konserwacja
6 KONSERWACJA Należy co najmniej raz w miesiącu oczyścić kratę grzejnika z kurzu przy pomocy szczotki i odkurzacza, przetrzeć obudowę wilgotną szmatką. Nie należy używać materiałów ściernych bądź agresywnych. 7 TRANSPORT I PRZECHOWYWANIE 7.1 Grzejniki w opakowaniu producenta mogą być transportowane przez wszystkie rodzaje krytych środków transportu, które zapewnią... - Seite 33 Dane I informacje produktowe, zgodne z Dyrektywą 2009/125/WE Wymogi w zakresie informacji dotyczące elektrycznych miejscowych ogrzewaczy pomieszczeń LEXIA LEXIA LEXIA LEXIA LEXIA Model: 500W 1000W 1500W 2000W 2500W Moc cieplna Nominalna moc cieplna , kW Minimalna moc cieplna 0,75 1,25 (orientacyjna) Pmin, kW Maksymalna stała moc cieplna Pmax,c, kW...
- Seite 34 Antes de su uso lea atentamente estas instrucciones y guárdalas para consultas futuras. En caso de entregar este convector a otro propietario, entregue también las instrucciones. PRECAUCIONES IMPORTANTES E INSTRUCCIONES DE SEGURIDAD Antes de conectar el convector a la red eléctrica debe asegurarse de que el voltaje del suministro en su casa corresponde al indicado en la placa de características del aparato.
- Seite 35 servicio oficial o con un especialista calificado para más instrucciones. ¡Atención! ¡Para evitar recalentamiento no cubra el aparato! PRECAUCIÓN: algunas partes de este producto pueden calentarse mucho y causar quemaduras. Se debe prestar especial atención en presencia de niños y personas indefensas.
- Seite 36 ¡ESTA PROHIBIDO! - No obstruya las rejillas, ni siquiera parcialmente (ya sea en la parte delantera del aparato o debajo de él), de lo contrario, el aparato podría sobrecalentarse. - No colocar cerca del convector materiales y objetos fácilmente nflamables. - El calefactor no debe instalarse directamente debajo de una toma de corriente fija.
-
Seite 37: Datos Técnicos
1 APLICACIONES ADECUADAS ADVERTENCIA: este calefactor es adecuado para fines domésticos normales y no debe utilizarse en ningún otro tipo de entorno. Este producto solo debe usarse en el país donde lo compró un minorista comercial reconocido. No lo use al aire libre. No instale si el producto está dañado. Este aparato está... - Seite 38 4.2 Hacia una instalación fija del convector: - Es necesario mantener distancias mínimas de los objetos al montar el convector como se muestra en la Figura 2 (dimensión en cm), Figura 3; - hacer una marca en una pared para la fijación (ver fig. 1, tabla 2); Tabla 2 Potencia nominal , kW L, mm...
- Seite 39 4.4 Poner la llave del interruptor (teclas del regulador de potencia) en la posición de apagado «0», poner el mando del termostato en la posición . El convector está listo para funcionar. 1 - mando del termostato 2 - teclas del regulador de potencia escalonado (tecla de interruptor para modelos sin regulador de potencia) Fig.
-
Seite 40: Condiciones De Garantia
6 MANTENIMIENTO Antes de cualquier acción de mantenimiento, corte la alimentación eléctrica del aparato. Para mantener el rendimiento del dispositivo, es necesario quitarle el polvo unas dos veces al año. La causa más frecuente de sobrecalentamiento es la acumulación de pelusa y polvo en el aparato. - Seite 41 Antes de utilizar este aparelho, leia o presente manual e guarde-o para futuras consultas. No cso de mudança de proprietário, o aparelho deve ser entregue acompanhado do manual do utilizador. PRECAUÇÕES IMPORTANTES E INSTRUÇÕES DE SEGURANÇA. Antes de ligar o aparelho, certifique-se de que a voltagem indicada na placa do aparelho corresponde à...
- Seite 42 Atenção: para evitar o sobreaquecimento, não cubra o aparelho! Este aparelho só deve ser plugado ou conectado, de acordo com as normas e normas vigentes, por pessoa autorizada. Se o cabo de alimentação estiver danificado, deve ser substituído pelo fabricante, pelo seu serviço pós-venda ou por pessoas igualmente qualificadas para evitar riscos.
-
Seite 43: Instruções Gerais
ADVERTÊNCIA: Não use este aquecedor em salas pequenas ocupadas por pessoas que não possam sair sozinhas, a menos que haja supervisão constante. Os aparelhos marcados com este símbolo não devem ser eliminados juntamente com o lixo doméstico, devem recolhidos separadamente e reciclados. A coleta e reciclagem de produtos em fim de vida devem ser realizadas de acordo com as disposições e decretos locais. -
Seite 44: Regras De Instalação
3 CONFIGURAÇÃO COMPLETA - convector elétrico - 1 unid. - suporte para instalação do convector na parede - 1 jogo - suportes (2 unid.) para instalar o convector no chão - 1 conjunto - Manual de operação e manutenção - 1 exemplar - embalagem - 1 conjunto 4 PREPARE PARA INSTALAR O APARELHO 4.1 Regras de instalação... - Seite 45 - fixe os suportes de montagem de qualquer maneira acessível, garantindo a fixação segura do convector durante todo o período de operação; - monte o convector nos suportes de montagem. 4.3 Para operar o convector no solo, instale a alça e os suportes conforme mostrado nas Figuras 4.1...4.4.
-
Seite 46: Manutenção
Coloque o botão do termóstato na posição e ligue o convector. - Desligue o convector da rede eléctrica. Coloque a chave interruptora (teclas do regulador de potência) na posição "0", retire da tomada a ficha do cabo de alimentação do convector. - Para reduzir a conta de luz: - monitorar o alcance da temperatura desejada na sala em tempo hábil;... - Seite 47 Requisitos de informação para aquecedores de ambiente local elétricos REGULAMENTO (UE) 2015/1188 LEXIA LEXIA LEXIA LEXIA LEXIA Identificadores de modelo: 500W 1000W 1500W 2000W 2500W Potência calorífica Potência calorífica nominal , kW Potência calorífica mínima 0,75 1,25 (indicative) Pmin, kW Potência calorífica contínua máxima Pmax,c,...
- Seite 48 Si prega di leggere attentamente le istruzioni prima dell’uso. Tieni sempre a tua disposizione questo manuale per un uso successivo. Leggere attentamente le istruzioni: Informazioni importanti sulla sicurezza • Il prodotto è destinato esclusivamente all’uso domestico. • Assicurarsi che il riscaldatore sia collegato alla rete elettrica della casa (230 V), come indicato sul riscaldatore.
- Seite 49 • Non toccare mai un riscaldatore elettrico con le mani bagnate. Il riscaldatore dovrebbe essere installato in modo che una persona che fa la doccia o il bagno non possa entrarne in contatto diretto. • Evitare di sovraccaricare la rete (il circuito) in cui si trova il iscaldatore collegato.
- Seite 50 non siano ostruite o coperte. Il riscaldatore dovrebbe essere usato in stanze con normali pavimenti. • Il riscaldatore non deve essere installato nelle immediate vicinanze di materiali infiammbili di qualsisai tipo, perche ci puo sempre essere un rischio di incendio. •...
-
Seite 51: Disposizioni Generali
1 DISPOSIZIONI GENERALI Questo apparecchio è destinato al normale uso domestico e non all'uso in ambienti commerciali/industriali, su veicoli oa bordo di navi o aerei. I termoconvettori sono dotati di termostato per l'impostazione e il mantenimento automatico della temperatura desiderata in ambiente, di un sistema di regolazione passo-passo della potenza, di un limitatore dell'aria in uscita (con autoripristino) e di un sistema di la protezione ambiente dal gelo (previene il congelamento dell'impianto di riscaldamento dell'acqua calda quando non è... - Seite 52 4.2 Questa apparecchiatura è stata progettata per essere installata in una residenza. Si prega di chiedere al proprio distributore prima di utilizzarlo per qualsiasi altro scopo. Non installare il termoconvettore in presenza di correnti d'aria che potrebbero comprometterne la regolazione (ad esempio, sotto un'unità di ventilazione meccanica centrale ecc...) 4.3 Il convettore deve essere installato secondo la normale pratica commerciale e in conformità...
- Seite 53 4.5 Per usare il convettore a pavimento installare la maniglia ei supporti come indicato nelle figure 4.1 - 4.4. Installare il convettore su una superficie orizzontale. Fig. 4.1 Fig. 4.2 Fig. 4.3 Fig. 4.4 4.6 Portare il chiave del commutatore (Chiave del regolatore di potenza) in posizione di spento “0”, portare la manopola del termostato in posizione “”.
-
Seite 54: Raccomandazioni Per L'uso
mantiene automaticamente la temperatura nella stanza al livello più (5…7)°C, questo protegge la stanza dal gelo. 5.3 Scollegamento del connettore dalla rete. Portare le chiavi degli interruttori in posizione spento “0”, portare la manopola del termostato nella posizione con la designazione e scollegare la spina del cavo di alimentazione dalla presa di corrente. -
Seite 55: Condizioni Di Garanzia
CONDIZIONI DI GARANZIA Questa garanzia è valida per 2 anni dalla data di acquisto originale ed è valida solo per 30 mesi dalla data di produzione. La garanzia copre la sostituzione o la fornitura di parti riconosciute difettose, esclusi eventuali danni. - Seite 56 Multi Thermique SAS 300 ROUTE DE CERTINES 01250 MONTAGNAT 04 28 36 06 74 contact@sun-chauffage.com...