Inhaltsverzeichnis
Werbung
Verfügbare Sprachen
Verfügbare Sprachen
Quicklinks
Please give us a chance to make it right and do better !
Contact our friendly customer service department for help first.
Replacements for missing or damaged parts will be shipped ASAP !
US office: Fontana
UK office: Ipswich
Contact Us !
Do NOT return this item.
AU office: Truganina
US:cs.us@costway.com
UK:cs.uk@costway.com
AU:cs.au@costway.com
EN
DE
FR
ES
IT
PL
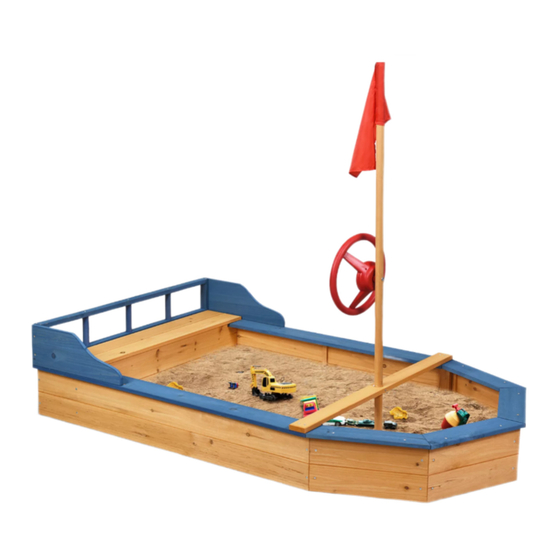
Kids Wooden Boat Sandbox
THIS INSTRUCTION BOOKLET CONTAINS IMPORTANT SAFETY INFORMATION. PLEASE READ AND KEEP FOR FUTURE REFERENCE.
USER'S MANUAL
TS10028
Werbung
Inhaltsverzeichnis

Verwandte Anleitungen für Costway Kids Wooden Boat Sandbox


Inhaltszusammenfassung für Costway Kids Wooden Boat Sandbox
- Seite 1 Replacements for missing or damaged parts will be shipped ASAP ! US office: Fontana UK office: Ipswich AU office: Truganina USER’S MANUAL Contact Us ! Kids Wooden Boat Sandbox TS10028 Do NOT return this item. US:cs.us@costway.com UK:cs.uk@costway.com AU:cs.au@costway.com THIS INSTRUCTION BOOKLET CONTAINS IMPORTANT SAFETY INFORMATION. PLEASE READ AND KEEP FOR FUTURE REFERENCE.
-
Seite 2: Before You Start
Parts and Hardware List Not actual size Before You Start Rail x1 Side Board x1 Side Board x1 Side Board x1 Rail x1 Please read all instructions carefully and keep it for future reference. General Security Warning Caution: The Product is not suitable for the children under 3 years Danger: Keep all small parts and packaging materials for this product away from babies Side Board x1 Side Board x1... - Seite 3 3.5*30 Φ6*60 3.5*30 B x14 A x2 B x2 Use 5 screws (B) to assemble the rail (4) and the side board Use 2 screws (B) to assemble the side board (3) to the side (7) together, and then use 2 screws (B) to assemble it to the board (1) completed in the previous step, and then use 2 screws side board (1).
- Seite 4 3.5*30 3.5*60 3.5*30 B x3 C x1 B x2 Use 2 screws (B) to fix the side board (10) to the side board (1) Use 2 screws (B) to fix the disk (9) to the side board (7) completed in the previous step. Fix the bench (8) to the side completed in the previous step.
- Seite 5 3.5*30 3.5*30 B x4 B x9 Use 4 screws (B) to fix the backrest (12) to the assembled side Use 8 screws (B) to fix the other side of the sand boat, and use boards (1 and 7). a screw (B) to fix the bench (8) to the assembled side board (2).
- Seite 6 3.5*30 3.5*30 B x2 B x6 Fix the disk (9) to the side board (6) with 2 screws (B). Connect the side board (14) to the side board (2) through the the pole (16) and fix them with 6 screws (B). Put the bench (13) in the position as shown in the figure.
- Seite 7 3.5*30 3.5*30 B x6 B x6 Connect the side board (15) to the other side board (1) through Connect the left side board (15) with the right side board (14) of the the pole (16) and fix them with 6 screws (B). the sand boat through the pole (17) and fix them with 6 screws (B).
- Seite 8 3.5*60 Φ6*65 C x1 D x1 Fix the pole (18) to the middle position in the forefront of the Take out the steering wheel (19) and fix it to the flagpole of as sand boat with a screw (C). shown in the figure. Lay the product on the floor mat (20) to complete the assembly.
- Seite 9 Deutsches Büro: FDS GmbH, Neuer Höltigbaum 36, 22143 Hamburg, Deutschland HANDBUCH Kontaktieren Sie uns ! Sandkasten TS10028 Schicken Sie diesen Artikel NICHT zurück, DE:cs.de@costway.com bitte wenden Sie sich an unseren Kundenservice. DIESE ANLEITUNG ENTHÄLT WICHTIGE SICHERHEITSINFORMATIONEN. BITTE SORGFÄLTIG LESEN UND ZUM SPÄTEREN NACHSCHLAGEN AUFBEWAHREN.
-
Seite 10: Teile- Und Zubehörliste
Teile- und Zubehörliste Nicht tatsächliche Größe Bevor Sie beginnen Seitenwand x1 Seitenwand x1 Seitenwand x1 Armlehne x1 Armlehne x1 Bitte sorgfältig lesen und zum späteren Nachschlagen aufbewahren. Allgemeine Sicherheitswarnung Warnung: Der Artikel ist nicht für Kinder unter 3 Jahren geeignet. Warnung: Halten Sie alle Kleinteile und Verpackungsmaterialien, die verschluckt Re�ungsring x2 werden können, von Babys und Kindern fern. - Seite 11 3.5*30 Φ6*60 3.5*30 B x14 A x2 B x2 Verwenden Sie 5 Schrauben (B), um die Armlehne (4) und Verwenden Sie 2 Schrauben (B), um das Seitenwand (3) mit das Seitenwand (7) zusammen zu montieren, und verwenden dem im vorherigen Schritt fertiggestellten Seitenwand (1) zu Sie dann 2 Schrauben (B), um es am Seitenwand (1) zu verbinden, und verwenden Sie dann 2 Schrauben (A), um die befestigen.
- Seite 12 3.5*30 3.5*60 3.5*30 B x3 C x1 B x2 Befestigen Sie das Seitenwand (10) mit 2 Schrauben (B) an dem Befestigen Sie den Rettungsring (9) mit 2 Schrauben (B) an dem in vorherigen Schritt fertiggestellten Seitenwand (1). Befestigen in vorherigen Schritt fertiggestellten Seitenwand (7). Sie die Sitzbank (8) mit einer Schraube (B) an dem Seitenwand (1) und befestigen Sie dann die Flagge (11) mit einer Schraube (C) an der Sitzbank (8).
- Seite 13 3.5*30 3.5*30 B x4 B x9 Befestigen Sie die Rückenlehne (12) mit 4 Schrauben (B) an den Befestigen Sie die andere Seite des Sandbootes mit 8 Schrauben montierten Seitenwände (1 und 7). (B) und befestigen Sie die Sitzbank (8) mit einer Schraube (B) an dem montierten Seitenwand (2).
- Seite 14 3.5*30 3.5*30 B x2 B x6 Befestigen Sie den Rettungsring (9) mit 2 Schrauben (B) an dem Verbinden Sie das Seitenwand (14) mit dem Seitenwand (2) Seitenwand (6). durch die Pfosten (16) und befestigen Sie sie mit 6 Schrauben (B). Bringen Sie die Bank (13) in die in der Abbildung gezeigte Position.
- Seite 15 3.5*30 3.5*30 B x6 B x6 Verbinden Sie das Seitenwand (15) mit dem anderen Verbinden Sie das linke Seitenwand (15) mit dem rechten Seitenwand (1) durch die Pfosten (16) und befestigen Sie sie mit Seitenwand (14) des Sandbootes durch die Pfosten (17) und 6 Schrauben (B).
- Seite 16 3.5*60 Φ6*65 C x1 D x1 Befestigen Sie die Pfosten (18) mit einer Schraube (C) an der Nehmen Sie das Lenkrad (19) heraus und befestigen Sie es an mittleren Position im vorderen Teil des Sandbootes. der Fahnenstange, wie in der Abbildung gezeigt. Legen Sie den Artikel auf die Matte (20), um die Montage abzuschließen.
-
Seite 17: Contactez-Nous
Bac à Sable TS10028 Ne retournez pas cet article. FR : cs.fr@costway.com Contactez notre service à la clientèle pour obtenir de l’aide. CE MANUEL CONTIENT DES INFORMATIONS IMPORTANTES SUR LA SÉCURITÉ. VEUILLEZ LE LIRE ET LE CONSERVER POUR TOUTE RÉFÉRENCE FUTURE. -
Seite 18: Avant De Commencer
Liste des Pièces et Accessoires Pas la dimension réelle Avant de Commencer Accoudoir x1 Panneau latéral x1 Panneau latéral x1 Panneau latéral x1 Accoudoir x1 Veuillez lire attentivement toutes les instructions et les conserver pour la référence ultérieure. Avertissement de Sécurité Générale Attention : Le produit ne convient pas aux enfants de moins de 3 ans. - Seite 19 3.5*30 Φ6*60 3.5*30 B x14 A x2 B x2 Utilisez 5 vis (B) pour assembler l’accoudoir (4) et le panneau Utilisez 2 vis (B) pour assembler le panneau latéral (3) au latéral (7), puis utilisez 2 vis (B) pour l'assembler au panneau panneau latéral (1) complété...
- Seite 20 3.5*30 3.5*60 3.5*30 B x3 C x1 B x2 Utilisez 2 vis (B) pour fixer le panneau latéral (10) au panneau Utilisez 2 vis (B) pour fixer la bouée de sauvetage (9) au latéral (1) complété à l'étape précédente. Fixez le banc (8) au panneau latéral (7) complété...
- Seite 21 3.5*30 3.5*30 B x4 B x9 Utilisez 4 vis (B) pour fixer le dossier (12) aux panneaux Utilisez 8 vis (B) pour fixer l'autre côté du bateau de sable, et latéraux assemblés (1 et 7). utilisez une vis (B) pour fixer le banc (8) au panneau latéral assemblé...
- Seite 22 3.5*30 3.5*30 B x2 B x6 Fixez la bouée de sauvetage (9) au panneau latéral (6) avec 2 Connectez le panneau latéral (14) au panneau latéral (2) à vis (B). travers le poteau (16) et fixez-les avec 6 vis (B). Mettre le banc (13) dans la position indiquée sur la figure.
- Seite 23 3.5*30 3.5*30 B x6 B x6 Connectez le panneau latéral (15) à l'autre panneau latéral (1) à Connectez la planche latérale gauche (15) avec la planche travers le poteau (16) et fixez-les avec 6 vis (B). latérale droite (14) du bateau de sable à travers le poteau (17) et fixez-les avec 6 vis (B).
- Seite 24 3.5*60 Φ6*65 C x1 D x1 Fixez le poteau (18) à la position médiane à l'avant du bateau Retirez le volant (19) et fixez-le au mât de drapeau comme de sable avec une vis (C). indiqué sur la figure. Posez le produit sur le tapis de sol (20) pour terminer l'assemblage.
- Seite 25 Arenero de Madera para Niños TS10028 NO devuelva este artículo. ES : cs.es@costway.com Primero póngase en contacto con nuestro amable departamento de servicio al cliente para obtener ayuda. ESTE MANUAL DE INSTRUCCIONES CONTIENE IMPORTANTES INFORMACIONES DE SEGURIDAD, POR FAVOR, LÉALO Y GUÁRDELO PARA FUTURAS CONSULTAS.
-
Seite 26: Antes De Empezar
Lista de Piezas y Accesorios No es el tamaño real Antes de Empezar Tablero lateral x1 Tablero lateral x1 Tablero lateral x1 Barandilla x1 Barandilla x1 Lea atentamente todas las instrucciones y consérvelas para futuras consultas. Advertencia de Seguridad General Precaución: El producto no es adecuado para los niños menores de 3 años. - Seite 27 3.5*30 Φ6*60 3.5*30 B x14 A x2 B x2 Utilice 5 tornillos (B) para ensamblar la barandilla (4) al Utilice 2 tornillos (B) para ensamblar el tablero lateral (3) al tablero lateral (7), y luego utilice 2 tornillos (B) para tablero lateral (1) completado en el paso anterior, y luego utilice ensamblarlo al tablero lateral (1).
- Seite 28 3.5*30 3.5*60 3.5*30 B x3 C x1 B x2 Utilice 2 tornillos (B) para fijar el tablero lateral (10) al tablero Utilice 2 tornillos (B) para fijar el disco (9) al tablero lateral (7) lateral (1) completado en el paso anterior. Fije el banco (8) al completado en el paso anterior.
- Seite 29 3.5*30 3.5*30 B x4 B x9 Utilice 4 tornillos (B) para fijar el respaldo (12) a los tableros Utilice 8 tornillos (B) para fijar el otro lado del arenero, y utilice laterales ensamblados (1 y 7). un tornillo (B) para fijar el banco (8) al tablero lateral ensamblado (2).
- Seite 30 3.5*30 3.5*30 B x2 B x6 Fije el disco (9) al tablero lateral (6) con 2 tornillos (B). Conecte el tablero lateral (14) al tablero lateral (2) a través del poste (16) y fíjelos con 6 tornillos (B). Coloque el banco (13) en la posición indicada en la figura.
- Seite 31 3.5*30 3.5*30 B x6 B x6 Conecte el tablero lateral (15) al tablero lateral (1) a través del Conecte el tablero lateral izquierdo (15) con el tablero lateral poste (16) y fíjelos con 6 tornillos (B). derecho (14) del arenero a través del poste (17) y fíjelos con 6 tornillos (B).
- Seite 32 3.5*60 Φ6*65 C x1 D x1 Fije el poste (18) en la posición central de la parte delantera del Saque el volante (19) y fíjelo al asta de la bandera como se arenero con un tornillo (C). muestra en la figura. Coloque el producto sobre la alfombra de suelo (20) para completar el montaje.
-
Seite 33: Manuale Utente
Contattaci ! Sabbiera per Bambini TS10028 NON restituire questo articolo. IT: cs.it@costway.com Si prega di contattare prima il nostro servizio clienti per assistenza. QUESTO MANUALE DI ISTRUZIONI CONTIENE IMPORTANTI INFORMAZIONI SULLA SICUREZZA. SI PREGA DI LEGGERE E CONSERVARE PER RIFERIMENTO FUTURO. -
Seite 34: Prima Di Iniziare
Lista delle Parti e degli Accessori Non è la dimensione reale Prima di iniziare Pannello laterale x1 Pannello laterale x1 Pannello laterale x1 Guida x1 Guida x1 Si prega di leggere attentamente tutte le istruzioni e conservarle per riferimento futuro. Avvertenza di sicurezza generale Attenzione: Il prodotto non è... - Seite 35 3.5*30 Φ6*60 3.5*30 B x14 A x2 B x2 Usare 5 viti (B) per assemblare la guida (4) e il pannello Usare 2 viti (B) per assemblare il pannello laterale (3) al laterale (7) insieme, e poi usare 2 viti (B) per assemblarli al pannello laterale (1) completato nel passo precedente, e poi pannello laterale (1), usare 5 viti (B) per assemblare la guida usare 2 viti (A) per assemblare la bandiera (11) al pannello...
- Seite 36 3.5*30 3.5*60 3.5*30 B x3 C x1 B x2 Usare 2 viti (B) per fissare il pannello laterale (10) al pannello Utilizzare 2 viti (B) per fissare la parte (9) al pannello laterale laterale (1) completato nel passo precedente. Fissare la panca (7) completato nel passo precedente.
- Seite 37 3.5*30 3.5*30 B x4 B x9 Utilizzare 4 viti (B) per fissare lo schienale (12) ai pannello Usare 8 viti (B) per fissare l'altro lato della sabbiera, e usare una laterali assemblati (1 e 7). vite (B) per fissare la panca (8) al pannello laterale assemblato (2).
- Seite 38 3.5*30 3.5*30 B x2 B x6 Fissare la parte (9) al pannello laterale (6) con 2 viti (B). Collegare il pannello laterale (14) al pannello laterale (2) attraverso il palo (16) e fissarli con 6 viti (B). Mettere la panca (13) nella posizione come mostrato nella figura.
- Seite 39 3.5*30 3.5*30 B x6 B x6 Collegare il pannello laterale (15) al pannello laterale (1) Collegare il pannelle laterale sinistro (15) e il pannelle laterale attraverso il palo (16) e fissarli con 6 viti (B). destro (16) della sabbiera attraverso il palo (17) e fissarli con 6 viti (B).
- Seite 40 3.5*60 Φ6*65 C x1 D x1 Fissare il palo (18) alla posizione centrale nella parte anteriore Estrarre il volante (19) e fissarlo all'asta della bandiera come della sabbiera con una vite (C). mostrato nella figura. Appoggiare il prodotto sul tappetino (20) per completare il montaggio.
-
Seite 41: Instrukcja Obsługi
łodzi TS10028 Nie zwracaj tego produktu. PL: sklep@costway.com Skontaktuj się z naszym działem obsługi klienta, aby uzyskać pomoc. NINIEJSZA INSTRUKCJA ZAWIERA ISTOTNE INFORMACJE DOTYCZĄCE BEZPIECZEŃSTWA. PROSIMY O ZAPOZNANIE SIĘ Z NIĄ I ZACHOWANIE JEJ DO WGLĄDU W PRZYSZŁOŚCI. -
Seite 42: Lista Części
Lista części Nierzeczywiste wymiary Zanim Zaczniesz Element burty x1 Element burty x1 Element burty x1 Reling x1 Reling x1 Przeczytaj uważnie wszystkie instrukcje i zachowaj je na przyszłość. Ogólne ostrzeżenia dotyczące bezpieczeństwa Uwaga: Produkt nie jest odpowiedni dla dzieci poniżej 3 lat Niebezpieczeństwo: Trzymaj wszystkie małe części i materiały opakowaniowe dla tego Element burty x1 Element burty x1 Ławeczka x1... - Seite 43 3.5*30 Φ6*60 3.5*30 B x14 A x2 B x2 Za pomocą 5 wkrętów (B) zmontuj ze sobą reling (4) i Za pomocą 2 wkrętów (B) przymocuj element burty (3) do element burty (7). Następnie za pomocą 2 wkrętów (B) elementu burty (1) z kroku 1. Następnie za pomocą 2 śrub (A) przykręć...
- Seite 44 3.5*30 3.5*60 3.5*30 B x3 C x1 B x2 Za pomocą 2 wkrętów (B) przymocuj element burty (10) do Za pomocą 2 wkrętów (B) przymocuj bulaj (9) do elementu drugiego elementu burty (1). Następnie przymocuj ławeczkę (8) burty (7). do elementu burty (1) za pomocą 2 wkrętów (B). Na końcu przymocuj maszt (11) do ławeczki (8) za pomocą...
- Seite 45 3.5*30 3.5*30 B x4 B x9 Za pomocą 4 wkrętów (B) przymocuj oparcie (12) do elementów Za pomocą 8 wkrętów (B) zamocuj drugą stronę piaskownicy. burty (1 i 7). Następnie przy użyciu wkrętu (B) przymocuj ławeczkę (8) do elementu burty (2).
- Seite 46 3.5*30 3.5*30 B x2 B x6 Przymocuj bulaj (9) do elementu burty (6) za pomocą 2 Połącz element burty (14) z drugim elementem burty (2) za wkrętów (B). pomocą łącznika (16), a następnie zamocuj za pomocą 6 wkrętów (B). Zamocuj ławeczkę (13) w pozycji pokazanej na rysunku.
- Seite 47 3.5*30 3.5*30 B x6 B x6 Połącz element burty (15) z drugim elementem burty (1) za Połącz lewy (15) i prawy element burty (14) za pomocą łącznika pomocą łącznika (16), a następnie zamocuj za pomocą 6 (17), a następnie zamocuj za pomocą 6 wkrętów (B). wkrętów (B).
- Seite 48 3.5*60 Φ6*65 C x1 D x1 Zamocuj element ozdobny dziobu (18) na środku przedniej Przymocuj koło sterowe (19) do masztu (8), tak jak pokazano części piaskownicy za pomocą wkrętu (C). na rysunku. Następnie umieść piaskownicę na macie (20), aby zakończyć montaż.