Herunterladen Inhalt Inhalt Diese Seite drucken

Werbung

Verfügbare Sprachen
  • DE

Verfügbare Sprachen

  • DEUTSCH, seite 31
1
Robot Pool Cleaner by Maytronics
EN
User Instructions
FR
Guide d'utilisation
IT
Istruzioni per l'uso
SP
Instrucciones para el Usuario
DEU
Bedienungsanweisungen
by
All manuals and user guides at all-guides.com
English
MCC8-UNI
8151247, 1/2011

Werbung

Inhaltsverzeichnis
loading

Inhaltszusammenfassung für Maytronics MCC8-UNI

  • Seite 1 All manuals and user guides at all-guides.com English Robot Pool Cleaner by Maytronics User Instructions Guide d’utilisation Istruzioni per l’uso Instrucciones para el Usuario Bedienungsanweisungen MCC8-UNI 8151247, 1/2011...
  • Seite 2 All manuals and user guides at all-guides.com...
  • Seite 3 All manuals and user guides at all-guides.com English What You’ll Find Inside the Box Part Comment Filter and cartridges Base frame for filter elements Ultra-fine filter 4 filters Bag for filters storage Spring filter 4 filters “S” clip Power supply unit Robot Pool Cleaner Robot Pool Cleaner Caddy kit...
  • Seite 4: Power Supply Unit

    All manuals and user guides at all-guides.com English 3. Power supply unit Digital, “Switch-Mode” power supply: •  Input - 100-250 AC Volts •  50-60 Hertz On/Off •  180 Watt switch •  Output - 30 VDC •  IP 54 Section 2 – Robot Pool Cleaner Operation Part 1 –...
  • Seite 5 All manuals and user guides at all-guides.com English C. Laying out the cable Unwind minimal required cable to cover the entire pool size, straight the cable along the pool side. Make sure there are no twists or kinks. 3 Meters Swivel 10 feet Only use the original supplied power supply unit.
  • Seite 6 All manuals and user guides at all-guides.com English Turning the Robot Pool Cleaner ON Plug the floating cable from the Robot Pool Cleaner Floating cable into the power supply unit. Plug the electrical cable from the power supply unit into the mains. Press the ON/OFF switch The Robot Pool Cleaner will now start to work.
  • Seite 7 All manuals and user guides at all-guides.com English Section 3 - Routine Maintenance Part 1 - Extracting and cleaning the filter elements Unplug power supply before any servicing activity. Reassembling the filter elements Locating tab Insert the locating tabs at the bottom of the Locating tab groove filter element into their groves on the base frame, then close the “S”...
  • Seite 8 All manuals and user guides at all-guides.com English Reinstall the filters according to the diagram DO NOT FORCE THE FILTERS INTO PLACE. Grooved end fitting Octagonal end fitting Important: Where applicable, you must reset the full filter bag indicator on the power supply unit. Recommendation: Rinse all brushes with clean water after each cleaning cycle.
  • Seite 9: Troubleshooting Guide

    Check if the impeller is blocked Check if the drive system is blocked Electrical problem (power supply), check power source. If power source is in order, please contact your Robot Pool Cleaner distributor Additional troubleshooting is available at our Website: www.maytronics.com...
  • Seite 10 All manuals and user guides at all-guides.com French Liste des pièces fournies dans l’emballage Pièces Remarques Filtre et cartouches Châssis des composants du filtre Filtre ultrafin 4 filtres Poche de rangement des sacs filtres Filtre pour nettoyage de printemps 4 filtres Crochet en “S”...
  • Seite 11 All manuals and user guides at all-guides.com French 3. Bloc d’alimentation électrique Alimentation numérique avec « Mode Interrupteur » (Switch mode): •  Entrée - 100-250 AC Volts Marche/ Arrêt •  50-60 Hertz •  180 Watts •  Sortie - 30 VDC • ...
  • Seite 12 All manuals and user guides at all-guides.com French C. Disposition du câble Déroulez le minimum nécessaire de câble pour assurer la couverture de toute la piscine. Veillez à le poser bien droit le long de la paroi et vérifiez qu’il ne présente ni nœuds ni torsades. 3 mètres Pivot (Swivel) 10 feet...
  • Seite 13 All manuals and user guides at all-guides.com French Mise sous tension du robot nettoyeur de piscine Reliez le câble flotteur du robot nettoyeur de piscine au bloc d’alimentation. Câble flotteur Reliez le câble électrique du bloc d’alimentation au secteur. Appuyez sur l’interrupteur de marche/arrêt (ON/ OFF).
  • Seite 14 All manuals and user guides at all-guides.com French Chapitre 3 – Maintenance de routine partie – Extraction et nettoyage des composants du filtre ère Débranchez l’alimentation avant d’entreprendre toute activité d’entretien. Remontage Attache de fixation Insérez les attaches de fixation au bas du Rainure pour attache filtre dans les rainures prévues à...
  • Seite 15 All manuals and user guides at all-guides.com French Réinstallez les filtres suivant le schéma. NE PAS FORCER SUR LES FILTRES POUR LES METTRE EN PLACE. Embout à rainure Embout octogonal Important: Le cas échéant, remettez l’indicateur de sac filtre à zéro sur le bloc d’alimentation. Recommandation: Rincez toutes les brosses à...
  • Seite 16: Localisation Des Pannes

    Vérifiez si le système d’entraînement est bloqué Vérifiez s’il existe un problème électrique (alimentation) en contrôlant l’arrivée du secteur Si l’arrivée du courant est correcte, veuillez contacter votre distributeur de robots nettoyeurs de piscines D’autres cas de panne sont consultables sur notre site Internet: www.maytronics.com...
  • Seite 17 All manuals and user guides at all-guides.com Italiano Cosa trovate nella scatola Parti commenti Filtro e cartuccia Telaio base per elementi filtro Filtro ultra fine 4 filtri Sacchetto per la conservazione dei filtri Filtro per la primavera 4 filtri Fermagli a “S” Alimentatore elettrico Robot per la pulizia delle piscine...
  • Seite 18 All manuals and user guides at all-guides.com Italiano 3. Alimentatore elettrico Alimentatore digitale switching: •  Ingresso 100-250 Volt CA Interruttore •  50-60 Hertz On/Off •  180 Watt. •  Uscita – 30VCC •  IP 54 Sezione 2 – Funzionamento dei robot per la pulizia delle piscine Parte 1 –...
  • Seite 19 All manuals and user guides at all-guides.com Italiano C. Posa del cavo Svolgere la lunghezza di cavo minima per la copertura di tutti i punti della piscina, stendendo il cavo lungo il bordo della piscina. Assicurare che non ci siano aggrovigliamenti e piegature. 3 metri Mulinello Usare solo l’alimentatore elettrico fornito in dotazione.
  • Seite 20 All manuals and user guides at all-guides.com Italiano Attivare robot per la pulizia delle piscine Collegare il cavo galleggiante del robot per la pulizia delle piscine all’alimentatore elettrico. Cavo galleggiante Collegare il cavo elettrico dell’alimentatore elettrico alla presa di rete. Premere l’interruttore ON/OFF.
  • Seite 21 All manuals and user guides at all-guides.com Italiano Sezione 3 – Manutenzione di routine Parte 1 – Estrazione degli elementi filtro e loro pulizia Staccare l’alimentatore elettrico dalla rete prima di ogni attività di servizio. Rimontaggio Aletta di posizione Inserire le alette di posizione del fondo del filtro Scanalatura per le nelle loro scanalature del telaio di base, poi alette di posizione...
  • Seite 22 All manuals and user guides at all-guides.com Italiano Re-installare i filtri secondo il diagramma NON FORZARE I FILTRI IN POSIZIONE. Raccordo finale scanalato Raccordo finale ottagonale Importante: Se applicabile, bisogna azzerare l’indicatore di sacchetto filtro pieno sull’alimentatore. Consiglio: Sciacquare tutte le spazzole con acqua pura dopo ogni ciclo di pulizia. Parte 2 –...
  • Seite 23 Verificare se il sistema di trazione è bloccato Problema elettrico (alimentatore), verificare l’alimentatore. Se l’alimentatore è funzionante, contattare il distributore dei robot per la pulizia delle piscine Un’ulteriore guida per la riparazione dei guasti è ottenibile sul sito web: www.maytronics.com...
  • Seite 24 All manuals and user guides at all-guides.com Spanish Dentro de la Caja Usted encontrará Parte Observaciones Armazón para los Elementos del Filtro Filtros y Cartuchos Filtro Ultra-Fino 4 Filtros Clip “S” Bolsa para almacenamiento de filtros Filtro de Resorte 4 filtros Clip “S”...
  • Seite 25 All manuals and user guides at all-guides.com Spanish 3. Unidad de la Fuente de Alimentación Fuente de alimentación Digital, “Switch-Mode”: •  Entrada - 100-250 AC Voltios Interruptor de •  50-60 Hertz Encendido/Apagado •  180 Watt •  Salida - 30 VDC • ...
  • Seite 26 All manuals and user guides at all-guides.com Spanish C. Colocar el Cable Desenrolle el mínimo cable requerido para cubrir todo el tamaño de la piscina, enderece el cable a lo largo del lado de la piscina. Cerciórese de que no haya torceduras o vueltas. 3 Metros Eslabón Giratorio 10 pies...
  • Seite 27 All manuals and user guides at all-guides.com Spanish Activar el robot limpiador de piscina Enchufe el cable flotador del robot limpiador de piscina en la unidad de la fuente de alimentación. Enchufe el cable eléctrico de la unidad de la fuente de alimentación en la red eléctrica.
  • Seite 28 All manuals and user guides at all-guides.com Spanish Sección 3 – Mantenimiento General Parte 1 – Remover y limpiar los elementos del filtro Desconecte la fuente de alimentación antes de cualquier actividad de mantenimiento. Reensamblar Lengüeta de localización Inserte las lengüetas de localización en la parte Ranura de la lengüeta inferior del elemento del filtro en sus ranuras en de localización...
  • Seite 29 All manuals and user guides at all-guides.com Spanish Re-instale los filtros según el diagrama NO FUERCE LOS FILTROS EN EL LUGAR. Pieza de extremidad Pieza de extremidad con ranuras octagonal Importante: Cuando pertinente, usted debe reajustar el indicador de bolsa de filtro llena en la unidad de la fuente de alimentación.
  • Seite 30: Guía De Localización De Averías

    Problema eléctrico (fuente de alimentación), Verifique la fuente de energía. Si la fuente de energía está en orden, entre en contacto con su distribuidor del robot limpiador de piscina Soluciones adicionales de problemas están disponibles en nuestro sitio Web: www.maytronics.com...
  • Seite 31: Was Sie In Der Box Finden Sollten

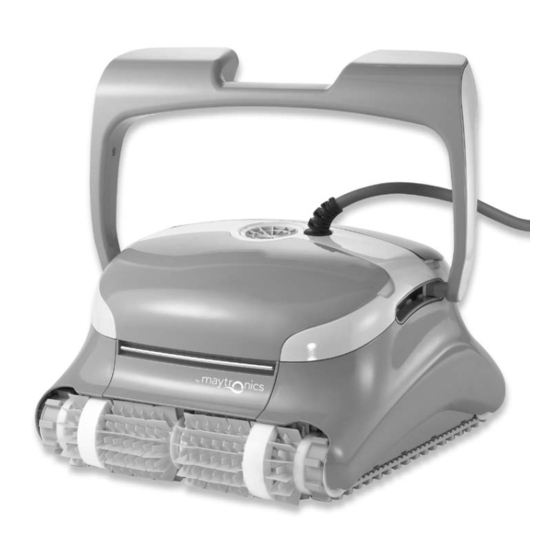
    All manuals and user guides at all-guides.com German Was Sie in der Box finden sollten Teil Bemerkung Grundrahmen für Filterelemente Filter und Kartuschen Ultrafeiner Filter 4 Filter Beutel zur Aufbewahrung der Filter Frühlingsfilter 4 filter S - Klips Stromversorgungs-Einheit Schwimmbad-Reinigungsroboter Schwimmbad-Reinigungsroboter Caddy Kit Optionale Komponenten sind auf Anfrage bei Ihrem...
  • Seite 32: Stromversorgungseinheit

    All manuals and user guides at all-guides.com German 3. Stromversorgungseinheit Digitale Stromversorgungseinheit mit Schalter: •  Eingangsstrom - 100-250 AC Volts •  50-60 Hertz An/Aus-Schalter •  180 Watt •  Ausgangsstrom - 30 VDC •  IP 54 Abschnitt 2 - Betrieb des Schwimmbad-Reinigungsroboters Teil 1 –...
  • Seite 33 All manuals and user guides at all-guides.com German C. Auslegen des Kabels Rollen Sie soviel Kabel ab wie Sie benötigen, um das gesamte Becken zu erreichen und legen es entlang der Schwimmbadseite aus. Vergewissern Sie sich, dass das Kabel keine Verdrehungen oder Knoten aufweist. 3 Meter Swivel Benutzen Sie nur die vom Hersteller gelieferte Original-Stromversorgungseinheit.
  • Seite 34 All manuals and user guides at all-guides.com German Anschalten des Schwimmbad-Reinigungsroboters Verbinden Sie das Schwimmkabel des Schwimmbad-Reinigungsroboters mit der Schwimm-Kabel Stromversorgungseinheit. Verbinden Sie das Stromkabel der Stromversorgungseinheit mit dem Stromnetz. Betätigen Sie den AN-/AUS-Schalter. Daraufhin beginnt der Schwimmbad- Reinigungsroboter mit der Arbeit. An-/Aus- Schalter Hinweis: : Wenn Ihr Modell über eine Fernbedienung verfügt, beachten Sie bitte die beiliegende Gebrauchsanweisung.
  • Seite 35: Abschnitt 3 - Routinemässige Wartung

    All manuals and user guides at all-guides.com German Abschnitt 3 – Routinemässige Wartung Teil 1 – Herausnahme und Reinigung der Filterelemente Trennen Sie die Stromversorgungseinheit vom Stromnetz ab, bevor Sie irgendwelche Wartungsar beiten ausführen. Wiedereinbau Fixierlasche Schieben sie die Fixierlaschen an der Unterseite Rille für die Fixierlasche des Filterelements in die entsprechenden Rillen im Basisrahmen und schliessen dann den S-Klips.
  • Seite 36: Abschnitt 4 - Lagerungsanweisungen

    All manuals and user guides at all-guides.com German Setzen Sie die Filter gemäss das Diagramms wieder ein. DRÜCKEN SIE DIE FILTER NICHT MIT GEWALT AN IHREN PLATZ . Geriffeltes Endstück Achteckiges Eckstück Wichtig: Gegebenenfalls müssen Sie die Anzeige des vollen Filterbeutels auf der Stromversorgungseinheit zurücksetzen.
  • Seite 37: Anleitung Zur Fehlerbehebung

    Überprüfen Sie, ob das Flügelrad blockiert wird Überprüfen Sie, ob das Antriebssystem blockiert wird Elektrisches Problem (Stromzufuhr), überprüfen Sie die Stromquelle . Wenn die Stromquelle in Ordnung ist, wenden Sie sich bitte an Ihren Schwimmbad-Reinigungsroboter-Fachhändler Weitere Hinweise zur Fehlerbehebung finden Sie auf unserer Webseite unter: www.maytronics.com...
  • Seite 38 All manuals and user guides at all-guides.com...
  • Seite 39 All manuals and user guides at all-guides.com...
  • Seite 40 All manuals and user guides at all-guides.com English Robot Pool Cleaner by Maytronics MCC8-UNI 8151247, 1/2011 www.maytronics.com...

Inhaltsverzeichnis