Inhaltsverzeichnis
Werbung
Verfügbare Sprachen
Verfügbare Sprachen
Quicklinks
Werbung
Inhaltsverzeichnis

Verwandte Anleitungen für Klarstein 10009786


Inhaltszusammenfassung für Klarstein 10009786
- Seite 1 Zitruspresse orange Saugroboter 10008166 10008167 10008168 10009786...
-
Seite 2: Anwendungsbereiche
Sehr geehrter Kunde, zunächst möchten wir Ihnen zum Erwerb Ihres Gerätes gratulieren. Bitte lesen Sie die folgenden Anschluss- und Anwendungshinweise sorgfältig durch und befolgen Sie diese um möglichen technischen Schäden vorzubeugen. Anwendungsbereiche Dieses Gerät ist zur Reinigung vom eigenen Zuhause, Hotelzimmern und kleinen Büros geeignet. Es können kurzflorige Teppiche, Holzfußböden, Hartböden und Fliesen gereinigt werden. -
Seite 3: Lieferumfang
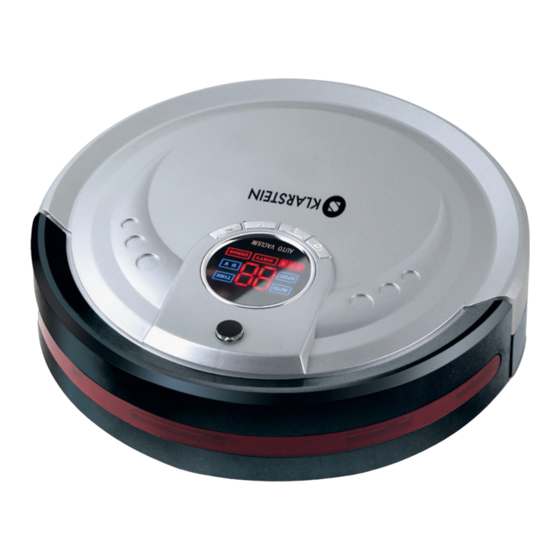
Lieferumfang Hauptgerät Abstandshalter Ladestation Fernbedienung Netzteil Mopping Teil Filter Seitenbürsten Staubpinsel Bedienungsanleitung (Mop und Halter) Das Gerät verfügt über einen Ein/Aus-Schalter. Wenn Sie das Gerät einschalten, befindet es sich im Standby-Modus und erwartet die Befehle mittels Fernbedienung oder Bedienfeld. Geräteübersicht Oberteil des Hauptgerätes Unterteil des Hauptgerätes... -
Seite 4: Fernbedienung
Ladestation Rutschfeste Streifen Ein/Aus-Schalter Einstellung Volle Zeitsteller Geschwindigkeit Infrarotsender Ladeelektrode Netzanschluss Fernbedienung LED-Anzeige LED-Indikator An/Aus „Andocken“ Automatische Reinigung Digitalanzeige „Spot“-Reinigung „Entlang der Wand“ Automatische Reinigung Zeit Vorwärts „Spot“-Reinigung Bewegung „Rechts“ Bewegung „Links“ Batteriestand Fehleranzeige Pause Verschmutzungs- Rückwärts anzeige UV-Taste Geschwindigkeit einstellen Vorbereitungen Anschließen der Ladestation 1. -
Seite 5: Bedienung
3. Sollten Sie die Mopp-Funktion nicht benötigen (z.B. Teppichböden), nehmen Sie das Mopp-Teil ab und Bewahren Sie es in einer trockenen Umgebung auf. Abb.1 Abb.2 Abb.3 Abb.4 Bedienung Das Gerät verfügt über einen Ein/Aus-Schalter. Wenn Sie das Gerät einschalten, befindet es sich im Standby-Modus und erwartet die Befehle mittels Fernbedienung oder Bedienfeld. -
Seite 6: Funktionstasten Am Gerät
Ladezeiten /Status 1. Während der manuellen Aufladung (Netzkabel an Hauptgerät angeschlossen), wird der Roboter nicht auf Tastenbefehle reagieren solange das Kabel angeschossen ist. 2. Während der ersten 3 Aufladungen stellen Sie bitte sicher, dass das Gerät mindestens 12 Stunden lang geladen wird. 3. -
Seite 7: Reinigungszeitpunkt Einstellen
Ladestation Schließen Sie die Ladestation an und schalten diese an Anmerkung: sobald Sie die Station vom Stromnetz trennen, gehen die vorgenommenen Einstellungen verloren. Wochen- und Zeiteinstellung Schalten Sie das Gerät ein und drücken Sie die Taste Zeiteinstellung Betätigen Sie die Taste um zwischen Stunden und Minuten zu wechseln, die Anzeige wird blinken. Stellen Sie den richtigen Wert mit „+“-Taste ein. -
Seite 8: Reinigung Des Staubbehälters
Die Infrarotbarriere ist Zubehör des Staubsaugroboters. Sie verhindert, dass der Saugroboter in Bereiche fährt, die nicht zu reinigen sind. Einsetzen und Entnehmen des Staubbehälters Schematische Darstellung: Entnehmen Sie den Staubbehälter, indem Sie die Taste auf dem Gerät drücken und nehmen Sie den Behälter heraus. -
Seite 9: Reinigung Der Hauptbürste
1. Drücken Sie die auf die gekennzeichnete Stelle mit dem Daumen und ziehen Sie den Filter horizontal raus(siehe Abb. 1-2). 2. Entnehmen Sie die Filter der Reihe nach (siehe Abb. 3). 3. Nehmen Sie die hintere Abdeckung ab (Abb. 4) und entnehmen Sie ebenfalls die Filter (Abb. 5). 4. -
Seite 11: Sicherheitshinweise Und Gewährleistung
SICHERHEITSHINWEISE UND GEWÄHRLEISTUNG • Diese Bedienungsanleitung dient dazu, Sie mit der Funktionsweise dieses Produktes vertraut zu machen. Bewahren Sie diese Anleitung daher stets gut auf, damit Sie jederzeit darauf zugreifen können. • Sie erhalten bei Kauf dieses Produktes zwei Jahre Gewährleistung auf Defekt bei sachgemäßem Gebrauch. - Seite 12 Thank you for purchasing M-788! Please read carefully this manual before using! Please follow the safety precautions below: These safety precautions are provided to avoid human or property damages, so please read carefully and observe the following Means the following symbols: Violation of the safety instructions Violation of the safety instructions may cause injury or death!
-
Seite 13: Names Of Parts
Components Auto Vacuum Virtual Wall Charging Remote Power Cleaner Dock station Controller Adapter Mopping part Filter Side Brush Cleaning User’s (rag and holder) Brush Manual Names of Parts Top of the Robot: Front bumper IR receiver LED Display Mode Select Run /Pause Dustbin Bottom of the Robot:... - Seite 14 1. Charging Dock station Floor skidproof pads Clock Power switch Adjuster Full go Timing IR sending window Power adapter socket Charging terminals Fernbedienung LED-Anzeige Indicator Power Auto Docking Digital display Wall-following Spot Auto Time Forward Spot Leftward Rightward Battery Power Error indicator Pause Backward...
- Seite 15 03. After installing the mopping rag (See figure 4), mopping can be done while sweeping and vacuuming, the cleaning effect will be better. 04. After using, just pull the holder out. 05. It’s recommend to wash and twist dry the mopping cloth before using the mopping function. Figure 1 Fix the mopping rag on the Figure 2...
- Seite 16 1. Charging Dock station High tension! Avoid High tension! Avoid electric shock. Please electric shock. Please operate with a dry operate with a dry hand! hand! Figure 1 Figure 2 1. Take out the battery before disposing of the robot. 2.
- Seite 17 03. SPOT: Spot cleaning, in this status, press the selection button “ ” to switch between 1, 2 and 3 secondary modes, the display will show corresponding digit . Modes: 1 – Cleaning along the spiral route (working for 1-4 minutes). 2 –...
-
Seite 18: Charging Status
3. Directional buttons(Forward, Backward, Leftward, Rightward ): Press the arrow buttons to control the robot to walk in the designated direction. Forward - Press this button to make the robot clean forward and it will automatically stop when meet obstacle. Rightward - Press this button once to make the robot turn right by about 10°, then clean forward and automatically stop when meet an obstacle, if you need a longer angle, please press and hold this button till satisfactory angle is achieved. - Seite 19 How to use the Charging dock station: There are 5 buttons as shown in the figure below, including: power switch “ ”, Full-go button “ ”, Clock button “ ”, timing button “ ” adjusting button “+” During the process a setting, the power switch have the function of “cancel”...
-
Seite 20: Virtual Wall
Press the power switch button “ ” or timing button “ ” will quit the time setting status without saving the timing value. 4. Auto clean setting : In normal working status of the charging base, press the full-go button “ ”... - Seite 21 1. Take out the battery before disposing of the cleaner. 2. Always remember to cut off the power before removing the battery. 3. Recycle or dispose of the battery properly. 4. To avoid explosion, never throw it into fire! How to Use the Virtual Wall 01.
- Seite 22 04. Take out the filter sponge inside the outlet window (See figure 5). 05. The scouring pad and the filter sponge can be cleaned in water and then reinstalled after drying. It’s recommend to generally clean them. Installation: 01. Suction inlet: Install the filter sponge and the scouring pad onto the filter mesh bracket orderly, and then install them into the dustbin.
- Seite 23 Step for assamble main brush 01. Put the clutch upper cover on the shaft of main brush .(see in Image1) 02. Insert the square side of main brush to the metal square port ,then pack the main brush and clutch into the other side.(see in Image2) 03.
- Seite 24 Trouble shooting Below inspections by yourself to this product before you request a repair. A. The Robot Stops while Working 01. Check if the selected cleaning time is over. 02. Check if there’s any error information on the LED display and refer to the following explanations to solve it.