Klarstein ICEWIND MAX Bedienungsanleitung
Vorschau ausblenden
Andere Handbücher für ICEWIND MAX:
- Bedienungsanleitung (44 Seiten) ,
- Handbuch (36 Seiten)

Verwandte Anleitungen für Klarstein ICEWIND MAX


Inhaltszusammenfassung für Klarstein ICEWIND MAX
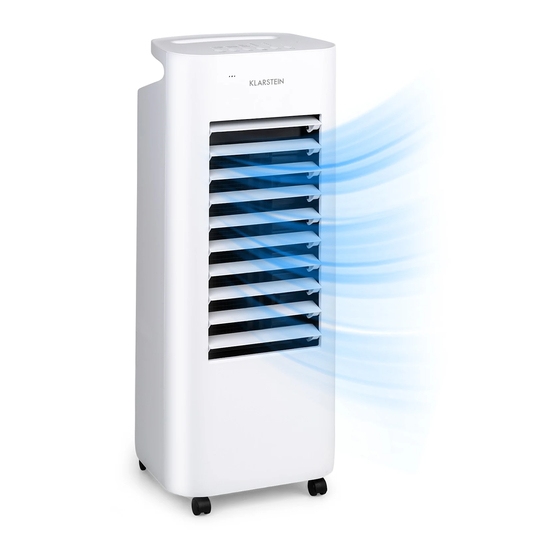
- Seite 1 ICEWIND MAX Luftkühler Air Cooler Enfriador de aire Rafraîchisseur d’air Raffreddatore d’aria 10036067 10036068 www.klarstein.com...
-
Seite 3: Inhaltsverzeichnis
Sehr geehrter Kunde, wir gratulieren Ihnen zum Erwerb Ihres Gerätes. Lesen Sie die folgenden Hinweise sorgfältig durch und befolgen Sie diese, um möglichen Schäden vorzubeugen. Für Schäden, die durch Missachtung der Hinweise und unsachgemäßen Gebrauch entstehen, übernehmen wir keine Haftung. Scannen Sie den folgenden QR-Code, um Zugriff auf die aktuellste Bedienungsanleitung und weitere Informationen rund um das Produkt zu erhalten. -
Seite 4: Sicherheitshinweise
SICHERHEITSHINWEISE • Prüfen Sie vor der Benutzung die Spannungsangabe auf dem Typenschild. Schließen Sie das Gerät nur an Steckdosen an, die der Spannung des Geräts entsprechen. • Halten Sie das Kabel fern von heißen Oberflächen und scharfkantigen Gegenständen. • Verlegen Sie das Kabel nicht unter einem Teppich und decken Sie es auch nicht mit anderen Gegenständen oder Stoffen ab. - Seite 5 • Lassen Sie das Gerät während des Betriebs nicht unbeaufsichtigt. Schalten Sie es aus und ziehen Sie den Stecker, wenn Sie es nicht benutzen. • Ziehen Sie den Stecker aus der Steckdose, bevor Sie das Gerät reinigen oder warten. • Ziehen Sie den Stecker nicht am Kabel aus der Steckdose, sondern halten Sie ihn beim Abziehen mit der Hand fest.
- Seite 6 • Stellen Sie das Gerät nur auf Untergründe, die unempfindlich gegenüber Nässe und hoher Luftfeuchtigkeit sind. Es kann immer mal vorkommen, dass beim Ein- und Ausbau des Wassertanks ein paar Tropfen danebengehen. Sollte das der Fall sein, wischen Sie die Wassertropfen umgehend weg.
-
Seite 7: Besondere Hinweise Zur Benutzung
WARNUNG Verletzungsgefahr! Achten Sie darauf, dass Kinder die Batterie nicht verschlucken. Wenn die Knopfzellenbatterie verschluckt wird, kann sie in nur 2 Stunden schwere innere Verbrennungen verursachen und zum Tod führen. Wenn Sie glauben, dass Batterien verschluckt worden sein könnten, suchen Sie sofort einen Arzt auf. -
Seite 8: Geräteübersicht Und Fernbedienung
GERÄTEÜBERSICHT UND FERNBEDIENUNG Bedienfeld Verdunstungsfilter Tasten Wassertank Luftauslass mit Rollen Lüftungsklappen... -
Seite 9: Bedienfeld
BEDIENFELD Display Display INBETRIEBNAHME Öffnen Sie die Verpackung und entnehmen Sie das Gerät. Stellen Sie sicher, dass alle im Lieferumfang enthaltenen Bestandteile vollständig sind. Stellen Sie das Gerät horizontal auf eine stabile Oberfläche. Neigen Sie das Gerät vor der Verwendung keinesfalls. Stellen Sie vor der Inbetriebnahme des Geräts sicher, dass die Spannung der verwendeten Steckdose, mit der auf dem Typenschild des Geräts angegebenen Spannung übereinstimmt. -
Seite 10: Bedienung
Wassertank Höchster Wasserstand Niedrigster Wasserstand BEDIENUNG Einschalten Drücken Sie die Taste , nachdem Sie den Netzstecker in die Steckdose gesteckt haben, um das Gerät vom Standbymodus in den Betriebsmodus zu versetzen. Werkseitig voreingestellt ist die Ventilatorgeschwindigkeit 1 im normalen Modus. Ventilatorgeschwindigkeit •... - Seite 11 Timer (1) Automatisches Ausschalten: • Drücken Sie, während das Gerät eingeschaltet ist, die Taste TIMER/PRESET, um in die Standbyeinstellung des Timers zu gelangen. Wenn Sie diese Taste mehrfach drücken, können Sie die Zeit bis zum automatischen Wechsel in den Standbymodus in der nachfolgenden Reihenfolge einstellen: 1h > 2h > 3h > ...
- Seite 12 Schwingfunktion Drücken Sie im Betriebszustand diese Taste, um die Schwingfunktion einzuschalten. Jedes Mal, wenn Sie sie einmal drücken, erden die Funktionen in der folgenden Reihenfolge aufgerufen: Auf- und Abschwingen > Links- und Rechtsschwingen > Schwingen AUS > Links- und Rechtsschwingen > Auf- und Abschwingen >...
- Seite 13 Fernbedienung Die Tasten der Fernbedienung entsprechen den Tasten des Geräts. Achten Sie bei der Verwendung der Fernbedienung darauf, dass der Infrarotsender der Fernbedienung auf den Infrarotempfänger des Geräts gerichtet wird. Zwischen der Fernbedienung und dem Gerät dürfen sich keine Hindernisse befinden. Entnehmen Sie die Batterien aus der Fernbedienung, wenn Sie diese über einen längeren Zeitraum nicht verwenden werden.
-
Seite 14: Reinigung Und Pflege
REINIGUNG UND PFLEGE Lagerung Entleeren Sie das Wasser aus dem Wassertank, wenn Sie das Gerät über einen längeren Zeitraum nicht verwenden. Lassen Sie das Gerät anschließend eine Zeit lang im Modus „General“ laufen, um den nassen Vorhang vollständig zu trocknen. Decken Sie das Gerät anschließend ab oder lagern Sie es in dessen Originalverpackung) Reinigung Wenn Sie das Gerät bereits über einen längeren Zeitraum verwendet haben kann... - Seite 15 Filter Wassertankreinigung Ziehen Sie den Wassertank zur Reinigung direkt heraus. Wasserkanalreinigung Sobald der Wassertank herausgezogen wurde können Sie prüfen, ob sich im Wasserkanal noch Restwasser befindet. Sollte dies der Fall sein, nehmen Sie das Wasser mit einem trockenen Tuch auf. Wasserkanal...
- Seite 16 Gehäusereinigung Reiben Sie das Gehäuse mit einem feuchten Tuch ab. Es ist verboten, das Gehäuse direkt mit Wasser abzuspülen. Reinigen Sie das Gehäuse nicht mit einem aggressiven Reinigungsmittel. Setzen Sie das gesamte Zubehör nach der Reinigung wieder in umgekehrter Reihenfolge in das Gerät ein. Hinweis: Drücken Sie zum Wiedereinsetzen des nassen Vorhangs dessen Unterseite in die dafür vorgesehene Öffnung (siehe Abbildung 3).
-
Seite 17: Fehlerbehebung
FEHLERBEHEBUNG Problem Mögliche Ursache Lösungsansatz Das Gerät läuft nicht. Der Stecker wurde nicht Stecken die den Stecker richtig eingesteckt. fest in die Steckdose. Die Verneblereinheit Bauen Sie die wurde nicht richtig Verneblereinheit korrekt eingebaut. ein. Das Gerät ist Schalten Sie das Gerät ausgeschaltet. -
Seite 18: Spezielle Entsorgungshinweise Für Verbraucher In Deutschland
SPEZIELLE ENTSORGUNGSHINWEISE FÜR VERBRAUCHER IN DEUTSCHLAND Entsorgen Sie Ihre Altgeräte fachgerecht. Dadurch wird gewährleistet, dass die Altgeräte umweltgerecht verwertet und negative Auswirkungen auf die Umwelt und menschliche Gesundheit vermieden werden. Bei der Entsorgung sind folgende Regeln zu beachten: • Jeder Verbraucher ist gesetzlich verpflichtet, Elektro- und Elek- tronikaltgeräte (Altgeräte) sowie Batterien und Akkus getrennt vom Hausmüll zu entsorgen. - Seite 19 • Bei einem Vertrieb unter Verwendung von Fernkommunikationsmitteln ist die unentgeltliche Abholung am Ort der Abgabe auf Elektro- und Elektronikgeräte der Kategorien 1, 2 und 4 gemäß § 2 Abs. 1 ElektroG, nämlich „Wärmeüberträger“, „Bildschirmgeräte“ (Oberfläche von mehr als 100 cm²) oder „Großgeräte“...
-
Seite 20: Hinweise Zur Entsorgung
HINWEISE ZUR ENTSORGUNG Wenn es in Ihrem Land eine gesetzliche Regelung zur Entsorgung von elektrischen und elektronischen Geräten gibt, weist dieses Symbol auf dem Produkt oder auf der Verpackung darauf hin, dass dieses Produkt nicht im Hausmüll entsorgt werden darf. Stattdessen muss es zu einer Sammelstelle für das Recycling von elektrischen und elektronischen Geräten gebracht werden. -
Seite 21: Technical Information
Dear customer, Congratulations on the purchase of your appliance. Please read the following instructions carefully and follow them to prevent potential damage. We accept no liability for damage caused by disregarding the instructions and improper use. Please scan the QR code to access the latest operating instructions and further information about the product. -
Seite 22: Safety Instructions
SAFETY INSTRUCTIONS • Check the voltage on the rating plate before use. Only connect the appliance to sockets which correspond to the voltage of the appliance. • Keep the appliance and cable away from sources of heat, sharp objects or anything that may cause damage. - Seite 23 • Do not leave this appliance unattended when it’s in use. Turn off and disconnect the appliance when you leave the room for an extended period. • Switch off the appliance and unplug from the mains socket when not in use, before filling, cleaning or other maintain.
- Seite 24 • The appliance may only be set up on water- and moisture-proof flooring materials (spilling some drops of water is unavoidable when the content of the tank is changed). • With each and every change of tank content, completely remove residual water from the equipment.
- Seite 25 WARNING Danger of injury! Make sure that children do not swallow the battery. If the button cell battery is swallowed, it can cause severe internal burns in only 2 hours and lead to death. If you think that batteries may have been swallowed, consult a doctor immediately.
-
Seite 26: Device Overview And Remote Control
DEVICE OVERVIEW AND REMOTE CONTROL Control panel Evaporation filter Buttons Water tank Air outlet with ventilation flaps Rollers... -
Seite 27: Control Panel
CONTROL PANEL Display Display GETTING STARTED Open the packaging and remove the device. Make sure that all items included in the scope of delivery are complete. Place the device horizontally on a stable surface. Do not tilt the unit before use. -
Seite 28: Operation
Water tank Highest water level Lowest water level OPERATION Switching on After plugging the power cord into the wall outlet, press the button switch the device from standby mode to operating mode. The factory default setting is fan speed 1 in normal mode. Fan speed •... - Seite 29 Timer (1) Automatic switch-off • While the unit is on, press the TIMER/PRESET button to enter the timer standby setting. If you press this key several times, you can set the time until the unit automatically switches to standby mode in the following sequence: 1h >...
- Seite 30 Swing function In operating mode, press this button to switch on the oscillation function. Each time you press it once, the functions are called up in the following order: Swing Up and Down > Swing Left and Right > Swing OFF > Swing Left and Right > Swing Up and Down >...
- Seite 31 Remote control The buttons on the remote control correspond to the buttons on the unit. When using the remote control, make sure that the infrared transmitter of the remote control is pointed at the infrared receiver of the unit. There must be no obstacles between the remote control and the device.
-
Seite 32: Cleaning And Care
CLEANING AND CARE Storage Empty the water from the water tank if you will not be using the device for a long period of time. Then let the unit run in "General" mode for a while to dry the wet curtain completely. - Seite 33 Filter Water tank cleaning Pull out the water tank directly for cleaning. Water channel cleaning Once the water tank has been pulled out, you can check whether there is any residual water in the water channel. If this is the case, absorb the water with a dry cloth.
- Seite 34 Housing cleaning Wipe the housing with a damp cloth. Do not rinse the housing directly with water. Do not clean the housing with an aggressive cleaning agent. After cleaning, put all the accessories back into the appliance in reverse order. Note: To replace the wet curtain, press its bottom into the opening provided (see figure 3).
-
Seite 35: Troubleshooting
TROUBLESHOOTING Problem Possible cause Solution approach The appliance is not The plug has not been Plug the power plug working. inserted correctly. securely into the wall socket. The nebuliser unit Install the nebuliser unit has not been installed correctly. correctly. The unit is switched off. -
Seite 36: Disposal Considerations
DISPOSAL CONSIDERATIONS If there is a legal regulation in your country regarding the disposal of electrical and electronic equipment, this symbol on the product or on the packaging indicates that this product must not be disposed of with household waste. Instead, it must be taken to a collection point for the recycling of electrical and electronic equipment. -
Seite 37: Fiche Technique
Cher client, chère cliente, Toutes nos félicitations pour l’acquisition de ce nouvel appareil. Lisez attentivement les indications suivantes et suivez-les pour éviter d'éventuels dommages. Nous ne saurions être tenus pour responsables des dommages dus au non-respect des consignes et à la mauvaise utilisation de l’appareil. -
Seite 38: Consignes De Sécurité
CONSIGNES DE SÉCURITÉ • Avant d‘utiliser l‘appareil, vérifiez sa tension sur la plaque signalétique. Ne branchez l‘appareil que sur des prises dont la tension correspond à ce le de l‘appareil. • Tenez le câble à l‘écart des surfaces chaudes et des objets aux angles pointus. •... - Seite 39 • Ne laissez pas l‘appareil en marche sans surveillance. Eteignez-le et débranchez la fiche quand vous ne l‘utilisez pas. • Débranchez la fiche de la prise avant de nettoyer l‘appareil ou de l‘entretenir. • Ne débranchez pas la fiche de la prise en tirant sur le câble mais tenez toujours fermement le corps de la fiche.
- Seite 40 • Placez l‘appareil sur une surface qui ne craigne ni l‘eau ni l‘humidité. Il peut toujours arriver que quelques gouttes d‘eau soient renversées à côté de l‘appareil lorsque vous retirez ou remettez le réservoir d‘eau. si cela se produit, essuyez immédiatement les gouttes d‘eau.
- Seite 41 MISE EN GARDE Risque de blessure ! Assurez-vous que les enfants n‘avalent pas la pile. Avaler la pile bouton peut provoquer de graves brûlures internes potentiellement mortelles en 2 heures seulement. Si vous pensez que des piles ont été avalées, consultez immédiatement un médecin.
-
Seite 42: Aperçu De L'appareil Et Télécommande
APERÇU DE L'APPAREIL ET TÉLÉCOMMANDE Panneau de commande Filtre d'évaporation Touches Réservoir d'eau Sortie d'air avec clapets de Roulettes ventilation... -
Seite 43: Panneau De Commande
PANNEAU DE COMMANDE Écran Écran MISE EN MARCHE Ouvrez l'emballage et retirez l'appareil. Assurez-vous que tous les éléments sont présents et complets. Placez l'appareil sur une surface stable et horizontale. N'inclinez en aucun cas l'appareil avant de l'utiliser. Avant de mettre en marche l'appareil pour la première fois, assurez-vous que la tension indiquée sur la plaque signalétique de l'appareil correspond à... -
Seite 44: Utilisation
Réservoir d'eau Niveau d'eau le plus élevé Niveau d'eau le plus bas UTILISATION Allumer Après avoir branché la fiche d'alimentation dans la prise de courant, appuyez sur la touche pour démarrer l'appareil ou le mettre en mode veille. La vitesse du ventilateur 1 est préréglée par défaut en mode normal. Vitesse du ventilateur •... - Seite 45 Minuterie (1) Arrêt automatique : • Lorsque l'appareil est allumé, appuyez sur la touche TIMER/PRESET pour accéder au réglage de veille de la minuterie. Appuyez plusieurs fois sur cette touche pour régler la durée avant le passage automatique en mode veille dans l'ordre suivant : 1h >...
- Seite 46 Fonction oscillation En mode de fonctionnement, appuyez sur cette touche pour activer la fonction d'oscillation. Chaque fois que vous appuyez une fois dessus, les fonctions sont appelées dans l'ordre suivant : Oscillation haut et bas > oscillation à gauche et à droite >...
- Seite 47 Télécommande Les touches de la télécommande correspondent aux touches de l'appareil. Lorsque vous utilisez la télécommande, veillez à ce que l'émetteur infrarouge de la télécommande soit dirigé vers le récepteur infrarouge de l'appareil. Il ne doit y avoir aucun obstacle entre la télécommande et l'appareil. Retirez les piles de la télécommande si vous ne l'utilisez pas pendant une période prolongée.
-
Seite 48: Nettoyage Et Entretien
NETTOYAGE ET ENTRETIEN Stockage Videz l'eau du réservoir d'eau et séchez-le soigneusement lorsque vous n'utilisez pas l'appareil pendant une période prolongée. Faites ensuite fonctionner l'appareil pendant un certain temps en mode « Général » afin de sécher complètement le rideau mouillé. Couvrez ensuite l'appareil ou stockez-le dans son emballage d'origine) Nettoyage Lorsque vous avez déjà... - Seite 49 Filtre Nettoyage du réservoir d'eau Retirez directement le réservoir d'eau pour le nettoyer. Nettoyage des canalisations d'eau Dès que le réservoir d'eau a été retiré, vous pouvez vérifier s'il reste de l'eau dans la canalisation d'eau. Si c'est le cas, absorbez l'eau avec un chiffon sec. Canalisation d'eau...
- Seite 50 Nettoyage du boîtier Essuyez le boîtier de l'appareil avec un chiffon humide. Il est interdit de rincer directement le boîtier à l'eau. Ne nettoyez pas le boîtier avec un produit de nettoyage agressif. Après le nettoyage, replacez tous les accessoires dans l'appareil dans l'ordre inverse.
-
Seite 51: Résolution Des Problèmes
RÉSOLUTION DES PROBLÈMES Problème Cause possible Solution L'appareil ne fonctionne L'appareil n'est pas Branchez bien la fiche pas. branché correctement. dans la prise. L'unité de nébulisation Installez correctement n'a pas été installée l'unité de nébulisation. correctement. L'appareil est éteint. Allumez l'appareil. Le câblage à... -
Seite 52: Informations Sur Le Recyclage
INFORMATIONS SUR LE RECYCLAGE S‘il existe une réglementation pour l‘élimination ou le recyclage des appareils électriques et électroniques dans votre pays, ce symbole sur le produit ou sur l‘emballage indique que cet appareil ne doit pas être jeté avec les ordures ménagères. -
Seite 53: Datos Técnicos
Estimado cliente: Le felicitamos por la adquisición de este producto. Lea atentamente el siguiente manual y siga cuidadosamente las instrucciones de uso con el fin de evitar posibles daños. La empresa no se responsabiliza de los daños ocasionados por un uso indebido del producto o por haber desatendido las indicaciones de seguridad. -
Seite 54: Indicaciones De Seguridad
INDICACIONES DE SEGURIDAD • Antes de utilizar el aparato, compruebe la tensión en la placa técnica del mismo. Conecte el aparato a tomas de corriente que se adecuen a la tensión del mismo. • Mantenga el cable lejos de las superficies calientes y de los objetos afilados. - Seite 55 • No deje el aparato sin supervisión cuando está en marcha. Apague el aparato y desconecte el enchufe de la toma de corriente si no lo utiliza. • Antes de limpiar o inspeccionar el aparato, desconéctelo de la toma de corriente. •...
- Seite 56 • Coloque el aparato en una superficie resistente a la humedad y a la humedad del aire elevada. Es posible que, al montar o desmontar el depósito de agua, se derramen algunas gotas. Si es así, limpie las gotas de inmediato.
- Seite 57 ADVERTENCIA Riesgo de lesiones. Asegúrese de que los niños no ingieran las baterías. Si se ingiere la pila de botón, en solo 2 horas puede sufrir quemaduras internas graves y la muerte. Si cree que alguien se ha podido tragar las pilas, contacte inmediatamente con un médico.
- Seite 58 VISTA GENERAL DE LA UNIDAD Y CONTROL REMOTO Panel de control Filtro de evaporación Botones Depósito de agua Salida de aire con aletas de Ruedas ventilación...
-
Seite 59: Panel De Control
PANEL DE CONTROL Pantalla Pantalla PUESTA EN FUNCIONAMIENTO Abra el envoltorio y extraiga la unidad. Asegúrese de que todos los componentes incluidos en el volumen de suministro están completos. Coloque el aparato horizontalmente sobre una superficie estable. No incline nunca la unidad antes de usarla. Antes de utilizar el aparato, asegúrese de que el voltaje especificado en la placa de características del aparato coincide con el voltaje de la toma de corriente de su casa. - Seite 60 Depósito de agua Nivel de agua más alto Nivel de agua más bajo PUESTA EN FUNCIONAMIENTO Encendido Después de conectar el cable de alimentación a la toma de corriente, presione el botón para cambiar el dispositivo del modo de espera al modo de funcionamiento.
- Seite 61 Temporizador (1) Apagado automático: • Mientras la unidad está encendida, pulse el botón TIMER/PRESET para entrar en el ajuste de espera del temporizador. Si pulsa esta tecla varias veces, puede ajustar el tiempo hasta que el aparato pase automáticamente al modo de espera en la siguiente secuencia: 1h >...
- Seite 62 Función de oscilación En el modo de funcionamiento, pulse este botón para activar la función de oscilación. Cada vez que se pulsa una vez, se llaman las funciones en el siguiente orden: Balanceo hacia arriba y hacia abajo > Balanceo hacia la izquierda y hacia la derecha >...
- Seite 63 Mando a distancia Los botones del mando a distancia se corresponden con los del aparato. Cuando utilice el mando a distancia, asegúrese de que el transmisor de infrarrojos del mando a distancia apunta al receptor de infrarrojos de la unidad. Asegúrese de que no haya obstáculos entre el mando a distancia y el aparato.
-
Seite 64: Limpieza Y Cuidado
LIMPIEZA Y CUIDADO Almacenamiento Vacíe el agua del depósito de agua si no utiliza el aparato durante un largo periodo de tiempo. A continuación, deje que la unidad funcione en modo "General" durante un rato para que la cortina húmeda se seque por completo. A continuación, cubra la unidad o guárdela en su embalaje original Limpieza Si ha estado utilizando el dispositivo durante mucho tiempo, el depósito de agua,... - Seite 65 Filtro Limpieza del depósito de agua Extraiga el tanque de agua directamente para limpiarlo. Limpieza del canal de agua Una vez extraído el depósito de agua, puede comprobar si hay agua residual en el canal de agua. En este caso, absorba el agua con un paño seco. Canal de agua...
- Seite 66 Limpieza de la carcasa Limpie la carcasa con un paño húmedo. Está prohibido enjuagar la carcasa directamente con agua. No limpie la carcasa con un producto de limpieza agresivo. Después de la limpieza, vuelva a colocar todos los accesorios en el aparato en orden inverso.
-
Seite 67: Reparación De Anomalías
REPARACIÓN DE ANOMALÍAS Anomalía Posible causa Propuesta de solución El aparato no funciona. El enchufe no Conecte el enchufe se ha conectado correctamente a la toma correctamente. de corriente. La unidad nebulizadora Instale correctamente la no se ha instalado unidad nebulizadora. correctamente. - Seite 68 INDICACIONES SOBRE LA RETIRADA DEL DISPOSITIVO Si en su país existe una disposición legal relativa a la eliminación de aparatos eléctricos y electrónicos, este símbolo estampado en el producto o en el embalaje advierte de que no debe eliminarse como residuo doméstico.
- Seite 69 Gentile cliente, La ringraziamo per l'acquisto del dispositivo. La preghiamo di leggere attentamente le seguenti indicazioni e di seguirle per prevenire eventuali danni. Non ci assumiamo alcuna responsabilità per danni scaturiti da una mancata osservanza delle avvertenze di sicurezza e da un uso improprio del dispositivo.
-
Seite 70: Avvertenze Di Sicurezza
AVVERTENZE DI SICUREZZA • Prima dell‘uso controllare la tensione sulla targhetta del dispositivo. Collegare il dispositivo solo ad una presa che corrisponde alla tensione indicata. • Tenere lontano il cavo di alimentazione da superfici calde e da oggetti appuntiti. • Non sistemare il cavo di alimentazione sotto un tappeto e non coprirlo con altri oggetti o tessuti. - Seite 71 • Non lasciare il dispositivo incustodito mentre è in funzione. Spegnere il dispositivo e staccare la spina quando non è in uso. • Staccare la spina prima di eseguire la pulizia o la manutenzione del dispositivo. • Non tirare il cavo per staccare la spina, bensì afferrare la spina alla base.
- Seite 72 • Collocare il dispositivo solo su superfici resistenti all‘umidità. Durante l‘installazione e la rimozione del serbatoio potrebbero cadere alcune gocce. In questo caso, asciugare immediatamente le gocce d‘acqua. • Cambiare l‘acqua nel serbatoio al massimo dopo 3 giorni. • Questo dispositivo può essere utilizzato dai bambini maggiori di 8 anni e dalle persone con limitate capacità...
- Seite 73 AVVERTENZA Pericolo di lesioni! Assicurarsi che i bambini non ingoiano le pile. Se le pile a bottone vengono ingoiate possono causare gravi bruciature interne nel giro di sole 2 ore e portare alla morte. Contattare subito un medico se si ha il dubbio che siano state ingoiate delle pile.
- Seite 74 DESCRIZIONE DEL DISPOSITIVO E DEL TELECOMANDO Pannello di controllo Filtro di vaporizzazione Tasti Serbatoio dell'acqua Uscita dell'aria con alette di Rotelle ventilazione...
-
Seite 75: Pannello Di Controllo
PANNELLO DI CONTROLLO Display Display MESSA IN FUNZIONE Aprire l'imballaggio e togliere il dispositivo. Assicurarsi che tutti i componenti inclusi nella fornitura siano completi. Posizionare il dispositivo in orizzontale su una superficie stabile. Non inclinare il dispositivo prima dell'uso. Prima della messa in funzione, assicurarsi che la tensione della presa elettrica utilizzata corrisponda a quella indicata sulla targhetta del dispositivo. - Seite 76 Serbatoio dell'acqua Livello massimo dell'acqua Livello minimo dell'acqua UTILIZZO Accensione Dopo aver inserito la spina nella presa, premere il tasto per far passare il dispositivo dalla modalità standby a quella operativa. L'impostazione predefinita prevede la velocità del ventilatore 1 in modalità normale.
- Seite 77 Timer (1) Spegnimento automatico: • A dispositivo acceso, premere TIMER/PRESET per accedere all'impostazione di standby del timer. Se si preme questo tasto più volte, è possibile impostare il tempo che deve trascorrere prima del passaggio automatico del dispositivo in standby. L'impostazione avviene in questo ordine: 1h > 2h > 3h > ... > 15h > Annullare l'impostazione del timer.
- Seite 78 Oscillazione In modalità operativa, premere questo tasto per attivare la funzione di oscillazione. Ogni volta che lo si preme, si accede alle funzioni nel seguente ordine: Oscillazione verticale > Oscillazione orizzontale > Oscillazione OFF > Oscillazione orizzontale > Oscillazione verticale > Oscillazione OFF. Umidificazione Se si preme questo tasto con il dispositivo in stato operativo, è...
- Seite 79 Telecomando I tasti del telecomando corrispondono a quelli del dispositivo. Quando si usa il telecomando, assicurarsi che il trasmettitore a infrarossi sia puntato sul ricevitore del dispositivo. Assicurarsi che non ci siano ostacoli tra il telecomando e il dispositivo. Togliere le batterie dal telecomando se non lo si usa per un lungo periodo di tempo.
-
Seite 80: Pulizia E Manutenzione
PULIZIA E MANUTENZIONE Stoccaggio Scaricare l'acqua dal serbatoio e asciugarlo accuratamente se non si usa il dispositivo per un lungo periodo di tempo. Lasciare poi il dispositivo in funzione in modalità "General" per un po', in modo da asciugare completamente il pannello di umidificazione. - Seite 81 Filtro Come pulire il serbatoio dell'acqua Togliere direttamente il serbatoio dell'acqua per pulirlo. Pulizia del condotto dell'acqua Una volta che il serbatoio è stato tolto, si può controllare se c'è dell'acqua residua nel condotto dell'acqua. Se è così, assorbire l'acqua con un panno asciutto. Condotto dell'acqua...
- Seite 82 Come pulire l'alloggiamento Pulire l'alloggiamento con un panno umido. È vietato sciacquare l'alloggiamento direttamente con acqua. Non pulire l'alloggiamento con un detergente aggressivo. Dopo la pulizia, riposizionare tutti gli accessori nel dispositivo in ordine inverso. Nota: per sostituire il pannello di umidificazione, premere la parte inferiore nell'apposita apertura (v.
-
Seite 83: Risoluzione Dei Problemi
RISOLUZIONE DEI PROBLEMI Problema Possibile causa Soluzione Il dispositivo non La spina non è collegata Inserire correttamente funziona. correttamente. la spina nella presa elettrica. L'unità di nebulizzazione Installare correttamente non è stata installata l'unità di nebulizzazione. correttamente. Il dispositivo è spento. Accendere il dispositivo. - Seite 84 AVVISO DI SMALTIMENTO Se nel vostro Paese sono vigenti regolamenti legislativi relativi allo smaltimento di dispositivi elettrici ed elettronici, questo simbolo sul prodotto o sull'imballaggio indica che non è consentito smaltire questo prodotto insieme ai rifiuti domestici. Il dispositivo deve invece essere portato in un centro di raccolta per il riciclaggio di dispositivi elettrici ed elettronici.