
Verwandte Anleitungen für Samsung SCC-641


Inhaltszusammenfassung für Samsung SCC-641
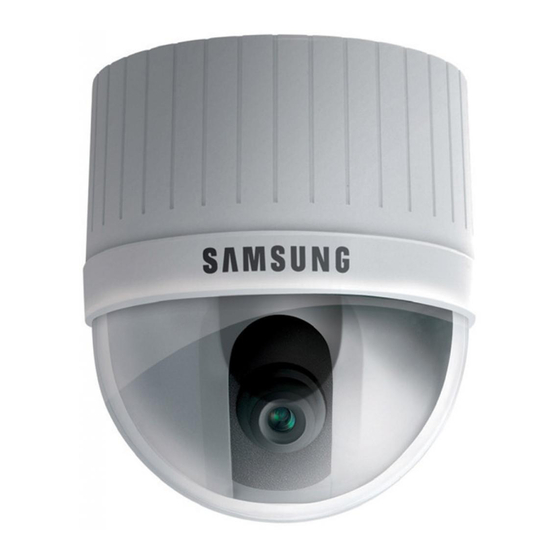
- Seite 1 SmartDome Camera SCC-641(P) Owner’s Instructions Benutzerhandbuch Manuel d’instruction Manual del usuario Istruzioni per l’uso Part : AB68-00393A(01) Printed in Korea...
-
Seite 2: Safety Precautions
9. If this product fails to operate normally, contact the store of purchase or your nearest service center. Never disassemble or modify this product in any way. (Samsung is not liable for problems caused by unauthorized modifications or attempted repair.) -
Seite 3: Before Usage
Before Usage This is a basic instruction manual for the SCC-641(P) user. It contains all the instructions needed to use the SCC-641(P) from a simple introduction of the control locations and functions of the SCC-641(P) to installation methods in the set up menu. -
Seite 4: Inhaltsverzeichnis
- SPECIAL 3-14 Chapter 1 SCC-641(P) Overview - AUTO FOCUS 3-15 SCC-641(P) Introduction - D-ZOOM 3-15 SCC-641(P) Location of Controls - EXIT 3-15 Locations of Controls - Front PRESET 3-16 Locations of Controls - Back ADAPTER CONNECTION AUTO MODE 3-18... -
Seite 5: Chapter 1 Scc-641(P) Overview
The SCC-641(P) is a high quality surveillance camera using x22 zoom lens and digital zoom IC, it can catch clear images up to 220 times. The SCC-641(P) has Low light function that enables it to take shots in the environment where there is almost no light, White Balance function that... - Seite 6 Locations of Control BACK FRONT...
-
Seite 7: Adapter Connection
INITIAL SETTING CAMERA ADDRESS SETUP Dip Switch setting is same as the following example: EX) CAMERA ADDR: When it's number 1, set as follows. SCC-641(P) Adapter BOARD SW500 Setting communication Protoco Use number 5~8 PIN of SW501 to set communication Protocol. -
Seite 8: Setting Rs-422A/Rs-485 Termination
Setting RS-422A/RS-485 termination SWITCH SETTING Receiver Address SW500-1 SW500-2 SW500-3 SW500-4 SW500-5 SW500-6 SW500-7 SW500-8 As it is shown in the structure map, when Controller and RS-422A/RS-485 is connected it should be terminated according to the Cable feature of impedance on the each end of the transmitting line to transfer the signals in long distance by controlling the reflection of the signals to the lowest. - Seite 9 Receiver Address SW500-3 SW500-4 SW500-5 SW500-6 SW500-7 SW500-8 Receiver Address SW500-1 SW500-2 SW500-3 SW500-4 SW500-5 SW500-6 SW500-7 SW500-8 SW500-1 SW500-2 1-13 1-14...
- Seite 10 Receiver Address SW500-1 SW500-2 SW500-3 SW500-4 SW500-5 SW500-6 SW500-7 SW500-8 Receiver Address SW500-1 SW500-2 SW500-3 SW500-4 SW500-5 SW500-6 SW500-7 SW500-8 1-15 1-16...
-
Seite 11: Chapter 2 Scc-641(P) Installations
Please check that all components listed below are included in the package: In this chapter we will look over the checkpoints before installation, installation environmental requirements, and precautions during the installation of the SCC-641(P). After that we'll show the actual installation of the SCC-641(P) and cable connections. SCC-641(P) Bracket Anchor Owner’s Instructions... -
Seite 12: Precautions For Installation And Usage
Precautions for Installation and Usage. Never face the SCC-641(P) towards the sun. Whether the SCC-641(P) is in use or not, never face it towards the sun. Use Do not attempt to disassemble the SCC-641(P). with caution when operating the SCC-641(P) in the vicinity of spotlights or There is a danger of electric shock if the screws or cover are removed. -
Seite 13: Preparing The Cable
Power Adapter Cable The cable connected to the Power input terminal of the SCC-641(P) is shown below with a rated voltage of 24VAC and ampacity of 15A. 3. Now connect the Power Adapter Cable. Use a driver to screw one part of the two lines of Power Adapter to Power Input Terminal of the SCC-641(P). -
Seite 14: Scc-641(P) Installation
4. [Figure 3,4] Connect the various cables to the CAMERA ADAPTER. (See page 2-6) SCC-641(P) Installation 1. [Figure 1] Install the structure on the ceiling. (Refer to Installation reference for the Length of the structure) * Built in by the builder of the structure... -
Seite 15: Chapter 3 Setup Menu Overview
* Use the screws (BH M3XL8) to connect the CAMERA and the ADAPTER so they don't move. In this chapter, we will look over the Setup Menu of the SCC-641(P), First we'll look over the overall structure of the Setup Menu, and then [Figure 6] we'll look at the functions of each menu. -
Seite 16: Structure Of The Setup Menu
LANGUAGE ENGLISH EXIT QUIT/SAVE Caution : SCC-641 has Auto Calibration function to enhance precision of PAN/TILT motor. Auto Calibration function displays A.C on screen and initializes LENS and PAN/TILT when there is no Key input by user for 24 hours. -
Seite 17: Camera Block Menu Contents
CAMERA SET menu screen, select CAMERA ID to ON and press [Enter]. You will see the sub screen for deciding on the ID of the SCC-641(P). The Camera ID can have up to 12 alphanumeric characters, along with several special characters.The assigned camera ID may be positioned to any desired location on the... -
Seite 18: V-Sync
PRESET or USER. If the "AREA" menu is set to PRESET, the Motion Detection function will MOTION DET [Enter] be applied to the basic part of the SCC-641(P)'s factory default presets. Set the AREA menu PHASE ( 000) ---- ----... -
Seite 19: Exit
EXIT VIDEO SET MENU The EXIT menu is used to quit the CAMERA SET menu of the SCC-641(P) and return IRIS to the MAIN MENU. The video output level of the monitor can be controlled by the IRIS lens depending on the - QUIT: Ignores the changed information and restores the saved information. -
Seite 20: Shutter
In the SHUTTER menu, the high-speed Electric shutter and AUTO low speed shutter of the not be changed. SCC-641(P) and the FIX low speed shutter can be set.The High speed Electric Shutter supports 7 different speeds from 1/100 to 1/10,000 of a second. The AUTO low speed shutter and FIX low speed shutter supports 12 different speeds from 2x to 128x magnifications.The Low speed shutter is the function that sets the shutter speed to low in... -
Seite 21: White Bal
WHITE BAL WHITE BAL The WHITE BAL menu insures that white is calibrated normally under any color Lights are generally denoted as color temperatures and expressed in Kelvin (。 K) temperature condition. When the WHITE BAL menu is set to the ATW mode, the white units. -
Seite 22: Special
- Mirror: Reverse the video output signal. - ONEAF: In ONEAF mode the SCC-641(P) auto focuses only while moving/stopping. When the SCC-641(P) is not moving it is same as MF mode and when it's - H-DTL: Adjust Horizontal Detail Level. -
Seite 23: Preset
PRESET POSITION SET PRESET NO.0 A total of 128 presets are available including the selection of PAN/TILT location and SET PAN/TILT From "POSITION SET..." press [ENTER] to get into the SET ZOOM/FOCUS Zoom/Focus, and setting up screen conditions and monitoring. (0 ~ 127) PAN/TILT, FOCUS/ZOOM SET screen to set the PAN/TILT Among the 128 PRESETS PRESET 0: HOME POSITION, PRESET 1: ALARM1, location and FOCUS/ZOOM condition then press [ENTER]... -
Seite 24: Auto Mode
AUTO MODE END SET AUTO PAN and PATTERN functions are in AUTO MODE. SET END! "END SET" gets into the END SET setup screen by AUTO PAN pressing [ENTER]. Adjust PAN/TILT location and After selecting the locations of two points (PAN/TILT) of START and END, it loops press [ENTER] to return to a higher menu. -
Seite 25: Pattern
PATTERN ALARM SET This is a replay function so that the MANUAL functions such as PAN, TILT, ZOOM, It consists of 4 ALARM INPUTs and 3 ALARM OUTs.It can sense an ALARM input from and FOCUS are played for 30 seconds. exterior SENSORs and it performs with PRESET or PATTERN function and outputs the ALARM OUT signals. -
Seite 26: Other Set
ALARM OUT OTHER SET ALARM OUT ALARM1 Each ALARM input corresponds to one of the 3 HOME RETURN ALARM2 ALARM3 ALARM OUT. < The ALARM3 is designed as the ALARM4 When there is no KEY input or other movement for a certain time, the camera moves to Relay OUT >... -
Seite 27: Product Specifications
CAM RESET Product specifications CAM RESET clears all the settings made so far and restores the factory default settings. SCC-641 "CAMERA RESET?" message appears when you select CAM RESET. Items Contents Select "CANCEL" to return to the menu setup display or select OK to restore the factory... - Seite 28 Zoom lens single body COMBI DOME CAMERA Product Type - AC 24± 10% (50Hz± 0.3Hz) Power Input · The copyright of the manual belongs to Samsung Electronics Co., Ltd. - 18W Power Consumption - PAL STANDARD COLOR SYSTEM Broadcasting Type ·...
- Seite 29 SmartDome Camera SCC-641(P) Benutzerhandbuch...
-
Seite 30: Sicherheitshinweise
Verkaufsstelle, in der Sie das Gerät erworben haben, oder an das nächste Kundendienstzentrum. Das Gerät darf niemals und in keiner Weise selbst zerlegt oder modifiziert werden. (Samsung übernimmt keine Haftung für Probleme, die durch unbefugte Abänderungen oder einen Reparaturversuch herbeigeführt sind.) -
Seite 31: Normzulassungen
Kapitelzusammenfassungen. werden. Wenn das Gerät störende Interferenzen beim Radio- oder Fernsehempfang "Kapitel 1 : Überblick über die SCC-641(P) ” enthält eine kurze verursacht, was durch ein oder Ausschalten des Geräts überprüft werden kann, Einführung in die Speed-Dome Kamera SCC-641(P), ihre sollte einer oder mehrere der folgenden Ratschläge befolgt werden:... - Seite 32 “Inhaltsverzeichnis” - SHUTTER 3-10 - AGC 3-11 Vor Inbetriebnahme - WEISSABGL 3-12 Kapitel 1 Überblick über die SCC-641(P) - SPEZIAL 3-14 Einführung in die SCC-641(P) - AUTO FOKUS 3-15 Steuerungselemente der SCC-641(P) - D-ZOOM 3-15 Steuerungselemente Vorderseite - AUSGANG 3-15 Steuerungselemente Rückseite...
-
Seite 33: Kapitel 1 Überblick Über Die Scc-641(P)
Überwachungskamera mit x22 Zoom-Objektiv und einem digitalen 10- fach Zoom. Sie kann scharfe Kamerabilder bis zu 220-fach auffangen. Die Speed-Dome Kamera SCC-641(P) hat eine Lichtverstärkung (Low Light Funktion), die es ermöglicht, Aufnahmen zu machen, auch wenn fast kein Licht vorhanden ist, einen Weißabgleich (White Balance Function), der natürliche Bilder entsprechend dem Hintergrundlicht korrigiert, einem... -
Seite 34: Steuerungselemente
Steuerungselemente Rückseite Vorderseite... -
Seite 35: Adapteranschluss
KAMERA ADDR: Wenn ihre Ziffer 1 ist, stellen Sie so ein. SCC-641(P) Adapter BOARD SW500 Einstellung des Kommunikationsprotokolls. Benutzen Sie die Ziffern 5 bis 8 PINs von SW501, um das Kommunikationsprotokoll einzustellen. A : SAMSUNG (SSC-1000) HALF PIN5 PIN6 PIN7 PIN8 Comp... -
Seite 36: Einstellung Der Rs-422A/Rs-485 Abschlüsse
Einstellung der RS-422A/RS-485 Abschlüsse Schaltereinstellung Empfänger-adresse SW500-1 SW500-2 SW500-3 SW500-4 SW500-5 SW500-6 SW500-7 SW500-8 Wenn der Controller und RS-422A/RS-485 Buchsen verbunden sind, sollte, wie in der Übersicht dargestellt, der Abschluss entsprechend der Impedanz (des Scheinwiderstandes) des jeweiligen Übertragungsweges eingestellt werden, um Signale bei großen Entfernungen durch Kontrolle der Reflektionen auf der Leitung auszugleichen. - Seite 37 SW500-3 SW500-4 SW500-5 SW500-6 SW500-7 SW500-8 SW500-1 SW500-2 SW500-3 SW500-4 SW500-5 SW500-6 SW500-7 SW500-8 Empfänger-adresse SW500-1 SW500-2 Empfänger-adresse 1-13 1-14...
- Seite 38 SW500-1 SW500-2 SW500-3 SW500-4 SW500-5 SW500-6 SW500-7 SW500-8 SW500-1 SW500-2 SW500-3 SW500-4 SW500-5 SW500-6 SW500-7 SW500-8 Empfänger-adresse Empfänger-adresse 1-15 1-16...
-
Seite 39: Kapitel 2 Installation Der Scc-641(P) Installation
Vor der Installation Kapitel 2 : Installation der SCC-641(P) Überprüfung des Verpackungsinhalts Überprüfen Sie bitte, ob alle unten aufgelisteten Teile in der Packung enthalten sind : In diesem Kapitel werden wichtige Punkte vor der Installation, Voraussetzungen für die Installationsumgebung und Vorsichtsmaßregel während der Installation der SCC-641(P) -
Seite 40: Vorsichtsmaßnahmen Für Installation Und Betrieb
Vorsichtsmassnahmen für Installation und Betrieb. Richten Sie die SCC-641(P) nie zur Sonne aus. Unabhängig davon, ob die Speed-Dome Kamera SCC-641(P) in Betrieb ist Bauen Sie die SCC-641(P) nicht auseinander. oder nicht, darf sie nie zur Sonne ausgerichtet werden. Seien sie vorsichtig, Es besteht die Gefahr eines elektrischen Schlages, wenn die Schrauben oder wenn Sie die Speed-Dome Kamera SCC-641(P) in der Nähe von... -
Seite 41: Vorbereitung Der Kabel
1. Verbinden Sie ein Ende des BNC-Video-Kabels mit dem Videoausgang (VIDEO OUT). Um die Speed-Dome Kamera SCC-641(P) zu installieren und in Betrieb zu 2., Verbinden Sie dann das andere Ende mit dem Videoeingang des Monitors. nehmen, werden folgende Kabel benötigt:... -
Seite 42: Installation Der Speed-Dome Kamera Scc-641(P)
4. [Bild 3, 4] Verbinden Sie die verschiedenen Kabel mit dem Kameraadapter (siehe Installation der Speed-Dome Kamera SCC-641(P) Seite 2-6) 1. [Bild 1] Befestigen Sie den Aufbau an der Decke. (Beachten Sie bei der Installation die Höhe des Aufbaus.) * Eingebaut vom Hersteller. -
Seite 43: Kapitel 3 Überblick Über Das Setup Menü
* Verwenden Sie Schrauben (BH M3XL8), um die Kamera und den Adapter zu befestigen. Dieses Kapitel gibt einen Überblick über das Setup-Menü der Speed-Dome Kamera SCC-641(P). Zuerst wird die allgemeine Struktur [Bild 6] des Setup-Menüs erläutert und dann die Funktionen der einzelnen Menüs. -
Seite 44: Aufbau Setup Menüs
AUS/1~3/HALB1/HALB2/VOLL AKTIVITAET AUS/1~3/HALB1/HALB2/VOLL AUSGANG VERL/SICHERN Achtung: AUX AUS KONTROLLE AUS1 AUS/EIN Die SCC-641 verfügt über eine automatische Kalibrierungsfunktion, die AUS2 AUS/EIN die Genauigkeit des SCHWENK/NEIGE-Motors verbessert. AUS3 AUS/EIN Die automatische Kalibrierungsfunktion zeigt A.C auf dem Bildschirm AUSGANG VERL/SICHERN an und initialisiert OBJEKTIV und SCHWENKEN/NEIGEN, wenn 24 WEITERE PROG HOME ZURÜCK... -
Seite 45: Inhalt Des Kamera Block Menüs
Monitor angezeigt wird. Stellen Sie auf dem KAMERA PROG- Menü- bildschirm KAMERA ID auf ON und drücken Sie die [Enter]-Taste. Jetzt sehen Sie das Untermenü zur Festlegung der ID der Kamera SCC-641(P). Die KAMERA ID kann aus bis zu 12 alphanumerischen Zeichen bestehen, zuzüglich einiger Sonderzeichen. Die eingestellte KAMERA ID kann an eine gewünschte Position platziert werden, indem man... -
Seite 46: Sync
ZOOM GESCH BEREICHA-Menü auf PRESET gestellt ist, wird die Bewegungsdetektion gemäß der AKTIVITAET werkseitig eingestellten Daten der Speed-Dome Kamera SCC-641(P) ausgeführt. Stellen Sie PHASE ( 000) ---- ---- das ABEREICH A-Menü auf BENUTZER und drücken Sie die [Enter]-taste. Nun können Sie... -
Seite 47: Ausgang
Bei gewöhnlichen Kameras stört starkes Hintergrundlicht die Klarheit der Objekte und Werte wieder her. lässt sie dunkel erscheinen. Bei der Speed-Dome Kamera SCC-641(P) kann das Problem des Gegenlichts gelöst und ein klares Bild erzeugt werden, wenn man GLK (Back Light Compensation), ein Untermenü des ALC/MANU-Menüs, einstellt. -
Seite 48: Shutter
Verstärkung automatisch zu steuern, stellen Sie das AGC-Menü auf AUS, für Im SHUTTER-Menü können der High-Speed-Electric-Shutter, der manuelle Steuerung auf EIN. Wenn das SHUTTER-Menü auf AUTO-low-speed-Shutter AUTO-Low-Speed-Shutter der Speed-Dome Kamera SCC-641(P) sowie der eingestellt ist, kann die Einstellung im AGC-Menü nicht verändert werden. FEST-Low-Speed-Shutter eingestellt werden. Der High-Speed-Electric-Shutter unterstützt 7 verschiedene Geschwindigkeiten von 1/120 bis 1/10K Sekunde. -
Seite 49: Weissabgl
WEISSABGL WEISSABGL Das WEISSABGL-Menü stellt sicher, dass weißes Licht unter beliebigen Licht wird allgemein in Farbtemperaturen angegeben und in Kelvin-Einheiten Farbtemperaturbedingungen auf normal abgeglichen wird. Wenn das WEISSABGL- gemessen.(°k). Menü auf ATW Modus eingestellt ist, wird der Weißabgleich automatisch den Die allgemeine Farbtemperatur von verschiedenen Lichtverhältnissen ist unten Farbtemperaturbedingungen angepasst. -
Seite 50: Spezial
- MF: Im MANUAL FOKUS-Modus kann der Nutzer den Fokus manuell einstellen. - BIB (Picture in Picture): Wenn der Digitale Zoom aktiviert ist, wird der auf 1/16tel - EINAF: Im OEINAF-Modus der Speed-Dome Kamera SCC-641(P) arbeitet derAutofokus nur während des Bewegens/Anhaltens. Wenn sich die Speed-Dome Kamera SCC- reduzierte Bildschirm angezeigt. -
Seite 51: Preset
PRESET POSITIONS PROG PRESET NR.0 S/N PROG Insgesamt sind 128 Voreinstellungen zugänglich einschließlich der Auswahl von Drücken Sie ausgehend von “POSITIONS PROG ...” ZOOM FOKUS PROG PAN/TILT-Einstellung, Zoom/Fokus und Bildschirm- und Aufnahmeeinstellungen. die [Enter]-Taste, um in das Menü zur Einstellung von S/N (0~127) und ZOOM/FOKUS zu gelangen. -
Seite 52: Auto Mode
AUTO MODE ENDE PROG Der AUTO-Modus enthält die Funktionen AUTO PAN und PATTERN. PROG ENDE! Über “ENDE PROG…” und Drücken der Enter-Taste AUTO PAN gelangen Sie in das ENDE PROG-Einstellungs-Menü. Nach Auswahl zweier Positionen (S/N) für Start und Ziel wird ein kontinuierlicher Stellen Sie die S/N Position ein und drücken Sie Schwenk in der angegebenen Geschwindigkeit gefahren. -
Seite 53: Pattern
PATTERN ALARM PROG Dies ist eine Wiederholungsfunktion, mit der die MANUAL-Funktionen wie S/N, Zur Verfügung stehen 4 ALARM ENTs und 3 ALARM AUSs. Das Gerät kann einen ZOOM und FOKUS für 30 Sekunden aufgezeichnet werden. Alarminput von einem externen Sensor empfangen oder im Rahmen der PRESET oder PATTERN-Funktion ein Alarmsignal geben. -
Seite 54: Weitere Prog
ALARM AUS PROG WEITERE PROG ALARM AUS ALARM1 Jeder Alarminput entspricht einem der 3 HOME ZURÜCK ALARM2 Alarmoutputs. <Alarm 3 ist reserviert für das Relais ALARM3 Wenn keine Eingabe oder keine Veränderungen für eine gewisse Zeit erfolgen, kehrt die ALARM4 OUT>. -
Seite 55: Kam Reset
KAM RESET Technische Daten Mit KAM RESET werden alle bisher vorgenommenen Einstellungen gelöscht und die SCC-641 werkseitigen Standardeinstellungen wiederhergestellt. Bei Auswahl von KAM RESET erscheint die Meldung "KAMERA RESET?". Artikel Spezifikation Wählen Sie BE ENDEN, um zum Bildschirmmenü zurückzukehren, oder OK, um die - Ein Körper-Kombi-Kuppelkamera mit Zoomobjektiv... - Seite 56 - Ein Körper-Kombi-Kuppelkamera mit Zoomobjektiv Co., Ltd. - AC 24± 10% (50Hz± 0.3Hz) Spannungsversorgung - 18W • Ohne vorherige Genehmigung von Samsung Electronics darf es weder Leistungsaufnahme - PAL Standard Farbsystem elektronisch, mechanisch, hörbar noch durch eine andere Methode Signalsystem...
- Seite 57 SmartDome Camera SCC-641(P) Manuel d’instruction...
-
Seite 58: Précautions De Sécurité
9. Si ce produit cesse de fonctionner correctement, communiquez avec votre revendeur ou le centre d’entretien de votre localité. Ne démontez ni ne modifiez jamais ce produit. (Samsung ne saurait être tenue pour responsable des problèmes techniques découlant d’une modification ou d’une tentative de réparation non autorisées.) -
Seite 59: Avant L'utilisation
Menu d’installation de SCC-641(P). digital,conformément à partie 15 des règles FCC. Ces limites sont conçues pour fournir la Le Menu d’installation de SCC-641(P) est exprimé en détail dans le protection résonnable contre l’interface nuisible dans une installation résidentielle.Cet équipement produit,utilise et peut mettre l’énergie de fréquence radio et si non installé... - Seite 60 Avant l’utilisation - BAL BLANCS 3-12 Chapitre 1 SCC-641(P) Vue d’ensemble - SPECIAL 3-14 SCC-641(P) Introduction - AUTO FOCUS 3-15 SCC-641(P) location de commandes - D-ZOOM 3-15 Contrôles de location- avant - SORITIE 3-15 Contrôles de location-arrière PRESET 3-16 Connexion d’adaptateur...
-
Seite 61: Chapitre 1 Scc-641(P) Vue D'ensemble
Chapitre 1 SCC-641(P) vue d’ensemble SCC-641(P) Introduction Le SCC-641(P) est le produit que la meilleure exécution de lentille de zoom a Dans ce chapitre nous introduisons brièvement SCC-641(P) interrâpé la caméra de surveillance. et montrerons fonctions principales,contrôle de Location et arrangement de commutateur. -
Seite 62: Connexion D'adaptateur
Connexion d’adaptateur Arrière Avant... - Seite 63 EX) CAMERA ADDR : quand il est le nombre 1, mettez comme suit. SCC-641(P) Adapter BOARD SW500 Arrangement de protocole de communication. Utilisez les nombres 5-8 PIN de SW501 pour mettre Protocole de communication. A : SAMSUNG (SSC-1000) HALF PIN5 PIN6 PIN7 PIN8...
-
Seite 64: Arrangement De Rs-422A Rs 485 D'une Terminaison
Arrangement de RS-422A/ RS-485 d’une terminaison Arrangement de commutateur Adresse de récepteur SW500-1 SW500-2 SW500-3 SW500-4 SW500-5 SW500-6 SW500-7 SW500-8 Comme on le montre dans la carte de structure,quand le contrôleur est joint, il doit être terminé selon la particularité de câble d’impédence sur chaque fin de la ligne de transmission pour transférer les signaux dans la longue distance en contrôlant la réflexion des signaux au plus bas. - Seite 65 Adresse de récepteur SW500-3 SW500-4 SW500-5 SW500-6 SW500-7 SW500-8 Adresse de récepteur SW500-1 SW500-2 SW500-3 SW500-4 SW500-5 SW500-6 SW500-6 SW500-8 SW500-1 SW500-2 1-13 1-14...
- Seite 66 Adresse de récepteur SW500-1 SW500-2 SW500-3 SW500-4 SW500-5 SW500-6 SW500-7 SW500-8 Adresse de récepteur SW500-1 SW500-2 SW500-3 SW500-4 SW500-5 SW500-6 SW500-7 SW500-8 1-15 1-16...
-
Seite 67: Avant L'installation
Dans ce chapitre nous regarderons sur les points de contrôle avant paquet. l’installation, installation exigences environnements, et précautions pendant l’installation du SCC-641(P).Après cela,nous montrerons l’installation réelle du SCC-641(P) et connexions de câble. SCC-641(P) Ancre de parenthèse Manueld’instruction Détenteur de caméra... -
Seite 68: Précautions Pour Installation Et Utilisation
SCC-641(P) système d’alimentation d’énergie. Energie consommée :18W N’exposez pas le SCC-641(P) à la pluie ou à l’humidité ou ne faites pas ntrée électrique :24VAC,1.5A fonctionner en place humide. Si le SCC-641(P) vient contact avec l’eau ,éteignez-vous le commutateur électrique immédiatement et entrez en contact avec un distributeur.L’humidité... -
Seite 69: Préparation Des Câbles
électrique au terminal d’entrée électrique. Câble vidéo Le câble de SCC-641(P) est le câble BNC pour connceter le terminal de production vidéo au terminal d’entrée vidéo du moniteur. 4. Ajustez le commutateur ci-dessous à la tension appropriée.Ainsi connectez la prise de l’adaptateur électrique au connecteur électrique. -
Seite 70: Installation De Scc-641(P)
4. [Figure3,4] Joignez les câbles divers à l’adaptateur de caméra.(Voir les pages 2-6) Installation de SCC-641(P) 1. [Figure1] Installez la structure sur le plafond. (Référez-vous à la référence d’installation pour la longueur de la structure.) * Encastré par le constructeur de la structure. -
Seite 71: Vue D'ensemble De Menu D'installation
* Utilisez les tournevis(BH M3XLB) pour joindre la Caméra et l’Adaptateur pour qu’ils ne se déplacent pas. Dans ce chapitre,nous parcourirons le menu d’installation de SCC-641(P).D’abord nous regarderons la structure complète du menu d’installation et les fonctions de chaque menu. [Figure 6] CONNECTEUR 7. -
Seite 72: Contenu De Menu D'installation
ALARME3 OFF/1~3/DEMI1/DEMI2/PLEIN ALARME4 OFF/1~3/DEMI1/DEMI2/PLEIN MOUVE OFF/1~3/DEMI1/DEMI2/PLEIN SORTIE QUITTER/SAUVER Avertissement : Le modèle SCC-641 dispose d’une fonction de calibrage automatique CONTRôLE SORTIE AUX SORTIE1 OFF/ON pour améliorer la précision du moteur PAN/INCLINAISON. SORTIE2 OFF/ON SORTIE3 OFF/ON La fonction de calibrage automatique affiche A.C sur l’écran et initialise... -
Seite 73: Caméra Id
QUITTER Camera ID Le menu de CAMERA ID assigne l’ID au SCC-641(P) pour être montré sur le moniteur connecté. Sur l’écran de menu de PROG CAMERA,sélectionnez CAMERA ID à ON et pressez [ENTER].Vous verrez le sous-écran pour choisir finalement l’ID du SCC-641(P).La CAMERA ID peut avoir jusqu’à... -
Seite 74: Sync
VITE ZOOM DET MOUVE Detection va être appliqué à la partie de base du défaut d’usine défini d’avance de [Enter] SCC-641(P). Mettez le menu de ZONE à User et pressez [ENTER],l’utilisateur peut choisir la PHASE ( 000) ---- ---- SORTIE QUITTER taille du secteur et l’emplacement où... -
Seite 75: Soritie
SORITIE MENU DE PROG VIDEO Le menu SORITIE est employé pour quitter le menu de jeu de caméra de SCC-641(P) IRIS et retourner au MENU PRINCIPAL. Le niveau de production vidéo du moniteur peut être contrôlé par la taille d’Iris selon le - QUITTER : ignore l’information changée et reconstitue l’information gardée. -
Seite 76: Shutter
ON ou mettez-le à OFF pour contrôle manuel.Si le menu SHUTTER est mis à l’obturateur Automatique de SCC-641(P) et l’obturateur de vitesse bas FIXE peut être mis. La haute de vitesse bas automatique,la valeur du menu CAG peut être ne pas changée. -
Seite 77: Bal Blancs
BAL BLANCS BAL BLANCS Le menu de BAL BLANCS assure que ce blanc est calibré normalement dans n’importe Les feux sont généralement dénotés comme des températures colorées et exprimés Quelle condition colorée de température.Quand le menu de BAL BLANCS est mis au dans les unités de Kelvin(°K). -
Seite 78: Special
- MF : dans le mode MANUAL FOCUS,l’utilisateur ajuste le Focus manuellement. au minimum va être montré. - UNAF : dans le mode UNAF le SCC-641(P) automatique se concentre suelement en se - Mirror(miroir) : changer complètement le signal de production vidéo. -
Seite 79: Preset
PRESET PROG POSITION PRESET NO. 0 PR PAN/TILT Le total de 128 presets sont disponible incluant le choix d’emplacement PAN/ TILT et PR ZOOM/FOCUS De “PROG POSITION …” pressez [ENTER] pour entrer ZOOM/ FOCUS et fondant les conditions de l’écran et le contrôle. dans PAN /TILT, FOCUS /ZOOM SET écran pour mettre Parmi les 128 PRESETS,PRESET 0 : POS ORIGING,PRESET1 : ALARME 1, l’emplacement PAN/ TILT et la condition FOCUS /ZOOM... -
Seite 80: Mode Auto
MODE AUTO PROG STOP Les fonctions AUTO PAN et RONDE sont dans le AUTO MODE. STOP PROG! “PROG STOP” entre dans l’écran d’installation de PAN AUTO STOP PROG en appuyant sur [ENTER]. Ajustez Après sélection de deux points(PAN /TILT) de DEM et STOP,il boucle continuellement l’emplacement de PAN/ TILT et pressez ENTER pour dans le jeu d’installation SPEED. -
Seite 81: Ronde
RONDE PROG ALARME C’est une fonction de replay(rejouer) pour que les fonctions manuelles comme Il consiste en 4 ALARME INPUTs et 3 SORT ALARME. Il peut sentir une entrée PAN,TILT,ZOOM et FOCUS sont joué pendant 30 secondes. d’ALARME de Détecteurs extérieurs et il exécute avec PRESET ou la fonction de modèle et produit le signal d’A SORT ALARME. -
Seite 82: Autre Prog
SORT ALARME AUTRE PRG SORT ALARME ALARME1 Chaque entrée d’ALARME correpond à un de 3 RET ORIGINE ALARME2 ALARME3 d’ALRME OUT. <L’ALARME 3 est désigné comme Lorsqu’aucune touche n’est actionnée ou qu’aucun mouvement n’est enregistré pendant une ALARME4 Replay OUT> MOUVE certaine période, la camera se déplacera vers la position de départ. -
Seite 83: Spécification Du Produit
RAZ CAM Spécification du produit La fonction RAZ CAM efface tous les paramètres définis par l’utilisateur et restaure les SCC-641 valeurs par défaut. Lorsque vous sélectionnez cette fonction, le message “RAZ CAMERA?” apparaît à l’écran. Articles Contenus Sélectionnez “ANNULER” pour revenir à l’écran du menu de configuration ou sélectionnez Lentille de Zoom à... - Seite 84 Mises en garde Lentille de Zoom à corps simple Type de produit - AC 24± 10% (50Hz± 0.3Hz) Entrée électrique Samsung Electronics Co., Ltd. est le propriétaire des droits d’auteur • - 18W Consommation électrique de ce guide d’utilisation. - Système coloré standard PAL Type de radiodiffusion Il est strictement interdit de copier ce guide sous forme électronique,...
- Seite 85 SmartDome Camera SCC-641(P) Manual del usuario...
-
Seite 86: Medidas De Seguridad
Nunca desarme ni modifique este producto de ninguna manera. (Samsung no es responsable por los problemas causados por Los avisos de advertencia le Los avisos de precaución le alertan modificaciones no autorizadas o por intentos de reparación.) -
Seite 87: Antes De Instalar El Equipo
El apartado más usado del SCC-641(P) será el menú de ajustes. El menú de ajustes está explicado con detalle en el Capítulo 3 Nota: Este equipo ha sido probado y cumple los límites de un dispositivo digital Clase B Menú... - Seite 88 Precauciones para la instalación y uso ALARMA PROG 3-21 Preparación del cable ALTRA PROG 3-23 Conexión del cable Especificaciones del producto Instalación de SCC-641(P) 3-25 Capítulo 3 Menú de ajustes Contenido del menú de ajustes MENÚ GENERAL DE CÁMARA C ONTENIDOS CÁMARA -CÁMARA ID...
-
Seite 89: Capítulo 1 Características Del Scc-641P
CAPITULO 1 CARACTERÍSTICAS DEL SCC-641P Introducción del SCC-641P En este capítulo se introduce brevemente el SCC-641P y El domo SCC-641P es una cámara de vigilancia con zoom incorporado. sus principales funciones, controles y ajuste de Proporciona altos niveles de seguridad de CCTV para banca o todo tipo de interruptores. -
Seite 90: Localización De Controles - Frontall
Localización de controles Localización de controles - Posterior Frontal Cubierta externa Cubierta Interna Lente Zoom... -
Seite 91: Conexiones Del Adaptador
Installation d’adresse de camera Dip Switch setting est même comme l’exemple suivant. EX) CAMERA ADDR : quand il est le nombre 1, mettez comme suit. PLACA de adaptador SCC-641 (P) SW500 Arrangement de protocole de communication. Utilisez les nombres 5-8 PIN de SW501 pour mettre Protocole de communication. -
Seite 92: Configuración Conmutadores
Ajuste de la terminación RS-422/RS-485 CONFIGURACIÓN CONMUTADORES Dirección de receptor SW500-1 SW500-2 SW500-3 SW500-4 SW500-5 SW500-6 SW500-7 SW500-8 Como muestra la figura cuando se conectan varios SCC-641P a un controlador (por ej. El SSC-1000) el último domo debe ser terminado en cuanto a impedancia del cable. División n <... - Seite 93 Dirección de receptor SW500-3 SW500-4 SW500-5 SW500-6 SW500-7 SW500-8 Dirección de receptor SW500-1 SW500-2 SW500-3 SW500-4 SW500-5 SW500-6 SW500-7 SW500-8 SW500-1 SW500-2 1-13 1-14...
- Seite 94 Dirección de receptor SW500-1 SW500-2 SW500-3 SW500-4 SW500-5 SW500-6 SW500-7 SW500-8 Dirección de receptor SW500-1 SW500-2 SW500-3 SW500-4 SW500-5 SW500-6 SW500-7 SW500-8 1-15 1-16...
-
Seite 95: Capítulo 2 Instalación Del Scc-641P
En este capítulo revisaremos los puntos principales antes de la la caja del equipo: instalación, necesidades para la misma y precauciones durante la instalación de SCC-641(P). Después le mostraremos la instalación en sí de SCC-641(P) y las conexiones de cable. SCC-641(P) -
Seite 96: Precauciones Para La Instalación Y Uso
Precauciones para la instalacián y uso Nunca encare el SCC-641P al sol Esté el SCC-641P en uso o no, nunca encare el SCC-641P al sol. Tenga No intente desmontar el SCC-641P cuidado de no exponer el SCC-641P con luces muy fuertes cercanas u otros Existe riesgo de descarga eléctrica si manipula los tornillos de la tapa brillos y luces reflectantes de objetos. -
Seite 97: Preparación Del Cable
Vídeo In del monitor. 4. Ajuste el interruptor bajo el Adaptador eléctrico al voltaje adecuado. Después, conecte el enchufe del Adaptador eléctrico al conector. 5. Conecte el terminal del Control remoto de SCC-641(P) y el mando Controlador externo. -
Seite 98: Instalación De Scc-641(P)
4. (Figura 3 y 4) Conecte todos los cables indicados en la página 14. Instalación del SCC-641P 1. Figura 1. Instalación del equipo empotrado (Consulte la guía de Instalación acerca de la longitud de la estructura) Empotrar en el cuerpo de la estructura. [figura 1] [figura 3] [figura 4]... -
Seite 99: Capítulo 3 Menú De Ajustes
6. (Figura 6) Inserte los tres espárragos del cuerpo del domo en el resultante de la figura 5 (adaptador de cámara más anclaje en U) y girelo unos 15. (Chequee el sonido que se produce al encajar una pieza con la otra y que está en posición correcta) Use los tornillos (BH M3XL8) para fijar el cuerpo del domo al adaptador de la cámara de CAPITULO 3 MENU DE AJUSTES forma la unidad ensamblada no se mueva. -
Seite 100: Cámara
MOVI OFF/1~3/MEDIO1/MEDIO2/LLENO SALIDA SALIR/GUARDAR Precaución: CONTROL SALIDA AUX SALIDA1 SCC-641 dispone de una función de calibración automática para SALIDA2 mejorar la precisión del motor PAN/TILT. SALIDA3 SALIDA SALIR/GUARDAR La función de calibración automática muestra A.C en la pantalla e inicializa LENS y PAN/TILT cuando el usuario tarda más de 24 horas... -
Seite 101: Cámara Id
MENÚ GENERAL DE CÁMARA Contenidos El Menú de cámara consiste en el Menú de CONFIGURACIÓN DE CÁMARA (CAMERA SET) y el de CONFIGURACIÓN DE VÍDEO (VIDEO SET). El diagrama anterior ilustra la estructura del menú de ajustes. En la siguiente sección se describen con detalle cada uno de los menús y submenús. -
Seite 102: Sync
SYNC DET MOVI (PROG CÁMARA) En el menú SYNC, se selecciona el tipo de sincronización En DET MOVI, se puede ajustar la función de Detección de Movimiento, Sensibilidad de vertical. La opción Int realiza la sincronización por reloj CÁMARA ID ON... -
Seite 103: Salida
BLC (Submenú del menú ALC/MANU) Con cámaras convencionales, una fuerte iluminación de fondo interfiere con la claridad de los objetos, haciéndolos aparecer oscuros. En SCC-641(P), si se fija BLC (compensación de luz de fondo), submenú del menú ALC/MANU, se resolverá el (PROG CÁMARA) -
Seite 104: Obturador
(PROG VIDEO) TAMAÑO TAMAÑO IRIS MANU... OBTURADOR Use las teclas BAL BLANCO [Izquierda, derecha, ESPECIAL AUTO FOCO UNOAF Arriba, Abajo] D-ZOOM POSICIÓN SALIDA SALIR POSICIÓN MANU Si el objeto estuviera en movimiento se vería borroso. Si el menú IRIS se ajusta a MANU, aparece el submenú de ajuste manual para abrir y Si pulsa las teclas izquierda/derecha continuamente, la velocidad aparecerá... -
Seite 105: Bal Blanco
BAL BLANCO BAL BLANCO El menú BAL BLANCO asegura que el blanco está calibrado normalmente bajo La luz se mide en temperaturas del color y se expresan generalmente en unidades de cualquier condición de temperatura del color. Cuando el menú BAL BLANCO se fija al Kelvin (°k). -
Seite 106: Especial
- MF : Es el modo Maual del enfoque, el usuario ajusta el foco manualmente. pantalla reducida a 1/16. - UNOAF : En modo de UNOAF, el SCC-641(P) enfoca automáticamente solamente -Espejo : Invierte la señal de salida de vídeo de izquierda a derecha. -
Seite 107: Preset
PRESET (Preselección) PROG POSICIÓN PRESET NO.0 Desde “PROG POSICIÓN...” presione [ ENTER ] para entrar PROG PAN/TILT Un total de 128 preset está disponible, en el preset se puede programar: la posición PROG ZUMBIDO/FOCO en el submenú PAN/TILT y FOCUS/ZOOM para fijar la PAN/TILT y de Zoom/Foco, y todas las funciones del vídeo asociado. -
Seite 108: Auto Pan
MODO AUTO PROG STOP Incluye as funciones de AUTO PAN y RONDA. Desde AUTO PAN entre en “PROG STOP...” TERMINARI! presionando [ ENTER ], aparecerá una pantalla con el AUTO PAN mensaje SET END parpadeando seleccione el fin del AUTOPAN con el joystick. Presione [ ENTER ] otra Después de programar el comienzo y fin de los dos parámetros (PAN/TILT) , rota vez para volver al menú... -
Seite 109: Ronda
RONDA ALARMA PROG Esto es una función para programar un recorrido manual elegido por el usuario. Se Consiste en 4 entradas de ALARMAS y 3 salidas de ALARMAS. Puede detectar una entrada de información de ALARMA desde un detector exterior y puede pueden programar parámetros de PAN/TILT, ZOOM y FOCO. -
Seite 110: Altra Prog
PROG SAL ALARMA ALTRA PROG SALIDA ALARMA Asigna las entradas de alarma a las 3 salidas de ALARMA1 VUELTA ORIG ALARMA2 ALARMA. ALARMA3 ALARMA4 MOVI Cuando pasa un cierto tiempo sin realizar ninguna orden de movimiento desde el teclado SSC-1000, la cámara se mueve a la localización del punto inicial SALIDA SALIR automáticamente. -
Seite 111: Especificaciones De Producto
RESET CÁM Especificaciones de producto RESET CÁM borra todos los ajustes que se han hecho hasta el momento y restaura la SCC-641 configuración predeterminada de fábrica. CONTENIDOS ITEM Aparece el mensaje “RESET CÁMARA?” cuando usted selecciona RESET CÁM. - DOME combinando cámara y zoom Tipo de producto Seleccione “CANCELAR”... - Seite 112 SCC-641P Atención ITEM CONTENIDOS - DOME combinando cámara y zoom Tipo de producto El copyright del manual es propiedad de Samsung Electronics Co., Ltd. • - 24 VAC± 10% (50Hz± 0.3Hz) Alimentación - 18W Consumo El manual no se podrá reproducir de forma electrónica, mecánica, •...
- Seite 113 SmartDome Camera SCC-641(P) Istruzioni per l’uso...
-
Seite 114: Norme Di Sicurezza
è acquistato l’apparecchio oppure al centro di assistenza più vicino. Non smontare né modificare il prodotto in alcun modo. (Samsung non è responsabile di problemi causati da alterazioni non autorizzate o da tentativi di riparare l’apparecchio.) -
Seite 115: Prima Dell'uso
Set-up. Si consiglia a tutti gli utenti del modello SCC-641(P), sia quelli esperti che hanno già utilizzato simili telecamere in precedenza, sia quelli meno esperti, di leggere il manuale prima dell’uso. - Seite 116 3-14 Introduzione al modello SCC-641 (P) -AUTO FOCUS 3-15 Collocazione dei comandi di SCC-641 (P) -D-ZOOM 3-15 Collocazione dei comandi di SCC-641 (P) – Fronte -USCITA 3-15 Collocazione dei comandi di SCC-641 (P) – Retro PRESET 3-16 CONNESSIONE ADATTATORE AUTOMODE...
-
Seite 117: Capitolo 1 Descrizione Di Scc-641 (P)
Il modello SCC-641 (P) dispone di una funzione di Allarme per le situazioni di allerta; per spostare la telecamera nella direzione desiderata, è possibile controllare le funzioni ZOOM-IN e ZOOM-OUT anche a distanza. - Seite 118 Collocazione dei comandi RETRO FRONTE...
-
Seite 119: Impostazioni Preliminari
L’impostazione del commutatore DIP-switch corrisponde all’esempio sottostante. Es. Indirizzo telecamera (CAMERA ADDR): se è su 1, regolare le impostazioni come nel riquadro. Tabla de adaptador de la SCC-641(P) SW500 Impostazioni del Protocollo di comunicazione. Utilizzare il numero PIN 5~8 del modulo SW 501 per impostare il Protocollo di comunicazione. -
Seite 120: Impostazioni Di Terminazione Rs-422A/Rs
Impostazioni di terminazione RS-422A/RS-485 IMPOSTAZIONI DI SELEZIONE identificativo ricevitore SW500-1 SW500-2 SW500-3 SW500-4 SW500-5 SW500-6 SW500-7 SW500-8 Come illustrato nella mappa della struttura, quando il Controller e il modulo RS 422A/RS- 485 sono connessi, le operazioni di terminazione debbono essere effettuate in base all’impedenza opposta dal cavo in ognuna delle uscite della linea di trasmissione, al fine di trasferire i segnali a lunga distanza controllando però... - Seite 121 identificativo ricevitore SW500-3 SW500-4 SW500-5 SW500-6 SW500-7 SW500-8 identificativo ricevitore SW500-1 SW500-2 SW500-3 SW500-4 SW500-5 SW500-6 SW500-7 SW500-8 SW500-1 SW500-2 1-13 1-14...
- Seite 122 identificativo ricevitore SW500-1 SW500-2 SW500-3 SW500-4 SW500-5 SW500-6 SW500-7 SW500-8 identificativo ricevitore SW500-1 SW500-2 SW500-3 SW500-4 SW500-5 SW500-6 SW500-7 SW500-8 1-15 1-16...
-
Seite 123: Installazione Di Scc-641 (P)
In questo capitolo, ci concentreremo sui controlli da effettuarsi prima di procedere all’installazione; sui requisiti ambientali per l’installazione; sulle precauzioni da prendersi durante la procedura di installazione del modello SCC-641 (P). In seguito, illustreremo la procedura di installazione di SCC-641 (P) e la connessione dei cavi. SCC-641(P) Mensola di supporto Manuale dell’utente... -
Seite 124: Precauzioni Di Installazione E Uso
Precauzioni di installazione e uso Non posizionare SCC-641 (P) contro la luce del sole. Sia in funzione, sia spenta, SCC-641 (P) non deve mai stare rivolta verso la Non cercare di disassemblare SCC-641 (P). luce del sole. SCC-641 (P) va usata con cautela nelle vicinanze di riflettori o Rimuovendo le viti o il coperchio, si rischia una scossa elettrica. -
Seite 125: Preparazione Dei Cavi
SCC-641 (P). Cavo video Il cavo di SCC-641 (P) è un cavo con innesto a baionetta (BNC) che connette il terminale video (video output) con la porta di connessione (video input) del monitor. -
Seite 126: Installazione Di Scc-641 (P)
4. [Figure 3-4] Connettere i vari cavi all’ADATTATORE DELLA TELECAMERA (vedi Installazione di SCC-641 (P) pagg. 2-6) 1. [Figura 1] Installare la struttura sul soffitto (Fare riferimento alle istruzioni di Installazione per valutare la lunghezza della struttura) * Realizzato sul posto dal costruttore della struttura... -
Seite 127: Descrizione Del Menù Di Setup
* Utilizzare le viti (BH M3XL8) per connettere la TELECAMERA con l’ADATTATORE affinché non si muovano. In questo capitolo, ci concentreremo sul menù di Setup di SCC-641 (P). Per prima cosa, vedremo la struttura del menù nel suo complesso, [figura 6] per poi soffermarci sulle funzioni di ogni singolo menù. -
Seite 128: Struttura Del Menù Di Setup
USCITA ESCI/SALVA CON USCITA AUX OUT1 Attenzione: OUT2 La SCC-641 è dotata di una funzione di calibrazione automatica per il OUT3 potenziamento della precisione del motore PAN/TILT. USCITA ESCI/SALVA La funzione di calibrazione automatica visualizza A.C sullo schermo e ALTRA PROG... -
Seite 129: Id Camera
ESCI ID CAMERA Il menù ID CAMERA assegna a SCC-641 (P) un numero di identificazione che compare sul monitor in stato di connessione. Dal menù PROG CAMERA, posizionare il cursore su ID CAMERA, selezionare ON e premere [Enter]. A questo punto, viene visualizzata una schermata per la scelta del numero di identificazione di SCC-641 (P). -
Seite 130: Sync
VEL ZOOM ACTIVITY DET (personalizzata). Se il menù “ZONA” è impostato su PRESET, la funzione di Motion Detection [Enter] sarà applicata sulle parti fondamentali dello schermo SCC-641 (P) predefinite. Spostando il FASE (000) ---- ---- cursore del menù ZONA su UTIL e premendo [ENTER], l’utente potrà scegliere l’ampiezza e... -
Seite 131: Uscita
USCITA MENU PROG VIDEO Il menù USCITA si usa per uscire dal menù CAMERA di SCC-641 (P) e tornare al IRIS MAIN MENU (menù principale). Il livello di output video (attività video) del monitor può essere controllato dalla lente IRIS -ESCI: ignora le informazioni modificate e ripristina le informazioni precedentemente (lente con obiettivo a diaframma), in base al livello di luce. -
Seite 132: Shutter
SHUTTER (otturatore) si trova in modalità AUTO low speed shutter (otturatore nonché lo shutter AUTO (automatico) a bassa velocità di SCC-641 (P) e lo shutter FISSO a automatico a bassa velocità), il valore del menù AGC non può essere modificato. -
Seite 133: Bil Bianco
BIL BIANCO BIL BIANCO Il menù di BIL BIANCO serve perché il bianco sia calibrato in modo normale a qualunque I gradi di luminosità sono generalmente indicati come temperature di colore, ed temperatura di colore. Quando il menù di BIL BIANCO si trova in modalità ATW, il espresse in gradi Kelvin (°K). -
Seite 134: Special
1/16. - UNOAF: nella modalità UNOAF, SCC-641 (P) focalizza automaticamente solo quando si muove o si arresta. Quando SCC-641 (P) non è in movimento, la funzione è -MIRROR: inverte il segnale output video. identica alla modalità MF, mentre quando è in movimento o in fase di arresto, è... -
Seite 135: Preset
PRESET PROG POSIZIONE PRESET NO.0 PROG ORR/VERT Sono disponibili ben 128 funzioni predefinite, tra cui una serie di posizioni PAN/TILT e Da “Position Set...” premere [ENTER] per entrare nella PROG ZOOM/FUOCO Zoom/Focus, nonché impostazioni relative alle condizioni e al monitoraggio dello schermata ORR/VERT, PROG ZOOM/FUOCO ed schermo (0 ~ 127). -
Seite 136: Auto Pan
MODO AUTO FINE PROG Le funzioni AUTO PAN e PERCORSO sono in MODO AUTO. PROG FINE! Da “FINE PROG”, premendo [ENTER], si accede alla AUTO PAN schermata dell’impostazione FINE PROG. Regolare la Dopo aver selezionato le collocazioni dei due punti (ORR/VERT) di avvio (START) e collocazione ORR/VERT e premere [ENTER] per fine (END), si continua fino ad impostare la velocità... -
Seite 137: Percorso
PERCORSO PROG ALLARMI Si tratta di una funzione di replay che consente di impostare le funzioni manuali Questa funzione comprende 4 INPUT DI ALLARMI e 3 OUTPUT DI ALLARMI. Il sistema può come ORR, VERT, ZOOM e FUOCO in 30 secondi. riconoscere un input di ALLARMEI attraverso i SENSORI esterni, funziona attraverso la funzione PRESET o PERCORSO ed emette i segnali output di ALLARMI OUT. -
Seite 138: Altra Prog
ALLARMI OUT ALTRA PROG ALLARMI OUT Ad ogni input di ALLARMI corrisponde uno dei 3 ALLARMI PTI POS INIZ ALLARMI1 ALLARMI2 OUT. ALLARMI3 Quando non sono stati inseriti COMANDI per un certo periodo di tempo, la telecamera ALLARMI4 ACTIVITY torna automaticamente alla INIZIALE. Nel menu “POS INIZIALE”... -
Seite 139: Specifiche Di Prodotto
CAM RESET Specifiche di prodotto Il comando “CAM RESET” azzera tutte le modifiche apportate e ripristina le impostazioni predefinite in fabbrica. SCC-641 Quando si seleziona “CAM RESET”, viene visualizzato il messaggio “CAMERA Funzione Contenuto RESET?”. Selezionare "ANNULLA" per ritornare al display del menu d’impostazione,... - Seite 140 - AC 24 ± 10% (50Hz ± 0.3Hz) Consumo di energia - 18W Tipologia di trasmissione - Sistema standard colore PAL • Il copyright del manuale è di proprietà di Samsung Electronics Dispositivo immagine - 1/4 inch IT CCD Co., Ltd. - 752(H) x 582(V) Pixel effettivi •...