Werbung
Verfügbare Sprachen
Verfügbare Sprachen
Quicklinks
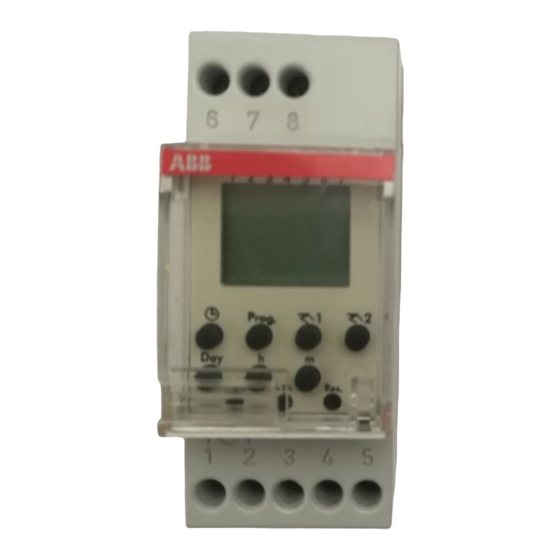
DTS 7/1
EA 555 1
GH V021 5551 R0002
DTS 7/2
EA 556 9
GH V021 5569 R0003
ISTRUZIONI PER IL
MONTAGGIO ED USO
INSTALLATION AND
OPERATION INSTRUCTIONS
WARTUNGS-UND
GEBRAUCHSANLEITUNG
INSTRUCTIONS POUR LE MONTAGE
ET L'UTILISATION
INTRUCCIONES PARA MONTAJE
Y EMPLEO
INSTRUÇÕES PARA A MONTAGEM
E UTILIZAÇÃO
ИНСТРУКЧИИ ПО МОНТАЖУ
System pro M
1
3
5
4
+ 1 h
5
m i n
6
.
s e c
.
C H
1 :
C H
2 :
F i x
F i x
P r o
g .
1
D a y
h
m
C l e
a r
+ 1 h
R e s
1
7
2
.
1 0
Werbung

Verwandte Anleitungen für ABB DTS 7/1


Inhaltszusammenfassung für ABB DTS 7/1
- Seite 1 DTS 7/1 System pro M EA 555 1 GH V021 5551 R0002 DTS 7/2 EA 556 9 GH V021 5569 R0003 ISTRUZIONI PER IL MONTAGGIO ED USO INSTALLATION AND OPERATION INSTRUCTIONS + 1 h m i n s e c...
- Seite 2 Inoltre la serie di interruttori orari DTS è provvista di una memo- ria permanente (eeprom) che assicura il mantenimento dei pro- grammi impostati indipendentemente dall’eventuale assenza di tensione. 1) Istruzioni di montaggio 1° 2° DIN EN 50022 (35 mm 2) Schema di collegamento DTS 7/1...
- Seite 3 DTS 7/2 3) Messa in funzione L’orario e la data sono già impostati dal costruttore in fabbrica Premere una volta per almeno due secondi il tasto “orologio” l’interruttore orario è ora attivo (appare quindi l’ora attuale) Nota: L’interruttore orario funziona infatti a risparmio di energia “Energy Saving”.
- Seite 4 Premere più volte il tasto “h” per impostare le ore Premere più volte il tasto “m” per impostare i minuti Premere una volta il tasto “orologio” per terminare l’impostazione 4b) Modifica della data attuale (anno - mese - giorno) Premere una volta il tasto “orologio” (adesso i due punti tra ora e minuti sono fissi non lampeggiano) 3 4 5 6 7 date...
- Seite 5 5) Programmazione (comandi ON - comandi OFF) Nota: Il numero massimo di comandi (ON/OFF) è 20 (Fr20) per il DTS 7/1 e di 40 (FR40) per il DTS 7/2 Prog. Premere più volte il tasto “Prog.” finchè sul display appare lo spazio libero di memoria Premere il tasto “h”...
- Seite 6 Premere il tasto “m” per impostare i minuti Premere più volte il tasto “mano1” (canale ch1) oppure solo per DTS 7/2 “mano2” (canale ch2) per impostare lo stato di commutazione ON o OFF finchè sul display appare: = ON oppure = OFF CH1: CH1:...
- Seite 7 6) Commutazioni temporanee in “ON” o “OFF” (senza variare la programmazione preimpostata) Premere più volte il tasto “mano1” (canale ch1) oppure solo per DTS 7/2 “mano2” (canale ch2) per selezionare una delle seguenti scelte possibili = Automatico = Funz. manuale = Funz.
- Seite 8 7) Impostazione Ora legale / Ora solare 7a) Impostazione manuale ora legale Premere una volta il tasto “+1h” (sul dispay appare quindi il nuovo orario ed il simbolo +1h CH1: Nota bene: Per tornare all’ora solare ripetere l’operazione. 7b) Visualizzazione del periodo di inizio e fine ora legale (preimpostata dal costruttore) Premere una volta il tasto “orologio”...
- Seite 9 Prog. Premere una volta il tasto “Prog.” per visualizzare il mese e il giorno di FINE ora legale ora legale Premere una volta il tasto “orologio” per terminare la visualizzazione 7c) Variazione dell’impostazione inizio e fine ora legale (primpostata dal costruttore) Premere una volta il tasto “orologio”...
- Seite 10 Prog. Premere una volta il tasto “Prog.” (sul display appare il mese e il giorno di inizio ora legale) Premere più volte il tasto “m” per impostare il mese in cui desidera INIZI l’ora legale Premere più volte il tasto “h” per impostare il giorno in cui si desidera INIZI l’ora legale Prog.
- Seite 11 8) Lettura, Modifica e Cancellazione dei programmi preimpostati 8a) Lettura Premere più volte il tasto “Prog.” per leggere Prog. i programmi preimpostati finchè non appare sul display “Fr xx” che indica il numero di spazi ancora liberi di memoria Premere una volta il tasto “orologio” per terminare la lettura 8b) Modifica Prog.
- Seite 12 8d) Cancellazione di tutta la programmazione preimpostata Prog. Premete più volte il tasto “Prog.” finchè sul display non appare sul display “Fr xx” Clear Premere una volta il tasto “Clear” finchè sul display non appare “CL” Clear Tenere premuto per circa 3 secondi il tasto “CL” per eliminare definitivamente tutti i programmi preimpostati Premere una volta il tasto “orologio”...
-
Seite 13: Indicazioni Del Display
10) LEGENDA OPERATORI Impostazione programma Interruttore manuale (canale 1 e canale 2) Impostazione orario Prog. Termine impostazione programma Clear Res. Reset Per scegliere il giorno/giorni Impostazione minuti, settimanali mese, anno Per cancellare i tempi Commutazione di comando ora solare/ora legale Impostazione ore, giorno, anno 11) INDICAZIONI DEL DISPLAY 1 2 3 4 5 6 7... - Seite 14 Frequenza di funzionamento [Hz] 50 / 60 Memorie (ON/OFF) [N°] 20 (Fr20) N° canali [ch] 1 (DTS 7/1); 2 (DTS 7/2) Intervallo minimo tra commutazione (ON/OFF) [min.] Classe di precisione [sec.] ± 2,5 / giorno Grado di protezione [IP] Riserva di carica batteria al litio...
- Seite 15 (contacts) model. The series of DTS time switches is also equipped with a perma- nent memory (eeprom) that maintains program settings even during a power outage. 1) Assembly instructions 1° 2° DIN EN 50022 (35 mm 2) Connection diagram DTS 7/1...
- Seite 16 DTS 7/2 3) Start-up The time and date are already set by the manufacturer. Push the "clock" button once for at least two seconds. The time switch is now active (the current time is shown). Note: The time switch operates based on an "Energy Saving" design.
- Seite 17 Push the "h" button the number of times needed to set the hour. Push the "m" button the number of times needed to set the minutes. Push the "clock" button once to complete the program setting. 4b) Current date change (year - month - day) Push the "clock"...
- Seite 18 5) Programming (ON commands - OFF commands) Nota: The maximum number of commands (ON/OFF) is 20 (Fr20) for DTS 7/1 and 40 (FR40) for DTS 7/2 Prog. Push the "Prog." button until the memory free space is indicated on the display.
- Seite 19 Push the "m" button to set the minutes. Push the "hand1" button several times (channel ch1) or only for DTS 7/2 "hand2" (channel ch2) to set the ON or OFF switching until the display indicates: = ON = OFF CH1: CH1: Alternate when pushing the "Day"...
- Seite 20 6) Temporary switching in "ON" or "OFF" (without changing the previous programming settings) Push the "hand1" button several times (channel ch1) or only for DTS 7/2 "hand2" (channel ch2) to select one of the following choices: manual Fixed = automatic function function = OFF...
- Seite 21 7) Daylight saving time/True solar time setting 7a) Daylight saving time manual setting Push the "+1h" button once (the display will indicate new hour and simbol "+1h") CH1: Note: Repeat the operation to return to true solar time. 7b) Daylight saving time start and end period display (set by the manufacturer) Push the "clock"...
- Seite 22 Prog. Push the "Prog." button once to display the daylight saving time END month and day. Push the "clock" button once to end the display. 7c) Daylight saving time start and end setting change Push the "clock" button once (the two points between hour and minutes remain on and do not flash).
- Seite 23 Prog. Push the "Prog." button once (the display will indicate the daylight saving time start month and day). Push the "m" button several times to set the month when the daylight saving time BEGINS. Push the "h" button several times to set the day when the daylight saving time BEGINS.
- Seite 24 8) Reading, Changing and Cancelling program settings 8a) Reading Push the "Prog." button several times to read the Prog. program settings until the display indicates "Fr xx" which refers to the number of spaces still available in memory. Push the "clock" button once to end the reading operation.
- Seite 25 8d) Cancelling all program settings Prog. Push the "Prog." button several times until the display indicates "Fr xx". Clear Push the "Clear" button once until the display indicates "CL". Clear Keep pushing the "CL" button for about 3 seconds to eliminate all program settings. Push the "clock"...
-
Seite 26: Display Indications
10) OPERATOR LEGEND Program setting Manual switch Time setting Prog. Program setting term Clear Res. Reset To select weekly Minutes, month, day/days year setting To cancel command True solar times time/daylight saving Hour, day, year setting 11) DISPLAY INDICATIONS 1 2 3 4 5 6 7 hour - current time = weekdays... - Seite 27 12) Technical Data Operating voltage 230c.a. +10% -15% Contact capacity 16 (ohmic load) 2,5 (inductive load) 1000 (with fluorescent bulbs) Nature of contact Switching (potential free) Operating frequency [Hz] 50 / 60 Memory (ON/OFF) [N°] 20 (Fr20) No. of channels [ch] Minimum switching interval (ON/OFF)
- Seite 28 Wochenversionen mit einem oder mehreren Kanälen (Kontakten). Die Reihe der Zeitschaltuhren DTS verfügt außerdem über einen permanenten Speicher (EEPROM), der die Beibehaltung der ein- gestellten Programme unabhängig von der Spannungsversorgung sichert. 1) Einbauanleitung 1° 2° DIN EN 50022 (35 mm 2) Anschlussplan DTS 7/1...
- Seite 29 DTS 7/2 3) Inbetriebnahme Uhrzeit und Datum sind bereits vom Hersteller im Werk eingestellt. Ein Mal mindestens zwei Sekunden lang die Taste "Uhr" drücken. Die Zeitschaltuhr ist jetzt aktiv (es erscheint die aktuelle Uhrzeit). Anm.: Die Zeitschaltuhr funktioniert im Energiesparmodus "Energy Saving".
- Seite 30 Die Taste "h" mehrmals drücken, um die Stunden einzustellen Die Taste "m" mehrmals drücken, um die Minuten einzustellen Einmal die Taste "Uhr" mehrmals drücken, um die Einstellung zu beenden 4b) Änderung des aktuellen Datums (Jahr - Monat - Tag) Einmal die Taste "Uhr" mehrmals drücken (die zwei Punkte zwischen den Stunden und Minuten blinken nicht) 3 4 5 6 7...
- Seite 31 Einmal die Taste "Prog." mehrmals 3 4 5 6 7 Prog. date drücken (zur Bestätigung des eingestellten Jahres), auf dem Display erscheint jetzt der Monat und der Tag Die Taste "h" mehrmals drücken, um den laufenden Tag einzustellen Die Taste "m" mehrmals drücken, um den laufenden Monat einzustellen Einmal die Taste "Uhr"...
- Seite 32 Die Taste "m" mehrmals drücken, um die Minuten einstellen Die Taste "Hand1" (Kanal ch1) mehrmals drücken, um den Umschaltstatus ON oder OFF einzustellen, bis auf dem Display erscheint: = ON oppure = OFF CH1: CH1: Abwechselnd die Taste "Day" und die 3 4 5 6 7 Taste "Prog"...
- Seite 33 6) Gleichzeitiges Umschalten in "ON" oder "OFF (ohne die voreingestellte Programmierung zu ändern) Die Taste "Hand1" (Kanal ch1) mehrmals drücken, um eine der folgenden möglichen Auswahlen zu wählen Fix - fixer = Automatik = Handbetrieb Betrieb = OFF = ON = fix ON = ON = OFF...
- Seite 34 7) Einstellung Sommerzeit / Winterzeit 7a) Manuelle Einstellung Sommerzeit Ein Mal die Taste "+1h" drücken (auf dem Display erscheint die neue Uhrzeit und das Zeichen +1h CH1: Bitte beachten: Zur Rückkehr zur Winterzeit die Tätigkeit wiederholen. 7b) Anzeige von Anfang und Ende der Sommerzeit (vom Hersteller voreingestellt) Einmal die Taste "Uhr"...
- Seite 35 Prog. Einmal die Taste "Prog." drücken, um den Monat und Tag des ENDES der Sommerzeit anzuzeigen Einmal die Taste "Uhr" drücken, um die Anzeige zu beenden 7c) Änderung der Einstellung von Anfang und Ende der Sommerzeit (vom Hersteller voreingestellt) Einmal die Taste "Uhr" drücken (die zwei Punkte zwi- schen den Stunden und Minuten blinken nicht) 3 4 5 6 7 date...
- Seite 36 Prog. Einmal die Taste "Prog." mehrmals drücken (auf dem Display erscheint der Monat und der Tag des Beginns der Sommerzeit) Die Taste "m" mehrmals drücken, um den Monat ein- zustellen, an dem die Sommerzeit BEGINNEN soll Die Taste "h" mehrmals drücken, um den Tag einzu- stellen, an dem die Sommerzeit BEGINNEN soll Prog.
- Seite 37 8) Lesen, Ändern und Löschen der voreingestellten Programme 8a) Lesen Die Taste "Prog." drücken, um die voreingestellten Prog. Programme zu lesen, bis auf dem Display "Fr xx" erscheint, um den noch freien Speicherplatz anzuzeigen Einmal die Taste "Uhr" mehrmals drücken, um das Lesen zu beenden 8b) Ändern Prog.
- Seite 38 8d) Löschen aller voreingestellten Programme Prog. Die Taste "Prog." mehrmals drücken, bis auf dem Display "Fr xx" erscheint Einmal die Taste "Clear" mehrmals Clear drücken, bis auf dem Display "CL" erscheint Die Taste "CL" etwa 3 Sekunden lang Clear gedrückt halten, um alle voreingestellten Programme endgültig zu löschen Einmal die Taste "Uhr"...
-
Seite 39: Tastenerklärung
10) TASTENERKLÄRUNG Programmeinstellung Manueller Schalter Uhrzeiteinstellung Prog. Ende der programme- instellung Clear Res. Reset Zur Wahl von tag/Wochentagen Einstellung Minuten, Monat, Jahr Zum Löschen der Umschalten Befehlszeiten Winter-/Sommerzeit Uhrzeit, Tag Jahr einstellen 11) DISPLAY-ANZEIGEN 1 2 3 4 5 6 7 aktuelle - orario attuale = Wochentage Date= Datum... - Seite 40 (Leuchtstofflampen) Kontakte Wechsler (Potentialfrei) Betriebsfrequenz [Hz] 50 / 60 Speicher (ON/OFF) [N°] 20 (Fr20) Kanalanzahl [ch] 1(DTS 7/1); 2 (DTS 7/ 2) Mindestabstand zwischen Umschalten (ON/OFF) [min.] Ganggenauigkeit [sec.] ± 2,5 / Tag Schutzart [IP] Ladereserve Lithiumbatterie Betriebstemperatur [°C] von- 25 bis + 55...
- Seite 41 (contacts). De plus, la série de disjoncteurs horaires DTS contient une mémoire permanente (eeprom) qui garantit la con- servation des programmes formulés, indépendamment de l’ab- sence éventuelle de tension. 1) Instructions de montage 1° 2° DIN EN 50022 (35 mm 2) Schéma de connexion DTS 7/1...
- Seite 42 DTS 7/2 3) Mise en service L’heure et la date sont déjà programmées par le fabricant en usine. Appuyer une fois pendant au moins deux secondes- sur la touche “horloge” l’interrupteur horaire est actif (l’heure actuelle est affichée) Nota: En effet, l’interrupteur horaire fonctionne avec la modalité d’épargne d’énergie “...
- Seite 43 Appuyer plusieurs fois sur la touche “h” pour program- mer les Appuyer plusieurs fois sur la touche “m” pour pro- grammer les Appuyer une fois sur la touche “horloge“ pour ache- ver la programmation 4b) Modification de la date actuelle (année - mois - jour) Appuyer une fois sur la touche “horloge”...
- Seite 44 5) Programmation commandes ON - commandes OFF) Nota: le nombre maxi: de commandes (ON/OFF) est 20 (Fr20) per il DTS 7/1 e di 20 (FR20) per il DTS 7/2 Prog. Appuyer plusieurs fois sur “Prog.” jusqu’à ce que le display affiche l’espace libre de mémoire...
- Seite 45 Appuyer sur la touche”m” pour programmer les minutes Appuyer plusieurs fois sur la touche “mano1” (canale ch1) pour programmer l’état l’état de commutation ON ou OFF, jusqu’à ce que le display affiche: = ON oppure = OFF CH1: CH1: Appuyer alternativement sur la touche 3 4 5 6 7 “Day”...
- Seite 46 6) Commutations provisoires en “ON” ou “OFF” (sans varier la programmation préprogrammée) Appuyer plusieurs fois sur la touche “mano1” ou uniquement pour DTS 7/2 “mano2” (canale ch2) pour sélectionner l’un des choix possibles = Automatico = Funz. manuale = Funz. fisso automatique fonct.
- Seite 47 7) Programmation heure légale / Heure solaire 7a) Programmation manuelle de l’heure légale Appuyer une fois sur la touche “+1h” (le display affiche de nouveau l’horaire et le symbole +1h CH1: Nota bene: Répéter l’opération pour retourner à l’heure solaire 7b) Visualisation de la période début et fin de l’heure légale (préprogrammée par le fabricant) Appuyer une fois sur la touche “horloge”...
- Seite 48 Prog. Appuyer une fois sur la touche “Prog.” pour visualiser le mois et le jour de FIN de l’heure légale Appuyer une fois sur la touche “horloge” pour termi- ner la visualisation 7c) Variation de la programmation de début et de fin de l’heure légale (préprogrammée par le fabricant) Appuyer une fois sur la touche “horloge”...
- Seite 49 Prog. Appuyer une fois sur la touche “Prog.” (le display affi- che le mois et le jour de début de l’heure légale) Appuyer plusieurs fois sur la touche “m” pour programmer le mois de DEBUT de l’heure légale Appuyer plusieurs fois sur la touche “h” pour program- mer le jour de DEBUT de l’heure légale Prog.
- Seite 50 8) Lecture, Modification et Annulation des programmes préprogrammés 8a) Lecture Appuyer plusieurs fois sur la touche “Prog.” pour lire Prog. les programmes pré-programmés jusqu’à ce que le display affiche “Fr xx” pour indiquer le nombre d’espaces encore libres de mémoire Appuyer une fois sur la touche “horloge”...
- Seite 51 8d) Annulation de toute la programmation préprogrammée Prog. Appuyer plusieurs fois sur la touche “Prog.” jusqu’à ce que le display affiche “Fr xx” Appuyer une fois sur la touche “Clear” Clear jusqu’à ce que le display affiche “CL” Appuyer pendant 3 sec. environs sur la touche “CL” Clear pour éli-miner définitivement tous les programmes préprogrammés...
- Seite 52 10) LEGENDE OPERATEURS Etablissement du programme Interrupteur manuel Programmation horaire Prog. Finde l'établissement du programme Clear Res. Initi Pour choisir jour/jours Programmation hebdomadaires minutes, mois, année Pour annuler les temps Commutation de commande heure solaire/légale Programmation heures, jour, année 11) INDICATIONS DUL DISPLAY 1 2 3 4 5 6 7 heure - actuelle = jours de la seimane...
- Seite 53 Frequence de fonctionnement [Hz] 50 / 60 Mémoires (ON/OFF) [N°] 20 (Fr20) N° canaux [ch] 1 (DTS 7/1); (DTS 7/2) Intervalle minimum entre commutation (ON/OFF) [min.] Classe de précision [sec.] ± 2,5 / jour Degré de protection [IP] Réserve de charge Batterie au lithium 3 Température...
- Seite 54 DTS cuenta con una memoria permanente (eeprom) que asegura el mantenimiento de los programas en el caso de una eventual ausencia de tensión. 1) Instrucciones de montaje 1° 2° DIN EN 50022 (35 mm 2) Esquema de conexión DTS 7/1...
- Seite 55 DTS 7/2 3) Puesta en marcha La hora y la fecha ya han sido programados en fábrica. Pulsar una vez y por lo menos durante dos segundos la tecla “reloj”. El interruptor horario se activa (aparece la hora actual). Nota: El interruptor horario funciona en modo con ahorro de energía “Energy saving”.
- Seite 56 Pulsar varias veces la tecla “h” para programar las horas. Pulsar varias veces la tecla “m” para programar los minutos. Pulsar una vez la tecla “reloj” para terminar la programación. 4b) Modificación de la fecha actual (año - mes - día): Pulsar una vez la tecla “reloj”...
- Seite 57 5) Programación (mandos ON - mandos OFF) Nota: El número máximo de maniobras (ON/OFF) es de 40 (Fr40). per il DTS 7/1 e di 20 (FR20) per il DTS 7/2 Prog. Pulsar varias veces la tecla “Prog.”...
- Seite 58 Pulsar la tecla “m” para programar los minutos. Pulsar varias veces la tecla “mano 1” (canal ch1), para programar el estado de conmutación ON o bien OFF hasta que en el display aparezca: = ON oppure = OFF CH1: CH1: Pulsar, alternando, la tecla “Day”...
- Seite 59 6) Maniobras temporales en “ON” u “OFF” (sin variar la programación previamente programada) Pulsar dos veces la tecla “mano1” (canal ch1), para seleccionar una de las siguientes opciones. = Automático = Funz. Manual = Funz. Fijo = OFF = ON = fijo ON = ON = OFF...
- Seite 60 7) Programación del horario verano/invierno 7a) Programación manual del horario de verano: Pulsar una vez la tecla “+1h” (en el display aparece entonces la nueva hora y el símbolo +1h) CH1: Atención: Para volver al horario anterior, repetir la operación. 7b) Visualización del período de comienzo y final del horario de verano/invierno (previamente programa da por el fabricante):...
- Seite 61 Prog. Pulsar una vez la tecla “Prog.” para visualizar el mes y el día de FINAL del horario de verano. Pulsar una vez la tecla “reloj” para terminar la visualización. 7c) Variación de la programación de comienzo y final del horario de verano (previamente programada por el fabricante): Pulsar una vez la tecla “reloj”...
- Seite 62 Prog. Pulsar una vez la tecla “Prog.” (en el display aparece el mes y el día de comienzo del horario de verano) Pulsar varias veces la tecla “m” para programar el mes en el que se desea que COMIENCE el horario de verano Pulsar varias veces la tecla “h”...
- Seite 63 8) Lectura, modificación y anulación de los programas previamente programados 8a) Lectura: Pulsar varias veces la tecla “Prog.” Prog. para leer los programas previamente programados hasta que no aparezca en el display “Fr xx” que indica el número de espacios que aún están libres de memoria. Pulsar una vez la tecla “reloj”...
- Seite 64 8d) Anulación de toda la programación previamente programada Prog. Pulsar varias veces la tecla “Prog.” hasta que en el display no aparezca“Fr xx”. Clear Pulsar una vez la tecla “Clear” hasta que en el display no aparezca “CL”. Manteneer apretada durante unos 3 segundos Clear la tecla “CL”...
-
Seite 65: Indicaciones Del Display
10) INDICACIONES EN EL DISPLAY Tecla de programa Interruptor manual Programación Prog. horaria Final programa Clear Res. Reset Para elegir el día/días Programacíon minutos, semanales mes y año Para anular los Conmutación horario tiempos de mando verano/invierno Programacíon horas, día, año 11) INDICACIONES DEL DISPLAY 1 2 3 4 5 6 7 Horas - horario actual... - Seite 66 12) Datos Técnicos Tensión de empleo asignada Ue 230c.a. +10% -15% Intesidad de empleo asignada Ie 16 (carga óhmica) 2,5 (carga inductiva) 1000 (con lámparas fluorescentes) Tipo de contacto conmutado (libre de potencial) Frecuencia [Hz] 50 / 60 Maniobras (ON/OFF) [N°] 20 (Fr20) N°...
- Seite 67 Para além disso, a série de interruptores horários DTS está equi- pada com memória permanente (eeprom) que assegura a manu- tenção dos programas definidos independentemente da possível falta de energia. 1) Esquema de ligação 1° 2° DIN EN 50022 (35 mm 2) Esquema di conexão DTS 7/1...
- Seite 68 DTS 7/2 3) Preparação para o funcionamento A hora e a data já foram programados pelo Fabricante nas suas instalações. Premere una volta per almeno due secondi il tasto “orologio” O interruptor horário está agora ativo (portanto aparece a hora atual) Nota: O interruptor horário funciona, de facto, com poupança de energia “Energy Saviong”.
- Seite 69 Carregar várias vezes no botão “h” para programar as horas Carregar várias vezes no botão “m” para programar os minutos Carregar uma vez no botão “relógio” para terminar a programação 4b) Modificação da data atual (ano - mês - dia) Carregar uma vez no botão “relógio”...
- Seite 70 5) Programação (comandos ON - comandos OFF) Nota: O número máximo de comandos (ON/OFF) é de 40 (Fr40) per il DTS 7/1 e di 40 (FR40) per il DTS 7/2 Prog. Carregar várias vezes no botão “Prog”...
- Seite 71 Carregar no botão “m” para programar os minutos Carregar várias vezes no botão “mão 1” (canal ch1) para programar o estado de comutação ON ou OFF até que aparece no mostrador: = ON oppure = OFF CH1: CH1: Carregar alternadamente no botão 3 4 5 6 7 “Day”...
- Seite 72 6) Comutações temporárias em “ON” ou “OFF” (sem modificar a programação pré-definida) Carregar várias vezes no botão “mão 1” (canal ch1) ou, só para DTS 7/2 “mão 2” (canal ch2) para selec- cionar uma das seguintes opções possíveis = automático = func.
- Seite 73 7) Programação da Hora legal / Hora solar 7a) Programação anual da hora legal Carregar uma vez no botão “+1h” (aparece no mostrador a nova hora e o símbolo +1h) CH1: Note bem: Repetir a operação para tornar à hora solar 7b) Visualização do período de início e de fim da hora legal (pré-programado pelo fabricante) Carregar uma vez no botão “relógio”...
- Seite 74 Prog. Carregar uma vez no botão “Prog.” para visualizar o mês e o dia de FINAL da hora legal Carregar uma vez no botão “relógio” para terminar a visualização 7c) Variação da programação de início e de final da hora legal (pré-programada pelo fabricante) Carregar uma vez no botão “relógio”...
- Seite 75 Prog. Carregar uma vez no botão “Prog.” (aparece o mês e o dia do INÍCIO da hora legal no mostrador) Carregar várias vezes no botão “m” para programar o mês no qual se deseja que INICIE a hora legal Carregar várias vezes no botão “h” para programar o dia no qual se deseja que INICIE a hora legal Prog.
- Seite 76 8) Leitura, Modificação e Cancelamento dos programas pré-definidos 8a) Leitura Carregar várias vezes no botão “Prog.” Prog. para ler os programas pré-definidos até que aparece “Fr xx” no mostrador, que indica o número de espaços ainda livres na memória. Carregar uma vez no botão “relógio” para terminar a leitura 8b) Modificação Prog.
- Seite 77 8d) Cancelamento de toda a programação pré-definida Prog. Carregar várias vezes no botão “Prog.” até que apareça “Fr xx” no mostrador Clear Carregar uma vez no botão “Clear” até que apareça “CL” no mostrador Manter premido durante 3 segundos Clear o botão “CL”...
- Seite 78 10) LEGENDA OPERADORES Programação do programa Interruptor manual Programação da hora Prog. Final da programação do programa Clear Res. Reset Para seleccionar o dia/ dias Programação dos semanais minutos, mês, ano Para cancelar os Comutação hora tempos de comando solar/hora legal Programação das horas, dia, ano 11) INDICAÇÕES NO DISPLAY 1 2 3 4 5 6 7...
- Seite 79 Frequência de funcionamento [Hz] 50 / 60 Memórias (ON/OFF) [N°] 20 (Fr40) N° de canais [ch] 1 (DTS 7/1); 2 (DTS7/2) Intervalo mínimo entre comutação (ON/OFF) [min.] Classe de precisão [sec.] ± 2,5 / dia Grau de protecção [IP] Reserva de carga Pilha de lítio...
- Seite 80 типа, одно- и двухканальные (с одним или двумя контактами). Кроме того, таймеры серии DTS оснащаются постоянной памятью (eeprom), которая обеспечивает сохранение заданных программ независимо от возможных отключений напряжения. 1) Монтажные инструкции 1° 2° DIN EN 50022 (35 mm 2) Схема соединения DTS 7/1...
- Seite 81 DTS 7/2 3) Пуск в работу Время и дата задаются изготовителем на заводе Нажать один раз минимум на две секунды кнопку “часы” теперь выключатель-таймер подключен (появляется текущее время) Прим.: Выключатель-таймер работает в нергосберегающем режиме “Energy Saving” . 4) Изменение текущего времени и даты 4a) Изменение...
- Seite 82 Нажать несколько раз кнопку “h” для задания часа Нажать несколько раз кнопку “m” для задания минут Нажать один раз кнопку “часы” для завершения задания 4b) Изменение текущей даты (год - месяц - день) Нажать один раз кнопку “часы” (теперь изображение двоеточия между часом и минутами не...
- Seite 83 для завершения задания 5) Программирование (команды ВКЛ - команды ОТКЛ) Прим.: Максимальное число команд (ВКЛ/ОТКЛ) равно 20 (Fr20) per il DTS 7/1 e di 40 (FR40) per il DTS 7/2 Prog. Нажимать несколько раз кнопку “Prog. ” , пока на дисплее не...
- Seite 84 Нажать кнопку “m” для задания минут Нажимать несколько раз кнопку “рука1” (канал ch1) или (только для DTS 7/2) “рука2” (канал ch2) для задания состояния переключения ВКЛ или ОТКЛ пока на дисплее не появляется: = ON или = OFF CH1: CH1: Нажимать...
- Seite 85 6) Временные переключения на “ВКЛ” или “ОТКЛ” (без изменений заданной программы) Нажимать несколько раз кнопку “рука1” (канал ch1) или(только для DTS 7/2) “рука2” (канал ch2) для выбора одного из следующихвозможныхвариантов автоматический ручной режим постоянный режим = fisso ON ОТКЛ ВКЛ = fisso OFF ВКЛ...
- Seite 86 7) Задание летнего / солнечного времени 7a) Ручное задание летнего времени Нажать один раз кнопку “+1h” (на дисплее появляется новое время и символ +1h) CH1: Прим.: Для возврата к солнечному времени нужно повторить операцию. 7b) Выдача на дисплей периода начала и конца летнего времени...
- Seite 87 Prog. Нажать один раз кнопку "Prog." для выдачи на дисплей месяца и дня КОНЦА летнего времени Нажать один раз кнопку “часы” для завершения изображения 7c) Изменение задания начала и конца летнего времени (задано изготовителем) Нажать один раз кнопку “часы” (изображение двоеточия между часом и минутами...
- Seite 88 Prog. Нажать один раз кнопку “Prog.” (на дисплее появляется месяц и день начала летнего времени) Нажать несколько раз кнопку “m” для задания месяца НАЧАЛА летнего времени Нажать несколько раз кнопку “h” для задания дня НАЧАЛА летнего времени Prog. Нажать один раз кнопку “Prog.” (на дисплее появляе...
- Seite 89 8) Чтение, изменение и стирание заданных программ 8a) Чтение Нажимать несколько раз кнопку “Prog.” для Prog. чтения заданных программ, пока на дисплее не появляется “Fr xx” ,что означает количество еще свободных мест в памяти Нажать один раз кнопку “часы” для завершения чтения 8b) Изменение...
- Seite 90 8d) Стирание всей заданной программы Prog. Нажимать несколько раз кнопку “Prog. ” , пока на дисплее не появляется “Fr xx” Clear Нажать один раз кнопку “Clear” пока на дисплее не появляется “CL” Держать кнопку “CL” нажатой примерно 3 секунды Clear для...
- Seite 91 10) ПОЯСНЕНИЯ Задание программы Ручной выключатель Задание времени Prog. Конец задания программы Clear Res. Сброс Для выбора дня/дней Задание минут, недели месяца, года Для стирания Переключение времени команд летнего/солнечного времени Задание часа, дня, года 11) УКАЗАНИЯ НА ДИСПЛЕЕ 1 2 3 4 5 6 7 время...
- Seite 92 потенциала) Рабочая частота [Гц] 50 / 60 Объем памяти (ВКЛ/ОТКЛ) [шт.] 20 (Fr20) Число каналов [кан.] 1 (DTS 7/1); 2 (DTS 7/2) Минимальный интервал между переключениями (ВКЛ/ОТКЛ) [мин.] Класс точности [сек.] ± 2,5 / день Степень защиты [IP] Резерв заряда Литиевый аккумулятор 3 Рабочая...