Werbung
Verfügbare Sprachen
Verfügbare Sprachen
Quicklinks
Werbung

Verwandte Anleitungen für Grundig VCW 4270 L


Inhaltszusammenfassung für Grundig VCW 4270 L
- Seite 1 Wet&Dry Upright Vacuum Cleaner User Manual VCW 4270 L DE - EN - CS 01M-GMS3950-3323-02...
- Seite 2 Bitte lesen Sie zuerst diese Bedienungsanleitung Sehr geehrte Kundin, sehr geehrter Kunde, Vielen Dank, dass Sie sich für ein Grundig-Produkt entschieden haben. Wir möchten, dass Sie mit diesem qualitativ hochwertigen Produkt, das nach dem neuesten Stand der Technik hergestellt wurde, die optimale Effizienz erreichen. Bitte stellen Sie sicher, dass Sie diese Bedienungsanleitung und die ergänzende Dokumentation vor der Verwendung vollständig...
- Seite 3 INHALT DEUTSCH 04-20 ENGLISH 21-36 ČESKY 37-53 3 / DE Nass- und Trocken-Stab-Staubsauger / Bedienungsanleitung...
- Seite 4 1 Wichtige Sicherheits- und Umwelthinweise 1.1 Allgemeine Sicherheit Reichweite von Kindern unter 8 Jahren auf. Um die Gefahr eines Brandes, ei- Bitte lagern Sie das Gerät in einem • nes elektrischen Schlages oder Innenraum, damit es nicht nass einer Verletzung zu verringern, be- wird;...
- Seite 5 1 Wichtige Sicherheits- und Umwelthinweise nicht über das Netzkabel. Halten mottenschutzhaltige Materialien Sie die Kabel von heißen Ober- oder Dämpfe auf, die von flächen fern; brennbaren Staub oder anderen explosiven oder giftigen Dämpfen Bitte verwenden Sie keine Ver- • freigesetzt werden; längerungskabel.
- Seite 6 1 Wichtige Sicherheits- und Umwelthinweise Verwenden Sie bitte nur vom Bitte betreiben oder lagern • • Hersteller empfohlenes Zubehör. Sie das Gerät nicht unter Die Verwendung von Teilen, die ungeeigneten Bedingungen nicht vom Hersteller geliefert wie hohen Temperaturen oder oder verkauft werden, kann zu niedriger Luftfeuchtigkeit.
- Seite 7 1 Wichtige Sicherheits- und Umwelthinweise Halten Sie Finger, Haare und lose 1.3 Informationen zur Verpackung • Kleidung von beweglichen Teilen Die Verpackung des Produkts wird aus wieder- verwertbaren Materialien in Übereinstimmung und Öffnungen fern, während mit der nationalen Gesetzgebung hergestellt. Sie das Produkt benutzen.
- Seite 8 2 Übersicht 8 / DE Nass- und Trocken-Stab-Staubsauger / Bedienungsanleitung...
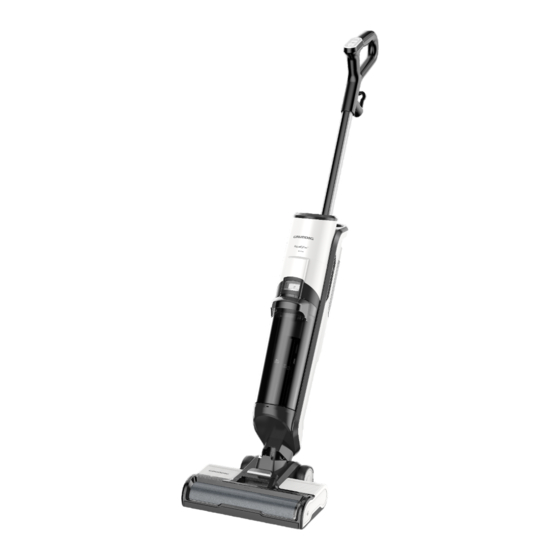
- Seite 9 2 Übersicht 2.1 Bedienelemente und 2.4 Einführung in das Produkt Komponenten 15. „ “ Ein-/Aus Taste: Drücken Sie diese Taste, 1. Ein-/Aus-Taste um den Nass-Trockensauger anzuschalten. Die 2. Taste für Trockenmodus Saugfunktion wird gestartet und gleichzeitig wird 3. Taste zum Einstellen der Wassermenge auf niedrigstem Level das Frischwasser ausgege- (min-max) ben.
- Seite 10 3 Einbau 3.1 Einbau des Griffes Setzen Sie den Griff senkrecht in Zusammenbau das Gehäuse ein. abgeschlossen, wenn ein „Klick“ zu hören ist. Um den Griff zu entfernen, drücken Sie auf die Ausbuchtung am unteren Ende des Griffs und ziehen Sie ihn nach oben. Für eine einfache Entfernung kann ein Stift oder langer Gegenstand zur Hilfe genommen werden.
- Seite 11 3 Einbau 3.3 Einbau der Bürstenwalze Ausbauen: Installation Halten Sie den Griff der Bürstenrolle Setzen Sie die Bürstenrolle auf die fest und ziehen Sie ihn nach oben Achse, schieben Sie sie nach innen heraus. und drücken Sie sie nach unten. Der Zusammenbau ist abgeschlossen, wenn ein „Klick“...
- Seite 12 4 Betrieb 4.1 Wie funktioniert es? On/Off Button Ein-/Aus-Taste Dry Mode Button Taste für Trockenmodus Taste zum Einstellen Wet Level Adjustment der Nassstufe (min- Button (min-max) max) Wasser nachfüllen: Einschalten: Einstellung der Wassermenge: Öffnen Sie den Frischwassertank, Kippen Sie das Gehäuse des Geräts Stellen Sie die Wassermenge um Wasser einzufüllen.
- Seite 13 4 Betrieb 4.3 Arbeitsweise im Selbstreinigungsmodus: 1. Schalten Sie das Gerät nach der Reinigung aus und stellen Sie es auf seine Ablagestation. 2. Drücken Sie die Taste (3), um die Selbstreinigungsfunktion zu aktivieren. Die Selbstreinigungstaste blinkt. 3. Drücken Sie die Selbstreinigungstaste (weißes Licht leuchtet und blinkt nicht) und der Prozess beginnt. 4.
- Seite 14 4 Betrieb 4.4 Anzeigeliste Symbol für niedrige Wassermenge Low Level Indicator Light High Level Button Symbol für hohe Wassermenge Self-cleaning Indicator Light Selbstreinigungsfunktion Dirty Tank Indicator Light Anzeigelampe für verschmutzten Brush Roller Indicator Light Bürstenwalzen-Kontrollleuchte Tank Power Indicator Light Betriebskontrollleuchte Füllstandskontrollleuchte: Betriebskontrollleuchte: Anzeigelampe für verschmutzten...
- Seite 15 5 Reinigung und Wartung 5.1 Die Reinigung der Bürste Es wird empfohlen, die Bürstenrolle nach Bitte reinigen Sie die Abdeckung dem Gebrauch gründlich zu reinigen. Um der Bürstenwalze bei Bedarf. zu vermeiden, dass sich Haare auf der Bürstenrolle verfangen, verwenden Sie bitte die Mehrzweck-Reinigungsbürste.
- Seite 16 5 Reinigung und Wartung 5.3 Die Reinigung der Aufbewahrungsstation Bitte spülen Sie die Station nach jedem Gebrauch ab. 5.4 Anleitung zum Austausch des Filters Verstopfung Dampfauslasses durch Verhärtung Wasserqualität zu verhindern, verfügt dieses Gerät über einen eingebauten Ionenaustauschfilter. Methode Ionenaustauschs werden Kalzium, Magnesium und andere harte...
- Seite 17 5 Reinigung und Wartung 5.5 Leitfaden für die tägliche Lagerung Nehmen Sie nach der täglichen Bitte schalten Sie das Gerät aus, Reinigung die Bürstenwalze und das ziehen Sie den Netzstecker und Zubehör heraus und legen Sie sie in wischen Sie das Gehäuse mit die dafür vorgesehenen Positionen Wasser oder einem neutralen der Aufbewahrungsstation.
- Seite 18 6 Probleme und Abhilfemaßnahmen PROBLEM MÖGLICHE URSACHE LÖSUNG Das Netzkabel ist nicht vollständig Schließen Sie das Kabel gut an eingesteckt Starten Sie das Gerät neu, nachdem Bürstenwalze verstopft Das Produkt funktioniert nicht Sie die Bürstenrolle gereinigt haben. Reinigen Sie den Tank und stellen Voller, verschmutzter Tank Sie zurück zum Neustart...
- Seite 19 Unsere Geräte werden nach den neuesten technischen Erkenntnissen entwickelt, produziert und geprüft. Sollte trotzdem eine Störung auftreten, so bitten wir Sie, sich mit Ihrem Fachhändler bzw. mit der Verkaufsstelle in Verbindung zu setzen. Sollte dies nicht möglich sein, wenden Sie sich bitte an das GRUNDIG Service-Center unter folgenden Kontaktdaten: Telefon: 0911 / 590 597 29 (Montag bis Freitag von 08.00 bis 18.00 Uhr)
- Seite 20 Sehr geehrte Kundin, sehr geehrter Kunde, als Käufer eines Haushaltskleingerätes der Marke Grundig stehen Ihnen die gesetzlichen Gewährleistungsrechte (Nachbesserung und Nacherfüllung) aus dem Kaufvertrag zu. Die Gewährleistung erfolgt für die Fehlerfreiheit bei Geräteübergabe entsprechend dem jewei- ligen Stand der Technik. Über die Gewährleistung hinaus räumt Ihnen der Hersteller eine Garantie ein, diese schränkt die gesetzliche Gewährleistung –...
- Seite 21 Please read this guide first! Dear Customer, Thank you for choosing a GRUNDIG product. We would like you to achieve the optimal efficiency from this high quality product which has been manufactured with state of the art technology. Please make sure you read and understand this guide and supplementary documentation fully before use and keep it as a reference.
- Seite 22 1 Important safety and environmental instructions 1.1 General safety Please do not immerse the ma- • chine in water or other liquids; To reduce the risk of fire, elec- Please do not use the appliance • tric shock or injury, please follow with wet hands;...
- Seite 23 1 Important safety and environmental instructions Please do not operate the Please accessories • • appliance when the inlet is only recommended by the blocked; manufacturer. Using parts not provided or sold by the Please keep hair, loose clothing, • manufacturer may cause fire, fingers or any part of the body electric shock or injury;,...
- Seite 24 1 Important safety and environmental instructions Please do not operate or Keep fingers, hair and loose • • store the appliance under clothing from moving parts and inappropriate conditions such openings whilst using product. as high temperature or low Children should be supervised •...
- Seite 25 1 Important safety and environmental instructions 1.3 Packaging information The product’s packaging is made of recyclable materials, in accordance with the National Legislation. Do not dispose the packaging waste with the household waste or other wastes, dispose it to the packaging col- lection areas specified by local authorities.
- Seite 26 2 Overview 26 / EN Wet&Dry Upright Vacuum Cleaner / User Manual...
- Seite 27 2 Overview 2.2 Technical data 2.1 Controls and components 1. On/Off Button Nominal input power: 400 W 2. Dry Mode Button Input: 220-240 V ~ 50-60 Hz 3. Wet Level Adjustment Button (min-max) Waterproof: IPX 4 4. Handle 5. LED Screen + Self-cleaning touch Fresh Water Tank Capacity: 550 ml 6.
- Seite 28 3 Installation 3.1 Installation of Handle Insert the handle into the body The assembly will be completed vertically. after hearing a “click”. To remove the handle, press the bulge at the bottom of the handle and pull it upward. 3.2 Installation of Clean Water Tank Install the fresh water tank into the corresponding position.
- Seite 29 3 Installation 3.3 Installation of Brush Tool Removal: Installation: Hold the handle of the brush roll Place the brush roll on the axle and and pull it out upward. push it inward, and press down. The assembly will be completed after hearing a “click”.
- Seite 30 4 Operation 4.1 How to Work On/Off Button Dry Mode Button Wet Level Adjustment Button (min-max) Water Refill: Power On: Level Adjustment: Open the fresh water tank to add Tilt the body of the appliance and Adjust the water spraying level water.
- Seite 31 4 Operation 4.3 Self-Cleaning Mode Working Method: 1. After cleaning is done, turn off the device and put it on its storage station 2. Self-Cleaning button flashes on automatically. 3. Press the self-clean button (white light on and no blink) and process will start. 4.
- Seite 32 4 Operation 4.4 Indication Guide Low Level Indicator Light High Level Button Self-cleaning Indicator Light Dirty Tank Indicator Light Brush Roller Indicator Light Power Indicator Light Level Indicator Light: Power Indicator Light: Dirty Tank Indicator Light: The light will be kept-on in white The light will be kept-on in blue The light flashes in red when the when the high / low level function...
- Seite 33 5 Cleaning and maintenance 5.1 The Cleaning of Brush It is recommended to deep clean Please rinse the brush roll cover the brush roller after use every when needed four to five times. To avoid of hair wrapping on the brush roll, please use the multi-purpose cleaning brush.
- Seite 34 5 Cleaning and maintenance 5.3 The Cleaning of Storage Station Please rinse the station every after use. 5.4 Filtration Replacement Guide In order to prevent the blockage of steam vent caused by water quality hardening, this appliance has a built-in ion exchange filter. With the method of ion exchange efficient replacement water...
- Seite 35 5 Cleaning and maintenance 5.5 Daily Storage Guide After daily cleaning, please take out Please shut off and unplug the the brush roller and accessories, appliance first, and wipe the body and place them in the specified of the appliance with water or positions of the storage station.
- Seite 36 6 Problems and remedies PROBLEM POSSIBLE CAUSE SOLUTION Power cord is not fully plugged Plug the cord well Brush Roller Blockage Restart after clean up the brush roll Product not working Clean up the tank and restore Full Dirty Tank back to restart The brush roller is entangled by hair Clean up the brush roll and restore...
- Seite 37 Nejprve si prosím přečtěte tuto příručku! Vážení zákazníci, Děkujeme vám, že jste si zvolili výrobek GRUNDIG. Chtěli bychom, abyste dosáhli optimální účinnosti tohoto vysoce kvalitního výrobku, který byl vyroben pomocí nejmodernějších technologií. Před použitím výrobku si prosím přečtěte celou tuto příručku a doplňkovou dokumentaci a uschovejte si je pro pozdější...
- Seite 38 1 Důležité bezpečnostní a ekologické pokyny 1.1 Všeobecné bezpeč- vody nebo do jiných kapalin; nostní pokyny Prosím nepoužívejte spotřebič • mokrýma rukama; Pro snížení rizika požáru, úrazu Spotřebič nepoužívejte pokud elektrickým proudem nebo zra- • spadne, rozbije se nebo spadne nění, dodržujte tyto požadavky: do vody, pošlete spotřebič...
- Seite 39 1 Důležité bezpečnostní a ekologické pokyny Spotřebič nepoužívejte, je-li Používejte pouze příslušenství • • přívod zablokován; doporučené výrobcem. Použití dílů, které nedodává nebo Abyste předešli riziku ohrožení, • neprodává výrobce, může udržujte vlasy, volné oblečení, způsobit požár, úraz elektrickým prsty nebo jakoukoli část těla proudem nebo zranění, mimo vstupní...
- Seite 40 1 Důležité bezpečnostní a ekologické pokyny Spotřebič nepoužívejte ani Děti by měly být pod dohledem, • • neskladujte v nevhodných aby si s přístrojem nehrály. podmínkách, například při Pokud je přívodní kabel • vysoké teplotě nebo nízké poškozen, musí jej vyměnit vlhkosti.
- Seite 41 1 Důležité bezpečnostní a ekologické pokyny 1.3 Informace o balení Obal tohoto výrobku je vyroben z recyklovatel- ných materiálů, v souladu s Národní legislati- vou pro životní prostředí. Nevyhazujte obalový odpad spolu s domovním či jiným odpadem, odložte ho na sběrných místech určených místními úřady.
- Seite 42 2 Přehled Stojanový vysavač pro mokré a suché vysávání / Uživatelská 42 / CZ příručka...
- Seite 43 2 Přehled 2.2 Technické údaje 2.1 Ovládací prvky a komponenty Jmenovitý příkon: 400 W 1. Tlačítko zapnutí / vypnutí Vstup: 220-240 V ~ 50-60 Hz 2. Tlačítko suchého režimu Voděodolný: IPX 4 3. Tlačítko nastavení mokré hladiny (min-max) Kapacita nádrže na čerstvou vodu: 550 ml 4.
- Seite 44 3 Instalace 3.1 Instalace rukojeti Rukojeť zasuňte vertikálně do těla . Montáž se dokončí po zaznění „cvaknutí“. Chcete-li odstranit rukojeť, stiskněte vypuklinu ve spodní části rukojeti a vytáhněte ji směrem nahoru. 3.2 Instalace nádrže na čistou vodu Nádrž na čerstvou vodu nainstalujte do příslušné...
- Seite 45 3 Instalace 3.3 Instalace nástroje Brush Tool Odstranění: Instalace: Držte rukojeť kotouče kartáče a Nasaďte válec kartáče na osu, vytáhněte ji směrem nahoru. zatlačte jej dovnitř a zatlačte jej. Montáž se dokončí po zaznění „cvaknutí“. Při používání kartáče na kobercové podlaze se doporučuje vypnout funkci rozprašování vody. 3.4 Instalace krytu válce kartáče Kryt zasuňte do příslušné...
- Seite 46 4 Obsluha 4.1 Jak pracovat Tlačítko zapnutí / On/Off Button vypnutí Tlačítko suchého Dry Mode Button režimu Tlačítko nastavení Wet Level Adjustment mokré hladiny Button (min-max) (min-max) Doplnění vody: Zapnutí: Nastavení úrovně: Otevřete nádrž na čerstvou vodu a Nakloňte tělo spotřebiče Úroveň...
- Seite 47 4 Obsluha 4.3 Pracovní metoda Režimu samočištění: 1. Po skončení čištění zařízení vypněte a položte jej na úložnou stanici 2. Tlačítko samočištění automaticky bliká. 3. Stiskněte tlačítko samočištění (svítí bílá kontrolka a nebliká) a proces se spustí. 4. Proces samočištění se ukončí a začne blikat červená kontrolka. 5.
- Seite 48 4 Obsluha 4.4 Průvodce kontrolkami Low Level Indicator Light High Level Button Tlačítko vysoké hladiny Kontrolka nízké hladiny Self-cleaning Indicator Light Kontrolka samočištění Dirty Tank Indicator Light Kontrolka Nádrže na nečistoty Brush Roller Indicator Light Světelná kontrolka kartáčového válce Power Indicator Light Kontrolka napájení...
- Seite 49 5 Čištění a údržba 5.1 Čištění kartáče Po každých čtyřech - pěti použitích V případě potřeby opláchněte kryt se doporučuje kartáčový váleček kartáčového válce hloubkově vyčistit. Abyste zabránili namotávání vlasů na kartáčový váleček, použijte víceúčelový čistící kartáč. Doporučuje se umístit Po vyčištění...
- Seite 50 5 Čištění a údržba 5.3 Čištění úložné stanice každém použití stanici opláchněte. 5.4 Průvodce výměnou filtrů Aby se zabránilo ucpání parního ventilu způsobenému tvrdou vodou, má tento spotřebič zabudovaný iontový výměnný filtr. Metodou výměny iontů se účinně nahrazují vápník, hořčík a jiné tvrdé molekuly vody, čímž...
- Seite 51 5 Čištění a údržba 5.5 Průvodce denním skladováním Po každodenním čištění vyjměte Nejprve spotřebič vypněte a odpojte kartáčový válec a příslušenství ze zásuvky a tělo spotřebiče otřete a umístěte je na určená místa v vodou nebo neutrálním čistícím úložné stanici. prostředkem.
- Seite 52 6 Problémy a náprava PROBLÉM MOŽNÁ PŘÍČINA ŘEŠENÍ Napájecí kabel není zcela zapojen Správně zapojte kabel Spusťte znovu po vyčištění Zablokování kartáčového válce Produkt nefunguje kartáčového válce Vyčistěte nádrž a znovu ji vložte Plná Nádrž na nečistoty zpět na restart Štětcový...
- Seite 53 Beko Grundig Deutschland GmbH Rahmannstraße 3 65760 Eschborn www.grundig.com...