Werbung
Quicklinks
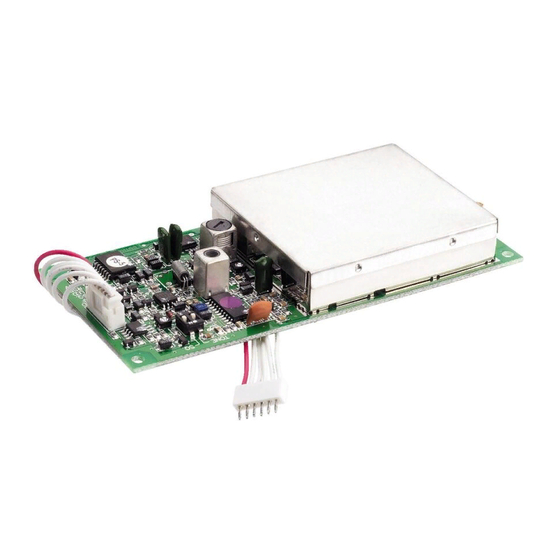
TXS-820M
Best.-Nr. 24.4470
D
A
CH
Empfangsmodul für
863,05 MHz oder
864,80 MHz
Bitte lesen Sie diese Anleitung vor der Inbetrieb-
nahme gründlich durch und heben Sie sie für ein
späteres Nachlesen auf.
1 Einsatzmöglichkeiten
Dieses Empfangsmodul dient zum nachträglichen
Einbau z. B in einen Verstärker, eine Aktivbox oder
in ein Mischpult. Es empfängt die Signale eines
Funkmikrofons aus der Serie TXS-82... von „img
Stage Line".
Für den Betrieb wird eine 8-V-Gleichspannung
be nötigt. Es lassen sich ein Feldstärke-Instrument,
eine LED zur Anzeige eines empfangenen Träger-
signals und ein Squelch-Regler anschließen.
2 Wichtige Hinweise zum sicheren Gebrauch
G
Das Modul ist nach der EMV-Richtlinie 2004 /
108 / EG (EMV = Elektromagnetische Verträg-
lichkeit) aufgebaut. Damit es auch im Betrieb
diese Richtlinie erfüllt, muss es in ein abge-
schirmtes Gehäuse eingesetzt und der Audio-
ausgang über eine abgeschirmte Leitung ange-
schlossen werden. Wird die EMV-Richtlinie
nicht eingehalten, erlischt die Konformitätser-
klärung.
GB
Receiving Module for
863.05 MHz or 864.80 MHz
Please read these instructions carefully prior to
setting the unit into operation and keep them for
later use.
1 Applications
This receiving module serves for subsequent
installation e. g. into an amplifier, an active speak -
er system, or a mixer. It receives the signals of a
wireless microphone of the series TXS-82... from
"img Stage Line".
For the operation an 8 V direct voltage is re -
quir ed. It is possible to connect a field strength
meter, an LED to indicate a received carrier signal,
and a squelch control.
2 Important Safety Notes
G
The module has been set up according to the
di rective 2004 / 108 / EC for electromagnetic
com patibility. In order to comply with this direc-
tive also during operation, it must be placed into
a screened housing and the audio output must
be connected via a screened cable. If the direc-
tive for electromagnetic compatibility is not
complied with, the declaration of conformity will
expire.
Ant.
1
Ein-/Ausschalt-Muting ein • Muting of switching noise: on
Ein-/Ausschalt-Muting aus • Muting of switching noise: off
TXS-822M
Best.-Nr. 24.4480
G
Schützen Sie das Modul vor Tropf- und Spritz-
wasser, hoher Luftfeuchtigkeit und Hitze (zu -
lässiger Einsatztemperaturbereich 0 – 40 °C).
G
Wird das Modul zweckentfremdet, falsch ange-
schlossen oder nicht fachgerecht repariert,
kann keine Haftung für daraus resultierende
Sach- oder Personenschäden und keine
Garantie für das Modul übernommen werden.
Soll das Modul endgültig aus dem Betrieb
genommen werden, übergeben Sie es
zur umweltgerechten Entsorgung einem
örtlichen Recyclingbetrieb.
3 Anschluss und Inbetriebnahme
1) Das Modul über die 6-polige Buchse (4) ent-
sprechend der Abb. 1 anschließen:
Pin nach Abb. 1
1
2
3
4
5
6
2) Soll die Squelch-Einstellung über ein separa-
tes Potentiometer erfolgen, nach Abb. 1 die
drei Bauelemente in der gestrichelten Umran-
G
Protect the module against dripping water and
splash water, high air humidity, and heat (ad -
missible ambient temperature range 0 – 40 °C).
G
No guarantee claims for the module and no lia-
bility for any resulting personal damage or
material damage will be accepted if the module
is used for other purposes than originally in -
tend ed, if it is not correctly connected or not re -
pair ed in an expert way.
If the module is to be put out of operation
definitively, take it to a local recy cling
plant for a disposal which is not harmful
to the environment.
3 Connection and Setting into Operation
1) Connect the module via the 6-pole jack (4)
according to fig. 1:
Pin acc. to fig. 1
1
2
3
4
5
6
2) For adjusting the squelch threshold via a sep-
arate potentiometer, connect the three compo-
TONE
ON
Squelch extern • external
Squelch intern • internal
1 2
®
MONACOR INTERNATIONAL GmbH & Co. KG • Zum Falsch 36 • 28307 Bremen • Germany
©
Copyright
by MONACOR INTERNATIONAL. All rights reserved.
3) Eine Antenne mit der entsprechenden Emp-
4) Zum Unterdrücken von Ein- und Ausschaltge-
5) Zum Einstellen der Squelch-Ansprechschwelle
Funktion
4 Technische Daten
Masse
Empfangsfrequenz
Audioausgang
externer Squelch-Regler
LED für Trägeranzeige
Empfangssystem: . . . . . . Non-Diversity
Instrument für Feldstärke
Audioausgang: . . . . . . . . max. 1,5 V
Betriebsspannung +8 V, 90 mA
Betriebsspannung: . . . . . 8 V , 90 mA
Abmessungen: . . . . . . . . 120 × 15 × 57 mm
Änderungen vorbehalten.
3) Connect an antenna with the corresponding
4) To suppress noise when switching on and off,
5) To adjust the squelch threshold, switch on a
4 Specifications
Receiving frequency
Function
ground
audio output
Receiving system: . . . . . non-diversity
external squelch control
Audio output: . . . . . . . . . max. 1.5 V
LED for carrier indication
Operating voltage: . . . . . 8 V , 90 mA
meter for field strength
operating voltage +8 V, 90 mA
Dimensions: . . . . . . . . . . 120 × 15 × 57 mm
Subject to technical modification.
SQ
ON
1 2
Squelch
intern
1
internal
6
GND
AF
LD1
SQ
LED
RSSI
+8V
56k
560
2 3
4
+8 V
A
100 μ A
dung an schließen und den DIP-Schalter SQ
(2) in die Position ON stellen.
Soll die Squelch-Ansprechschwelle mit dem
internen Potentiometer (3) eingestellt werden,
dürfen die drei Bau elemente in der gestrichel-
ten Umrandung nicht angeschlossen sein! Den
DIP-Schalter SQ in die Position „aus" stellen.
fangsfrequenz an die Buchse (1) anschließen.
räuschen den DIP-Schalter TONE (2) in die
Position ON stellen.
einen passenden Sender einschalten. Das ex -
terne Squelch-Potentiometer (P1) oder das
interne (3) so einstellen, dass die angeschlos-
sene LED (LD1) leuchtet.
TXS-820M: . . . . . . . . . 863,05 MHz
TXS-822M: . . . . . . . . . 864,80 MHz
nents within the dashed lines according to fig. 1
and set the DIP switch SQ (2) to position ON.
For adjusting the squelch threshold with the
internal potentiometer (3), the three compo-
nents within the dashed lines must not be con-
nected! Set the DIP switch SQ to position "off".
receiving frequency to the jack (1).
set the DIP switch TONE (2) to position ON.
matching transmitter. Adjust the external
squelch potentiometer (P1) or the internal
potentiometer (3) so that the connected LED
(LD1) lights up.
TXS-820M: . . . . . . . . . 863.05 MHz
TXS-822M: . . . . . . . . . 864.80 MHz
4k7
Audio
P1
20k
47k
nur bei externer
Squelch-Einstellung
for external
squelch adjustment only
Œ
A-0488.99.02.07.2011
Werbung

Verwandte Anleitungen für IMG STAGELINE TXS-820M


Inhaltszusammenfassung für IMG STAGELINE TXS-820M
- Seite 1 Empfangsfrequenz Audioausgang 108 / EG (EMV = Elektromagnetische Verträg- TXS-820M: ..863,05 MHz externer Squelch-Regler lichkeit) aufgebaut. Damit es auch im Betrieb TXS-822M: ..864,80 MHz LED für Trägeranzeige...
- Seite 2 Fonction Fréquence de réception et de sécurité TXS-820M : ..863,05 MHz Masse Le module est conçu selon la directive 2004 / TXS-822M : ..864,80 MHz Sortie audio 108 / CE relative à...
- Seite 3 Función Frecuencia de recepción El módulo ha sido instalado de acuerdo con la TXS-820M: ..863,05 MHz Masa Directiva 2004 / 108 / CE para la compatibilidad TXS-822M: ..864,80 MHz Salida audio electromagnética.