Inhaltsverzeichnis
Werbung
Verfügbare Sprachen
Verfügbare Sprachen
Benutzerhandbuch
Deutschland
ONLINE USV-Systeme AG
Luise-Ullrich-Str. 8
D-82031 Grünwald
Phone +49 (89) 2423990-10
Fax
+49 (89) 2423990-20
www.online-usv.de
ZE1000-3000_manual_ger_eng_it_V1.0.3
ONLINE ZINTO E-Serie
Modelle 1000 – 3000
Version: 1.0.3
Deutsch:
Seite
English:
Page
Italia:
Pagina
Italien
ONLINE UPS-Systems S.r.l.
Via Ferruccio Gilera 110
I-20862 Arcore (MB)
Phone +39 (039) 2051444
Fax
+39 (039) 2051435
www.online-ups.it
1 / 120
1 -
41 -
81 - 120
Schweiz
ONLINE USV-Systeme AG
Eigenheimstraße 11
CH-8304 Wallisellen (Zürich)
Phone
Fax
www.online-usv.ch
........................................................................
40
80
+41 (44) 9452829
+41 (44) 9453288
R. Kistler
Werbung
Kapitel
Inhaltsverzeichnis
Fehlerbehebung

Verwandte Anleitungen für online ZINTO E-Serie

Inhaltszusammenfassung für online ZINTO E-Serie
-
Seite 1: Benutzerhandbuch
Benutzerhandbuch ONLINE ZINTO E-Serie Modelle 1000 – 3000 Version: 1.0.3 Deutsch: Seite English: Page 41 - Italia: Pagina 81 - 120 Deutschland Italien Schweiz ONLINE USV-Systeme AG ONLINE UPS-Systems S.r.l. ONLINE USV-Systeme AG Luise-Ullrich-Str. 8 Via Ferruccio Gilera 110 Eigenheimstraße 11 D-82031 Grünwald... - Seite 2 2 / 120 ZE1000-3000_manual_ger_eng_it_V1.0.3 R. Kistler ................
-
Seite 3: Inhaltsverzeichnis
Inhalt Benutzerhandbuch ................1 Einleitung ..................6 Sicherheitswarnungen ..............8 Montage ..................9 Überprüfung der Lieferung ..........9 Auspacken der USV-Anlage ..........9 Überprüfung des Zubehörs ..........10 Installation als Tower ............10 Installation im Rack ............11 Inbetriebnahme ..............13 Betrieb .................. - Seite 4 Technische Daten ..............34 Spezifikation ..............34 Rückansicht ............... 35 CE Bestätigung ..............37 Garantie ..................38 4 / 120 ZE1000-3000_manual_ger_eng_it_V1.0.3 R. Kistler ................
- Seite 5 Abbildungsverzeichnis Abbildung 1: Prinzipschaltplan ............. 6 Abbildung 2: ZINTO E 1000 - 3000 im Rack ........7 Abbildung 3: ZINTO E 1000 - 3000 als Tower........7 Abbildung 4: Installation als Tower ............. 10 Abbildung 5: Entfernen der Frontblende..........11 Abbildung 6: Befestigung im Rack ............
-
Seite 6: Einleitung
E I N L E I T U N G 1. Einleitung Die ONLINE USV-Systeme AG (ONLINE) gehört zu den führenden Herstellern von unterbrechungsfreien Stromversorgungen (USV). Seit 1988 beschäftigt sich das deutsche Unternehmen mit Entwick- lung, Fertigung, Vertrieb und Support von USV-Systemen. Nach ver- kauften Stückzahlen sind die Produkte der ONLINE die deutsche... -
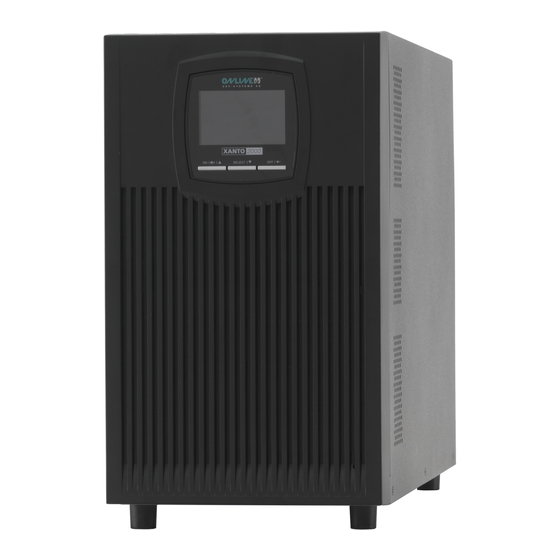
Seite 7: Abbildung 2: Zinto E 1000 - 3000 Im Rack
E I N L E I T U N G Daneben bietet die ZINTO E die folgenden Vorzüge: Rack-Tower-Kombimodell, nur 2HE Leises Betriebsgeräusch NAS-Kompatibilität Perfekte Sinus-Ausgangsspannung Wirkungsgrad von >96% EBM+ Ladetechnologie für 72 Monate Batterielebenserwar- tung ... -
Seite 8: Sicherheitswarnungen
S I C H E R H E I T S W A R N U N G E N 2. Sicherheitswarnungen Dieses Handbuch enthält wichtige Anweisungen, die Sie während der Installation und Wartung der USV-Anlage und der Batterien be- folgen müssen. -
Seite 9: Montage
M O N T A G E 3. Montage 3.1 Überprüfung der Lieferung Bewahren Sie die Transportkartons und das Verpackungsmaterial für die Spedition oder die Verkaufsstelle auf. Falls Anlagenteile wäh- rend des Transports beschädigt wurden, reichen Sie innerhalb von 24 Stunden eine Transportschaden-Reklamation bei Ihrem Lieferan- ten ein. -
Seite 10: Überprüfung Des Zubehörs
M O N T A G E 3.3 Überprüfung des Zubehörs 19“-Montagewinkel (links und rechts) Füße für Tower-Montage RS-232 Schnittstellenkabel USB Schnittstellenkabel 3 (ZINTO E 1000 + 1500 + 2000) 10A Kaltgeräteverlängerung 2 (ZINTO E 3000) 16A Netzanschlusskabel 1 (nur ZINTO E 3000) Software DataWatch Bedienungsanleitung Tabelle 1: Lieferumfang... -
Seite 11: Installation Im Rack
M O N T A G E 3.5 Installation im Rack Die USV-Anlage wird vollständig zusammengebaut und anschluss- fertig geliefert. ACHTUNG Das Gehäuse hat ein hohes Gewicht (siehe Technische Daten). Für das Rack-Modell werden optionale Gleitschienen (Art.-Nr. Rack- Kit) angeboten. Die Gleitschienen sind passend für 48 cm (19 Zoll) Racks mit einer Bautiefe von 61 bis 76 cm (24 bis 30 Zoll). -
Seite 12: Abbildung 6: Befestigung Im Rack
M O N T A G E 6. Richten Sie die Montagewinkel (L = Links und R = Rechts) mit den Schraubenbohrungen auf jeder Seite der USV-Anlage aus und befestigen Sie diese mit den beigefügten M4 x 8 Flach- kopfschrauben. 7. -
Seite 13: Inbetriebnahme
7. Schalten Sie die Verbraucher der Reihe nach ein. HINWEIS Die internen Batterien lassen sich in weniger als drei Stun- den auf 90% ihrer Kapazität aufladen. ONLINE empfiehlt, die Batterien nach der Installation oder nach längerer Lagerung 48 Stunden lang aufzuladen. -
Seite 14: Betrieb
B E T R I E B 4. Betrieb 4.1 Bedienfeld Die USV-Anlage verfügt über ein Bedienfeld mit 4 Tasten und ein grafisches Display (siehe Abbildung 7). Im Normalbetrieb leuchtet Hintergrundbe- leuchtung blau. Bei wichtigen Warnmeldungen rot. Abbildung 7: Bedienfeld (Modell ZINTO E 1000) Taste Funktion... -
Seite 15: Display
B E T R I E B 4.2 Display Symbol Beschreibung Funktion Eingangsspan- Zeigt abwechselnd die Eingangsspannung nung u. -frequenz und –frequenz an Eingangsstecker Signalisiert den Eingangsstecker Ausgangsspan- Zeigt abwechselnd die Ausgangsspannung nung u. -frequenz und –frequenz an Ausgangs- Signalisiert die Ausgangsbuchsen buchsen USV Status Zeigt den USV Status an. -
Seite 16: Einstellungen
B E T R I E B String Beschreibung STbY USV-Anlage im Standby-Betrieb IPVL Eingangsspannung zu niedrig IPVH Eingangsspannung zu hoch IPFL Eingangsfrequenz zu niedrig IPFH Eingangsfrequenz zu hoch NORM USV-Anlage im Normalbetrieb USV-Anlage im Normalbetrieb, zusätzlich Buck-&-Boost-Funktion bATT USV-Anlage im Batteriebetrieb TEST Funktions- oder Batterietest läuft OPVH... -
Seite 17: Tabelle 5: Einstellungen
B E T R I E B Einstellung Verfügbare Optionen Standard „230V“ [220]=220V [230]=230V Ausgangs- [240]=240V spannung „Normal“ [000]= Normal = ±20% Eingangsspannungstoleranz Eingang [001]= Weitbereich = +20% / -30% Eingangsspannungstoleranz [002]= Generator = 40Hz – 70Hz Eingangsfrequenztoleranz „aktiviert“ [000]=deaktiviert TEST [001]=aktiviert Automatische... -
Seite 18: Betriebszustände
B E T R I E B 4.4 Betriebszustände Der Status der USV-Anlage wird auf dem Bedienfeld angezeigt. Normalbetrieb Im Normalbetrieb wird im Display „NORM“ angezeigt und die USV- Anlage vom Versorgungsnetz gespeist. Die USV-Anlage überwacht die Batterien und lädt diese je nach Bedarf auf. Die angeschlosse- nen Verbraucher werden mit Strom versorgt. -
Seite 19: Starten Und Abschalten
B E T R I E B 4.5 Starten und Abschalten 1. Stecken Sie das Netzanschlusskabel (bei ZINTO E 3000 im Lieferumfang) der USV-Anlage in eine Steckdose. Das Display an der USV-Anlage leuchtet auf und „STbY“ wird angezeigt. 2. Halten Sie die Taste an der USV-Anlage für mindestens drei Sekunden lang gedrückt. - Seite 20 B E T R I E B Abschalten 1. Halten Sie die Taste an der USV-Anlage drei Sekunden lang gedrückt. Die USV-Anlage gibt ein kurzes akustisches Signal. Die USV- Anlage wechselt in den Standby-Betrieb und das Display zeigt „STbY“ an. HINWEIS Wird die Taste nach weniger als drei Sekunden losgelas-...
-
Seite 21: Kommunikation
K O M M U N I K A T I O N 5. Kommunikation 5.1 RS-232- und USB-Schnittstelle Um die Kommunikation zwischen der USV-Anlage und einem Com- puter herzustellen, schließen Sie den Computer mithilfe eines geeig- neten Datenkabels (Kabel im Lieferumfang) an die RS-232- oder USB-Schnittstelle der USV-Anlage an (siehe Abbildung 15, Abbil- dung 16 und Abbildung 17). -
Seite 22: Potenzialfreie Kontakte
K O M M U N I K A T I O N 5.2 Potenzialfreie Kontakte Die potenzialfreien Kontakte (nicht ZINTO E 1000) zwischen Pin 1 und Pin 5 bzw. Pin 8 und Pin 5 sind als Optokoppler ausgeführt. Damit der potenzialfreie Kontakt ordnungsgemäß arbeitet muss eine Gleichspannung (max. -
Seite 23: Notaus-Funktion (Epo)
K O M M U N I K A T I O N 5.4 Notaus-Funktion (EPO) Die Notaus-Funktion (EPO = Emergency Power-Off) dient zum sofor- tigen Abschalten der USV-Anlage und der angeschlossenen Ver- braucher aus der Ferne. Hierzu muss der EPO-Stecker (Rückseite USV-Anlage, siehe Abbildung 10) entfernt und ein externer Notaus- Schalter angeschlossen werden. -
Seite 24: Datawatch Software
K O M M U N I K A T I O N 5.5 DataWatch Software Zum serienmäßigen Lieferumfang der ZINTO E-Serie gehört Data- Watch, die umfassende Softwarelösung zum Shutdown und Ma- nagement des PC- oder Serversystems, sowie zum Monitoring der ZINTO E und des Stromversorgungsnetzes. -
Seite 25: Wartung
Monate auf, indem Sie die USV-Anlage an das Ver- sorgungsnetz anschließen. Die internen Batterien laden sich in we- niger als drei Stunden auf bis zu 90% ihrer Kapazität auf. ONLINE empfiehlt, die Batterien nach längerer Lagerung (>3 Monate) 48 Stunden lang zu laden. -
Seite 26: Batteriewechsel
W A R T U N G 6.4 Batteriewechsel HINWEIS Entfernen Sie die Batterien nicht, solange die USV-Anlage im Batteriebetrieb läuft. Dank der Hot-Swap-Funktion können die Batterien ohne vorheriges Abschalten der USV-Anlage und ohne Trennen der angeschlosse- nen Verbraucher ausgetauscht werden. Falls Sie die USV-Anlage vor dem Batteriewechsel lieber vom Netz trennen möchten, lesen Sie den Abschnitt „Starten und Abschalten“. -
Seite 27: Abbildung 11: Entfernen Der Frontblende
W A R T U N G ACHTUNG GEFAHR EINES ELEKTRISCHEN SCHLAGS. Nehmen Sie auf keinen Fall selbst Veränderungen an der Verkabelung oder den Anschlüssen der Batterie vor. Der Versuch, eigen- ständig die Verkabelung der Batterie zu verändern, kann zu ernsthaften Verletzungen führen ... -
Seite 28: Abbildung 12: Trennen Der Batterie-Steckverbindung
W A R T U N G 2. Trennen Sie die Batterie-Steckverbindung (siehe Abbildung 12). Abbildung 12: Trennen der Batterie-Steckverbindung 3. Entfernen Sie die Batterieabdeckung (siehe Abbildung 13). Abbildung 13: Entfernen der Batterieabdeckung 4. Ziehen Sie den Batterieeinschub vorsichtig am Griff heraus (siehe Abbildung 14) Abbildung 14: Entnahme des Batterieeinschubes 28 / 120... -
Seite 29: Testen Der Neuen Batterien
W A R T U N G 5. Tauschen Sie die Batterien im Batterieeinschub aus. HINWEIS Überprüfen Sie, ob die Ersatzbatterien dieselben Spezifikati- onen aufweisen wie die Altbatterien. Lesen Sie den Abschnitt Entsorgen der Altbatterien oder der USV-Anlage für eine sachgemäße Entsorgung. 6. -
Seite 30: Entsorgen Der Altbatterien Oder Der Usv-Anlage
6.6 Entsorgen der Altbatterien oder der USV-Anlage Erkundigen Sie sich vor Ort bei einer Recycling-Stelle, wie die Altbat- terie oder die USV-Anlage ordnungsgemäß entsorgt werden können. Altbatterien können auch kostenlos bei ONLINE entsorgt werden. Bitte kontaktieren Sie hierzu den Support (siehe Support). ACHTUNG ... -
Seite 31: Fehlerbehebung
F E H L E R B E H E B U N G 7. Fehlerbehebung Die ZINTO E ist für den selbstständigen Betrieb ausgelegt und mel- det eventuell auftretende Probleme automatisch im Display. 7.1 Warnmeldungen Alarmsignal Mögliche Ursache Maßnahme oder Status Ein Stromausfall ist aufge- Die USV-Anlage versorgt die ange-... -
Seite 32: Allgemeine Fehler
F E H L E R B E H E B U N G 7.2 Allgemeine Fehler Betriebszustand Mögliche Ursache Maßnahme USV-Anlage Die Batterien müssen aufge- Schließen Sie die USV-Anlage 48 stellt nicht die er- laden oder getauscht wer- Stunden an den Netzstrom an, um wartete Zeit für die den. -
Seite 33: Support
F E H L E R B E H E B U N G 7.4 Support Als deutscher Anbieter garantiert ONLINE direkte Ansprechbarkeit, unbürokratische Bearbeitung und kürzeste Reaktionszeiten. Umfas- sende Unterstützung ist selbstverständlich – vor und nach dem Kauf. Bei ONLINE werden umfassende Support- und Serviceleistungen groß... -
Seite 34: Technische Daten
T E C H N I S C H E D A T E N 8. Technische Daten 8.1 Spezifikation Modell ZINTO E ZINTO E ZINTO E ZINTO E 1000 1500 2000 3000 Artikel-Nr. ZE1000 ZE1500 ZE2000 ZE3000 Elektrische Eigenschaften Nennleistung (VA/W) 1000VA 1500VA... -
Seite 35: Rückansicht
T E C H N I S C H E D A T E N Betriebsbedingungen, Normen und Zulassungen Betriebstemperatur 0 - 40°C Relative Luftfeuchtigkeit 20 - 80% nicht kondensierend Betriebshöhe bis 1.500 Meter über NN Lagertemperatur -15 - 45°C Geräuschentwicklung Lautlos / Lautlos /... -
Seite 36: Abbildung 16: Rückansicht Zinto E 1500 Und 2000
T E C H N I S C H E D A T E N HINWEIS Die Anschlüsse für Lastsegment 1 sind schraffiert darge- stellt. Abbildung 16: Rückansicht ZINTO E 1500 und 2000 Abbildung 17: Rückansicht ZINTO E 3000 36 / 120 ZE1000-3000_manual_ger_eng_it_V1.0.3 R. -
Seite 37: Ce Bestätigung
T E C H N I S C H E D A T E N 8.3 CE Bestätigung 37 / 120 ZE1000-3000_manual_ger_eng_it_V1.0.3 R. Kistler ................ -
Seite 38: Garantie
Die ONLINE USV-Systeme AG (ONLINE) gewährleistet, dass dieses Produkt für die Dauer von zwei Jahren ab Kaufdatum frei von Mate- rial- und Fertigungsfehlern ist. Die Verpflichtung von ONLINE gemäß dieser Garantie ist auf die Reparatur oder den Ersatz (Entscheidung trifft ONLINE) jeglicher defekter Produkte begrenzt. Bevor unter die Garantie fallende Wartungsleistungen in Anspruch genommen wer- den können, muss beim Kundendienst eine Warenrücknahme-... - Seite 39 39 / 120 ZE1000-3000_manual_ger_eng_it_V1.0.3 R. Kistler ................
- Seite 40 40 / 120 ZE1000-3000_manual_ger_eng_it_V1.0.3 R. Kistler ................
-
Seite 41: Ze1000-3000_Manual_Ger_Eng_It_V1.0.3
User Manual ONLINE XANTO E series Models 1000 – 3000 Version: 1.0.2 Deutsch: Seite English: Page 41 - Italia: Pagina 81 - 120 Germany Italy Switzerland ONLINE USV-Systeme AG ONLINE UPS-Systems S.r.l. ONLINE USV-Systeme AG Luise-Ullrich-Str. 8 Via Ferruccio Gilera 110 Eigenheimstraße 11... - Seite 42 42 / 120 ZE1000-3000_manual_ger_eng_it_V1.0.3 R. Kistler ................
- Seite 43 Contents User Manual ..................41 Introduction ................46 Safety warnings ................ 48 Installation ................49 Inspecting the shipment ............ 49 Unpacking the UPS system ..........49 Checking the accessories ..........50 Installation as tower ............50 Installation in the rack ............51 Commissioning ..............
- Seite 44 Technical Data................74 Specification ..............74 Rear view ................75 CE conformity ..............77 Warranty ................... 78 44 / 120 ZE1000-3000_manual_ger_eng_it_V1.0.3 R. Kistler ................
- Seite 45 List of figures Figure 1: Principle wiring diagram ............46 Figure 2: ZINTO E 1000 - 3000 in rack ..........47 Figure 3:ZINTO E 1000 - 3000 as tower ..........47 Figure 4: Installation as tower ............. 50 Figure 5: Removing the front cover ............ 51 Figure 6: Fastening in rack ..............
-
Seite 46: Introduction
German company has specialised in the development, manufacture and sales & support of UPS systems. In terms of quantity sold, the products of ONLINE, the German number one in the UPS market, are internationally recognised because of their high quality and ex- cellent support. -
Seite 47: Figure 2: Zinto E 1000 - 3000 In Rack
I N T R O D U C T I O N In addition, ZINTO E provides the following advantages: Combination rack-tower model, only 2HE Quiet operating noise NAS compatibility Perfect sinusoidal output voltage >96% efficiency ... -
Seite 48: Safety Warnings
S A F E T Y W A R N I N G S Safety warnings This handbook contains important instructions that you must comply with during the installation and maintenance of the UPS system and the batteries. Please read these instructions completely before you begin working with the device. -
Seite 49: Installation
I N S T A L L A T I O N Installation Inspecting the shipment Keep the shipping cartons and the packaging material for the ship- ping company or the sales agency. If parts of the system were dam- aged during transport, please submit a transport damage claim to your supplier within 24 hours. -
Seite 50: Checking The Accessories
I N S T A L L A T I O N Checking the accessories 19" mounting bracket (left and right) Bases for tower installation RS232 interface cable USB interface cable 10A low-heat devices power cord exten- 3 (ZINTO E 1000 + 1500 + 2000) sion 2 (ZINTO E 3000) 16A power cable... -
Seite 51: Installation In The Rack
I N S T A L L A T I O N Installation in the rack The UPS system is delivered completely assembled and ready-to- connect. CAUTION The housing is heavy (see Technical Data). Optional slide rails (article number: Rack-Kit) are available for the rack model. -
Seite 52: Figure 6: Fastening In Rack
I N S T A L L A T I O N 6. Align the mounting bracket (L = left and R = right) with the screw holes on each side of the UPS system and secure these using the supplied M4 x 8 pan-head screws. 7. -
Seite 53: Commissioning
7. Switch on the consumers one after the other. NOTE The internal batteries will charge up to 90% of their capacity in less than three hours. ONLINE recommends charging the batteries for 48 hours after installation or after a longer peri- od of storage. -
Seite 54: Operation
O P E R A T I O N Operation Control panel The UPS system has a control panel with four buttons and a graphical display (see Figure 7). The background lighting lights up in blue during normal opera- tion. It lights up red in case of important warning messages. -
Seite 55: Display
O P E R A T I O N Display Symbol Description Function Line input voltage Alternatingly displays the line input voltage and frequency and frequency Line input plug Indicates the line input plug Line output volt- Alternatingly displays the line output voltage age and frequen- and frequency Output jacks... -
Seite 56: Settings
O P E R A T I O N String Description STbY UPS system in standby mode IPVL Line input voltage too low IPVH Line input voltage too high IPFL Line input frequency too low IPFH Line input frequency too high NORM UPS system in normal mode UPS system in normal mode... -
Seite 57: Table 5: Settings
O P E R A T I O N Setting Available options Standard "230V" [220]=220V [230]=230V Line output [240]=240V voltage "Normal" [000]= normal = +/-20% line input voltage tolerance Line input [001]= wide range = +20% / -30% line input voltage tolerance [002]= generator = 40Hz –... -
Seite 58: Operating States
O P E R A T I O N Operating states The status of the UPS system is displayed on the control panel. Normal mode In normal mode, the "NORM" display lights up continuously and the UPS system is supplied by the mains power supply. The UPS sys- tem monitors the batteries and charges these as needed. -
Seite 59: Startup And Shutdown
O P E R A T I O N Startup and shutdown 1. Plug the power cable of the UPS system into an outlet (includ- ed in the scope of supply of ZINTO E 3000). The display of the UPS system lights up and shows "StbY." 2. - Seite 60 O P E R A T I O N Shutdown 1. Keep the button on the UPS system pressed for three sec- onds. The UPS system emits a brief acoustic signal. The UPS sys- tem switches to standby mode and the display shows "STbY." NOTE If the button is released after less than 3 seconds, the...
-
Seite 61: Communication
C O M M U N I C A T I O N Communication RS-232 and USB interfaces To establish communication between the UPS system and a com- puter, connected the computer to the RS232 or USB interface of the UPS system using a suitable data cable (included in delivery) (see Figure 15, Figure 16, and Figure 17). -
Seite 62: Potential Free Contacts
C O M M U N I C A T I O N Potential free contacts The potential free contacts (not ZINTO E 1000) between Pin 1 and Pin 5 or Pin 8 and Pin 5 are designed as optical couplers. In order for the potential free contacts to work properly, a direct volt- age (max. -
Seite 63: Emergency-Off Function (Epo)
C O M M U N I C A T I O N Emergency-off function (EPO) The emergency-off function (EPO = Emergency Power-Off) is used for the immediate, remote deactivation of the UPS system and the connected consumers. For this purpose, the EPO plug (rear of UPS system, see Figure 10) must be removed and an external emergen- cy-off switch must be connected. -
Seite 64: Datawatch Software
C O M M U N I C A T I O N DataWatch software The standard scope of supply of the ZINTO E series includes Da- taWatch, the comprehensive software solution for the shutdown and management of the PC or server system, as well as for the monitor- ing of ZINTO E and the power supply mains. -
Seite 65: Maintenance
UPS system to the mains power supply. The internal batteries will charge up to 90% of their capacity in less than three hours. ONLINE recommends charg- ing the batteries for 48 hours after longer periods of storage (>3 months). -
Seite 66: Battery Change
M A I N T E N A N C E Battery change NOTE Do not remove the batteries while the UPS system is running in battery mode. Thanks to the hot-swap function, the batteries can be replaced with- out shutting down the UPS system and without having to disconnect the connected loads. -
Seite 67: Figure 11: Removing The Front Cover
M A I N T E N A N C E CAUTION DANGER OF AN ELECTRICAL SHOCK. Do not perform modifications to the cabling or the connections of the batter- ies yourself. Attempting to modify the cabling of the batteries yourself can lead to serious injuries ... -
Seite 68: Figure 12: Disconnecting The Battery Plug Connection
M A I N T E N A N C E 2. Disconnect the battery plug connection (see Figure 12). Figure 12: Disconnecting the battery plug connection 3. Remove the battery cover (see Figure 13). Figure 13: Removing the battery cover 4. -
Seite 69: Testing The New Batteries
M A I N T E N A N C E 5. Replace the batteries in the battery module insert. NOTE Check whether the replacement batteries have the same specifications as the old batteries. Please read the "Disposing of old batteries or the UPS sys- tem"... -
Seite 70: Disposing Of Old Batteries Or The Ups System
Disposing of old batteries or the UPS system Contact the local recycling centre for information on disposing of the old batteries or UPS system properly. You can also dispose of old batteries at ONLINE at no cost. Please contact support for this option (see Support). CAUTION ... -
Seite 71: Troubleshooting
T R O U B L E S H O O T I N G Troubleshooting ZINTO E is designed for independent operation and automatically indicates any problems on the display. Warning messages Alarm signal Possible causes Measure or status A power failure has oc- The UPS system supplies the con- Battery mode... -
Seite 72: General Faults
T R O U B L E S H O O T I N G General faults Operating state Possible causes Measure The UPS system batteries must Connect the UPS system to the does not make the charged or replaced. mains power for 48 hours to charge expected time... -
Seite 73: Support
As German provider, ONLINE guarantees direct responsiveness, hassle-free processing and the shortest reaction times. Comprehen- sive support is understood – before and after the purchase. At ONLINE, comprehensive support and service solutions are our top priority. Direct consulting and support free of cost under:... -
Seite 74: Technical Data
T E C H N I C A L D A T A Technical Data Specification Model ZINTO E ZINTO E ZINTO E ZINTO E 1000 1500 2000 3000 Article number ZE1000 ZE1500 ZE2000 ZE3000 Electrical properties Nominal output (VA/W) 1000VA 1500VA 2000VA... -
Seite 75: Rear View
T E C H N I C A L D A T A Operation conditions, standards, and approvals Operating temperature 0 - 40°C Relative air humidity 20 - 80% noncondensing Operating height Up to 1,500 metres above sea level Storage temperature -15 - 45°C Noise development silently /... -
Seite 76: Figure 16: Rear View Of Zinto E 1500 And 2000
T E C H N I C A L D A T A NOTE The connections for load segment 1 are shown shaded. Figure 16: Rear view of ZINTO E 1500 and 2000 Figure 17: Rear view of ZINTO E 3000 76 / 120 ZE1000-3000_manual_ger_eng_it_V1.0.3 R. - Seite 77 T E C H N I C A L D A T A CE conformity 77 / 120 ZE1000-3000_manual_ger_eng_it_V1.0.3 R. Kistler ................
- Seite 78 ONLINE USV-Systeme AG (ONLINE) hereby warrants this product to be free from defects in material and workmanship for a period of two years from the date of purchase. The obligation of ONLINE un- der this warranty is limited to the replacement or repair of any prod- uct which proves upon our examination to be defective.
- Seite 79 79 / 120 ZE1000-3000_manual_ger_eng_it_V1.0.3 R. Kistler ................
- Seite 80 80 / 120 ZE1000-3000_manual_ger_eng_it_V1.0.3 R. Kistler ................
-
Seite 81: Manuale Dell'utente
Manuale dell'utente ONLINE ZINTO Serie E Modelli 1000 - 3000 Versione: 1.0.2 Deutsch: Seite English: Page 41 - Italia: Pagina 81 - 120 Germania Italia Svizzera ONLINE USV-Systeme AG ONLINE UPS-Systems S.r.l. ONLINE USV-Systeme AG Luise-Ullrich-Str. 8 Via Ferruccio Gilera 110 Eigenheimstraße 11... - Seite 82 82 / 120 ZE1000-3000_manual_ger_eng_it_V1.0.3 R. Kistler ................
- Seite 83 Indice Manuale dell'utente ................81 Introduzione ................86 Avvertenze di sicurezza ............88 Montaggio ................. 89 Controllo della fornitura ............. 89 Disimballaggio dell’UPS ............ 89 Controllo degli accessori ........... 90 Installazione come tower ........... 90 Installazione come rack ............. 91 Messa in funzione .............
- Seite 84 Dati tecnici ................114 Specifiche dei sistemi UPS ..........114 Vista posteriore dell’UPS ..........115 Dichiarazione CE............. 117 Garanzia ................. 118 84 / 120 ZE1000-3000_manual_ger_eng_it_V1.0.3 R. Kistler ................
- Seite 85 Elenco delle figure Figura 1: Schema di principio ............. 86 Figura 2: ZINTO E 1000 - 3000 come rack ........87 Figura 3: ZINTO E 1000 - 3000 come tower ........87 Figura 4: Installazione Tower ............. 91 Figura 5: Smontaggio del pannello frontale ........91 Figura 6: Fissaggio nel rack ...............
-
Seite 86: Introduzione
I N T R O D U Z I O N E Introduzione ONLINE USV-Systeme AG (ONLINE) è un'azienda tedesca leader nel settore dei gruppi di continuità (UPS), attiva dal 1988 nello svi- luppo, produzione, commercializzazione e assistenza di sistemi UPS. - Seite 87 I N T R O D U Z I O N E Inoltre ZINTO E offre i seguenti vantaggi: Modello combinato rack-tower, solo 2 unità Funzionamento silenzioso Compatibilità NAS Tensione di uscita sinusoidale perfetta Rendimento >96% ...
-
Seite 88: Avvertenze Di Sicurezza
A V V E R T E N Z E D I S I C U R E Z Z A Avvertenze di sicurezza Il presente manuale contiene istruzioni importanti da osservare du- rante l'installazione e la manutenzione del sistema UPS e delle bat- terie. -
Seite 89: Montaggio
ONLINE non potrà prendersi carico di eventuali danni. Successiva- mente raccomandiamo di esaminare la merce ricevuta, comunicando a ONLINE entro 8 (otto) giorni dalla consegna eventuali vizi riscon- trati. In caso contrario i prodotti saranno considerati definitivamente accettati e conformi a quanto richiesto nell’ordine. Conservare i car- toni di trasporto e il materiale d'imballaggio per l’eventuale reso in... -
Seite 90: Controllo Degli Accessori
M O N T A G G I O Per il disimballaggio della scatola e degli accessori: Aprire il cartone esterno e prelevare gli accessori imballati con l’UPS. Prelevare il sistema UPS dal cartone esterno sollevandolo con cautela. Posizionare l’UPS in un luogo protetto e sufficientemente ventilato, privo di umidità, gas infiammabili e corrosione. -
Seite 91: Installazione Come Rack
M O N T A G G I O 1. Spingere sistema UPS in verticale nei due piedi (vedi Figura 4). Per assicurare la stabilità, la distanza tra i piedi deve essere la massima possibile. Figura 4: Installazione Tower 2. Procedere con il paragrafo "Messa in funzione". Installazione come rack L’UPS viene fornito completamente assemblato e pronto per il colle- gamento. - Seite 92 M O N T A G G I O 3. Divaricare le graffe in plastica ed estrarre il display dal fissag- gio. Ruotarlo di 90° in senso antiorario, quindi inserirlo nuo- vamente nel pannello frontale. 4. Montare nuovamente il pannello frontale. Spingere il pannello verso destra finché...
-
Seite 93: Messa In Funzione
7. Attivare le utenze, una dopo l'altra. AVVERTENZA Le batterie interne si ricaricano in meno di tre ore fino al 90% della loro capacità. ONLINE consiglia di ricaricare le batterie per 48 ore dopo l'installazione o dopo un lungo periodo di immagazzinamento. -
Seite 94: Funzionamento
F U N Z I O N A M E N T O Funzionamento Quadro di comando L’ UPS è dotato di un quadro di comando a 4 tasti e di un di- splay grafico (vedi Figura 7). Durante il funzionamento nor- male l'illuminazione dello sfon- do è... -
Seite 95: Display
F U N Z I O N A M E N T O Display Simbolo Descrizione Funzione Tensione e fre- Mostra alternativamente la tensione e la fre- quenza in ingres- quenza in ingresso Connettore di in- Segnala il connettore di ingresso gresso Tensione e fre- Mostra alternativamente la tensione e la fre-... -
Seite 96: Impostazioni
F U N Z I O N A M E N T O Messaggio Descrizione STbY Sistema UPS in standby IPVL Tensione in ingresso troppo bassa IPVH Tensione in ingresso troppo alta IPFL Frequenza in ingresso troppo bassa IPFH Frequenza in ingresso troppo alta NORM UPS in modalità... -
Seite 97: Tabella 5: Impostazioni
F U N Z I O N A M E N T O Impostazione Opzioni disponibili Standard "230V" [220]=220V [230]=230V Tensione in [240]=240V uscita "normal" [000]= Normale = +/-20% tolleranza tensione in ingresso Ingresso [001]= Wide range +20= +/-30% tolleranza tensione in ingresso [002]= Generatore = 40Hz –... -
Seite 98: Modalità D'esercizio
F U N Z I O N A M E N T O Modalità d’esercizio Lo stato dell’UPS viene visualizzato sul quadro di comando. Funzionamento normale In modalità di funzionamento normale sul display compare "NORM" e il sistema UPS viene alimentato dalla rete di alimentazione. L’UPS monitora le batterie e le ricarica se necessario. -
Seite 99: Avvio E Spegnimento
F U N Z I O N A M E N T O Avvio e spegnimento Avvio dell’UPS 1. Collegare il cavo di allacciamento alla rete del sistema UPS (per il modello ZINTO E 3000 compreso nella dotazione) a una presa di corrente. Il display del sistema UPS si accende e compare "STbY ". - Seite 100 F U N Z I O N A M E N T O Disattivazione 1. Premere il tasto del sistema UPS per almeno tre secondi. L’UPS emette un breve segnale acustico, commuta sulla mo- dalità Standby e sul display compare "STbY". AVVERTENZA Se il tasto viene rilasciato dopo meno di tre secondi,...
-
Seite 101: Comunicazione
C O M U N I C A Z I O N E Comunicazione Interfaccia RS-232 e interfaccia USB Per ripristinare la comunicazione tra l’UPS e un computer, collegare il computer a una delle interfacce di comunicazione dell’UPS me- diante un cavo dati idoneo (cavo fornito in dotazione) (vedi Figura 15, Figura 16 e Figura 17). -
Seite 102: Contatti Privi Di Potenziale
C O M U N I C A Z I O N E Contatti privi di potenziale I contatti a potenziale libero (non ZINTO E 1000) tra pin 1 e pin 5 oppure tra pin 8 e pin 5 sono realizzati come foto accoppiatori. Perché... -
Seite 103: Funzione Arresto Di Emergenza (Epo)
C O M U N I C A Z I O N E Funzione arresto di emergenza (EPO) La funzione di arresto di emergenza (EPO = Emergency Power-Off) serve per disattivare immediatamente l’UPS e le utenze collegate a distanza. A tal fine è necessario rimuovere il connettore EPO (sul la- to posteriore del sistema UPS, vedi Figura 10) e collegare un inter- ruttore di arresto di emergenza esterno. -
Seite 104: Software Datawatch
C O M U N I C A Z I O N E Software DataWatch In dotazione a ogni sistema della Serie ZINTO E viene fornito il soft- ware DataWatch, la soluzione completa per lo spegnimento e la ge- stione del sistema di PC o server, nonché per il monitoraggio del gruppo ZINTO E e della rete. -
Seite 105: Manutenzione
Le batterie interne si ricaricano in meno di tre ore fino al 90% della loro capacità. ONLINE raccomanda di ricaricare le batterie per 48 ore dopo un lungo tempo di immagazzinamento (> 3 mesi). -
Seite 106: Sostituzione Delle Batterie
M A N U T E N Z I O N E Sostituzione delle batterie AVVERTENZA Non rimuovere le batterie finché il sistema UPS funziona nel- la modalità a batteria. Grazie alla funzione hot-swap è possibile sostituire le batterie senza prima spegnere l’UPS e senza separare i carichi collegati. - Seite 107 M A N U T E N Z I O N E ATTENZIONE PERICOLO DI SCOSSA ELETTRICA. Non apportare in al- cun caso modifiche al cablaggio o ai collegamenti della bat- teria. Il tentativo di modificare in proprio il cablaggio della bat- teria può...
- Seite 108 M A N U T E N Z I O N E 2. Separare il collegamento a innesto della batteria (vedi Figura 12). Figura 12: Distacco del collegamento a innesto delle batterie 3. Rimuovere la copertura delle batterie (vedi Figura 13). Figura 13: Smontaggio della copertura delle batterie 4.
-
Seite 109: Test Delle Batterie Nuove
M A N U T E N Z I O N E 5. Sostituire le batterie nell'inserto batterie. AVVERTENZA Verificare che le batterie sostitutive abbiano le stesse speci- fiche delle batterie vecchie. Per uno smaltimento corretto leggere il paragrafo "Smalti- mento delle batterie vecchie o dell’UPS"... -
Seite 110: Smaltimento Delle Batterie Vecchie O Dell'ups
Le batterie vecchie possono essere smaltite gratuitamente anche inviandole (a proprio carico) ad ONLINE. Per un gruppo di batterie con peso totale superiore ai 100 Kg., sarà possibile concordare direttamente con il CO.BAT. il ritiro gratuito presso la propria sede. -
Seite 111: Risoluzione Dei Guasti
R I S O L U Z I O N E D E I G U A S T I Risoluzione dei guasti L’UPS ZINTO E è predisposto per il funzionamento autonomo e se- gnala automaticamente sul display eventuali problemi durante il fun- zionamento. -
Seite 112: Guasti Generali
R I S O L U Z I O N E D E I G U A S T I Guasti generali Segnale di Possibile causa Misura allarme o stato L’UPS non mette a Le batterie devono essere Collegare l’UPS alla corrente di rete disposizione caricate o sostituite. -
Seite 113: Servizio Assistenza
Naturalmente offriamo un supporto completo prima e dopo l'acquisto. I servizi di supporto e assistenza di ONLINE sono noti e apprezzati per la loro eccellenza. Consulenza e supporto diretti. -
Seite 114: Dati Tecnici
D A T I T E C N I C I Dati tecnici Specifiche dei sistemi UPS Modello ZINTO E ZINTO E ZINTO E ZINTO E 1000 1500 2000 3000 Cod. articolo ZE1000 ZE1500 ZE2000 ZE3000 Caratteristiche elettriche Potenza nominale (VA/W) 1000VA 1500VA 2000VA... -
Seite 115: Vista Posteriore Dell'ups
D A T I T E C N I C I Condizioni di eserci- zio, norme e autorizza- zioni Temperatura d'eserci- 0 - 40°C Umidità relativa 20 - 80% senza condensa Altezza d'installazione Fino a 1.500 metri sul livello del mare Temperatura di -15 - 45°C esercizio... - Seite 116 D A T I T E C N I C I AVVERTENZA I collegamenti per il segmento di carico 1 sono tratteggiati. Figura 16: Vista posteriore ZINTO E 1500 e 2000 Figura 17: Vista posteriore ZINTO E 3000 116 / 120 ZE1000-3000_manual_ger_eng_it_V1.0.3 R.
-
Seite 117: Dichiarazione Ce
D A T I T E C N I C I Dichiarazione CE 117 / 120 ZE1000-3000_manual_ger_eng_it_V1.0.3 R. Kistler ................ -
Seite 118: Garanzia
ONLINE USV-Systeme AG (ONLINE) garantisce che il presente prodotto è privo di difetti di materiale e fabbricazione per un periodo di due anni dalla data di acquisto. Gli obblighi di ONLINE previsti dal- la presente garanzia si limitano alla riparazione o alla sostituzione (a discrezione di ONLINE) dei prodotti difettosi. - Seite 119 119 / 120 ZE1000-3000_manual_ger_eng_it_V1.0.3 R. Kistler ................
- Seite 120 120 / 120 ZE1000-3000_manual_ger_eng_it_V1.0.3 R. Kistler ................