Silvercrest SIKP 3400 A1 Bedienungsanleitung
Induktionskochplatte
Vorschau ausblenden
Andere Handbücher für SIKP 3400 A1:
- Bedienungsanleitung (62 Seiten) ,
- Bedienungsanleitung (62 Seiten) ,
- Bedienungsanleitung (82 Seiten)
Inhaltsverzeichnis
Werbung
Verfügbare Sprachen
Verfügbare Sprachen
Quicklinks
KOMPERNASS GMBH
Burgstraße 21
D-44867 Bochum
www.kompernass.com
Version des informations · Stand van de informatie
Stand der Informationen · Last Information Update:
07 / 2012 · Ident.-No.: SIKP3400A1042012-2
IAN 75467
PLAQUE À INDUCTION SIKP 3400 A1
PLAQUE À INDUCTION
Mode d'emploi
INDUKTIONSKOCHPLATTE
Bedienungsanleitung
IAN 75467
2
Avant de lire le mode d'emploi, ouvrez la page contenant les illustrations et familiarisez-vous ensuite avec
toutes les fonctions de l'appareil.
Vouw vóór het lezen de pagina met de afbeeldingen open en maak u vertrouwd met alle functies van het
apparaat.
Klappen Sie vor dem Lesen die Seite mit den Abbildungen aus und machen Sie sich anschließend mit allen
Funktionen des Gerätes vertraut.
Before reading, unfold the page containing the illustrations and familiarise yourself with all functions of
the device.
FR / BE
INDUCTIEKOOKPLAAT
NL / BE
Gebruiksaanwijzing
DE / AT / CH
GB
INDUCTION HOB
Operating instructions
2
Mode d'emploi
Gebruiksaanwijzing
Bedienungsanleitung
Operating instructions
Page
1
Pagina 21
Seite
41
Page
61
Werbung
Kapitel
Inhaltsverzeichnis
Fehlerbehebung

Verwandte Anleitungen für Silvercrest SIKP 3400 A1


Inhaltszusammenfassung für Silvercrest SIKP 3400 A1
- Seite 1 Klappen Sie vor dem Lesen die Seite mit den Abbildungen aus und machen Sie sich anschließend mit allen Funktionen des Gerätes vertraut. Before reading, unfold the page containing the illustrations and familiarise yourself with all functions of the device. PLAQUE À INDUCTION SIKP 3400 A1 FR / BE Mode d’emploi Page PLAQUE À...
-
Seite 3: Inhaltsverzeichnis
Sommaire Introduction ........... 2 Utilisation conforme . -
Seite 4: Introduction
Introduction Félicitations pour l'achat de votre nouvel appareil ! Vous avez en eff et fait l'acquisition d'un équipement fi able et effi cace. La notice du mode d'emploi fait partie de cet équipement. Cette notice donne des recom- mandations importantes pour l'utilisation de l'appareil en toute sécurité. Prendre connaissance de cette notice avant d'utiliser l'appareil. -
Seite 5: Accessoires Fournis
Accessoires fournis L'appareil est équipé par défaut des composants suivants : ▯ plaque à induction ▯ aimant ▯ notice d'utilisation 1) Sortir du carton toutes les pièces de l'appareil et la notice. 2) Retirer tous les matériaux d'emballage. REMARQUE ► Vérifi... -
Seite 6: Présentation De L'appareil / Accessoires
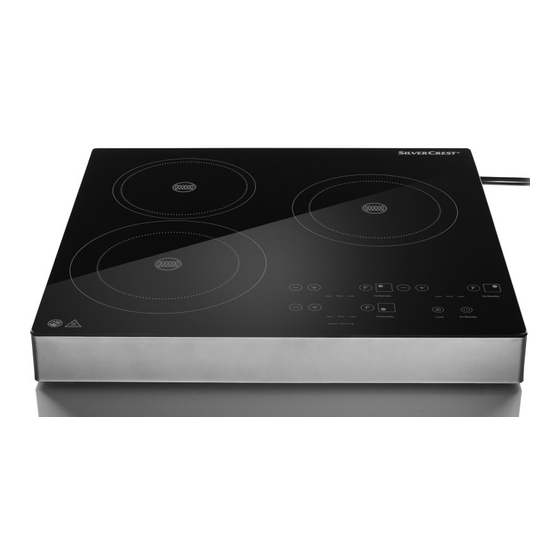
Présentation de l'appareil / accessoires Illustration A : 1 Plaque de cuisson arrière (1000 W) 2 Plaque de cuisson de droite (1400 W) 3 Champ de commande 4 Plaque de cuisson avant (2000 W) Figure B : 5 Touche "-" 6 Touche "+"... -
Seite 7: Consignes De Sécurité
Consignes de sécurité RISQUE D'ÉLECTROCUTION Veillez à ce que le cordon d'alimentation ne soit ► jamais mouillé ou humide pendant le fonction- nement. Disposez le cordon de manière à éviter qu'il ne soit endommagé ou coincé. Si le cordon d'alimentation ou le connecteur était ►... -
Seite 8: Risque De Choc Électrique
RISQUE DE CHOC ÉLECTRIQUE Assurez-vous que l'appareil, le cordon d'ali- mentation ou le connecteur secteur ne soient jamais immergés dans de l'eau ou dans d'autres liquides. MISE EN GARDE ! RISQUE D'ACCIDENT Ne touchez pas la surface sur laquelle un récipient ►... - Seite 9 MISE EN GARDE ! RISQUE D'ACCIDENT Attention ! Surface brûlante ! Ce symbole vous incite à ne pas toucher la plaque de cuisson directement après l'usage. Risque de brûlure ! MISE EN GARDE ! RISQUE D'INCENDIE ! Les préparations brûlantes peuvent se mettre à ►...
- Seite 10 MISE EN GARDE ! RISQUE D'INCENDIE ! Ne jamais faire fonctionner l'appareil sur une ► surface ou un support métallique. Il y a en eff et risque de surchauff e et donc de source d'incendie. L'appareil peut d'autre part être endommagé de façon irréparable.
-
Seite 11: Mode De Fonctionnement
Mode de fonctionnement Alors qu'avec les plaques de cuisson habituelles, ce sont les plaques elles-mêmes qui deviennent chaudes, la chaleur sur une plaque de cuisson à induction est générée au fond du récipient de cuisson. La plaque de cuisson elle-même ne s'échauff... -
Seite 12: Installation
Installation L'appareil nécessite une arrivée d'air libre pour ne pas surchauff er. Voilà pourquoi nous vous recommandons d'installer l'appareil comme suit : – un espace libre de 10 cm minimum tout autour, par ex. vers le mur le plus proche, –... -
Seite 13: Fonctionnement
Fonctionnement Plaques de cuisson par induction La plaque de cuisson 4 à l'avant et la plaque de cuisson 2 à droite ■ disposent chacune de 10 niveaux de puissance. La plaque de cuisson 2 à droite fonctionne indépendamment des autres plaques : elle peut toujours fonctionner à... -
Seite 14: Opération
Opération L'utilisation des plaques de cuisson 1 2 4 est présentée en prenant l'exemple de la plaque de cuisson 1 arrière. Les touches et les témoins lumineux sont numérotés sur le rabattant de la plaque de cuisson 1 arrière. L'utilisation des 3 plaques de cuisson est identique, en agissant sur les éléments de commande e i o correspondants. -
Seite 15: Mise À L'arrêt Automatique De Sécurité
5) Pour mettre à l'arrêt la plaque de cuisson 1, actionnez la touche "On/ Standby" w. Pour mettre à l'arrêt simultanément toutes les plaques de cuisson 1 2 4, actionnez la touche "On/Standby" t. REMARQUE Lorsque les 3 plaques de cuisson 1 2 4 sont à l'arrêt après la fi n d'une ►... -
Seite 16: Minuterie
REMARQUE ► L'appareil se met automatiquement en mode 'standby' au bout de 120 minutes. Minuterie Vous pouvez sélectionner une durée de 0 - 180 min, qui lorsqu'elle est écoulée, met à l'arrêt la plaque de cuisson correspondante 1 2 4. Si vous actionnez la touche "+"... -
Seite 17: Sécurité Enfant
Minuterie en mode ‚température' 1) Démarrez tout d'abord le réchauff ement, conformément à la description précédente. 2) Actionnez la touche "F" q jusqu'à ce que le témoin lumineux du mode température 9 et le témoin lumineux de minuterie 0 s'allument en même temps. -
Seite 18: Nettoyage
Nettoyage ATTENTION - RISQUE DE CHOC ÉLECTRIQUE ! ► Avant de nettoyer l'appareil, retirez toujours la fi che secteur de la prise secteur. ► L'appareil ne doit sous aucun prétexte être plongé dans l'eau ou d'autres liquides ! Il peut en résulter un danger de mort par choc électrique et l'appareil peut être endommagé. -
Seite 19: Dépannage
Dépannage SOLUTIONS PROBLÈMES CAUSE POSSIBLE POSSIBLES La fi che secteur i n'est pas Branchez l'appareil sur L'appareil ne fonctionne branchée. une prise secteur. pas. Le témoin lumineux On/Standby r ne Adressez-vous au service L'appareil est endommagé. s'allume pas. après-vente. pas de récipient sur la plaque Mettre un récipient appro- de cuisson correspondante prié... -
Seite 20: Mise Au Rebut
pas de récipient sur la plaque Mettre un récipient appro- de cuisson correspondante 1 prié sur la plaque de cuisson 2 4. 1 2 4. Présence d'un récipient inappro- Mettre un récipient appro- Affi chage de - - - sur l'un prié... -
Seite 21: Importateur
Importateur KOMPERNASS GMBH BURGSTRASSE 21 44867 BOCHUM, GERMANY www.kompernass.com Garantie Cet appareil bénéfi cie de 3 ans de garantie à compter de la date d'achat. L'appareil a été fabriqué avec soin et consciencieusement contrôlé avant sa distribution. Veuillez conserver le ticket de caisse en guise de preuve d'achat. Dans le cas où... -
Seite 22: Service Après-Vente
Service après-vente Service France Tel.: 0800 919270 E-Mail: kompernass@lidl.fr IAN 75467 Service Belgique Tel.: 070 270 171 (0,15 EUR/Min.) E-Mail: kompernass@lidl.be IAN 75467 SKIP 3400 A1... - Seite 23 Inhoud Inleiding ........... . . 22 Gebruik in overeenstemming met bestemming .
-
Seite 24: Inleiding
Inleiding Hartelijk gefeliciteerd met de aankoop van uw nieuwe apparaat! U heeft daarmee gekozen voor een modern en eersteklas product. De gebruiks- aanwijzing maakt onderdeel uit van dit product. Zij bevat belangrijke instruc- ties voor veiligheid, gebruik en afvoer. Maakt u zich voor het gebruik van het product vertrouwd met alle gebruiks- en veiligheidsinstructies. -
Seite 25: Inhoud Van Het Pakket
Inhoud van het pakket Het apparaat wordt standaard met volgende componenten geleverd: ▯ Inductiekookplaat ▯ Magneet ▯ Gebruiksaanwijzing 1) Haal alle delen van het apparaat en de gebruiksaanwijzing uit de doos. 2) Verwijder al het verpakkingsmateriaal. OPMERKING ► Controleer of de levering compleet is en of er sprake is van zichtbare schade. -
Seite 26: Beschrijving Van Het Apparaat / Accessoires
Beschrijving van het apparaat / accessoires Afbeelding A: 1 Kookplaat achter (1000 W) 2 Kookplaat rechts (1400 W) 3 Bedieningspaneel 4 Kookplaat voor (2000 W) Afbeelding B: 5 Toets "-" 6 Toets "+" Display 8 Indicatielampje prestatie-modus ("Heat") 9 Indicatielampje temperatuur-modus ("Temp.") 0 Indicatielampje Timer q Toets "F"... -
Seite 27: Veiligheidsvoorschriften
Veiligheidsvoorschriften GEVAAR VOOR STROOMSCHOKKEN Let erop, dat het netsnoer tijdens het bedrijf nooit ► nat of vochtig wordt. Leg het zo neer dat het niet be- klemd raakt of anderszins beschadigd kan worden. Als het netsnoer of de netstekker beschadigd blijken, ►... - Seite 28 GEVAAR VOOR STROOMSCHOKKEN Let erop, dat het apparaat, het netsnoer of de stekker nooit ondergedompeld worden in water of andere vloeistoff en. WAARSCHUWING! LETSELGEVAAR! Raak het oppervlak niet aan waarop eerst een ► hete pan heeft gestaan. Direct daarna kan het oppervlak erg heet zijn.
- Seite 29 WAARSCHUWING! LETSELGEVAAR! Let op! Heet oppervlak! Dit symbool waarschuwt u ervoor om de kookplaat direct na gebruik aan te raken. Verbrandingsgevaar! WAARSCHUWING! BRANDGEVAAR! Oververhitte gerechten kunnen in brand vliegen! ► Laat het apparaat nooit onbeheerd werken. Plaats het daarom ook nooit onder brandbare ►...
- Seite 30 WAARSCHUWING! BRANDGEVAAR! Gebruik het apparaat nooit op een metalen tafel ► of een andere ondergrond van metaal. Deze kan verhit raken en zodoende brand veroorzaken. Of kan het apparaat onherstelbaar beschadigd raken. Gebruik het apparaat niet met een externe tijd- ►...
-
Seite 31: Wijze Van Functioneren
Wijze van functioneren Terwijl gewone kookplaten zelf erg heet worden, ontstaat de hitte bij een induc- tiekookplaat in de bodem van het kookgerei. De kookplaat zelf wordt niet verhit - deze wordt heet, als er iets in een pan daarop wordt verhit en de hitte in de pan terug-straalt op de kookplaat. -
Seite 32: Plaatsen
Plaatsen Het apparaat heeft vrije luchttoevoer nodig om niet oververhit te raken. Zet het apparaat daarom zo neer, dat ... – min. 10 cm afstand rondom vrij blijft, bijv. ten opzichte van de dichtstbij- zijnde wand, – min. 60 cm afstand naar boven toe vrij blijft, bijv. ten opzichte van een hangkast. -
Seite 33: Werking
Werking De inductiekookplaten De voorste 4 en de rechter kookplaat 2 beschikken telkens over 10 pres- ■ tatieniveaus. De rechter 2 kookplaat loopt onafhankelijk van de overige kookplaten, d.w.z. u kunt altijd een prestatieniveau tot een prestatieniveau 10 instellen. De achterste kookplaat 1 beschikt over 5 prestatieniveaus. ■... -
Seite 34: Bediening
Bediening De bediening van de kookplaten 1 2 4 wordt hier uitgelegd aan de hand van de achterste kookplaat 1. De toetsen en indicatielampjes zijn doorgenummerd op de uitvouwpagina voor de achterste kookplaat 1. De bediening is echter bij alle 3 kookplaten met behulp van de betreff ende bedieningselementen e i o identiek. -
Seite 35: Veiligheidsuitschakeling
5) Om de kookplaat 1 uit te schakelen, drukt u op de toets "On / Standby" w. Om alle kookplaten 1 2 4 gelijktijdig uit te schakelen, drukt u op de toets "On / Standby" t. OPMERKING Als alle 3 kookplaten 1 2 4 na een gebruik of instelling uitgeschakeld ►... -
Seite 36: Timer
OPMERKING ► Het apparaat wordt na 120 minuten automatisch in de standby-modus geschakeld. Timer U kunt een tijd van 0 - 180 min. vooraf kiezen na verloop waarvan de betreff ende kookplaat 1 2 4 moet uitschakelen. Als u op de toets "+" 6 drukt, wordt de tijd steeds met 5 minuten verhoogd. -
Seite 37: Kinderslot
Timer in de temperatuur-modus 1) Start eerst het verhitten in de temperatuur-modus zoals eerder beschreven. 2) Druk dan zo vaak op de toets "F" q totdat het indicatielampje temperatuur- modus 9 en het indicatielampje timer 0 gelijktijdig branden. 3) Stel met behulp van de toetsen "-" 5 en "+" 6 de gewenste tijd in na verloop waarvan de kookplaat 1 moet uitschakelen. -
Seite 38: Reinigen
Reinigen WAARSCHUWING - GEVAAR VOOR STROOMSCHOKKEN! ► Voordat u het apparaat reinigt, haalt u altijd eerst de stekker uit het stop- contact. ► In geen geval mag het apparaat, of delen ervan, worden onderge- dompeld in vloeistoff en! Hierdoor kan levensgevaar ontstaan door een elektrische schok en het apparaat kan beschadigd raken. -
Seite 39: Problemen Oplossen
Problemen oplossen MOGELIJKE MOGELIJKE PROBLEEM OORZAAK OPLOSSINGEN De netstekker is niet Sluit het apparaat aan Het apparaat functioneert aangesloten. op een stopcontact. niet. Het indicatielampje On / Standby r brandt Neem contact op met Het apparaat is beschadigd. niet. de service. Er staat geen reservoir op Zet een geschikt reservoir de betreff... -
Seite 40: Apparaat Afdanken
Er staat geen reservoir op Zet een kookreservoir op de betreff ende kookplaat het kookplaat 1 2 4. 1 2 4. Er staat een ongeschikt kook- Zet een geschikt kookreser- Op een van de displays reservoir op de betreff ende voir op de kookplaat wordt - - - aangegeven. -
Seite 41: Garantie
Garantie U heeft op dit apparaat 3 jaar garantie vanaf de koopdatum. Het apparaat werd zorgvuldig geproduceerd en voorafgaand aan de levering nauwkeurig gecontroleerd. Bewaar a.u.b. de kassabon als aankoopbewijs. Bij een garantiekwestie neemt u telefonisch contact op met uw serviceadres. Alleen op die manier kan een kosteloze verzending van uw product worden gegarandeerd. - Seite 42 SKIP 3400 A1...
- Seite 43 Inhaltsverzeichnis Einleitung ........... . 42 Bestimmungsgemäße Verwendung .
-
Seite 44: Einleitung
Einleitung Herzlichen Glückwunsch zum Kauf Ihres neuen Gerätes! Sie haben sich damit für ein modernes und hochwertiges Produkt entschieden. Die Bedienungsanleitung ist Bestandteil dieses Produktes. Sie enthält wichtige Hinweise für Sicherheit, Gebrauch und Entsorgung. Machen Sie sich vor der Benutzung des Produkts mit allen Bedien- und Sicherheitshinweisen vertraut. Benutzen Sie dieses Produkt nur wie beschrieben und für die angegebenen Einsatzbereiche. -
Seite 45: Lieferumfang
Lieferumfang Das Gerät wird standardmäßig mit folgenden Komponenten geliefert: ▯ Induktionskochplatte ▯ Magnet ▯ Bedienungsanleitung 1) Entnehmen Sie alle Teile des Gerätes und die Bedienungsanleitung aus dem Karton. 2) Entfernen Sie sämtliches Verpackungsmaterial. HINWEIS ► Prüfen Sie die Lieferung auf Vollständigkeit und auf sichtbare Schäden. ►... -
Seite 46: Gerätebeschreibung / Zubehör
Gerätebeschreibung / Zubehör Abbildung A: 1 Kochfeld hinten (1000 W) 2 Kochfeld rechts (1400 W) 3 Bedienfeld 4 Kochfeld vorne (2000 W) Abbildung B: 5 Taste „-“ 6 Taste „+“ 7 Display 8 Kontrollleuchte Leistungsmodus („Heat“) 9 Kontrollleuchte Temperaturmodus („Temp.“) 0 Kontrollleuchte Timer q Taste „F“... -
Seite 47: Sicherheitshinweise
Sicherheitshinweise STROMSCHLAGGEFAHR Achten Sie darauf, dass im Betrieb das Netzka- ► bel niemals nass oder feucht wird. Führen Sie es so, dass es nicht eingeklemmt oder anderweitig beschädigt werden kann. Sollte das Netzkabel oder der Netzstecker be- ► schädigt sein, lassen Sie diese erst durch den Service (Kundendienst) ersetzen, bevor Sie das Gerät weiter verwenden. - Seite 48 STROMSCHLAGGEFAHR Stellen Sie sicher, dass das Gerät, das Netz- kabel oder der Netzstecker niemals in Was- ser oder andere Flüssigkeiten getaucht wird. WARNUNG! VERLETZUNGSGEFAHR! Berühren Sie nicht die Fläche, auf der zuvor ein ► heißes Kochgefäß gestanden hat. Direkt danach kann die Fläche sehr heiß...
- Seite 49 WARNUNG! VERLETZUNGSGEFAHR! Achtung! Heiße Oberfl äche! Dieses Symbol warnt Sie davor, direkt nach dem Gebrauch das Kochfeld zu berühren. Verbrennungsgefahr! WARNUNG! BRANDGEFAHR! Überhitzte Speisen können zu brennen beginnen! ► Lassen Sie das Gerät nie unbeaufsichtigt arbeiten. Stellen Sie es deshalb auch niemals unter brenn- ►...
-
Seite 50: Um Gefahren Durch Elektromagnetische Felder Zu Vermeiden
WARNUNG! BRANDGEFAHR! Betreiben Sie das Gerät niemals auf einem me- ► tallischen Tisch oder einer anderen metallischen Unterlage. Diese kann sich erhitzen und so zu einem Brand führen. Oder das Gerät kann irrepa- rabel beschädigt werden. Betreiben Sie das Gerät nicht mit einer externen ►... -
Seite 51: Funktionsweise
Funktionsweise Während normale Kochplatten selber heiß werden, entsteht die Hitze bei einer Induktionskochplatte im Boden des Kochgeschirrs. Das Kochfeld selber wird nicht erhitzt - es erhitzt sich, wenn Etwas in einem Topf darauf erhitzt wird und die Hitze im Topf auf das Kochfeld zurückstrahlt. (Rückerwärmung). Hierfür sorgt ein Energiefeld, das nur in magnetisch leitfähigen Materialien Hitze erzeugt, z.B. -
Seite 52: Aufstellen
Aufstellen Das Gerät benötigt freie Luftzufuhr, um nicht zu überhitzen. Stellen Sie das Gerät deshalb so auf, dass ... – min. 10 cm Abstand rundum frei bleibt, z.B. zur nächsten Wand, – min. 60 cm Abstand nach oben frei bleibt, z.B. zu einem Hängeschrank. ■... -
Seite 53: Betrieb
Betrieb Die Induktionskochfelder Das vordere 4 und das rechte Kochfeld 2 verfügen über je 10 Leistungs- ■ stufen. Das rechte 2 Kochfeld läuft unabhängig von den übrigen Kochfel- dern, d.h. Sie können jederzeit eine Leistungsstufe bis zu Leistungsstufe 10 einstellen. Das hintere Kochfeld 1 verfügt über 5 Leistungsstufen. -
Seite 54: Bedienen
Bedienen Die Bedienung der Kochfelder 1 2 4 wird hier exemplarisch für das hintere Kochfeld 1 erklärt. Die Tasten und Kontrollleuchten sind auf der Ausklappseite für die hintere Kochplatte 1 durchnummeriert. Die Bedienung ist jedoch bei allen 3 Kochfeldern mit Hilfe der jeweiligen Bedienelemente e i o identisch. 1) Stellen Sie mittig auf das hintere Kochfeld 1 das Kochgefäß... -
Seite 55: Sicherheitsabschaltung
5) Um das Kochfeld 1 auszuschalten, drücken Sie die Taste „On / Standby“ w. Um alle Kochfelder 1 2 4 gleichzeitig auszuschalten, drücken Sie die Taste „On / Standby“ t. HINWEIS Wenn alle 3 Kochfelder 1 2 4 nach einer Benutzung oder Einstellung ►... -
Seite 56: Timer
HINWEIS ► Das Gerät schaltet sich nach 120 Minuten automatisch in den Standby- Modus. Timer Sie können eine Zeit von 0 - 180 Min. vorwählen, nach deren Ablauf sich das je- weilige Kochfeld 1 2 4 ausschalten soll. Wenn Sie die Taste „+“ 6 drücken, erhöht sich die Zeit um jeweils 5 Minuten. -
Seite 57: Timer Im Temperaturmodus
Timer im Temperaturmodus 1) Starten Sie erst das Erhitzen im Temperaturmodus wie zuvor beschrieben. 2) Drücken Sie dann die Taste „F“ q so oft, bis die Kontrollleuchte Temperatur- modus 9 und die Kontrollleuchte Timer 0 gleichzeitig leuchten. 3) Stellen Sie mit Hilfe der Tasten „-“ 5 und „+“ 6 die gewünschte Zeit ein, nach deren Ablauf sich das Kochfeld 1 ausschalten soll. -
Seite 58: Reinigen
Reinigen WARNUNG - STROMSCHLAGGEFAHR! ► Bevor Sie das Gerät reinigen, ziehen Sie immer den Netzstecker aus der Netzsteckdose. ► Auf keinen Fall darf das Gerät oder Teile davon in Flüssigkeiten getaucht werden! Hierdurch kann Lebensgefahr durch elektrischen Schlag entstehen und das Gerät beschädigt werden. ►... -
Seite 59: Fehlerbehebung
Fehlerbehebung MÖGLICHE PROBLEM MÖGLICHE URSACHE LÖSUNGEN Der Netzstecker ist nicht ange- Schließen Sie das Gerät an Das Gerät funktioniert schlossen. eine Netzsteckdose an. nicht. Die Kontrollleuchte On / Standby r leuchtet Wenden Sie sich an den Das Gerät ist beschädigt. nicht. -
Seite 60: Gerät Entsorgen
Ziehen Sie den Netzstecker In einem der Displays wird Das Gerät ist überhitzt (im aus der Netzsteckdose und E07 angezeigt. Temperatur-Modus)! warten Sie, bis sich das Gerät abgekühlt hat. Ziehen Sie den Netzstecker In einem der Displays wird Der Temperatursensor ist aus der Netzsteckdose und E08 angezeigt. -
Seite 61: Importeur
Importeur KOMPERNASS GMBH BURGSTRASSE 21 44867 BOCHUM, GERMANY www.kompernass.com Garantie Sie erhalten auf dieses Gerät 3 Jahre Garantie ab Kaufdatum. Das Gerät wurde sorgfältig produziert und vor Anlieferung gewissenhaft geprüft. Bitte bewahren Sie den Kassenbon als Nachweis für den Kauf auf. Bitte setzen Sie sich im Garantiefall mit Ihrer Servicestelle telefonisch in Verbindung. -
Seite 62: Service
Service Service Deutschland Tel.: 01805 772 033 (0,14 EUR/Min. aus dem dt. Festnetz, Mobilfunk max. 0,42 EUR/Min.) E-Mail: kompernass@lidl.de IAN 75467 Service Österreich Tel.: 0820 201 222 (0,15 EUR/Min.) E-Mail: kompernass@lidl.at IAN 75467 Service Schweiz Tel.: 0842 665566 (0,08 CHF/Min., Mobilfunk max. 0,40 CHF/Min.) E-Mail: kompernass@lidl.ch IAN 75467 SKIP 3400 A1... - Seite 63 Index Introduction ..........62 Intended use .
-
Seite 64: Introduction
Introduction Congratulations on the purchase of your new appliance! You have clearly decided in favour of a modern and high quality product. These operating instructions are a component of this product. They contain important information about the safety, operation and disposal of the appliance. Before using this product familiarise yourself with all of these operating and safety in- structions. -
Seite 65: Items Supplied
Items supplied The appliance is delivered with the following components as standard: ▯ Induction Hob ▯ Magnet ▯ Operating Instructions 1) Remove all parts of the appliance and the operating instructions from the carton. 2) Remove all packing material. NOTICE ►... -
Seite 66: Description Of Appliance / Attachments
Description of appliance / attachments Illustration A: 1 Cooking area, rear (1000 W) 2 Cooking area, right (1400 W) 3 Control panel 4 Cooking area, front (2000 W) Illustration B: 5 Button "-" 6 Button "+" 7 Display 8 Control lamp power mode ("Heat") 9 Control lamp temperature mode ("Temp.") Control Lamp Timer q Button "F"... -
Seite 67: Safety Instructions
Safety instructions RISK OF ELECTRIC SHOCK Ensure that the power cable can never become ► wet or damp during operation. Lay the cable such that it cannot be pinched or otherwise damaged. Should the cable or the electric plug become ►... - Seite 68 RISK OF ELECTRIC SHOCK Ensure that the appliance, the cable and the plug are NEVER submersed in water or other fl uids. WARNING! RISK OF INJURY! Do not touch the area on which hot cookware ► has just been standing. Directly after cooking, this area could be very hot.
- Seite 69 WARNING! RISK OF INJURY! Caution! Hot surfaces! This symbol warns you not to touch the cooking area directly after use. Risk of Burns! WARNING! RISK OF FIRE! Overheated foodstuff s could begin to burn! Never ► let the appliance be in use without supervision. Additionally, NEVER position the appliance be- ►...
- Seite 70 WARNING! RISK OF FIRE! NEVER operate the appliance on a metal table ► or other metallic surface. This may heat up and thus cause a fi re. Or, the appliance could be- come irreparably damaged. Do not operate the appliance via an external ►...
-
Seite 71: Manner Of Operation
Manner of operation Whilst standard hotplates become warm themselves, in an induction cooker the heat is created in the base of the cookware. The cooking area itself does not heat up - it becomes hot itself only insofor as, when a pan is heated up on it, then some heat radiates back onto the cooking area. -
Seite 72: Setup
Setup So as not to overheat, the appliance requires unrestricted ventilation. Therefore, position the appliance such that ... – there is an all-round free space of minimum 10 cm, e.g. to the nearest wall, – a free space directly above of minimum 60 cm, e.g. to a suspended wall cabinet. -
Seite 73: Operation
Operation The induction cooking areas The front 4 and the right cooking areas 2 each have 10 power levels. The ■ right 2 cooking area runs independently of the other cooking areas, i.e. you can always set an output power level up of to level 10. The rear cooking area 1 has 5 power levels. -
Seite 74: Operation
Operation The operation of the individual cooking areas 1 2 4 is explained here by using the rear cooking area 1 as the example. The buttons and control lamps for the rear cooking area 1 are numbered on the fold-out page. However, the operation of all 3 cooking areas is identical with the respective operating ele- ments e i o. -
Seite 75: Safety Switch Off
5) To switch the cooking area 1 off , press the button "On / Standby" w. To switch all cooking areas 1 2 4 off at the same time, press the button "On / Standby" t. NOTICE When all 3 cooking areas 1 2 4 are off , after usage or adjustment, ►... -
Seite 76: Timer
NOTICE ► The appliance switches itself into the standby mode automatically after 120 minutes. Timer You can pre-select a time period from 0 - 180 mins., after the expiry of which the respective cooking area 1 2 4 should switch itself off . If you press the button "+"... -
Seite 77: Timer In The Temperature Mode
Timer in the Temperature Mode 1) First, start the heating in the temperature mode as previously described.. 2) Then press the button "F" q repeatedly until the control lamp Temperature Mode 9 and the control lamp Timer 0 glow simultaneously. 3) Use the buttons "-"... -
Seite 78: Cleaning
Cleaning WARNING - RISK OF ELECTRIC SHOCK! ► Always remove the plug from the mains power socket before you clean the appliance. ► UNDER NO CIRCUMSTANCES may the appliance or parts of it be submersed in liquids! This could result in you receiving a fatal electric shock and the appliance being damaged. -
Seite 79: Troubleshooting
Troubleshooting POSSIBLE PROBLEM POSSIBLE CAUSE SOLUTIONS Connect the appliance to The appliance does not The plug is not connected. a mains power socket. function. The control lamp On / Standby r does not In this case, contact The appliance is damaged. glow. -
Seite 80: Disposal Of The Appliance
Disconnect the plug from E08 appears in one of the The temperature sensor is the mains power socket displays. defective. and contact the Customer Services department. There is no cookware on Place suitable cookware on the respective cooking area the cooking area 1 2 4. -
Seite 81: Importer
Importer KOMPERNASS GMBH BURGSTRASSE 21 44867 BOCHUM, GERMANY www.kompernass.com Warranty With this appliance you receive a warranty of 3 years from the date of purchase. This appliance has been manufactured with care and meticulously examined before delivery. Please retain your receipt as proof of purchase. In the case of a warranty claim please make contact by telephone with our Customer Service department.