Werbung
Verfügbare Sprachen
Verfügbare Sprachen
Quicklinks
Model name indication position
See "Removing the trim plate" (P.13)
Position d'indication du nom du modèle
Reportez-vous à la section « Retrait de la
plaque de garniture » (p.29)
Anzeigeposition der Modellbezeichnung
Siehe „Entfernen der Ziertafel" (S.45)
Model naam indicatie positie
Zie "Verwijderen van de afwerkingsplaat"
(P.61)
Trim plate
Plaque de garniture
Zierplatte
Afwerkingsplaat
Piastra di taglio
Marco
Moldura
© 2021 JVCKENWOOD Corporation
KW-M27DBT
MONITOR WITH RECEIVER
Quick Start Guide
ÉCRAN AVEC RÉCEPTEUR
Guide de démarrage rapide
MONITOR MIT EMPFÄNGER
Kurzanleitung
MONITOR MET ONTVANGER
Snelstartgids
MONITOR CON RICEVITORE
Guida rapida
MONITOR CON RECEPTOR
Guía de inicio rápido
MONITOR COM RECETOR
Guia de Iniciação Rápida
Posizione di indicazione del nome del
modello
Posición de la indicación del nombre del
modelo
Posição da indicação do nome do modelo
Fare riferimento a "Rimozione della piastra
di taglio" (P.77)
Consulte "Retirada del marco" (P.93)
Consulte "Retirar a moldura" (P.109)
B5K-0672-02 (E)
Werbung

Verwandte Anleitungen für JVC KW-M27DBT


Inhaltszusammenfassung für JVC KW-M27DBT
- Seite 1 KW-M27DBT MONITOR WITH RECEIVER Quick Start Guide ÉCRAN AVEC RÉCEPTEUR Guide de démarrage rapide MONITOR MIT EMPFÄNGER Kurzanleitung MONITOR MET ONTVANGER Snelstartgids MONITOR CON RICEVITORE Guida rapida MONITOR CON RECEPTOR Guía de inicio rápido MONITOR COM RECETOR Guia de Iniciação Rápida...
- Seite 2 Tuner Setup ........................ 6 USB ....................7 • When you purchase optional accessories, check Preparation ......................... 7 with your JVC dealer to make sure that they work Playback operations ..................... 7 with your model and in your area. iPod/iPhone ................8 •...
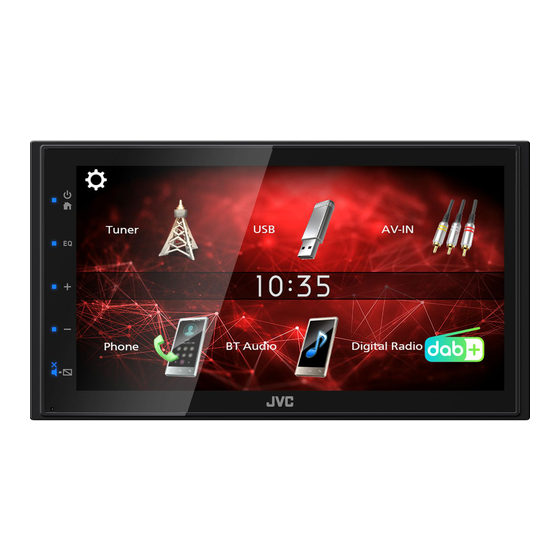
- Seite 3 Getting Started [Screen] Turn the ignition key of your car to ACC. [Dimmer] The unit is turned on. Select the dimmer mode. Press the < > button. “High” (Default) / “Mid” / “Low” Touch [ ]. [Demo] Select the demonstration mode. Default is “ON”. [Information] Displays the software version of this unit.
- Seite 4 Displays the Mirroring screen. 4 + , – (Volume) • When android device with “Mirroring OB for JVC” • Adjusts volume. The volume will go up until 20 application installed is connected. when you keep pressing [ + ].
- Seite 5 Digital Radio Digital Radio Digital Radio Basic Operation Digital Radio Setup Press the < > button. Touch [ Touch [Digital Radio]. Set each item as follows. Ñ Source control screen [Service List] Displays the Service List screen. 1 Displays the information of the current service: •...
- Seite 6 Tuner Tuner Basic Operation Tuner Setup Press the < > button. Touch [ Touch [Tuner]. Set each item as follows. Ñ Source control screen [Auto Store] Automatically searches and stores the 6 stations with the strongest signals for the selected band. 1 Displays the information of the current station: PS name, Frequency, PTY Genre, Indicator Items “Auto Store”...
- Seite 7 Preparation Ñ For Video playback When the operation buttons are not displayed Ñ Connecting a USB device on the screen, touch the display. Remove the cap of the USB terminal. Connect the USB device with the USB cable. The unit reads the device and playback starts. ] : You can adjust image quality in video Ñ...
- Seite 8 iPod/iPhone iPod/iPhone Preparation Playback operations Ñ Connecting iPod/iPhone Ñ Control the music you are listening to on the source control screen. • For Lightning connector models: Use USB Audio cable for iPod/iPhone—KS-U62 (optional accessory). • For details about connecting iPod/iPhone, see page 15 .
- Seite 9 Controlling Audio External Components You can adjust various settings such as audio Using external audio/video players balance or subwoofer level. Ñ Starting playback Press the <EQ> button. See the below for each operation method. Connect an external component to the AV-IN input terminal.
- Seite 10 Touch [Phone]. paired to this unit. See the table below for each operation method. Turn on the Bluetooth function on your smartphone/cell-phone. Search the unit (“KW-M27DBT”) from your smartphone/cell-phone. If a PIN code is required, enter the PIN code (“0000”). •...
- Seite 11 Installation Bluetooth Playing Bluetooth Audio Device Before Installation Before installation of this unit, please note the Press the < > button. following precautions. Touch [BT Audio]. #WARNINGS Ñ Source control screen • If you connect the ignition wire (red) and the battery wire (yellow) to the car chassis (ground), you may cause a short circuit, that in turn may start a fire.
- Seite 12 Installation • Connect the speaker wires correctly to the terminals Installing the unit to which they correspond. The unit may be damaged or fail to work if you share the ¤ wires or Ñ Non-Japanese cars ground them to any metal part in the car. •...
- Seite 13 Installation Ñ Microphone unit Ñ Removing the unit 1) Check the installation position of the microphone 1) Remove the trim plate by referring to step 1 in (accessory 4). “Removing the trim plate”. 2) Clean the installation surface. 2) Insert the extraction key (accessory 2) deeply into 3) Remove the separator of the microphone the slot as shown.
- Seite 14 Installation Ñ Connecting wires to terminals Ñ Connecting wires to terminals Light Blue/Yellow (Steering remote control wire) To steering remote To use the steering wheel remote control feature, you need an exclusive remote adapter (not supplied) matched to your car. Accessory 4: Light Green (Parking sensor wire) Bluetooth Microphone...
- Seite 15 (0.8 m) • Make sure that the pin assignment of the connector 5V = 1.0A matches with the JVC unit. • Take extra notice of the power wire. • In case battery wire and ignition wire are not corresponding then change them accordingly.
- Seite 16 About this Unit More information Note for specifications Ñ Usable USB device Ñ Bluetooth section This unit can play MPEG1/ MPEG2/ MPEG4/ H.264/ Frequency MKV/ MP3/WMA/ AAC/ WAV/ FLAC/ OGG files stored : 2.402 – 2.480 GHz in a USB mass storage class device. Output Power •...
- Seite 17 About this Unit A CONSUMER ENGAGED IN A PERSONAL ACTIVITY AND/ THIS SOFTWARE IS PROVIDED BY THE COPYRIGHT OR WAS OBTAINED FROM A VIDEO PROVIDER LICENSED HOLDERS AND CONTRIBUTORS ``AS IS’’ AND ANY TO PROVIDE AVC VIDEO. NO LICENSE IS GRANTED OR EXPRESS OR IMPLIED WARRANTIES, INCLUDING, SHALL BE IMPLIED FOR ANY OTHER USE.
- Seite 18 Ñ Précautions d'utilisation de l'appareil Préparation ......................23 • Lorsque vous achetez des accessoires en option, Options de lecture ..................... 23 vérifiez auprès de votre revendeur JVC qu'ils iPod/iPhone ................24 fonctionneront avec votre modèle et dans votre Préparation .......................24 région.
- Seite 19 Mise en route [Bluetooth] Tournez la clé de contact de votre véhicule sur Affiche l'écran de réglages du Bluetooth. la position ACC. [Screen] L'appareil se met en marche. [Dimmer] Appuyez sur le bouton < >. Sélectionner le mode gradateur. Touchez [ «...
- Seite 20 • Lorsqu'un appareil Android avec l'application • Règle le volume. Le volume augmentera jusqu'à « Mirroring OB for JVC » installée est connecté. 20 tant que vous maintiendrez [ + ] enfoncé. 4 Passe à un élément externe connecté à la borne (MUTE, Display off) d'entrée AV-IN.
- Seite 21 Radio numérique Radio numérique Utilisation de base de la radio Configuration de la radio numérique numérique Appuyez sur le bouton < >. Touchez [ Touchez [Digital Radio]. Réglez chaque option comme suit. Ñ Écran de commande de source [Service List] Affiche l'écran de liste des services.
- Seite 22 Tuner Utilisation de base de la radio Configuration du syntoniseur Appuyez sur le bouton < >. Touchez [ Touchez [Tuner]. Réglez chaque option comme suit. Ñ Écran de commande de source [Auto Store] Recherche et mémorise automatiquement les 6 stations avec les signaux les plus puissants pour la 1 Affiche les informations concernant la station en bande sélectionnée.
- Seite 23 [E], [F] : Recherche le contenu précédent/ Préparation suivant. Touchez et maintenez enfoncé pour effectuer Ñ Connecter un périphérique USB une avance ou un retour rapide. Retirer le capuchon de la borne USB. [1] : Recherche le fichier. (p.23) Branchez le périphérique USB avec le câble Ñ...
- Seite 24 iPod/iPhone iPod/iPhone Préparation Options de lecture Ñ Connexion d'un iPod/iPhone Ñ L'écran de commande de la source vous permet de gérer la musique que vous • Pour les modèles de paratonnerre : Utilisez le écoutez. câble Audio USB pour iPod/iPhone—KS-U62 (accessoire optionnel).
- Seite 25 Contrôle de l'audio Composants Externes Vous pouvez agir sur les différents paramètres, Utilisant des lecteurs audio/vidéo comme la balance audio ou le niveau du caisson de externes graves par exemple. Appuyez sur le bouton <EQ>. Ñ Démarrer la lecture Veuillez consulter ce qui suit pour chaque Connecter un composant externe à...
- Seite 26 Veuillez consulter le tableau ci-dessous pour Activer la fonction Bluetooth sur votre chaque méthode de fonctionnement. smartphone/téléphone portable. Recherchez l'appareil (« KW-M27DBT ») à partir de votre smartphone/téléphone portable. Si un code PIN est requis, entrez le code PIN (« 0000 »).
- Seite 27 Installation Bluetooth Utilisation d'un appareil audio Avant l'installation Bluetooth en lecture Avant d'installer cet appareil, veuillez prendre les mesures de précaution suivantes. Appuyez sur le bouton < >. #AVERTISSEMENTS Appuyez sur [BT Audio]. • Si vous branchez le câble d'allumage (rouge) et le câble de la batterie (jaune) au châssis de la voiture Ñ...
- Seite 28 Installation • Fixez les fils à l'aide de colliers et enroulez le ruban Ñ Procédure d'installation de vinyle autour des fils qui entre en contact avec les 1) Pour éviter les courts-circuits, retirez la clé de parties métalliques afin de protéger les fils et éviter contact, puis débranchez la borne ¤...
- Seite 29 Installation Ñ Microphone Ñ Retrait de l'appareil 1) Vérifiez la position d'installation du microphone 1) Retirez la plaque de garniture en vous référant à (accessoire 4). l'étape 1 dans « Retrait de la plaque de garniture ». 2) Nettoyez la surface d'installation. 2) Insérez la clé...
- Seite 30 Installation Ñ Connexion des câbles sur les contacts électriques Ñ Connexion des câbles sur les contacts électriques Bleu ciel/Jaune (Câble de la télécommande au volant) Vers la télécommande au volant Pour utiliser la fonction de télécommande au volant, vous avez besoin d'un adaptateur de télécommande spécial (non fourni) qui correspond à...
- Seite 31 5V = 1.0A conditions suivantes : • Veiller à ce que l'affectation des broches du Capuchon connecteur corresponde à l'unité JVC. • Prendre un avis supplémentaire pour le câble d'alimentation. • Si les câbles d'alimentation et de contact ne correspondent pas, les changer en conséquence.
- Seite 32 À propos de cet appareil Plus d'informations Remarques concernant les spécifications Ñ Périphérique USB utilisable Cet appareil peut lire les fichiers MPEG1/ MPEG2/ Ñ Section Bluetooth MPEG4/ H.264/ MKV/ MP3/WMA/ AAC/ WAV/ FLAC/ Fréquence OGG stockés dans un périphérique de stockage de : 2,402 –...
- Seite 33 À propos de cet appareil – Neither the name of the Xiph.org Foundation nor the • THIS PRODUCT IS LICENSED UNDER THE AVC PATENT PORTFOLIO LICENSE FOR THE PERSONAL USE OF A names of its contributors may be used to endorse or CONSUMER OR OTHER USES IN WHICH IT DOES NOT promote products derived from this software without RECEIVE REMUNERATION TO (¡)ENCODE VIDEO IN...
- Seite 34 Digitalradio ................37 Fahrt nicht für längere Zeit. Grundfunktionen des Digitalradios ............37 • Falls bei der Installation Probleme auftreten, Digitalradio-Einrichtung .................37 nehmen Sie Kontakt mit Ihrem JVC-Händler auf. TUNER ..................38 Tuner-Grundfunktionen ................. 38 Ñ Vorsichtsmaßnahmen bei der Radiosetup ......................38 Verwendung dieses Gerätes USB ....................39...
- Seite 35 Erste Schritte [Bluetooth] Stellen Sie den Zündschlüssel Ihres Autos auf Zeigt den Bildschirm für die "ACC". Bluetootheinstellungen an. Das Gerät ist eingeschaltet. [Screen] Drücken Sie die < >-Taste. [Dimmer] Berühren Sie [ Wählen Sie den Helligkeitsmodus aus. „High“ (Werkseinstellung)/„Mid“/„Low“ [Demo] Wählen Sie den Demonstrationsmodus aus.
- Seite 36 Zeigt den Spiegelungsbildschirm an. wenn der EINRICHTUNGS-Bildschirm angezeigt • Wenn ein Android-Gerät mit der installierten wird, oder auf dem Listenbildschirm usw. Anwendung „Mirroring OB for JVC“ verbunden 4 + , – (Lautstärke) ist. • Lautstärkeregelung. Die Lautstärke wird bis 20 4 Wechselt zu einer externen Komponente, die an erhöht, wenn Sie [ + ] weiter drücken.
- Seite 37 Digitalradio Digitalradio Grundfunktionen des Digitalradios Digitalradio-Einrichtung Drücken Sie die < >-Taste. Berühren Sie [ Berühren Sie [Digital Radio]. Jedes Element wie folgt einstellen. Ñ Quellensteuerungsbildschirm [Service List] Zeigt den Servicelisten-Bildschirm an. 1 Zeigt die Informationen zum aktuellen Service an: • [ ] : Berühren und dann [Yes] berühren, um die aktuellste Serviceliste zu finden.
- Seite 38 TUNER Tuner-Grundfunktionen Radiosetup Drücken Sie die < >-Taste. Berühren Sie [ Berühren Sie [Tuner]. Jedes Element wie folgt einstellen. Ñ Quellensteuerungsbildschirm [Auto Store] Sucht und speichert die 6 Sender mit den stärksten Signalen automatisch für das ausgewählte Band. 1 Zeigt die Information zum aktuellen Sender an: PS-Name, Frequenz, PTY-Genre, Anzeigeelemente „Auto Store“...
- Seite 39 [E], [F] : Sucht den vorigen/nächsten Inhalt. Vorbereitung Für schnellen Vorlauf oder schnellen Rücklauf anhaltend drücken. Ñ Anschluss eines USB-Geräts [1] : Sucht die Datei. (S.39) Nehmen Sie den Deckel des USB-Anschlusses Ñ Für die Videowiedergabe USB-Gerät und USB-Kabel verbinden. Wenn die Bedientasten nicht auf dem Bildschirm angezeigt werden, berühren Sie das Display.
- Seite 40 iPod/iPhone iPod/iPhone Vorbereitung Wiedergabefunktionen Ñ Anschluss des iPods/iPhones Ñ Steuern Sie die Wiedergabe der Musik am Quellensteuerungsbildschirm. • Für Modelle mit Lightning-Anschluss: Nutzen Sie das USB-Audiokabel für iPod/iPhone—KS-U62 (optionales Zubehör). • Für Details zum Anschluss eines iPods/iPhones siehe Seite 47. Nehmen Sie den Deckel des USB-Anschlusses Schließen Sie das iPod/iPhone an.
- Seite 41 Audio-Steuerung Externe Komponenten Sie können unterschiedliche Einstellungen wie die Nutzung von externen Audio-/ Audiobalance oder den Subwooferpegel einstellen. Videoplayern Drücken Sie die <EQ>-Taste. Ñ Wiedergabe starten Nachfolgend finden Sie die jeweilige Betriebsmethode. Schließen Sie eine externe Komponente an den AV-IN-Eingangsanschluss an. (S.46) Drücken Sie die <...
- Seite 42 Sie können Ihr Bluetooth-Smartphone verwenden, wenn es mit diesem Gerät verbunden ist. Schalten Sie die Bluetooth-Funktion an Ihrem Smartphone/Mobiltelefon ein. Suchen Sie das Gerät („KW-M27DBT“) auf Ihrem Smartphone/Mobiltelefon. Telefonanrufe tätigen Wenn die Eingabe eines PIN-Codes erforderlich ist, geben Sie den PIN-Code („0000“) ein.
- Seite 43 Installation Bluetooth Wiedergabe mit einem Bluetooth- Vor der Installation Audiogerät Vor der Installation dieses Geräts beachten Sie bitte die folgenden Vorsichtsmaßnahmen. Drücken Sie die < >-Taste. #WARNHINWEISE Berühren Sie [BT Audio]. • Verbinden Sie Zünddraht (rot) und Batteriekabel (gelb) mit dem Fahrzeugchassis (Erde), so könnte Ñ...
- Seite 44 Installation • Isolieren Sie nicht angeschlossene Kabel mit Ñ Installationsvorgang Vinylband oder ähnlichem Material. Entfernen 1) Um einem Kurzschluss vorzubeugen, ziehen Sie Sie nicht die Kappen von den Enden nicht bitte den Schlüssel aus dem Zündschloss und angeschlossener Kabel und Anschlüsse, damit keine trennen Sie die ¤-Klemme der Batterie ab.
- Seite 45 Installation Ñ Mikrofoneinheit Ñ Ausbauen des Geräts 1) Überprüfen Sie die Einbauposition des Mikrofons 1) Entfernen Sie wie unter Schritt 1 von „Entfernen der (Zubehör 4). Ziertafel“ beschrieben die Ziertafel. 2) Säubern Sie die Installationsfläche. 2) Führen Sie den Entnahmeschlüssel (Zubehör 2) tief 3) Entfernen Sie die Schutzfolie vom Mikrofon in den Schlitz ein, wie abgebildet.
- Seite 46 Installation Ñ Anschließen der Kabel an die Anschlüsse Ñ Anschließen der Kabel an die Anschlüsse Hellblau/Gelb (Lenkrad-Fernbedienungskabel) Zur Lenkrad-Fernbedienung Für die Verwendung der Lenkrad- Fernbedienungsfunktion benötigen Sie einen speziellen Fernbedienungsadapter (nicht im Lieferumfang enthalten), der auf Ihr Fahrzeug abgestimmt ist. Zubehör 4: Hellgrün (Parksensorkabel) Bluetooth-Mikrofon...
- Seite 47 (0,8 m) anschließen: 5V = 1.0A • Überprüfen Sie, ob die Stiftbelegung des Steckers mit dem JVC-Gerät übereinstimmt. Deckel • Achten Sie besonders auf das Stromkabel. • Wenn das Batteriekabel und das Zündkabel nicht übereinstimmen, tauschen Sie sie entsprechend aus.
- Seite 48 Wissenswertes über dieses Gerät Weitere Informationen Hinweis zu den Spezifikationen Ñ Verwendbare USB-Geräte Ñ Bluetoothbereich Dieses Gerät kann MPEG1/MPEG2/MPEG4/H.264/ Frequenz MKV/MP3/WMA/AAC/WAV/FLAC/OGG-Dateien : 2,402 – 2,480 GHz wiedergeben, die auf einem USB-Massenspeicher Ausgangsleistung gespeichert sind. : +8 dBm (DURCHSCHN.), Leistungsklasse 1 •...
- Seite 49 Wissenswertes über dieses Gerät AND/OR (¡¡)DECODE AVC VIDEO THAT WAS ENCODED BY THIS SOFTWARE IS PROVIDED BY THE COPYRIGHT A CONSUMER ENGAGED IN A PERSONAL ACTIVITY AND/ HOLDERS AND CONTRIBUTORS ``AS IS’’ AND ANY OR WAS OBTAINED FROM A VIDEO PROVIDER LICENSED EXPRESS OR IMPLIED WARRANTIES, INCLUDING, TO PROVIDE AVC VIDEO.
- Seite 50 • Kijk niet naar het scherm of richt uw ogen niet op Basisbediening digitale radio ..............53 het scherm als u langere tijd aan het rijden bent. Digitale radio instellen ..................53 • Raadpleeg uw JVC-dealer als u tijdens de Tuner ..................54 installatie problemen ondervindt. Basisbediening van de Tuner ..............54 Installatie van de afstemmer ...............
- Seite 51 Aan de Slag [Screen] Draai de contactsleutel van uw auto in de stand [Dimmer] ACC. Selecteer de dimmerstand. Het toestel wordt ingeschakeld. „High” (standaard)/„Mid”/„Low” Druk op de < > knop. [Demo] Raak [ ] aan. Selecteer de demonstratiestand. De standaardinstelling is „ON” (aan). [Information] Geeft de softwareversie van dit apparaat weer.
- Seite 52 Geeft het Spiegelenscherm weer. tijdens het SETUP-scherm of op het lijstscherm, • Wanneer er een Android-apparaat waarop de enz. app „Mirroring OB for JVC” is geïnstalleerd wordt 4 + , – (Volume) aangesloten. • Regelt het volume. Het volume gaat tot niveau 4 Schakelt naar een extern component aangesloten 20 wanneer u [ + ] ingedrukt houdt.
- Seite 53 Digitale radio Digitale radio Basisbediening digitale radio Digitale radio instellen Druk op de < > knop. Raak [ ] aan. Raak [Digital Radio] aan. Stel de verschillende items als volgt in. Ñ Bronbedieningsscherm [Service List] Geeft het Servicelijst-scherm weer. 1 Informatie over de huidige zender wordt •...
- Seite 54 Tuner Basisbediening van de Tuner Installatie van de afstemmer Druk op de < > knop. Raak [ ] aan. Raak [Tuner] aan. Stel de verschillende items als volgt in. Ñ Bronbedieningsscherm [Auto Store] Zoekt automatisch naar de 6 stations met de sterkste signalen voor de geselecteerde band en 1 Geeft de informatie van de huidige zender weer: slaat deze op.
- Seite 55 Voorbereiding Ñ Voor het afspelen van Video Wanneer de bedieningsknoppen niet worden Ñ Een USB-apparaat aansluiten weergegeven op het scherm, raak dan het scherm aan. Verwijder de dop van het USB-aansluitpunt. Sluit het USB-apparaat via de USB-kabel aan. Het toestel leest de disk en het afspelen begint. Ñ...
- Seite 56 iPod/iPhone iPod/iPhone Voorbereiding Weergaveopties Ñ Aansluiten iPod/iPhone Ñ Regel de muziek op het bronregelscherm. • Voor Lightning aansluitingsmodellen: Gebruik USB-audiokabel voor iPod/iPhone—KS-U62 (optionele accessoire). • Voor meer informatie over het aansluiten van iPod/iPhone, zie pagina 63. Verwijder de dop van het USB-aansluitpunt. Sluit de iPod/iPhone aan.
- Seite 57 Audio regelen Externe Componenten U kunt verschillende instellingen veranderen, zoals Externe audio/video-spelers geluidbalans of subwooferniveau. gebruiken Druk op de <EQ>-knop. Ñ Het afspelen begint Zie de tabel hieronder voor elke bedieningsmethode. Koppel een extern component aan het AV-IN- ingangsaansluitpunt. (P.62) Druk op de <...
- Seite 58 Zie de tabel hieronder voor elk van de Zet de Bluetooth-functie op uw smartphone/ methodes. mobiele telefoon aan. Zoek de unit („KW-M27DBT”) vanaf uw smartphone/mobiele telefoon. Als er een PIN-code is vereist, voert u de pincode („0000”) in. •...
- Seite 59 Installatie Bluetooth Bluetooth-audioapparaat afspelen Vóór de installatie Neem vóór de installatie van dit toestel de volgende Druk op de < > knop. voorzorgsmaatregelen in acht. Raak [BT Audio] aan. #WAARSCHUWINGEN Ñ Bronbedieningsscherm • Als u de ontstekingskabel (rood) en de accukabel (geel) op het chassis van de auto (massa) aansluit, kunt u kortsluiting veroorzaken waardoor brand kan ontstaan.
- Seite 60 Installatie • Zet de bedrading met behulp van de kabelklemmen Ñ Installatieprocedure en wikkel de vinyltape rond de draden die in contact 1) Voorkom kortsluiting door de sleutel uit het komt met de metalen delen en om te voorkomen contactslot te verwijderen en de ¤ aansluiting van dat de draden om kortsluiting te voorkomen.
- Seite 61 Installatie Ñ De microfoon Ñ De eenheid verwijderen 1) Controleer de installatiepositie van de microfoon 1) Zie stap 1 in „Verwijderen van de afwerkingsplaat” (accessoire 4). voor het verwijderen van het inbouwframe. 2) Reinig het installatieoppervlak. 2) Plaats de extractiesleutel (accessoire 2) diep in de 3) Verwijder de beschermstrook van de microfoon opening, zoals afgebeeld.
- Seite 62 Installatie Ñ Verbinden van kabels met aansluitingen Ñ Verbinden van kabels met aansluitingen Lichtblauw/geel (stuurafstandsbedieningsingang) Naar stuurafstandsbediening Om de stuurafstandsbediening te gebruiken, hebt u een adapter nodig (niet meegeleverd) die bij uw auto past. Accessoire 4: Lichtgroen (Kabel van parkeersensor) Bluetooth-microfoon Accessoire 5: Uitbreidingskabel Uit het oogpunt van veiligheid...
- Seite 63 USB-aansluiting (0,8 m) • Wees ervan verzekerd dat de pinbezetting van de 5V = 1.0A aansluiting past op het JVC-apparaat. • Let extra op de stroomkabel. Afdekking • In het geval dat de batterijkabel en de ontstekingskabel niet overeenkomen, wissel ze dan.
- Seite 64 Informatie over dit toestel Meer informatie H.264/MPEG-4 AVC .mp4, mkv, avi, .flv, .f4v, .ts .mkv Ñ Bruikbaar USB-apparaat Dit apparaat kan MPEG1/MPEG2/MPEG4/H.264/ Opmerking voor specificaties MKV/MP3/WMA/AAC/WAV/FLAC en OGC-bestanden die op een USB-geheugen zijn opgeslagen Ñ Bluetooth-gedeelte afspelen. • Bestandssysteem: FAT16/ FAT32 Frequentie : 2,402 –...
- Seite 65 Informatie over dit toestel – Neither the name of the Xiph.org Foundation nor the • THIS PRODUCT IS LICENSED UNDER THE AVC PATENT PORTFOLIO LICENSE FOR THE PERSONAL USE OF A names of its contributors may be used to endorse or CONSUMER OR OTHER USES IN WHICH IT DOES NOT promote products derived from this software without RECEIVE REMUNERATION TO (¡)ENCODE VIDEO IN...
- Seite 66 Ñ Precauzioni per l'uso di questa unità Configurazione sintonizzatore ..............70 USB ....................71 • Quando si acquistano accessori opzionali, Preparazione ......................71 verificare con il rivenditore JVC che siano Operazioni di riproduzione ................71 compatibili con il proprio modello e che siano iPod/iPhone ................72 utilizzabili nel proprio Paese.
- Seite 67 Per iniziare [Bluetooth] Ruotare la chiave di accensione dell'automobile Viene visualizzata la schermata Impostazioni in posizione ACC. Bluetooth. L'unità si accende. [Screen] Premere il pulsante < >. [Dimmer] Sfiorare [ Selezionare la modalità di attenuazione. “High” (predefinito)/“Mid”/“Low” [Demo] Selezionare la modalità dimostrazione. L'impostazione predefinita è...
- Seite 68 * La schermata Audio non è visualizzata durante • Quando è collegato un dispositivo Android con la schermata di CONFIGURAZIONE o nella l’applicazione “Mirroring OB for JVC” installata. schermata dell’elenco, ecc. 4 Passa a un componente esterno connesso al 4 +, – (Volume) terminale di ingresso AV-IN.
- Seite 69 Radio digitale Radio digitale Funzionamento di base della radio Configurazione Radio digitale digitale Sfiorare [ Premere il pulsante < >. Impostare ogni voce come segue. Sfiorare [Digital Radio]. Ñ Schermata di controllo della sorgente [Service List] Visualizza la schermata dell’elenco servizi. •...
- Seite 70 Sintonizzatore Funzionamento di base Configurazione sintonizzatore sintonizzatore Sfiorare [ Premere il pulsante < >. Impostare ogni voce come segue. Sfiorare [Tuner]. Ñ Schermata di controllo della sorgente [Auto Store] Cerca automaticamente e memorizza le 6 stazioni con il segnale più forte per la banda selezionata. Appare “Auto Store”...
- Seite 71 [E], [F] : Ricerca il contenuto precedente/ Preparazione successivo. Sfiorare e mantenere il contatto per avanzare/ Ñ Connessione di un dispositivo USB tornare indietro velocemente. Togliere il cappuccio al terminale USB. [1] : Ricerca il file. (P.71) Collegare il dispositivo USB con l'apposito cavo. Ñ...
- Seite 72 iPod/iPhone iPod/iPhone Preparazione Operazioni di riproduzione Ñ Connessione di un iPod/iPhone Ñ Controllare la musica che si sta ascoltando dalla schermata di controllo • Per i modelli con connettore luminoso: Utilizzare della sorgente. un cavo audio USB per iPod/iPhone—KS-U62 (accessorio opzionale). •...
- Seite 73 Regolazione audio Componenti esterni È possibile regolare varie impostazioni, per esempio Utilizzo di lettori audio/video il bilanciamento audio o il livello del subwoofer. esterni Premere il pulsante <EQ>. Ñ Inizio della riproduzione Per ciascun metodo di funzionamento, fare riferimento a quanto segue. Connettere un componente esterno al terminale di ingresso AV-IN.
- Seite 74 Bluetooth se è abbinato a quest’unità. Per ciascuna funzione, fare riferimento alla Attivare la funzione Bluetooth sul proprio seguente tabella. smartphone/telefono cellulare. Ricercare l’unità (“KW-M27DBT”) dal proprio smartphone o cellulare. Se viene richiesto un codice PIN, immettere il codice PIN (“0000”). •...
- Seite 75 Installazione Bluetooth Riproduzione del dispositivo audio Prima dell'installazione Bluetooth Prima dell'installazione di quest'unità, osservare le seguenti precauzioni. Premere il pulsante < >. #AVVERTENZE Sfiorare [BT Audio]. • Se si collega il cavo di accensione (rosso) e il cavo della batteria (giallo) al telaio della vettura (massa), Ñ...
- Seite 76 Installazione • Assicurare i cavi con dei morsetti e avvolgere del Ñ Procedura di installazione nastro vinilico attorno ai cavi che entrano in contatto 1) Per evitare cortocircuiti, estrarre la chiave con le parti in metallo per proteggerli e per evitare dall'accensione e scollegare il ¤...
- Seite 77 Installazione Ñ Microfono Ñ Rimozione dell’unità 1) Controllare la posizione di installazione del 1) Rimuovere la piastra di taglio facendo riferimento al microfono (accessorio 4). passaggio 1 in “Rimozione della piastra di taglio”. 2) Pulire la superficie di installazione. 2) Inserire la chiave di estrazione (accessorio 2) in 3) Rimuovere il separatore del microfono (accessorio profondità...
- Seite 78 Installazione Ñ Collegare i fili ai terminali Ñ Collegare i fili ai terminali Celeste/giallo (cavo di comando remoto del volante) Al controllo remoto dello sterzo Per utilizzare la funzione di comando remoto del volante, occorre uno speciale adattatore remoto (non in dotazione) adatto alla vettura. Accessorio 4: Verde chiaro (cavo sensore di parcheggio) Microfono Bluetooth...
- Seite 79 Cappuccio commercio all’unità, controllare quanto segue: • Assicurarsi che l’assegnazione del pin del connettore corrisponda all’unità JVC. • Prestare molta attenzione al cavo di alimentazione. • Nel caso in cui il cavo della batteria e il cavo di accensione non corrispondano, cambiarli.
- Seite 80 Informazioni su questa unità Ulteriori informazioni Nota per le specifiche Ñ Dispositivi USB utilizzabili Ñ Sezione Bluetooth Questa unità può riprodurre file MPEG1/MPEG2/ Frequenza MPEG4/H.264/MKV/MP3/WMA/AAC/WAV/FLAC/ : 2,402 – 2,480 GHz OGG memorizzati in un dispositivo di archiviazione Potenza di uscita di massa USB.
- Seite 81 Informazioni su questa unità A CONSUMER ENGAGED IN A PERSONAL ACTIVITY AND/ THIS SOFTWARE IS PROVIDED BY THE COPYRIGHT OR WAS OBTAINED FROM A VIDEO PROVIDER LICENSED HOLDERS AND CONTRIBUTORS ``AS IS’’ AND ANY TO PROVIDE AVC VIDEO. NO LICENSE IS GRANTED OR EXPRESS OR IMPLIED WARRANTIES, INCLUDING, SHALL BE IMPLIED FOR ANY OTHER USE.
- Seite 82 Ñ Precauciones para el uso de esta unidad USB ....................87 • Cuando compre accesorios opcionales, pregunte Preparativos ......................87 a su distribuidor JVC si dichos accesorios son Operaciones de reproducción ..............87 compatibles con su modelo y en su región. iPod/iPhone ................88 •...
- Seite 83 Inicio [Bluetooth] Coloque la llave de encendido del coche en la Muestra la pantalla Configuración de Bluetooth. posición ACC. [Screen] La unidad se pone en marcha. [Dimmer] Pulse el botón < >. Seleccione el modo de atenuación. Toque [ “High” (predeterminado)/“Mid”/“Low” [Demo] Seleccione el modo de demostración.
- Seite 84 4 + , – (Volumen) • Cuando se conecta un dispositivo Android con • Ajusta el volumen. Si continúa presionando [ + ] la aplicación “Mirroring OB for JVC” instalada. el volumen aumentará hasta 20. 4 Cambia a un componente externo conectado al (MUTE, Pantalla desactivada) terminal de entrada AV-IN.
- Seite 85 Radio digital Radio digital Funcionamiento básico de la radio Configuración de la radio digital digital Toque [ Pulse el botón < >. Ajuste cada elemento del modo siguiente. Toque [Digital Radio]. Ñ Pantalla de control de fuente [Service List] Muestra la pantalla Lista de servicios. •...
- Seite 86 Sintonizador Funcionamiento básico del Configuración del sintonizador sintonizador Toque [ Pulse el botón < >. Ajuste cada elemento del modo siguiente. Toque [Tuner]. Ñ Pantalla de control de fuente [Auto Store] Busca y almacena automáticamente las 6 estaciones con las señales más fuertes para la banda seleccionada.
- Seite 87 [E], [F] : Busca el contenido anterior/ Preparativos siguiente. Mantenga pulsado para avanzar o retroceder Ñ Conexión de un dispositivo USB rápidamente. Retire la tapa del terminal de USB. [1] : Busca el archivo. (P.87) Conecte el dispositivo USB con el cable USB. Ñ...
- Seite 88 iPod/iPhone iPod/iPhone Preparativos Operaciones de reproducción Ñ Conexión de iPod/iPhone Ñ Controle la música que está escuchando en la pantalla de control de fuente. • Para modelos con conector Lightning: Use el cable de audio USB para iPod/iPhone—KS-U62 (accesorio opcional). •...
- Seite 89 Control del audio Componentes externos Puede ajustar diversas opciones como el balance de Uso de reproductores de audio/ audio o el subwoofer. vídeo exteriores Pulse el botón <EQ>. Ñ Inicio de la reproducción Consulte la información siguiente para cada método de funcionamiento. Conecte un componente externo a la terminal de entrada AV-IN.
- Seite 90 Consulte la tabla de abajo para cada método de Active la función Bluetooth en su teléfono funcionamiento. inteligente/teléfono móvil. Busque la unidad (“KW-M27DBT”) en su teléfono inteligente/teléfono móvil. Si se requiere un código PIN, introduzca el código PIN (“0000”). •...
- Seite 91 Instalación Bluetooth Reproducir dispositivos de audio Antes de la instalación Bluetooth Antes de la instalación de esta unidad, tenga en cuenta las precauciones siguientes. Pulse el botón < >. #ADVERTENCIAS Toque [BT Audio]. • Si conecta el cable de encendido (rojo) y el cable de la batería (amarillo) al chasis del automóvil (tierra), Ñ...
- Seite 92 Instalación • Asegure los cables con las abrazaderas de cable y Ñ Procedimiento de instalación envuelva cinta de vinilo alrededor de los cables que 1) Para evitar cortocircuitos, retire la llave del entren en contacto con los elementos metálicos encendido y desconecte el terminal ¤ de la para proteger los cables y para evitar cortocircuitos.
- Seite 93 Instalación Ñ Unidad de micrófono Ñ Desmontaje de la unidad 1) Compruebe la posición de instalación del 1) Retire el marco según las indicaciones del paso 1 de micrófono (accesorio 4). “Retirada del marco”. 2) Limpie la superficie de instalación. 2) Introduzca la llave de extracción (accesorio 2) 3) Extraiga el separador del micrófono (accesorio 4) y profundamente en la ranura tal y como se muestra.
- Seite 94 Instalación Ñ Conectar los cables a los terminales Ñ Conectar los cables a los terminales Azul claro/Amarillo (cable del mando a distancia de la dirección) Al mando a distancia de la dirección Para utilizar la función de mando a distancia en el volante es necesario un adaptador remoto exclusivo (no suministrado) apropiado para su vehículo.
- Seite 95 Antes conectar los conectores ISO disponibles Tapa comercialmente a la unidad, compruebe la siguiente condición: • Asegúrese que la asignación de clavijas del conector coincide con la unidad JVC. • Tome precauciones extra con el cable de alimentación. M4x6 REAR OUT...
- Seite 96 Acerca de esta unidad Más información Nota para especificaciones Ñ Dispositivos USB que pueden utilizarse Ñ Sección de Bluetooth Esta unidad puede reproducir archivos MPEG1/ Frecuencia MPEG2/MPEG4/H.264/MKV/MP3/WMA/AAC/ : 2,402 – 2,480 GHz WAV/FLAC/OGG guardados en un dispositivo de Potencia de salida almacenamiento masivo USB.
- Seite 97 Acerca de esta unidad AND/OR (¡¡)DECODE AVC VIDEO THAT WAS ENCODED BY THIS SOFTWARE IS PROVIDED BY THE COPYRIGHT A CONSUMER ENGAGED IN A PERSONAL ACTIVITY AND/ HOLDERS AND CONTRIBUTORS ``AS IS’’ AND ANY OR WAS OBTAINED FROM A VIDEO PROVIDER LICENSED EXPRESS OR IMPLIED WARRANTIES, INCLUDING, TO PROVIDE AVC VIDEO.
- Seite 98 Configuração de Sintonizador ..............102 USB ..................103 • Quando comprar acessórios opcionais, confirme Preparativos ......................103 junto do representante JVC que eles funcionam Operações de reprodução................103 com o seu modelo e na sua zona. iPod/iPhone ................ 104 • A função Radio Data System (Sistema dados Preparativos ......................104...
- Seite 99 Primeiros Passos [Bluetooth] Rode a chave de ignição do seu carro para ACC. Apresenta o ecrã de Definições do Bluetooth. A unidade está ligada. [Screen] Pressione o botão < >. [Dimmer] Toque em [ Selecione o modo de gradação. “High” (Padrão) / “Mid” / “Low” [Demo] Selecione o modo de demonstração.
- Seite 100 * O ecrã de Áudio não é exibido no ecrã • Quando estiver conectado um dispositivo CONFIGURAÇÃO ou no ecrã da lista, etc. Android com a aplicação “Mirroring OB for JVC” 4 + , – (Volume) instalada. • Ajusta o volume. O volume vai até ao nível 20 4 Muda para um componente externo conectado quando premir [ + ] continuamente.
- Seite 101 Rádio Digital Rádio Digital Operação Básica do Rádio Digital Configuração do Rádio Digital Pressione o botão < >. Toque em [ Toque em [Digital Radio]. Defina cada item da seguinte forma. Ñ Ecrã de controlo da fonte [Service List] Apresenta o ecrã de Lista de Serviço. 1 Mostra a informação sobre o serviço atual: •...
- Seite 102 Sintonizador Operação Básica do Sintonizador Configuração de Sintonizador Pressione o botão < >. Toque em [ Toque em [Tuner]. Defina cada item da seguinte forma. Ñ Ecrã de controlo da fonte [Auto Store] Procura e guarda automaticamente as 6 estações com o sinal mais forte para a banda selecionada.
- Seite 103 Preparativos Ñ Para reprodução de Vídeo Quando os botões de operação não forem Ñ Conectar a um dispositivo USB exibidos no ecrã, toque no ecrã. Remova a tampa do terminal USB. Ligue o dispositivo USB com o cabo USB. A unidade lê o dispositivo e inicia a reprodução. ] : Pode ajustar a qualidade da imagem no Ñ...
- Seite 104 iPod/iPhone iPod/iPhone Preparativos Operações de reprodução Ñ Conectar a iPod/iPhone Ñ Controle a música que está a ouvir no ecrã de controlo das fontes. • Para modelos com conector Lightning: Use o cabo USB Áudio para iPod/iPhone—KS-U62 (acessório opcional). • Para detalhes sobre conectar a iPod/iPhone, consulte a página 111.
- Seite 105 Controlar o Áudio Componentes Externos Pode ajustar várias definições, como o balanço Utilizar leitores de áudio/vídeo áudio ou o nível de subwoofer. externos Pressione o botão <EQ>. Ñ Iniciar a reprodução Consulte o seguinte para cada método de operação. Conecte um componente externo ao terminal de entrada AV-IN.
- Seite 106 Consulte a seguinte tabela para cada método Ligue a função Bluetooth no seu smartphone/ de operação. telemóvel. Procure a unidade (“KW-M27DBT”) a partir do seu smartphone/telemóvel. Se for necessário um código PIN, introduza o código PIN (“0000”). •...
- Seite 107 Instalação Bluetooth Reproduzir um dispositivo de áudio Antes da instalação Bluetooth Antes da instalação desta unidade, tenha em consideração as seguintes precauções. Pressione o botão < >. #AVISOS Toque em [BT Audio]. • Se ligar o fio de ignição (vermelho e o fio da bateria (amarelo) ao chassis do automóvel (terra), pode Ñ...
- Seite 108 Instalação • Fixe os fios com grampos de cabos e envolva Ñ Método de instalação uma fita de vinil em torno dos fios que entrem em 1) Para prevenir um curto-circuito, remova a chave da contacto com peças metálicas para proteger os fios ignição e desligue o terminal ¤...
- Seite 109 Instalação Ñ Unidade do microfone Ñ Retirar a unidade 1) Verifique a posição de instalação do microfone 1) Retire a moldura seguindo o passo 1 em “Retirar a (acessório 4). moldura”. 2) Limpe a superfície de instalação. 2) Insira a chave de extração (acessório 2) 3) Retire o separador do microfone (acessório 4) e profundamente na ranhura, conforme mostrado.
- Seite 110 Instalação Ñ Ligar os cabos aos terminais Ñ Ligar os cabos aos terminais Azul-claro/amarelo (fio do controlo remoto do volante) Para controlo remoto do volante Para utilizar a função de controlo remoto do volante, é necessário um adaptador remoto exclusivo (não fornecido) que corresponda ao seu automóvel.
- Seite 111 Antes de conectar os ISO comercialmente Tampa disponibilizados à unidade, verifique a seguinte condição: • Certifique-se de que a atribuição de pino do conector corresponde à unidade JVC. • Tenha precaução redobrada com o cabo de alimentação. M4x6 REAR OUT...
- Seite 112 Sobre esta unidade Mais informação Nota para especificações Ñ Compatibilidade com dispositivos USB Ñ Secção Bluetooth Esta unidade consegue reproduzir ficheiros MPEG1/ Frequência MPEG2/ MPEG4/ H.264/ MKV/ MP3/ WMA/ AAC/ : 2,402 – 2,480 GHz WAV/ FLAC/ OGG armazenados num dispositivo USB Alimentação de saída de armazenamento em massa.
- Seite 113 Sobre esta unidade AND/OR (¡¡)DECODE AVC VIDEO THAT WAS ENCODED BY THIS SOFTWARE IS PROVIDED BY THE COPYRIGHT A CONSUMER ENGAGED IN A PERSONAL ACTIVITY AND/ HOLDERS AND CONTRIBUTORS ``AS IS’’ AND ANY OR WAS OBTAINED FROM A VIDEO PROVIDER LICENSED EXPRESS OR IMPLIED WARRANTIES, INCLUDING, TO PROVIDE AVC VIDEO.
- Seite 114 Hertfordshire WD24 4WH, UNITED KINGDOM EU-vertegenwoordiger: JVCKENWOOD Europa B.V. Hereby, JVCKENWOOD declares that the radio equipment “KW-M27DBT” is Amsterdamseweg 37, 1422 AC UITHOORN, NEDERLAND in compliance with the relevant statutory requirements. The full text of the declaration of conformity is available at the following internet address: Per le aree commerciali in Europa URL: https://www.jvc.net/cs/car/eudoc/...
- Seite 115 Slovensko KW-M27DBT е в съответствие с Директива 2014/53/ЕС. Пълният текст на S tem JVCKENWOOD izjavlja, da je radijska oprema KW-M27DBT v skladu z ЕС декларацията за съответствие е достъпен на следния интернет адрес: Direktivo 2014/53/EU. Celotno besedilo direktive EU o skladnosti je dostopno...