
Verwandte Anleitungen für Klarstein AREZZO


Inhaltszusammenfassung für Klarstein AREZZO
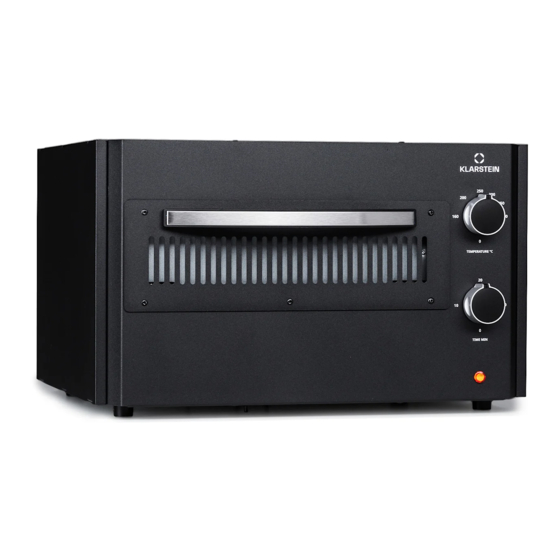
- Seite 1 AREZZO Pizzaofen Pizza Oven Horno para pizza Four à pizza Forno per pizza 10041186 www.klarstein.com...
-
Seite 3: Inhaltsverzeichnis
Sehr geehrter Kunde, wir gratulieren Ihnen zum Erwerb Ihres Gerätes. Lesen Sie die folgenden Hinweise sorgfältig durch und befolgen Sie diese, um möglichen Schäden vorzubeugen. Für Schäden, die durch Missachtung der Hinweise und unsachgemäßen Gebrauch entstehen, übernehmen wir keine Haftung. Scannen Sie den folgenden QR-Code, um Zugriff auf die aktuellste Bedienungsanleitung und weitere Informationen rund um das Produkt zu erhalten. -
Seite 4: Sicherheitshinweise
SICHERHEITSHINWEISE Dieses Gerät ist ausschließlich für den privaten Bereich im Innenbereich ausgelegt und darf nicht kommerziell verwendet werden. Lesen Sie sich die Bedienungsanleitung aufmerksam durch und bewahren Sie diese an einem sicheren Ort auf. Stellen Sie sicher, dass Sie die Bedienungsanleitung, falls Sie das Gerät an eine andere Person weitergeben, ebenfalls beifügen. - Seite 5 • Das Gerät darf nicht in Kombination mit einem Timer oder einem separaten Fernbedienungssystem verwendet werden. • Lassen Sie das Gerät während der Verwendung nicht unbeaufsichtigt. • Lassen Sie das Gerät nicht im Freien oder in einer feuchten Umgehung stehen. •...
-
Seite 6: Aufstellort
• Wenn eine GS-geprüfte 16 A Mehrfach-Steckerleiste verwendet wird, darf diese wegen Brandgefahr nicht mit mehr als 3680 Watt belastet werden. • Stellen Sie sicher, dass Kinder nicht am Netzkabel ziehen und dass dieses so verlegt wird, dass es nicht zur Stolperfalle werden kann. •... -
Seite 7: Geräteübersicht
GERÄTEÜBERSICHT Temperatur- Einstellregler Timer- Einstellregler Tür öffnen Ziehen Sie am Türgriff, um Heben Sie die Türverklei- Klappen Sie die Türverklei- die Schublade herauszuziehen. dung etwas an. dung nach unten. Tür schließen Klappen Sie die Tür- Lassen Sie die Türverklei- Drücken Sie gegen die Tür, verkleidung nach oben. -
Seite 8: Inbetriebnahme
INBETRIEBNAHME Hinweis: Dieses Gerät ist ausschließlich für den Gebrauch im Haushalt geeignet. Entfernen Sie das gesamte Verpackungsmaterial, die Aufkleber und das Plastikband um den Netzstecker. Reinigen Sie alle herausnehmbaren Teile (beispielweise den Pizzastein), wie im Abschnitt „Reinigung und Pflege“ beschrieben. Es wird empfohlen, den Pizzastein gründlich trocknen zu lassen, bevor er wieder in das Gerät hineingelegt wird. -
Seite 9: Bedienung
Vorheizen Heizen Sie den Backofen vor dem Gebrauch immer 12 Minuten lang vor. Für Gerichte wie Pizza, gefrorene Snacks usw. heizen Sie den Pizzastein immer zusammen mit dem Ofen vor, indem Sie den Pizzastein hineinlegen, bevor das Gerät mit dem Aufheizen beginnt. Bei empfindlicheren Backwaren wie Keksen, Croissants usw. - Seite 10 • Ziehen Sie, sobald die eingestellte Temperatur erreicht ist, die Schublade am Griff waagerecht nach vorne. Klappen Sie die Tür anschließend nach unten. Hinweis: Die Metallteile und der Pizzastein werden sehr heiß! • Geben Sie etwas Mehl auf den Heber und den Pizzastein. •...
- Seite 11 Bedienung Stecken Sie den Netzstecker in die Steckdose. Die Betriebsanzeige leuchtet auf und zeigt an, dass das Gerät an den Strom angeschlossen ist. Stellen Sie mit dem Temperaturregler die gewünschte Temperatur ein. Siehe Abschnitt „Temperatur- und Funktionsauswahl“. Stellen Sie mit dem Timerregler die gewünschte Garzeit ein. Hinweis: Der Garvorgang kann jederzeit unterbrochen werden, indem der Timerregler gegen den Uhrzeigersinn auf „0“...
-
Seite 12: Temperatur- Und Funktionsauswahl
TEMPERATUR- UND FUNKTIONSAUSWAHL Dieser Pizzaofen verfügt über 6 Temperatureinstellungen, die so programmiert wurden, dass sie optimale Ergebnisse für die zu garenden Speisen gewährleisten. In der nachfolgenden Kochtabelle finden Sie Angaben zu unterschiedlichen Garmethoden und Lebensmitteln, wie z. B. Backen, Snacks, Pizza - normal, mit aufgehender Kruste, Tiefkühlpizza usw. -
Seite 13: Reinigung Und Pflege
REINIGUNG UND PFLEGE Hinweis: Dieses Produkt enthält keine vom Benutzer zu wartenden Geräteteile. Vergewissern Sie sich vor der Reinigung des Geräts und Geräteteilen, dass der Ofen ausgeschaltet, vom Stromnetz getrennt und vollständig abgekühlt ist. Die Heizelemente dürfen NICHT gereinigt werden. Reinigen Sie die Tür mit einem Schwamm, einem weichen Tuch oder einem Nylonschwamm mit Spülmittel und Wasser. -
Seite 14: Spezielle Entsorgungshinweise Für Verbraucher In Deutschland
SPEZIELLE ENTSORGUNGSHINWEISE FÜR VERBRAUCHER IN DEUTSCHLAND Entsorgen Sie Ihre Altgeräte fachgerecht. Dadurch wird gewährleistet, dass die Altgeräte umweltgerecht verwertet und negative Auswirkungen auf die Umwelt und menschliche Gesundheit vermieden werden. Bei der Entsorgung sind folgende Regeln zu beachten: • Jeder Verbraucher ist gesetzlich verpflichtet, Elektro- und Elek- tronikaltgeräte (Altgeräte) sowie Batterien und Akkus getrennt vom Hausmüll zu entsorgen. - Seite 15 • Bei einem Vertrieb unter Verwendung von Fernkommunikationsmitteln ist die unentgeltliche Abholung am Ort der Abgabe auf Elektro- und Elektronikgeräte der Kategorien 1, 2 und 4 gemäß § 2 Abs. 1 ElektroG, nämlich „Wärmeüberträger“, „Bildschirmgeräte“ (Oberfläche von mehr als 100 cm²) oder „Großgeräte“...
-
Seite 16: Hinweise Zur Entsorgung
HINWEISE ZUR ENTSORGUNG Wenn es in Ihrem Land eine gesetzliche Regelung zur Entsorgung von elektrischen und elektronischen Geräten gibt, weist dieses Symbol auf dem Produkt oder auf der Verpackung darauf hin, dass dieses Produkt nicht im Hausmüll entsorgt werden darf. Stattdessen muss es zu einer Sammelstelle für das Recycling von elektrischen und elektronischen Geräten gebracht werden. -
Seite 17: Technical Data
Dear customer, Congratulations on purchasing this device. Please read the following instructions carefully and follow them to prevent possible damages. We assume no liability for damage caused by disregard of the instructions and improper use. Scan the QR code to get access to the latest user manual and more product information. -
Seite 18: Safety Instructions
SAFETY INSTRUCTIONS This unit is designed exclusively for private indoor use and may not be used commercially. Read the operating instructions carefully and keep them in a safe place. Make sure that if you pass the unit on to another person, you also include the operating instructions. - Seite 19 • Do not touch the high-power quartz radiators with metallic objects. Make sure that food does not come into contact with the radiators. • Never immerse the device in water. • Keep a distance of 10 cm around the unit from walls and other objects. •...
-
Seite 20: Installation Site
Installation site • Never place this appliance on or near hot surfaces (for example, hot stoves). • Only use the device on a level, stable and heat-resistant surface. It is important that there are no flammable objects near the appliance. •... -
Seite 21: Device Overview
DEVICE OVERVIEW Temperature setting controller Timer adjuster Open door Pull the door handle to pull Lift the door trim a little. Fold down the door trim. out the drawer. Close the door Fold up the door trim. Release the door panel so Press against the door to that it stands up. -
Seite 22: Getting Started
GETTING STARTED Note: This device is only suitable for household use. Remove all packaging material, stickers and plastic tape from around the mains plug. Clean all removable parts (e.g. the pizza stone) as described in the section "Cleaning and Care". It is recommended to let the pizza stone dry thoroughly before putting it back into the appliance. -
Seite 23: Operation
For more delicate baked goods such as biscuits, croissants, etc., preheating the pizza stone may cause the food to cook too quickly and is therefore not recommended. In general, preheating the pizza stone is not necessary if the food is cooked on the lower heating levels (baking and deep-frying). - Seite 24 Note: The metal parts and the pizza stone get very hot! • Put some flour on the lifter and the pizza stone. • Place the food to be cooked on the pizza stone with the lifter. Close the drawer and push it back into the appliance. •...
- Seite 25 Operation Plug the power plug into the wall socket. The power indicator lights up to indicate that the unit is connected to the power. Use the temperature controller to set the desired temperature. See section "Temperature and Function Selection". Set the timer to the desired cooking time. Note: The cooking process can be interrupted at any time by turning the timer control anti-clockwise to "0".
-
Seite 26: Temperature And Function Selection
TEMPERATURE AND FUNCTION SELECTION This pizza oven has 6 temperature settings programmed to ensure optimal results for the food being cooked. In the cooking table below, you will find information on different cooking methods and foods, such as baking, snacks, pizza - normal, with rising crust, frozen pizza, etc. -
Seite 27: Cleaning And Care
CLEANING AND CARE Note: This product does not contain any user serviceable parts. Before cleaning the appliance and appliance parts, make sure that the oven is switched off, disconnected from the mains and completely cooled down. The heating elements must NOT be cleaned. Clean the door with a sponge, soft cloth or nylon sponge with washing-up liquid and water. -
Seite 28: Disposal Considerations
DISPOSAL CONSIDERATIONS If there is a legal regulation in your country regarding the disposal of electrical and electronic equipment, this symbol on the product or on the packaging indicates that this product must not be disposed of with household waste. Instead, it must be taken to a collection point for the recycling of electrical and electronic equipment. -
Seite 29: Fiche Technique
Cher client, chère cliente, Toutes nos félicitations pour l’acquisition de ce nouvel appareil. Lisez attentivement les indications suivantes et suivez-les pour éviter d'éventuels dommages. Nous ne saurions être tenus pour responsables des dommages dus au non-respect des consignes et à la mauvaise utilisation de l’appareil. -
Seite 30: Consignes De Sécurité
CONSIGNES DE SÉCURITÉ Cet appareil est exclusivement conçu pour un usage privé à l'intérieur et ne doit pas être utilisé à des fi ns commerciales. Avant d'utiliser l'appareil, lisez attentivement et intégralement le mode d'emploi et conservez-le en lieu sûr. Assurez-vous de transmettre le mode d'emploi lorsque vous l'appareil change de propriétaire. - Seite 31 • Ne laissez jamais l'appareil sans surveillance pendant son fonctionnement. • Ne laissez pas l'appareil à l'extérieur ou dans un environnement humide. • Ne placez aucun objet sur l'appareil et ne couvrez pas les fentes d'aération. • Ne touchez pas les émetteurs à quartz haute puissance avec des objets métalliques.
- Seite 32 trébuchement. • Débranchez la fiche de la prise de courant lorsque l'appareil n'est pas surveillé, avant de retirer ou d'ajouter des pièces et avant de le nettoyer. • Ne préparez jamais d'aliments à forte teneur en matières grasses dans l'appareil, car la graisse peut facilement s'enflammer sur les éléments chauffants.
-
Seite 33: Aperçu De L'appareil
APERÇU DE L'APPAREIL Régulateur température Régulateur de la minuterie Ouvrir la porte Tirez sur la poignée de la Soulevez légèrement le Rabattez le panneau de porte pour extraire le tiroir. panneau de porte. porte vers le bas. Fermer la porte Rabattez le panneau de Relâchez le panneau de Appuyez sur la porte pour... -
Seite 34: Mise En Marche
MISE EN MARCHE Remarque : Cet appareil convient uniquement à un usage domestique. Retirez tous les matériaux d'emballage, les étiquettes et la bande en plastique autour de la fiche d'alimentation. Nettoyez toutes les pièces amovibles (par exemple la pierre à pizza) comme décrit dans la section «... -
Seite 35: Utilisation
Préchauffage Préchauffez toujours le four pendant 12 minutes avant de l'utiliser. Pour les plats comme la pizza, les snacks surgelés et autres, préchauffez toujours la pierre à pizza en même temps que le four, en plaçant la pierre à pizza à l'intérieur avant que l'appareil ne commence à chauffer. Pour les produits de boulangerie plus délicats comme les biscuits, les croissants, et autres, le préchauffage de la pierre à... - Seite 36 • Dès que la température réglée est atteinte, tirez le tiroir horizontalement vers l'avant en le tenant par la poignée. Rabattez ensuite la porte vers le bas. Remarque : les parties métalliques et la pierre à pizza deviennent très chaudes ! •...
- Seite 37 Utilisation Branchez la fiche dans la prise. Le voyant d'alimentation s'allume et indique que l'appareil est branché sur le courant. Réglez le régulateur de température sur la température souhaitée. Voir la section « Sélection de la température et des fonctions ». Réglez la minuterie sur le temps de cuisson souhaité.
-
Seite 38: Sélection De La Température Et Des Fonctions
SÉLECTION DE LA TEMPÉRATURE ET DES FONCTIONS Ce four à pizza dispose de 6 réglages de température programmés pour garantir des résultats optimaux pour les aliments à cuire. Dans le tableau de cuisson ci-dessous, vous trouverez des indications sur différents modes de cuisson et aliments, comme la cuisson au four, les snacks, la pizza - normale, à... -
Seite 39: Nettoyage Et Entretien
NETTOYAGE ET ENTRETIEN Remarque : Ce produit ne contient aucune pièce réparable par l'utilisateur. Avant de nettoyer l'appareil et ses éléments, assurez-vous que le four est éteint, débranché du réseau électrique et qu'il a complètement refroidi. Les éléments chauffants ne doivent PAS être nettoyés. Nettoyez la porte avec une éponge, un chiffon doux ou une éponge en nylon imbibée de liquide vaisselle et d'eau. -
Seite 40: Informations Sur Le Recyclage
INFORMATIONS SUR LE RECYCLAGE Si l'élimination des appareils électriques et électroniques est réglementée dans votre pays, ce symbole sur le produit ou sur l'emballage indique qu'il ne doit pas être mis au rebut avec les ordures ménagères. Vous devez l'acheminer vers un point de collecte pour le recyclage des appareils électriques et électroniques. -
Seite 41: Datos Técnicos
Estimado cliente: Le felicitamos por la adquisición de este producto. Lea atentamente el siguiente manual y siga cuidadosamente las instrucciones de uso con el fin de evitar posibles daños. La empresa no se responsabiliza de los daños ocasionados por un uso indebido del producto o por haber desatendido las indicaciones de seguridad. -
Seite 42: Indicaciones De Seguridad
INDICACIONES DE SEGURIDAD Esta unidad está diseñada exclusivamente para uso privado en interiores y no puede ser utilizada comercialmente. Lea atentamente las instrucciones de uso y guárdelas en un lugar seguro. Asegúrate de que si pasas la unidad a otra persona, incluyas también las instrucciones de uso. - Seite 43 • No toque los radiadores de cuarzo de alta potencia con objetos metálicos. Asegúrese de que los alimentos no entren en contacto con los radiadores. • No sumerja nunca el aparato en agua. • Mantenga una distancia de 10 cm alrededor de la unidad con respecto a las paredes y otros objetos.
- Seite 44 • Limpie el aparato después de cada uso para evitar la aparición de bacterias y moho. • Deslice siempre la bandeja recogemigas por debajo de la resistencia inferior. Lugar de instalación • No coloque nunca este aparato sobre o cerca de superficies calientes (por ejemplo, estufas calientes).
-
Seite 45: Descripción General Del Aparato
DESCRIPCIÓN GENERAL DEL APARATO Controlador de ajuste de temperatura Regulador de tiempo Puerta abierta Tira del tirador de la puerta Levanta un poco el embel- Dobla el embellecedor de para sacar el cajón. lecedor de la puerta. la puerta. Cerrar la puerta Doble el panel de la puerta Suelte el panel de la puerta Presione contra la puerta... -
Seite 46: Puesta En Funcionamiento
PUESTA EN FUNCIONAMIENTO Nota: Este aparato está destinado exclusivamente a uso doméstico. Retire todo el material de embalaje, las pegatinas y la cinta de plástico de alrededor del enchufe. Limpie todas las piezas desmontables (por ejemplo, la piedra para pizza) como se describe en la sección "Limpieza y mantenimiento". - Seite 47 Precalentamiento Precaliente siempre el horno durante 12 minutos antes de utilizarlo. Para platos como pizzas, bocadillos congelados, etc., precaliente siempre la piedra para pizza junto con el horno, colocando la piedra para pizza en el interior antes de que el aparato comience a calentarse. En el caso de productos de panadería más delicados, como galletas, croissants, etc., el precalentamiento de la piedra para pizza puede hacer que los alimentos se cocinen demasiado rápido, por lo que no se recomienda.
- Seite 48 • Una vez alcanzada la temperatura ajustada, tire del cajón hacia delante en horizontal por el asa. Entonces, pliega la puerta hacia abajo. Nota: ¡Las partes metálicas y la piedra de la pizza se calientan mucho! • Pon un poco de harina en el elevador y en la piedra de la pizza. •...
- Seite 49 Puesta en funcionamiento Introduzca el cable de alimentación en la toma de corriente. El indicador de alimentación se enciende para indicar que la unidad está conectada a la corriente. Ajuste la temperatura deseada con el mando de control de la temperatura. Véase el apartado "Selección de temperatura y funciones".
- Seite 50 SELECCIÓN DE TEMPERATURA Y FUNCIONES. Este horno para pizzas tiene 6 ajustes de temperatura programados para garantizar resultados óptimos para los alimentos que se cocinan. En la tabla de cocción que aparece a continuación encontrará información sobre diferentes métodos de cocción y alimentos, como el horneado, los bocadillos, la pizza - normal, con corteza ascendente, la pizza congelada, etc.
-
Seite 51: Limpieza Y Cuidado
LIMPIEZA Y CUIDADO Nota:El aparato no contiene piezas que el usuario pueda reparar. Antes de limpiar el aparato y sus partes, asegúrese de que el horno esté apagado, desconectado de la red eléctrica y completamente frío. Las resistencias NO deben limpiarse. Limpie la puerta con una esponja, un paño suave o una esponja de nylon con detergente y agua. -
Seite 52: Indicaciones Sobre La Retirada Del Aparato
INDICACIONES SOBRE LA RETIRADA DEL APARATO Si en su país existe una disposición legal relativa a la eliminación de aparatos eléctricos y electrónicos, este símbolo estampado en el producto o en el embalaje advierte de que no debe eliminarse como residuo doméstico. -
Seite 53: Dati Tecnici
Gentile cliente, La ringraziamo per l'acquisto del dispositivo. La preghiamo di leggere attentamente le seguenti indicazioni e di seguirle per prevenire eventuali danni. Non ci assumiamo alcuna responsabilità per danni scaturiti da una mancata osservanza delle avvertenze di sicurezza e da un uso improprio del dispositivo. -
Seite 54: Avvertenze Di Sicurezza
AVVERTENZE DI SICUREZZA Questo dispositivo è progettato esclusivamente per uso privato, al chiuso e non per scopi commerciali. Leggere attentamente il manuale d'uso e conservarlo in un luogo sicuro. Se il dispositivo viene dato a un'altra persona, assicurarsi di accludere il manuale d'uso. - Seite 55 • Non lasciare il dispositivo all'aperto o in un ambiente umido. • Non poggiare oggetti sul dispositivo e non coprire le fessure di ventilazione. • Non toccare gli elementi al quarzo ad alta potenza con oggetti metallici. Assicurarsi che gli alimenti non entrino in contatto con gli elementi riscaldanti. •...
- Seite 56 • Non preparare mai alimenti con un alto contenuto di grasso nel dispositivo, poiché il grasso può prendere fuoco facilmente sugli elementi riscaldanti. Utilizzare sempre la pala in acciaio inox e i guanti da forno per rimuovere gli alimenti. • Pulire il dispositivo dopo ogni uso per evitare la formazione di batteri e muffe.
-
Seite 57: Descrizione Del Dispositivo
DESCRIZIONE DEL DISPOSITIVO Regolazione della temperatura Regolazione del timer Aprire lo sportello Tirare l'impugnatura dello Sollevare leggermente il Abbassare il pannello dello sportello per etrarre il cassetto. pannello dello sportello. sportello. Chiudere lo sportello Piegare verso l'alto il pan- Lasciare andare il pannello Premere contro lo sportello nello dello sportello. -
Seite 58: Messa In Funzione
MESSA IN FUNZIONE Nota: questo dispositivo è adatto esclusivamente all'uso in contesti casalinghi. Rimuovere tutto il materiale d'imballaggio, le etichette e il nastro di plastica intorno alla spina di alimentazione. Pulire tutti i componenti rimovibili (per esempio la pietra refrattaria ) come descritto nel paragrafo "Pulizia e manutenzione". -
Seite 59: Utilizzo
Preriscaldare Preriscaldare sempre il forno per 12 minuti prima dell'uso. Per piatti come pizza, snack congelati, ecc., preriscaldare sempre la pietra refrattaria insieme al forno, lasciandola all'interno prima che inizi a riscaldarsi. Per i prodotti da forno più delicati, come biscotti, croissant, ecc., il preriscaldamento della pietra può... - Seite 60 • Una volta raggiunta la temperatura impostata, tirare il cassetto in avanti orizzontalmente dall'impugnatura. Poi piegare lo sportello verso il basso. Nota: le parti metalliche e la pietra refrattaria diventano molto calde! • Mettere un po' di farina sulla pala e sulla pietra. •...
- Seite 61 Utilizzo Inserire la spina nella presa elettrica. La spia dell'alimentazione si accende per indicare che il dispositivo è collegato alla corrente. Impostare la temperatura desiderata con la manopola. V. il paragrafo "Selezione della temperatura e delle funzioni". Impostare il timer sul tempo di cottura desiderato. Nota: il processo di cottura può...
-
Seite 62: Selezione Della Temperatura E Delle Funzioni
SELEZIONE DELLA TEMPERATURA E DELLE FUNZIONI Questo forno per la pizza ha 6 impostazioni di temperatura programmate per garantire risultati ottimali in base agli alimenti da cuocere. Nella tabella di cottura qui sotto si trovano informazioni su diversi metodi di cottura e alimenti, come la cottura al forno, snack, pizza - normale, con crosta lievitata, pizza surgelata, ecc. -
Seite 63: Pulizia E Manutenzione
PULIZIA E MANUTENZIONE Nota: il dispositivo non contiene componenti che necessitano di manutenzione da parte dell'utente. Prima di pulire il dispositivo e le sue parti, assicurarsi che il forno sia spento, scollegato dalla rete e completamente raffreddato. Gli elementi riscaldanti NON devono essere puliti. Pulire lo sportello con una spugna, un panno morbido o una spugna di nylon con un po' di detersivo e acqua. -
Seite 64: Avviso Di Smaltimento
AVVISO DI SMALTIMENTO Se nel vostro Paese sono vigenti regolamenti legislativi relativi allo smaltimento di dispositivi elettrici ed elettronici, questo simbolo sul prodotto o sull'imballaggio indica che non è consentito smaltire questo prodotto insieme ai rifiuti domestici. Il dispositivo deve invece essere portato in un centro di raccolta per il riciclaggio di dispositivi elettrici ed elettronici.