Inhaltsverzeichnis
Werbung
Verfügbare Sprachen
Verfügbare Sprachen
Quicklinks
HEATPAL MARBLE
Infrarot-Heizung
Infrared Heater
Radiador infrarrojo
Radiateur Infrarouge
Radiatore a infrarossi
10032022
www.klarstein.com
Hinweis: Dieses Produkt ist nur für gut isolierte Räume
oder für den gelegentlichen Gebrauch geeignet.
Note: This product is only suitable for well insulated
spaces or occasional use.
Nota: Este producto está indicado únicamente en
lugares abrigados o para una utilización punctual.
Remarque : Ce produit ne peut être utilisé que dans
des locaux bien isolés ou de manière occasionnelle.
Advertencia: Questo prodotto è adatto solo per spazi
ben isolati o uso occasionale.
Werbung
Kapitel
Inhaltsverzeichnis

Verwandte Anleitungen für Klarstein HEATPAL MARBLE 10032022


Inhaltszusammenfassung für Klarstein HEATPAL MARBLE 10032022
- Seite 1 Infrared Heater Radiador infrarrojo Radiateur Infrarouge Radiatore a infrarossi 10032022 www.klarstein.com Hinweis: Dieses Produkt ist nur für gut isolierte Räume oder für den gelegentlichen Gebrauch geeignet. Note: This product is only suitable for well insulated spaces or occasional use. Nota: Este producto está indicado únicamente en lugares abrigados o para una utilización punctual.
-
Seite 3: Inhaltsverzeichnis
Sehr geehrter Kunde, wir gratulieren Ihnen zum Erwerb Ihres Gerätes. Lesen Sie die folgenden Hinweise sorgfältig durch und befolgen Sie diese, um möglichen Schäden vorzubeugen. Für Schäden, die durch Missachtung der Hinweise und unsachgemäßen Gebrauch entstehen, übernehmen wir keine Haftung. Scannen Sie den folgenden QR-Code, um Zugriff auf die aktuellste Bedienungsanleitung und weitere Informationen rund um das Produkt zu erhalten. -
Seite 4: Produktdatenblatt
PRODUKTDATENBLATT Modellkennung(en) 10032022, 10032992, 10032993 Angabe Symbol Wert Einheit Angabe Einheit Wärmeleistung Nur bei elektrischen Speicher-Einzelraumheizgeräten: Art der Regelung der Wärmezufuhr Nennwärmeleistung 1,266 Manuelle Regelung der Wärmezufuhr mit k.A. integriertem Thermostat Mindestwärmeleistung k.A. Manuelle Regelung der Wärmezufuhr k.A. (Richtwert) mit Rückmeldung der Raum- und/oder Außentemperatur Maximale kontinuierliche 1,266... -
Seite 5: Sicherheitshinweise
SICHERHEITSHINWEISE • Modifi zieren Sie das Gerät nicht und nehmen Sie es nicht auseinander. • Halten Sie Kinder unter 3 Jahren vom Gerät fern. • Kinder ab 8 Jahren, psychisch, sensorisch und körperlich eingeschränkte Menschen dürfen das Gerät nur benutzen, wenn sie vorher von einer für sie verantwortlichen Aufsichtsperson ausführlich mit den Funktionen und den Sicherheitsvorkehrungen vertraut gemacht wurden und die damit verbundenen Risiken verstehen. - Seite 6 • Spritzen Sie keine Flüssigkeiten auf das Gerät, egal ob es ein- oder ausgeschaltet ist. • Stellen Sie das Gerät niemals in einem Bereich mit hoher Luftfeuchtigkeit auf und hängen Sie keine feuchten Gegenstände auf (Handtücher, Decken usw.). • Wenn das Gerät nach dem Gebrauch oder im Winter wieder verpackt wird, lagern Sie es bitte in einer trockenen Umgebung.
-
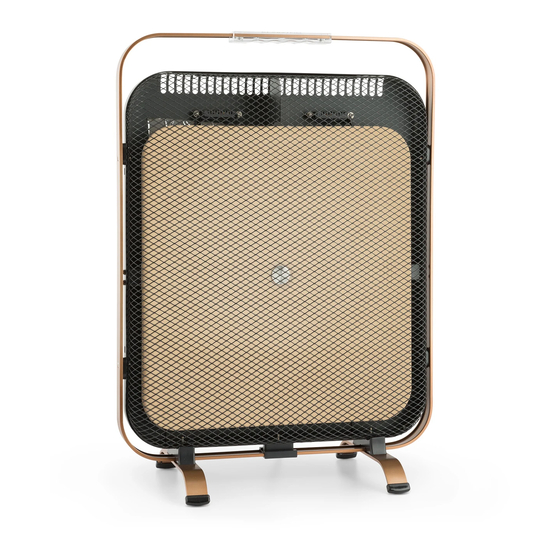
Seite 7: Geräteübersicht
GERÄTEÜBERSICHT Griff Frontgitter Luftauslass Bedienfeld Füße... -
Seite 8: Bedienfeld
BEDIENFELD Heiz-Kontrollleuchte Temperaturregler MIN-Position Komfortzone Ein/Aus-Schalter MAX-Position Anti-Frost-Position INSTALLATION Packen Sie die einzelnen Teile des Installations-Kits vorsichtig aus und versichern Sie sich, dass kein Teil während des Transports beschädigt wurde. Falls Teile beschädigt sind, wenden Sie sich umgehend an den Kundendienst. Installations-Kit Füße (2x) Schraube (4x) -
Seite 9: Bedienung
Installation Befestigen Sie die Füße mit den 4 Schrauben. BEDIENUNG Versichern Sie sich, dass sich der Regler auf der MAX-Position befindet und der Schalter auf OFF steht. Stecken Sie den Stecker in die Steckdose. Stellen Sie den Schalter auf ON. Stellen Sie mit dem Regler die gewünschte Temperatur ein. -
Seite 10: Reinigung Und Pflege
REINIGUNG UND PFLEGE Hinweis: Schalten Sie das Gerät aus und ziehen Sie den Stecker aus der Steckdose. Warten Sie, bis das Gerät vollständig abgekühlt ist, bevor Sie sie reinigen. • Benutzen Sie zur Reinigung der Lüftungsschlitze und Gitter einen Staubsauger. •... - Seite 11 Dear Customer, Congratulations on purchasing this device. Please read the following instructions carefully and follow them to prevent possible damages. We assume no liability for damage caused by disregard of the instructions and improper use. Scan the QR code to get access to the latest user manual and more product information.
-
Seite 12: Product Data Sheet
PRODUCT DATA SHEET Model identifier(s): 10032022, 10032992, 10032993 Item Symbol Value Unit Item Unit Heat output Type of heat input, for electric storage local space heaters only Nominal heat output 1.266 manual heat charge control, with integrated thermostat Minimum heat output manual heat charge control with room and/or (indicative) outdoor temperature feedback... -
Seite 13: Safety Instructions
SAFETY INSTRUCTIONS • Don’t do any modifi cation to the heater. • Children of less than 3 years should be kept away unless continuously supervised. • Children over the age of 8 and persons with reduced physical, sensory or mental capabilities or those with a lack of experience and knowledge may only use the device if they are instructed on how to do so by a person responsible for their safety, or if they are supervised and understand the hazards associated with the... - Seite 14 • Never splash any liquid to the product, whenever the product is on or off! • Never place the product in the high humid area and hang up any damp objects (eg. Towel, blanket or etc.) • When the product is re-packed after use or Winter seasons, please place into the dry surrounding area for storage.
-
Seite 15: Product Description
PRODUCT DESCRIPTION Handle Front net Air outlet Control panel Feet... -
Seite 16: Control Panel
CONTROL PANEL Heating indicator light Temperature control knob MIN position Comfortable zone Power switch MAX position Anti-Frost position INSTALLATION Carefully unpack the components and check that no damage occurred during transportation. If any damage is apparent or any component is missing, please contact the dealer immediately. -
Seite 17: Operation
Installation Fix two feet on the bottom of the heater by screws. OPERATION Ensure that the Temperature Control Knob is at “Max” position. Also, make sure the power switch is at “OFF” position. Plug the power cord into a suitable electrical outlet. -
Seite 18: Cleaning And Care
CLEANING AND CARE Note: Turn off the unit and unplug it from the power outlet. Wait until the unit has completely cooled down before cleaning it. • Use a vacuum cleaner to clean the ventilation slots and grilles. • Remove dust on the outside surfaces with a damp (not wet) cloth. •... -
Seite 19: Datos Técnicos
Estimado cliente: Le felicitamos por la adquisición de este producto. Lea atentamente las siguientes instrucciones y sígalas para evitar posibles daños. No asumimos ninguna responsabilidad por los daños causados por el incumplimiento de las instrucciones y el uso inadecuado. Escanee el siguiente código QR para obtener acceso a la última guía del usuario y más información sobre el producto. -
Seite 20: Hoja De Datos Del Producto
HOJA DE DATOS DEL PRODUCTO Denominación del modelo 10032022, 10032992, 10032993 Dato Símbolo Valor Unidad Dato Unidad Potencia térmica Solo con disposítivos de acumulación de calor eléctricos para abastecimiento local: Tipo de regulación del abastecimiento de calor Potencia térmica nominal 1,266 Regulación manual del abastecimiento de calor con termostato integrado:... -
Seite 21: Indicaciones De Seguridad
INDICACIONES DE SEGURIDAD • No intente desmontar ni modifi car el aparato usted mismo. • Mantenga a los niños menores de 3 años alejados del aparato. • Los niños mayores de 8 años y las personas con discapacidad física, sensorial o psíquica, o con falta de experiencia y conocimientos pueden utilizar el aparato si han sido previamente instruidos por su tutor o supervisor sobre el funcionamiento del mismo y conocen las funciones, las indicaciones de seguridad... - Seite 22 • No salpique con líquidos la unidad, tanto si está encendida como apagada. • No coloque nunca el aparato en una zona con mucha humedad y no cuelgue objetos húmedos (toallas, mantas, etc.). • Cuando vuelva a embalar la unidad después de su uso o en invierno, guárdela en un entorno seco.
-
Seite 23: Descripción Del Aparato
DESCRIPCIÓN DEL APARATO Rejilla delantera Salida de aire Panel de control Patas... -
Seite 24: Panel De Control
PANEL DE CONTROL Indicador luminoso de calefacción Regulador de temperatura Posición MIN Zona de confort Interruptor on/off Posición MAX Posición anti escarcha INSTALACIÓN Desembale cada una de las piezas del kit de instalación con cuidado y asegúrese de que ninguna de ellas se ha visto dañada durante el transporte. Contacte con el servicio de atención al cliente en caso de que alguna pieza esté... -
Seite 25: Utilización
Instalación Fije las patas con los cuatro tornillos incluidos. UTILIZACIÓN Asegúrese de que el regulador se encuentre en la posición MAX y que el interruptor esté en la posición OFF. Conecte el enchufe a la toma de corriente. Coloque el interruptor en la posición ON. A continuación, ajuste la temperatura deseada con el regulador. -
Seite 26: Limpieza Y Cuidado
LIMPIEZA Y CUIDADO Nota: Apague la unidad y desenchúfela de la toma de corriente. Espere hasta que la unidad se haya enfriado completamente antes de limpiarla. • Use una aspiradora para limpiar las ranuras de ventilación y las rejillas. • Elimine el polvo de las superficies exteriores con un paño húmedo (no mojado). •... -
Seite 27: Fiche Technique
Chère cliente, cher client, Toutes nos félicitations pour l’acquisition de ce nouvel appareil. Veuillez lire attentivement et respecter les instructions de ce mode d’emploi afin d’éviter d’éventuels dommages. Nous ne saurions être tenus pour responsables des dommages dus au non-respect des consignes et à... -
Seite 28: Fiche De Données Produit
FICHE DE DONNÉES PRODUIT Référence (s) du produit 10032022, 10032992, 10032993 Donnée Symbole Valeur Unité Donnée Unité Puissance calorifique Uniquement pour les radiateurs électriques à accumulation : Type de régulation de l'apport de chaleur Puissance calorifique 1,266 Régulation manuelle de l'apport de chaleur Sans nominale avec thermostat intégré... -
Seite 29: Consignes De Securite
CONSIGNES DE SECURITE • Ne pas modifi er l’appareil ni le démonter. • Maintenir les enfants de moins de 3 ans loin de l’appareil. • Les enfants âgés de plus de 8 ans et les personnes ayant des capacités physiques, sensorielles ou mentales réduites ou dénués d‘expérience et de connaissances ne doivent utiliser l‘appareil que si la personne responsable de leur sécurité... - Seite 30 • Ne pas éclabousser l'appareil avec du liquide, qu'il soit allumé ou éteint. • Ne placez jamais l'appareil dans une zone très humide et ne suspendez pas d'objets humides (serviettes, couvertures, etc.). • Si vous remballez l'appareil après utilisation ou pour l'hiver, conservez-le dans un environnement sec.
-
Seite 31: Apercu De L'appareil
APERCU DE L’ APPAREIL Poignée Grille frontale Sortie d’air Panneau de commande Pieds... -
Seite 32: Panneau De Commande
PANNEAU DE COMMANDE Voyant de contrôle de la chaleur Bouton de réglage de la température Position MIN Zone de confort Interrupteur marche/arrêt Position MAX Position antigel INSTALLATION Déballer avec précaution les différents éléments du kit d’installation et s’assurer qu’aucun d’entre eux n’a été endommagé pendant le transport. Si des éléments sont endommagés, s’adresser immédiatement au service client. -
Seite 33: Utilisation
Installation Fixer les pieds à l’aide des 4 vis. UTILISATION S’assurer que le bouton se trouve en position MAX et que l’interrupteur est éteint. Brancher l’appareil. Placer l’interrupteur sur ON. Régler la température souhaitée à l’aide du bouton. Tourner le bouton dans le sens des aiguilles d’une montre pour augmenter la température. -
Seite 34: Nettoyage Et Entretien
NETTOYAGE ET ENTRETIEN Remarque : Mettez l‘appareil hors tension et débranchez-le de la prise de courant. Attendez que l‘appareil soit complètement refroidi avant de le nettoyer. • Utilisez un aspirateur pour nettoyer les fentes d‘aération et les grilles. • Enlever la poussière sur les surfaces extérieures à l‘aide d‘un chiffon umide (non mouillé). - Seite 35 Gentile cliente, La ringraziamo per aver acquistato il dispositivo. La preghiamo di leggere attentamente le seguenti istruzioni per l’uso e di seguirle per evitare possibili danni. Non ci assumiamo alcuna responsabilità per danni scaturiti da una mancata osservazione delle avvertenze di sicurezza e da un uso improprio del dispositivo.
-
Seite 36: Scheda Informativa Del Prodotto
SCHEDA INFORMATIVA DEL PRODOTTO Identificazione del modello (i) 10032022, 10032992, 10032993 Indicazione Simbolo Valore Unità Indicazione Unità Potenza termica Solo per gli apparecchi per il riscaldamento d'ambiente locale elettrici ad accumulo: Tipo di controllo dell´apporto termico Potenza termica nominale 1,266 Controllo manuale del carico termico con N.D. -
Seite 37: Avvertenze Di Sicurezza
AVVERTENZE DI SICUREZZA • Non apportare modifi che e non smontare il dispositivo. • Tenere il dispositivo fuori dalla portata dei bambini minori di 3 anni. • Questo dispositivo può essere utilizzato dai bambini maggiori di 8 anni e dalle persone con limitate capacità... - Seite 38 • Non spruzzare liquidi sul dispositivo, sia quando è spento che quando è acceso. • Non posizionare mai il dispositivo in ambienti con elevata umidità dell’aria e non appenderci oggetti umidi (asciugamani, coperte, ecc.). • Se il dispositivo viene imballato nuovamente dopo l’uso o durante l’inverno, conservarlo in un luogo asciutto.
-
Seite 39: Descrizione Del Prodotto
DESCRIZIONE DEL PRODOTTO Impugnatura Griglia frontale Uscita aria Pannello dei comandi Piedi... -
Seite 40: Pannello Dei Comandi
PANNELLO DEI COMANDI Spia di controllo riscaldamento Manopola temperatura Posizione MIN Zona comfort Interruttore on/off Posizione MAX Posizione antigelo INSTALLAZIONE Disimballare con cautela i singoli componenti del kit di installazione e assicurarsi che non si siano danneggiati durante il trasporto. Se ci sono dei componenti danneggiati, contattare subito il servizio clienti. -
Seite 41: Utilizzo
Installazione Fissare i piedi utilizzando le 4 viti. UTILIZZO Assicurarsi che la manopola sia posizionata su MAX e che l‘interruttore sia impostato su OFF. Inserire la spina nella presa. Impostare l‘interruttore su ON. Impostare la temperatura desiderata con la manopola. Ruotare la manopola in senso orario per aumentare la temperatura. -
Seite 42: Pulizia E Manutenzione
PULIZIA E MANUTENZIONE Nota: Spegnere l‘unità e scollegarla dalla presa di corrente. Attendere che l‘unità si sia raffreddata completamente prima di pulirla. • Pulire le fessure e le griglie di aerazione con un aspirapolvere. • Rimuovere la polvere dalle superfici esterne con un panno umido (non bagnato). •... -
Seite 43: Technische Gegevens
Geachte klant, hartelijk gefeliciteerd met de aanschaf van dit apparaat. Lees de hierna volgende handleiding aandachtig door en volg de instructies op om schade te voorkomen. Voor schade veroorzaakt door het niet in acht nemen van de instructies of door onjuist gebruik nemen wij geen verantwoordelijkheid. -
Seite 44: Productinformatieblad
PRODUCTINFORMATIEBLAD Artikelidentificatie 10032022, 10032992, 10032993 Aanduiding Symbool Waarde Eenheid Aanduiding Eenheid Warmtevermogen Alleen voor individuele elektrische ruimteverwarmers: regulering van de warmtetoevoer Nominaal warmtevermogen 1,266 Handmatige regeling van de warmtetoevoer n.v.t. met ingebouwde thermostaat Minimaal warmtevermogen n.v.t. Handmatige regeling van de warmtetoevoer n.v.t. -
Seite 45: Veiligheidsinstructies
VEILIGHEIDSINSTRUCTIES • Wijzig het apparaat niet en haal het niet uit elkaar. • Houdt kinderen onder de 3 jaar buiten bereik van het apparaat. • Kinderen vanaf 8 jaar en personen met een beperkte lichamelijke en/of geestelijke gezondheid mogen het apparaat alleen gebruiken wanneer ze van tevoren door een toezichthoudend persoon uitvoerig met de veiligheidsvoorschriften en functies vertrouwd zijn gemaakt. - Seite 46 • Spuit geen vloeistof op het apparaat, ongeacht of het aan of uit is. • Plaats het apparaat niet in een ruimte met een hoge luchtvochtigheid en leg er geen vochtige elementen op (handdoeken, theedoeken, kleding, enz). • Wanneer het apparaat na gebruik of na de winter weer ingepakt wordt, bergt u het a.u.b.
-
Seite 47: Overzicht Apparaat
OVERZICHT APPARAAT Handgreep Frontrooster Luchtuitlaat Bedieningspaneel Voetsteunen... -
Seite 48: Bedieningspaneel
BEDIENINGSPANEEL Controlelampje verwarming Temperatuurregelaar MIN positie Comfortzone Aan / Uit schakelaar MAX positie Anti-vries positie INSTALLATIE Pak de individuele onderdelen van de installatiekit voorzichtig uit en verzeker uzelf ervan dat er geen onderdelen beschadigd zijn geraakt gedurende het transport. Wanneer u beschadigingen constateert wendt u zich per omgaande tot onze klantenservice. -
Seite 49: Bediening
Installatie Bevestig de beide voetsteunen met de 4 schroeven. BEDIENING Verzeker uzelf ervan dat de regelaar op MAX staat en de schakelaar op OFF. Steek de stekker in het stopcontact. Zet de schakelaar op ON. Stel met de regelaar de gewenste temperatuur in. Draai de regelaar met de klok mee om de temperatuur te verhogen, draai hem tegen de klok in om de temperatuur te verlagen. -
Seite 50: Reiniging En Onderhoud
REINIGING EN ONDERHOUD Let Op! Schakel het apparaat uit en neem voordat u met de reiniging of het onderhoud begint de stekker uit het stopcontact om een elektrische schok te voorkomen. • Dompel de stekker, de kabel en het apparaat nooit in water of andere vloeistof(fen) onder.