AEG BSB578270M Benutzerinformation
Vorschau ausblenden
Andere Handbücher für BSB578270M:
- Benutzerinformation (184 Seiten) ,
- Benutzerinformation (188 Seiten)

Verwandte Anleitungen für AEG BSB578270M


Inhaltszusammenfassung für AEG BSB578270M
- Seite 1 BSB578270M Benutzerinformation Backofen BSE578270M User Manual BSS578270M Oven Notice d'utilisation Four Istruzioni per l’uso Forno USER MANUAL...
-
Seite 2: Inhaltsverzeichnis
FÜR PERFEKTE ERGEBNISSE Danke, dass Sie sich für dieses AEG Produkt entschieden haben. Wir haben es geschaffen, damit Sie viele Jahre von seiner ausgezeichneten Leistung und den innovativen Technologien, die Ihnen das Leben erleichtern, profitieren können. Es ist mit Funktionen ausgestattet, die in gewöhnlichen Geräten nicht vorhanden sind. - Seite 3 14. ENERGIEEFFIZIENZ....... 44 9.1 Einsetzen des Zubehörs....28 14.1 Produktinformationen und 9.2 Temperatursensor......29 Produktdatenblatt*....... 44 14.2 Energiesparen......45 10. ZUSATZFUNKTIONEN......31 15. MENÜSTRUKTUR........46 10.1 Verriegelung........ 31 10.2 Automatische Abschaltung..31 15.1 Menü..........46 10.3 Kühlgebläse......... 31 My AEG Kitchen app 3/184...
-
Seite 4: Sicherheitshinweise
Kinder sollten beaufsichtigt werden, um sicherzustellen, • dass sie nicht mit dem Gerät und mit Mobilgeräten über My AEG Kitchen spielen. Halten Sie sämtliches Verpackungsmaterial von Kindern • fern und entsorgen Sie es ordnungsgemäß. -
Seite 5: Allgemeine Sicherheit
SICHERHEITSHINWEISE 1.2 Allgemeine Sicherheit Die Montage des Geräts und der Austausch des Kabels • muss von einer Fachkraft vorgenommen werden. Verwenden Sie das Gerät nicht, bevor es in den • Einbauschrank gesetzt wird. Vor Wartungsarbeiten ist das Gerät von der elektrischen •... -
Seite 6: Sicherheitsanweisungen
SICHERHEITSANWEISUNGEN 2. SICHERHEITSANWEISUNGEN 2.1 Montage WARNUNG! Die Montage des Geräts darf nur von einer qualifizierten Fachkraft durchgeführt werden. • Entfernen Sie das gesamte Verpackungsmaterial. • Montieren Sie ein beschädigtes Gerät nicht und benutzen Sie es nicht. • Halten Sie sich an die mitgelieferte Montageanleitung. •... -
Seite 7: Elektrischer Anschluss
SICHERHEITSANWEISUNGEN Länge des Netzanschlusskabels. Das Kabel befin‐ 1500 mm det sich in der rechten Ecke auf der Rückseite Befestigungsschrauben 4x25 mm 2.2 Elektrischer Anschluss WARNUNG! Brand- und Stromschlaggefahr. • Alle elektrischen Anschlüsse sind von einem geprüften Elektriker vorzunehmen. • Das Gerät muss geerdet sein. •... -
Seite 8: Gebrauch
SICHERHEITSANWEISUNGEN Gesamtleistung (W) Kabelquerschnitt (mm²) maximal 1380 3 x 0.75 maximal 2300 3 x 1 maximal 3680 3 x 1.5 Das Erdkabel (grün/gelb) muss 2 cm länger sein als die Phasen- und Nullleiter (blaue und braune Kabel). 2.3 Gebrauch WARNUNG! Verletzungs-, Verbrennungs-, Stromschlag- oder Explosionsgefahr. -
Seite 9: Reinigung Und Pflege
SICHERHEITSANWEISUNGEN • Dieses Gerät ist nur zum Kochen bestimmt. Es darf nicht für andere Zwecke z. B. zum Erwärmen von Räumen verwendet werden. • Die Backofentür muss beim Betrieb geschlossen sein. • Ist das Gerät hinter einer Möbelfront (wie etwa einer Tür) installiert, achten Sie darauf, dass die Tür während des Gerätebetriebs nicht geschlossen wird. -
Seite 10: Dampfgaren
MONTAGE – Bringen Sie Tiere (besonders Vögel) für die Zeit während und nach der Pyrolyse und nach der ersten Anwendung der Höchsttemperatur in einen gut belüfteten Bereich. • Kleine Tiere reagieren auch während des laufenden Reinigungsprogramms empfindlich auf die lokalen Temperaturschwankungen in der Nähe von Pyrolyse-Backöfen. •... -
Seite 11: Montage
MONTAGE 3.1 Montage www.youtube.com/electrolux www.youtube.com/aeg How to install your AEG/Electrolux Oven - Column installation (*mm) min. 550 min. 560 (*mm) min. 550 min. 560 11/184... -
Seite 12: Befestigung Des Ofens Am Möbel
MONTAGE 3.2 Befestigung des Ofens am Möbel 12/184... -
Seite 13: Gerätebeschreibung
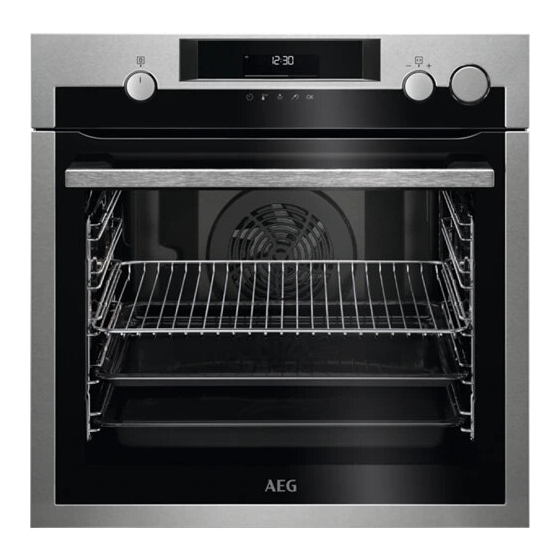
GERÄTEBESCHREIBUNG 4. GERÄTEBESCHREIBUNG 4.1 Gesamtansicht Bedienfeld Einstellknopf für die Ofenfunktionen Anzeige Einstellknopf Wassertank Heizelement Buchse für den Temperatursensor Lampe Ventilator Einschubschienen, herausnehmbar Ablaufschlauch Wasserauslassventil Einschubebenen Dampfeinlass 4.2 Zubehör • Kombirost Für Kochgeschirr, Kuchenformen, Braten. • Backblech Für Kuchen und Plätzchen. •... -
Seite 14: Ein- Und Ausschalten Des Backofens
EIN- UND AUSSCHALTEN DES BACKOFENS 5. EIN- UND AUSSCHALTEN DES BACKOFENS 5.1 Versenkbare Knöpfe Drücken Sie zum Benutzen des Geräts den Knopf. Der Knopf kommt dann heraus. 5.2 Bedienfeld Drehen Sie Sensorfelder des Bedienfelds Drücken Sie den Knopf Back‐ Schnell‐ ofen‐... -
Seite 15: Vor Der Ersten Verwendung
VOR DER ERSTEN VERWENDUNG Verriege‐ Koch-Assistent Reinigung Einstellungen Schnellaufheizung lung Timer-An‐ zeigen: Wi-Fi Anzeige - blinkt, wenn der Backofen mit Fernsteuerung-Anzeige – Der Backofen WLAN verbunden werden kann. kann aus der Ferne gesteuert werden. Die Wi-Fi-Verbindung ist eingeschaltet. Fernsteuerung ist eingeschaltet. Fortschrittsbalken - für Temperatur oder Zeit. -
Seite 16: Erstes Vorheizen
• Ein drahtloses Netzwerk mit Internetverbindung. • Ein Mobilgerät, das mit Ihrem drahtlosen Netzwerk verbunden ist. Schritt Laden Sie die mobile App herunter My AEG Kitchen und folgen Sie den Anweisungen für die nächsten Schritte. Schritt Drehen Sie den Knopf, um Folgendes auszuwählen:... -
Seite 17: Softwarelizenzen
Schweden, Norwegen, Schweiz, Vereinigtes Königreich, Türkei. 6.4 Softwarelizenzen Die Software in diesem Produkt enthält Bauteile, die auf kostenloser und Open-Source-Software basieren. AEG anerkennt die Beiträge der offenen Software- und Roboter-Communities zum Ent‐ wicklungsprojekt. Um den Quellcode dieser kostenlosen und Open-Source-Software-Bauteile aufzurufen, deren Li‐... -
Seite 18: Ofenfunktionen
TÄGLICHER GEBRAUCH Garen mit Dampf Drücken Sie Schieben Sie auf den Deckel Füllen Sie den den Wasser‐ Stellen Sie die Stellen Sie die Tem‐ des Wasser‐ Wassertank mit tank in seine Dampfheizfunk‐ peratur ein. tanks, um ihn 900 ml Wasser. ursprüngliche tion ein. -
Seite 19: Hinweise Zu: Feuchte Umluft
TÄGLICHER GEBRAUCH Ofenfunktion Gerät Lässt Fertiggerichte (z. B. Pommes frites, Kroketten oder Frühlingsrollen) schön knusprig werden. Tiefkühlgerichte Diese Funktion ist entwickelt worden, um während des Kochvorgangs Energie zu sparen. Wenn Sie diese Funktion nutzen, kann die Temperatur im Garraum von der eingestellten Temperatur abweichen. Es wird die Feuchte Umluft Restwärme genutzt. -
Seite 20: Einstellung: Koch-Assistent
TÄGLICHER GEBRAUCH Wassertank-Füllstandsanzeige Der Tank ist leer. Füllen Sie den Tank auf. Wenn Sie zu viel Wasser in den Tank füllen, leitet der Sicherheitsauslass das überschüssige Was‐ ser in den Boden des Garraums. Saugen Sie das Wasser mit einem Schwamm auf. Entleeren des Wasserbehälters Schalten Sie den Backofen aus, lassen Sie Schrit... -
Seite 21: Koch-Assistent Mit Rezepten
TÄGLICHER GEBRAUCH Koch-Assistent - Verwenden Sie diese Funktion, um ein Gericht schnell mit den Standard‐ einstellungen zuzubereiten: 1 - 45 Öffnen Sie das Menü. Wählen Koch-Assis‐ Wählen Sie das Ge‐ Geben Sie das Ge‐ tent. Drücken Sie richt. Drücken Sie richt in den Backofen. - Seite 22 TÄGLICHER GEBRAUCH Speise Gewicht Einschubebene / Zubehör Dauer Steak, rosa 180 - 220 g ~ 15 Min. 3; Bräter auf Kombirost pro Stück; 3 Braten Sie das Fleisch einige Minuten in cm dicke einer heißen Pfanne. Setzen Sie es in Scheiben den Backofen ein.
- Seite 23 TÄGLICHER GEBRAUCH Speise Gewicht Einschubebene / Zubehör Dauer Schweinefleisch Schweinebra‐ 1,5 - 2 kg ~ 165 Min. 1; Bräter auf Kombirost ten oder Wenden Sie das Fleisch nach der Hälfte Schulter der Gardauer. Pulled Pork 1,5 - 2 kg ~ 215 Min. 2;...
- Seite 24 TÄGLICHER GEBRAUCH Speise Gewicht Einschubebene / Zubehör Dauer Hähnchen‐ 180 - 200 g ~ 25 Min. 2 Auflaufform auf Kombirost brust pro Stück Verwenden Sie Ihre Lieblingsgewürze. Braten Sie das Fleisch einige Minuten in einer heißen Pfanne. Hähnchen‐ ~ 30 Min. 3;...
- Seite 25 TÄGLICHER GEBRAUCH Speise Gewicht Einschubebene / Zubehör Dauer Apfelkuchen 45 Min. 3; Backblech Apfelkuchen 40 Min. 2; Kuchenform auf Kombirost Apfelkuchen 60 Min. 1; 22 cm Kuchenform auf Kombi‐ rost Brownies 2 kg 30 Min. 3; tiefe Pfanne Schokoladen‐ 25 Min. 3;...
-
Seite 26: Uhrfunktionen
UHRFUNKTIONEN Speise Gewicht Einschubebene / Zubehör Dauer Kartoffelgra‐ 1 - 1,5 kg 60 Min. 1; Auflaufform auf Kombirost Pizza frisch, 2 Backblech mit Backpapier 35 Min. dünn auskleidet Pizza frisch, 2; Backblech mit Backpapier aus‐ 25 Min. dick kleidet Quiche 45 Min. -
Seite 27: Einstellung: Uhrfunktionen
UHRFUNKTIONEN 8.2 Einstellung: Uhrfunktionen Einstellung: Uhrzeit Schritt 1 Schritt 2 Schritt 3 Um die Uhrzeit zu ändern, rufen Sie das Stellen Sie die Uhrzeit Menü auf und wählen Sie Einstellungen, Drücken Sie: ein. Tageszeit. Einstellung: Kurzzeit-Wecker Schritt 1 Schritt 2 Schritt 3 Im Display wird Folgen‐... -
Seite 28: Verwendung: Zubehör
VERWENDUNG: ZUBEHÖR Einstellung: Zeitvorwahl Schritt Schritt 2 Schritt 3 Schritt 4 Schritt 5 Schritt 6 Im Dis‐ play wird Display Folgen‐ zeigt des an‐ die Uhr‐ gezeigt: zeit an --:-- Wählen Drücken Stellen Stellen Sie die START Sie wie‐ Drücken Drücken Sie die Sie die... -
Seite 29: Benutzung: Temperatursensor
VERWENDUNG: ZUBEHÖR Backblech /Auflaufpfanne: Schieben Sie das Blech zwischen die Füh‐ rungsstäbe der Einhängegitter. Kombirost, Backblech /Auflaufpfanne: Schieben Sie das Backblech zwischen die Führungsstäbe der Einhängegitter und dem Kombirost auf die Führungsstäbe da‐ rüber. 9.2 Temperatursensor Temperatursensor misst die Temperatur im Inneren der Speise. Es gibt zwei Temperatureinstellungen: Die Backofentemperatur. - Seite 30 VERWENDUNG: ZUBEHÖR Schritt Einsetzen: Temperatursensor. Fleisch, Geflügel und Fisch Auflauf Führen Sie die Spitze des Temperatursensor Führen Sie die Spitze des Temperatursensor so so ein, dass er sich in der Mitte des Fleisch‐ ein, dass sie sich in der Mitte des Auflaufs befin‐ stücks oder Fischs befindet, möglichst im det.
-
Seite 31: Zusatzfunktionen
ZUSATZFUNKTIONEN 10. ZUSATZFUNKTIONEN 10.1 Verriegelung Diese Funktion verhindert ein versehentliches Verstellen der Ofenfunktion. Einschalten, wenn der Backofen in Betrieb ist – das eingestellte Garen wird fortgesetzt und das Bedienfeld ist verriegelt. Einschalten, wenn der Backofen ausgeschaltet ist – der Backofen kann nicht eingeschaltet wer‐ den, das Bedienfeld ist verriegelt. - Seite 32 TIPPS UND HINWEISE (°C) (Min.) Brötchen, süß, 16 Backblech oder tiefes 20 - 30 Stück Blech Brötchen, 9 Stück Backblech oder tiefes 30 - 40 Blech Pizza, gefroren, Kombirost 10 - 15 0,35 kg Biskuitrolle Backblech oder tiefes 25 - 35 Blech Brownie Backblech oder tiefes...
-
Seite 33: Feuchte Umluft - Empfohlenes Zubehör
TIPPS UND HINWEISE (°C) (Min.) Makronen, 24 Backblech oder tiefes 25 - 35 Stück Blech Muffins, 12 Stück Backblech oder tiefes 30 - 40 Blech Kleingebäck, pi‐ Backblech oder tiefes 25 - 30 kant, 20 Stück Blech Mürbeteigplätz‐ Backblech oder tiefes 25 - 35 chen, 20 Stück Blech... -
Seite 34: Gartabellen Für Prüfinstitute
TIPPS UND HINWEISE 11.3 Gartabellen für Prüfinstitute Informationen für Prüfinstitute Tests gemäß IEC 60350-1. (°C) (Min.) Tört‐ Ober-/ Back‐ 20 - 30 chen, 20 Unterhitze blech Blech Tört‐ Heißluft Back‐ 150 - 20 - 35 chen, 20 blech Blech Tört‐ Heißluft Back‐... -
Seite 35: Reinigung Und Pflege
REINIGUNG UND PFLEGE (°C) (Min.) Biskuit, Heißluft Kombi‐ 2 und 40 - 60 Backofen 10 Min. Kuchen‐ rost vorheizen. form Ø 26 cm Mürbe‐ Heißluft Back‐ 140 - 20 - 40 teigge‐ blech bäck Mürbe‐ Heißluft Back‐ 2 und 140 - 25 - 45 teigge‐... -
Seite 36: Hinweise Zur Reinigung
REINIGUNG UND PFLEGE 12.1 Hinweise zur Reinigung Feuchten Sie ein weiches Tuch mit warmem Wasser und etwas mildem Reini‐ gungsmittel an, und reinigen Sie damit die Vorderseite des Backofens. Reinigen Sie die Metalloberflächen mit einer Reinigungslösung. Reinigungs‐ Reinigen Sie Flecken mit einem milden Reinigungsmittel. mittel Reinigen Sie den Garraum nach jedem Gebrauch. -
Seite 37: Benutzung: Pyrolytische Reinigung
REINIGUNG UND PFLEGE 12.3 Benutzung: Pyrolytische Reinigung Reinigen Sie den Backofen mit Pyrolytische Reinigung. WARNUNG! Es besteht das Risiko von Verbrennungen. VORSICHT! Befinden sich weitere Geräte in demselben Küchenmöbel, verwenden Sie diese nicht während dieser Funktion. Andernfalls kann der Backofen beschädigt werden. Vor dem Pyrolytische Reinigung: Schalten Sie den Back‐... -
Seite 38: Erinnerungsfunktion Reinigen
REINIGUNG UND PFLEGE Nach Abschluss der Reinigung: Schalten Sie den Back‐ Reinigen Sie den Garraum mit Entfernen Sie die Rückstände ofen aus und warten Sie, einem weichen Tuch. vom Garraumboden. bis er abgekühlt ist. 12.4 Erinnerungsfunktion Reinigen Der Backofen erinnert Sie daran, wann er mit der pyrolytischen Reinigung gereinigt werden muss. -
Seite 39: Aus- Und Einbau Der: Tür
REINIGUNG UND PFLEGE Nach Abschluss der Reinigung: Schalten Sie den Leeren Sie den Spülen Sie den Wasser‐ Reinigen Sie das Backofen aus. Wassertank. Siehe tank aus und reinigen Sie Ablaufrohr mit war‐ Kapitel Täglicher die restlichen Kalkrückstän‐ mem Wasser und Gebrauch, „Entlee‐... - Seite 40 REINIGUNG UND PFLEGE Schritt Fassen Sie das Scharnier auf der lin‐ ken Seite der Tür an. Schritt Heben und drehen Sie den Hebel am linken Scharnier vollständig. Schritt Schließen Sie die Backofentür halb bis zur ersten Raststellung. Anschlie‐ ßend heben und ziehen Sie die Tür nach vorn aus der Aufnahme heraus.
-
Seite 41: Austausch: Lampe
REINIGUNG UND PFLEGE Achten Sie beim Wiedereinsetzen der Glas‐ scheiben (A und B) auf die richtige Reihenfol‐ ge. Überprüfen Sie das Symbol/den Aufdruck auf der Seite der Glasscheibe. Jede Glas‐ scheibe sieht anders aus, um den Aus- und Einbau zu erleichtern.. Bei korrektem Einbau macht die Türabde‐... -
Seite 42: Fehlersuche
FEHLERSUCHE Schritt Ersetzen Sie die Lampe durch eine geeignete, bis 300 °C hitzebeständige Lampe. Schritt Bringen Sie die Glasabdeckung wieder an. 13. FEHLERSUCHE WARNUNG! Siehe Kapitel Sicherheitshinweise. 13.1 Was zu tun ist, wenn … In allen Fällen, die nicht in dieser Tabelle aufgeführt sind, wenden Sie sich bitte an einen autorisierten Kundendienst. - Seite 43 FEHLERSUCHE Fehlercodes Im Display erscheint … Prüfen Sie, ob Folgendes zutrifft ... Err C2 Sie haben den Temperatursensor Stecker aus der Buchse entfernt. Err C3 Die Backofen-Tür ist geschlossen und die Tür‐ verriegelung ist nicht beschädigt. Err F102 Die Backofen-Tür ist geschlossen. Err F102 Die Türverriegelung nicht defekt ist.
-
Seite 44: Servicedaten
Wir empfehlen, hier folgende Daten zu notieren: Modell (MOD.) ......... Produktnummer (PNC) ......... Seriennummer (S.N.) ......... 14. ENERGIEEFFIZIENZ 14.1 Produktinformationen und Produktdatenblatt* Herstellername BSB578270M 949494787 Modellidentifikation BSE578270M 949494772 BSS578270M 949494786 Energieeffizienzindex 81.2 Energieeffizienzklasse Energieverbrauch bei Standardbeladung, Ober-/Unterhit‐ 0.93 kWh/Programm Energieverbrauch bei Standardbeladung, Umluft 0.69 kWh/Programm... -
Seite 45: Energiesparen
ENERGIEEFFIZIENZ Fassungsvermögen 72 l Backofentyp Einbau-Backofen BSB578270M 33.7 kg Gewicht BSE578270M 32.9 kg BSS578270M 33.8 kg * Für die Europäische Union gemäß EU-Richtlinien 65/2014 und 66/2014. Für die Republik Weißrussland gemäß STB 2478-2017, Anhang G; STB 2477-2017, Anlagen A und B. -
Seite 46: Menüstruktur
MENÜSTRUKTUR Feuchte Umluft Diese Funktion soll während des Garvorgangs Energie sparen. Bei Verwendung dieser Funktion schaltet sich die Lampe automatisch nach 30 Sekunden aus. Sie können die Lampe wieder einschalten, aber dadurch werden die erwarteten Energieeinsparungen reduziert. 15. MENÜSTRUKTUR 15.1 Menü - Wählen Sie , um die Menü... - Seite 47 MENÜSTRUKTUR Einstellungen Erinnerungsfunktion Ein / Aus Wi-Fi Ein / Aus Reinigen Automatischer Fernbe‐ Ein / Aus Netzwerk ignorieren Ja / Nein trieb DEMO Aktivi‐ Softwareversion Prüfen erungscode: 2468 Gerät auf Werksein‐ Ja / Nein stellungen zurückset‐ 16. UMWELTTIPPS Recyceln Sie Materialien mit dem Symbol .
- Seite 48 CONTENTS FOR PERFECT RESULTS Thank you for choosing this AEG product. We have created it to give you impeccable performance for many years, with innovative technologies that help make life simpler – features you might not find on ordinary appliances. Please spend a few minutes reading to get the very best from it.
- Seite 49 14.1 Product Information and Product 9.1 Inserting accessories..... 72 Information Sheet*....... 87 9.2 Food Sensor........73 14.2 Energy saving......88 10. ADDITIONAL FUNCTIONS..... 74 15. MENU STRUCTURE........89 10.1 Lock..........74 15.1 Menu..........89 10.2 Automatic switch-off.....75 10.3 Cooling fan........75 My AEG Kitchen app 49/184...
-
Seite 50: Safety Information
Children should be supervised to ensure that they do not • play with the appliance and mobile devices with My AEG Kitchen. Keep all packaging away from children and dispose of it •... -
Seite 51: Safety Instructions
SAFETY INSTRUCTIONS Do not use the appliance before installing it in the built-in • structure. Disconnect the appliance from the power supply before • carrying out any maintenance. If the mains power supply cable is damaged, it must be • replaced by the manufacturer, its Authorised Service Centre or similarly qualified persons to avoid an electrical hazard. -
Seite 52: Electrical Connection
SAFETY INSTRUCTIONS • Install the appliance in a safe and suitable place that meets installation requirements. • Keep the minimum distance from other appliances and units. • Before mounting the appliance, check if the oven door opens without restraint. • The appliance is equipped with an electric cooling system. It must be operated with the electric power supply. -
Seite 53: Use
SAFETY INSTRUCTIONS • Do not let mains cables touch or come near the appliance door or the niche below the appliance, especially when it operates or the door is hot. • The shock protection of live and insulated parts must be fastened in such a way that it cannot be removed without tools. -
Seite 54: Care And Cleaning
SAFETY INSTRUCTIONS • Open the appliance door carefully. The use of ingredients with alcohol can cause a mixture of alcohol and air. • Do not let sparks or open flames to come in contact with the appliance when you open the door. -
Seite 55: Steam Cooking
SAFETY INSTRUCTIONS – any removable objects (including shelves, side rails etc., provided with the product) particularly any non-stick pots, pans, trays, utensils etc. • Read carefully all the instructions for Pyrolytic cleaning. • Keep children away from the appliance while the Pyrolytic cleaning operates. The appliance becomes very hot and hot air is released from the front cooling vents. -
Seite 56: Disposal
• Remove the door catch to prevent children or pets from becoming trapped in the appliance. 3. INSTALLATION WARNING! Refer to Safety chapters. 3.1 Building in www.youtube.com/electrolux www.youtube.com/aeg How to install your AEG/Electrolux Oven - Column installation (*mm) min. 550 min. 560 56/184... -
Seite 57: Securing The Oven To The Cabinet
INSTALLATION (*mm) min. 550 min. 560 3.2 Securing the oven to the cabinet 57/184... -
Seite 58: Product Description
PRODUCT DESCRIPTION 4. PRODUCT DESCRIPTION 4.1 General overview Control panel Knob for the heating functions Display Control knob Water drawer Heating element Socket for the food sensor Lamp Shelf support, removable Draining pipe Water outlet valve Shelf positions Steam inlet 4.2 Accessories •... -
Seite 59: How To Turn Oven On And Off
HOW TO TURN OVEN ON AND OFF 5. HOW TO TURN OVEN ON AND OFF 5.1 Retractable knobs To use the appliance press the knob. The knob comes out. 5.2 Control panel Control panel sensor fields Press Turn the knob Fast Heat Timer Light... -
Seite 60: Before First Use
BEFORE FIRST USE Timer indi‐ cators: Wi-Fi indicator - flashes when the oven can be Remote operation indicator - the oven connected to Wi-Fi. can be controlled remotely. Wi-Fi connection is turned on. Remote operation is turned on. Progress bar - for temperature or time. Water tank indicators Food sensor indicator 6. -
Seite 61: Wireless Connection
To connect the oven you need: • Wireless network with the Internet connection. • Mobile device connected to your wireless network. Step 1 Download the mobile app My AEG Kitchen and follow the instructions for the next steps. Step 2 Turn the knob to select: Frequency 2.4 GHz WLAN... -
Seite 62: Software Licences
6.4 Software licences The software in this product contains components that are based on free and open source soft‐ ware. AEG gratefully acknowledges the contributions of the open software and robotics communi‐ ties to the development project. To access the source code of these free and open source software components whose license conditions require publishing, and to see their full copyright information and applicable license terms, please visit: http://aeg.opensoftwarerepository.com (folder NIU5). - Seite 63 DAILY USE Standard heating functions Heating function Application To bake on up to three shelf positions at the same time and to dry food. Set the temperature 20 - 40 °C lower than for Conventional Cooking. True Fan Cooking To bake and roast food on one shelf position. Conventional Cooking The function is suitable for meat, poultry, oven dishes and casseroles.
-
Seite 64: Notes On: Moist Fan Baking
DAILY USE Heating function Application To enter the Menu: Assisted Cooking, Cleaning, Settings. Menu 7.3 Notes on: Moist Fan Baking This function was used to comply with the energy efficiency class and ecodesign requirements according to EU 65/2014 and EU 66/2014. Tests according to EN 60350-1. The oven door should be closed during cooking so that the function is not interrupted and the oven operates with the highest energy efficiency possible. -
Seite 65: How To Set: Assisted Cooking
DAILY USE 7.5 How to set: Assisted Cooking Every dish in this submenu has a recommended function and temperature. You can adjust the time and the temperature during cooking. For some of the dishes you can also cook The degree to which a dish is cooked: with: •... - Seite 66 DAILY USE Dish Weight Shelf level / Accessory Duration time Beef Roast Beef, ~ 40 min rare 1 - 1,5 kg; 4 2; baking tray Roast Beef, - 5 cm thick ~ 50 min Fry the meat for a few minutes on a hot medium pieces pan.
- Seite 67 DAILY USE Dish Weight Shelf level / Accessory Duration time Veal roast 0,8 - 1,5 kg; ~ 80 min 2; roasting dish on wire shelf (e.g. shoulder) 4 cm thick Use your favourite spices. Add liquid. pieces Roast covered. Pork Pork roast 1,5 - 2 kg ~ 165 min...
- Seite 68 DAILY USE Dish Weight Shelf level / Accessory Duration time Chicken 180 - 200 g ~ 25 min 2; casserole dish on wire breast per piece shelf Use your favourite spices. Fry the meat for a few minutes on a hot pan. Chicken legs, ~ 30 min 3;...
- Seite 69 DAILY USE Dish Weight Shelf level / Accessory Duration time Apple tart 40 min 2; pie form on wire shelf Apple pie 60 min 22 cm pie form on wire shelf Brownies 2 kg 30 min 3; deep pan Chocolate 25 min 3;...
-
Seite 70: Clock Functions
CLOCK FUNCTIONS Dish Weight Shelf level / Accessory Duration time Pizza fresh, 2; baking tray lined with bak‐ 35 min thin ing paper Pizza fresh, 2; baking tray lined with baking 25 min thick paper Quiche 45 min 2; baking tin on wire shelf Baguette / 0.8 kg 50 min... - Seite 71 CLOCK FUNCTIONS How to set: Time of day To change the time of day enter the menu Set the clock. Press: and select Settings, Time of day. How to set: Minute minder Step 1 Step 2 Step 3 The display shows: 0:00 Set the Minute minder...
-
Seite 72: How To Use: Accessories
HOW TO USE: ACCESSORIES How to set: Time Delay Step 1 Step 2 Step 3 Step 4 Step 5 Step 6 The dis‐ The dis‐ play play shows: shows: the time --:-- of day Select Press re‐ Set the Set the STOP Press: Press:... -
Seite 73: Food Sensor
HOW TO USE: ACCESSORIES Wire shelf, Baking tray / Deep pan: Push the tray between the guide bars of the shelf support and the wire shelf on the guide bars above. 9.2 Food Sensor Food Sensor- measures the temperature inside the food. There are two temperatures to be set: The oven temperature. -
Seite 74: Additional Functions
ADDITIONAL FUNCTIONS Step 4 Plug Food Sensor into the socket at the front of the oven. The display shows the current temperature of: Food Sensor. Step 5 - press to set the core temperature of the sensor. Step 6 - press to confirm. When food reaches the set temperature, the signal sounds. -
Seite 75: Automatic Switch-Off
HINTS AND TIPS 10.2 Automatic switch-off For safety reasons the oven turns off after some time, if a heating function works and you do not change any settings. (°C) 30 - 115 12.5 120 - 195 200 - 245 250 - maximum The Automatic switch-off does not work with the functions: Light, Food sensor, Time Delay. - Seite 76 HINTS AND TIPS (°C) (min) Soufflè, 6 pieces ceramic ramekins on 25 - 30 wire shelf Sponge flan base flan base tin on wire shelf 15 - 25 Victoria sandwich baking dish on wire shelf 40 - 50 Poached fish, 0.3 baking tray or dripping 20 - 25 Whole fish, 0.2 kg...
-
Seite 77: Moist Fan Baking - Recommended Accessories
HINTS AND TIPS (°C) (min) Vegetarian ome‐ pizza pan on wire shelf 25 - 30 lette Mediterranean baking tray or dripping 25 - 30 vegetables, 0.7 11.2 Moist Fan Baking - recommended accessories Use the dark and non-reflective tins and containers. They have better heat absorption than the light colour and reflective dishes. - Seite 78 HINTS AND TIPS (°C) (min) Small True Fan Baking 2 and 150 - 20 - 35 cakes, Cooking tray 20 per tray Apple Convention‐ Wire 70 - 90 pie, 2 al Cooking shelf tins Ø20 Apple True Fan Wire 70 - 90 pie, 2 Cooking shelf...
-
Seite 79: Care And Cleaning
CARE AND CLEANING (°C) (min) Toast, 4 Grill Wire max. 2 - 3 minutes Preheat the oven shelf first side; 2 - 3 for 3 minutes. pieces minutes sec‐ ond side Beef bur‐ Grill Wire max. 20 - 30 Put the wire shelf ger, 6 shelf and on the fourth level... -
Seite 80: How To Remove: Shelf Supports
CARE AND CLEANING Clean all accessories after each use and let them dry. Use a soft cloth with warm water and a mild detergent. Do not clean the accessories in a dishwash‐ Do not clean the non-stick accessories using abrasive cleaner or sharp-edged Accessories objects. -
Seite 81: Cleaning Reminder
CARE AND CLEANING Pyrolytic Cleaning Step 1 Enter menu: Cleaning Option Duration C1 - Light cleaning C2 - Normal cleaning 1 h 30 min C3 - Thorough cleaning 2 h 30 min Step 2 - press to select the cleaning programme. Step 3 - press to start the cleaning. -
Seite 82: How To Remove And Install: Door
CARE AND CLEANING Step 2 Place a deep pan below the steam inlet. Step 3 Pour water into the water drawer: 850 ml. Add citric acid: 5 teaspoons. Wait for 60 min. Step 4 Turn on the oven and set the function: Humidity Low. Set the temperature to 230 °C. Turn off the oven after 25 min and wait until it is cold. - Seite 83 CARE AND CLEANING CAUTION! Do not use the oven without the glass panels. Step 1 Fully open the door and find the hinge to the right side of the door. Step 2 Use a screwdriver to lift and turn fully the right side hinge lever.
-
Seite 84: How To Replace: Lamp
CARE AND CLEANING Step 9 Hold the door glass panels by their top edge and carefully pull them out one by one. Start from the top panel. Make sure the glass slides out of the supports completely. Step 10 Clean the glass panels with water and soap. -
Seite 85: Troubleshooting
TROUBLESHOOTING Before you replace the lamp: Step 1 Step 2 Step 3 Turn off the oven. Wait until Disconnect the oven from the Put a cloth on the bottom of the oven is cold. mains. the cavity. Back lamp Step 1 Turn the glass cover to remove it. - Seite 86 TROUBLESHOOTING Components The lamp is turned off. Moist Fan Baking - is turned on. The lamp does not work. The lamp is burnt out. The Food sensor does not operate. The plug of the Food sensor is fully inserted in‐ to the socket.
-
Seite 87: Service Data
Product number (PNC) ......... Serial number (S.N.) ......... 14. ENERGY EFFICIENCY 14.1 Product Information and Product Information Sheet* Supplier's name BSB578270M 949494787 Model identification BSE578270M 949494772 BSS578270M 949494786 Energy Efficiency Index 81.2 Energy efficiency class Energy consumption with a standard load, conventional 0.93 kWh/cycle... -
Seite 88: Energy Saving
ENERGY EFFICIENCY Heat source Electricity Volume 72 l Type of oven Built-In Oven BSB578270M 33.7 kg Mass BSE578270M 32.9 kg BSS578270M 33.8 kg * For European Union according to EU Regulations 65/2014 and 66/2014. For Republic of Belarus according to STB 2478-2017, Appendix G; STB 2477-2017, Annexes A and B. -
Seite 89: Menu Structure
MENU STRUCTURE 15. MENU STRUCTURE 15.1 Menu - select to enter the Menu. Menu structure Assisted Cooking Cleaning Settings Step 1 Step 2 Step 3 Step 4 Step 5 O1 - O15 Adjust the value Select the Menu, Select the set‐ Confirm setting. -
Seite 90: Environmental Concerns
MENU STRUCTURE Settings Reset all settings Yes / No 16. ENVIRONMENTAL CONCERNS Recycle materials with the symbol . Put the packaging in relevant containers to recycle it. Help protect the environment and human health by recycling waste of electrical and electronic appliances. - Seite 91 TABLE DES MATIÈRES POUR DES RÉSULTATS PARFAITS Merci d’avoir choisi ce produit AEG. Nous l’avons conçu pour qu’il vous offre des performances irréprochables pendant de nombreuses années, en intégrant des technologies innovantes vous simplifiant la vie – fonctions que vous ne trouverez peut-être pas sur des appareils ordinaires.
- Seite 92 TABLE DES MATIÈRES 5. COMMENT ALLUMER ET ÉTEINDRE LE 10.2 Arrêt automatique...... 120 FOUR............103 10.3 Ventilateur de refroidissement... 120 5.1 Manettes rétractables....103 11. CONSEILS..........120 5.2 Bandeau de commande....103 11.1 Chaleur Tournante Humide..120 6. AVANT LA PREMIÈRE UTILISATION..104 11.2 Chaleur Tournante Humide - accessoires recommandés....
-
Seite 93: Information Sur La Sécurité
INFORMATION SUR LA SÉCURITÉ My AEG Kitchen app INFORMATION SUR LA SÉCURITÉ Avant d'installer et d'utiliser cet appareil, lisez soigneusement les instructions fournies. Le fabricant ne pourra être tenu pour responsable des blessures et dégâts résultant d'une mauvaise installation ou utilisation. Conservez toujours les instructions dans un lieu sûr et accessible pour vous y référer... -
Seite 94: Sécurité Générale
INFORMATION SUR LA SÉCURITÉ Veillez à ce que les enfants ne jouent pas avec l’appareil et • les appareils mobiles avec My AEG Kitchen. Ne laissez pas les emballages à la portée des enfants et • jetez-les convenablement. AVERTISSEMENT : tenez les enfants et les animaux •... -
Seite 95: Consignes De Sécurité
CONSIGNES DE SÉCURITÉ Pour retirer les supports de grille, tirez d'abord sur l'avant de • ceux-ci, puis sur l'arrière, pour les écarter des parois extérieures. Réinstallez les supports de grille en répétant cette procédure dans l'ordre inverse. N'utilisez pas de nettoyeur vapeur pour nettoyer l'appareil. •... -
Seite 96: Branchement Électrique
CONSIGNES DE SÉCURITÉ Profondeur de l'appareil 569 (mm) Profondeur d’encastrement de l’appareil 548 (mm) Profondeur avec porte ouverte 1022 (mm) Dimensions minimales de l’ouverture de ventila‐ 560x20 (mm) tion. Ouverture placée sur la partie inférieure de la face arrière Longueur du câble d’alimentation secteur. Le câ‐ 1500 (mm) ble est placé... -
Seite 97: Utilisation
CONSIGNES DE SÉCURITÉ Types de câbles compatibles pour l'installation ou le remplacement pour l’Europe : H07 RN-F, H05 RN-F, H05 RRF, H05 VV-F, H05 V2V2-F (T90), H05 BB-F Pour la section du câble, consultez la puissance totale sur la plaque signalétique. Vous pouvez également consulter le tableau : Puissance totale (W) Section du câble (mm²) -
Seite 98: Entretien Et Nettoyage
CONSIGNES DE SÉCURITÉ – ne versez pas d'eau directement dans l'appareil chaud. – ne conservez pas de plats et de nourriture humides dans l'appareil après avoir terminé la cuisson. – Installez ou retirez les accessoires avec précautions. • La décoloration de l'émail ou de l'acier inoxydable est sans effet sur les performances de l'appareil. -
Seite 99: Cuisson À La Vapeur
CONSIGNES DE SÉCURITÉ • Le nettoyage par pyrolyse est un processus à haute température qui peut dégager de la fumée provenant des résidus alimentaires et des matériaux dont est fait le four. Par conséquent, nous recommandons à nos clients de suivre les conseils ci-dessous : –... -
Seite 100: Mise Au Rebut
• Retirez le dispositif de verrouillage du hublot pour empêcher les enfants et les animaux de s'enfermer dans l'appareil. 3. INSTALLATION AVERTISSEMENT! Reportez-vous aux chapitres concernant la sécurité. 3.1 Encastrement www.youtube.com/electrolux www.youtube.com/aeg How to install your AEG/Electrolux Oven - Column installation (*mm) min. 550 min. 560 100/184... -
Seite 101: Fixation Du Four Au Meuble
INSTALLATION (*mm) min. 550 min. 560 3.2 Fixation du four au meuble 101/184... -
Seite 102: Description De L'appareil
DESCRIPTION DE L'APPAREIL 4. DESCRIPTION DE L'APPAREIL 4.1 Vue d’ensemble Bandeau de commande Manette de sélection des modes de cuisson Affichage Manette de commande Bac à eau Résistance Prise pour la sonde à viande Éclairage Chaleur tournante Support de grille, amovible Tuyau de vidange Vanne de vidange de l'eau Niveaux de la grille... -
Seite 103: Comment Allumer Et Éteindre Le Four
COMMENT ALLUMER ET ÉTEINDRE LE FOUR 5. COMMENT ALLUMER ET ÉTEINDRE LE FOUR 5.1 Manettes rétractables Pour utiliser l'appareil, appuyez sur la manette. La manette sort alors de son logement. 5.2 Bandeau de commande Appuyez sur la Tournez la ma‐ Touches tactiles du bandeau de commande touche nette... -
Seite 104: Avant La Première Utilisation
AVANT LA PREMIÈRE UTILISATION Voyants du minu‐ teur : Voyant Wi-Fi : - clignote lorsque le four peut être Télécommande indicateur - le four peut connecté au Wi-Fi. être contrôlé à distance. La connexion Wi-Fi : est activée. Télécommande est allumé. Barre de progression - de la température ou de l’heure. -
Seite 105: Connexion Wi-Fi
• Un réseau sans fil avec connexion Internet. • d'un appareil mobile connecté à votre réseau sans fil. Étape 1 Téléchargez l'application mobile My AEG Kitchen et suivez les instructions pour les étapes suivantes. Étape 2 Tournez la manette pour sélectionner : Fréquence... -
Seite 106: Licences Du Logiciel
Autriche, Pologne, Portugal, Roumanie, Slovénie, Slovaquie, Finlande, Suède, Norvège, Suisse, Royaume-Uni, Turquie. 6.4 Licences du logiciel Le logiciel de ce produit contient des composants basés sur un logiciel libre et ouvert. AEG recon‐ naît pleinement les contributions du logiciel ouvert et des communautés robotiques au projet de développement. -
Seite 107: Modes De Cuisson
UTILISATION QUOTIDIENNE 7.2 Modes de cuisson Modes de cuisson standard Mode de cuisson Application Pour faire cuire sur 3 niveaux en même temps et pour sécher des ali‐ ments. Diminuez les températures de 20 à 40 °C par rapport à la Chauffa‐ ge Haut/ Bas. -
Seite 108: Remarques Sur : Chaleur Tournante Humide
UTILISATION QUOTIDIENNE Mode de cuisson Application Pour rôtir de gros morceaux de viande ou de volaille avec os sur un seul niveau. Pour gratiner et faire dorer. Turbo gril Pour accéder au menu : Cuisson assistée, Nettoyage, Configurations. Menu 7.3 Remarques sur : Chaleur Tournante Humide Cette fonction était utilisée pour se conformer à... -
Seite 109: Comment Régler : Cuisson Assistée
UTILISATION QUOTIDIENNE Vidange du réservoir d'eau Éta‐ Éteignez le four, laissez la porte ouverte et pe 1 attendez que le four soit froid. Éta‐ Raccordez le tuyau de vidange (C) à la pe 2 vanne de vidange (A) via le connecteur (B). Maintenez l'extrémité... -
Seite 110: Cuisson Assistée Avec Des Recettes
UTILISATION QUOTIDIENNE 7.6 Cuisson assistée avec des recettes Légende Sonde de cuisson disponible. Placez la Sonde de cuisson dans la partie la plus épaisse du plat. Le four s’éteint lorsque la température définie de la Sonde de cuisson est atteinte. Ajoutez de l’eau dans le réservoir. - Seite 111 UTILISATION QUOTIDIENNE Plat Poids Niveau/Accessoire Durée Rôti de bœuf, saignant ~ 75 min (cuisson basse température) 2 ; plateau de cuisson Rôti de bœuf, Servez-vous de vos épices préférées ou 1 - 1,5 kg ; 4 à point (cuis‐ simplement du sel et du poivre fraîche‐ - 5 cm ~ 85 min son basse...
- Seite 112 UTILISATION QUOTIDIENNE Plat Poids Niveau/Accessoire Durée Émincé de 1,5 - 2 kg ~ 215 min 2 ; plateau de cuisson porc CBT Utilisez vos épices préférées. Retournez la viande à la moitié du temps de cuisson pour faire dorer de manière homogène. Longe, fraî‐...
- Seite 113 UTILISATION QUOTIDIENNE Plat Poids Niveau/Accessoire Durée Canard entier 2 - 3 kg ~ 100 min 2 ; plat à rôtir sur grille métalli‐ Utilisez vos épices préférées. Placez la viande sur un plat à rôtir. Retournez le canard à la moitié du temps de cuisson. Oie entière 4 - 5 kg ~ 110 min...
- Seite 114 UTILISATION QUOTIDIENNE Plat Poids Niveau/Accessoire Durée Brownies 2 kg 30 min 3 ; plat profond Muffins au 25 min 3 ; bac à muffins sur grille métalli‐ chocolat Quatre-quarts 50 min 2 ; moule quatre-quarts sur grille mé‐ tallique Légumes/Garnitures Pommes de 1 kg 50 min...
-
Seite 115: Fonctions De L'horloge
FONCTIONS DE L'HORLOGE Plat Poids Niveau/Accessoire Durée Pizza fraîche, 2 ; plateau de cuisson recouvert 25 min épaisse de papier sulfurisé Quiche 45 min 2 ; plat de cuisson sur grille métalli‐ Baguette/ 0,8 kg 50 min 2 ; plateau de cuisson recou‐ Ciabatta/Pain vert de papier sulfurisé... - Seite 116 FONCTIONS DE L'HORLOGE Comment régler Heure actuelle Pour modifier l'heure actuelle, accédez au menu et sélectionnez Configurations, Heu‐ Réglez l’horloge. Appuyez sur re actuelle. Comment régler Minuteur Étape 1 Étape 2 Étape 3 L’affichage indique : 0:00 Réglez la Minuteur Appuyez sur : Appuyez sur Le minuteur commence son décompte immédiatement.
-
Seite 117: Conseils D'utilisation : Accessoires
CONSEILS D'UTILISATION : ACCESSOIRES Comment régler Départ différé Étape 1 Étape 2 Étape 3 Étape 4 Étape 5 Étape 6 L'affi‐ chage L’affi‐ indi‐ chage que : indique : l'heure --:-- actuelle Sélec‐ AR‐ Appuyez à Réglez DÉ‐ tionnez Réglez RÊTER plusieurs Appuyez... -
Seite 118: Sonde De Cuisson
CONSEILS D'UTILISATION : ACCESSOIRES Plateau de cuisson /Plat à rôtir: Poussez le plateau entre les rails du sup‐ port de grille. Grille métallique, Plateau de cuisson / Plat à rôtir: Poussez le plateau entre les rails du sup‐ port de grille et glissez la grille métallique entre les rails se trouvant juste au-dessus. - Seite 119 CONSEILS D'UTILISATION : ACCESSOIRES Viande, volaille et poisson Ragoût Insérez la pointe de la Sonde de cuisson au Introduisez la pointe de la Sonde de cuisson centre de la viande ou du poisson, dans la exactement au centre du ragoût. La Sonde de partie la plus épaisse si possible.
-
Seite 120: Fonctions Supplémentaires
FONCTIONS SUPPLÉMENTAIRES 10. FONCTIONS SUPPLÉMENTAIRES 10.1 Touches Verrouil. Cette fonction permet d’éviter une modification involontaire de la fonction du four. Activez-la lorsque le four est allumé - la cuisson réglée est maintenue, le bandeau de commande est verrouillé. Activez-la lorsque le four est éteint - le four ne peut pas être allumé, le bandeau de commande est verrouillé. - Seite 121 CONSEILS (°C) (min) Petits pains su‐ Plateau de cuisson ou 20 - 30 crés, (16 pièces) plat à rôtir Petits pains, Plateau de cuisson ou 30 - 40 (9 pièces) plat à rôtir Pizza, surgelée, grille métallique 10 - 15 0,35 kg Gâteau Roulé...
-
Seite 122: Chaleur Tournante Humide - Accessoires Recommandés
CONSEILS (°C) (min) Meringues, Plateau de cuisson ou 25 - 35 (24 pièces) plat à rôtir Muffins, (12 piè‐ Plateau de cuisson ou 30 - 40 ces) plat à rôtir Petite pâtisserie Plateau de cuisson ou 25 - 30 salée, (20 pièces) plat à... - Seite 123 CONSEILS 11.3 Tableaux de cuisson pour les instituts de tests Informations pour les instituts de test Tests conformément à la norme IEC 60350-1. (°C) (min) Petits Chauffage Plateau 20 - 30 gâteaux, Haut/ Bas de cuis‐ 20 par plateau Petits Chaleur Plateau 150 -...
-
Seite 124: Entretien Et Nettoyage
ENTRETIEN ET NETTOYAGE (°C) (min) Génoise, Chaleur Grille 2 et 4 40 - 60 Préchauffez le moule à tournante métalli‐ four pendant gâteau 10 minutes. Ø26 cm Sablé Chaleur Plateau 140 - 20 - 40 tournante de cuis‐ Sablé Chaleur Plateau 2 et 4 140 -... -
Seite 125: Remarques Concernant L'entretien
ENTRETIEN ET NETTOYAGE 12.1 Remarques concernant l'entretien Nettoyez la façade du four avec un chiffon doux, de l’eau tiède et un détergent doux. Utilisez une solution de nettoyage pour nettoyer les surfaces métalliques. Agents net‐ Nettoyez les taches avec un détergent doux. toyants Nettoyez la cavité... -
Seite 126: Comment Utiliser : Nettoyage Par Pyrolyse
ENTRETIEN ET NETTOYAGE 12.3 Comment utiliser : Nettoyage par pyrolyse Nettoyez le four avec Nettoyage par pyrolyse. AVERTISSEMENT! Risque de brûlure. ATTENTION! Si un autre appareil est installé dans le même meuble, ne l’utilisez pas en même temps que cette fonction. Vous risqueriez d’endommager le four. Avant le Nettoyage par pyrolyse : Éteignez le four et atten‐... -
Seite 127: Nettoyage Conseillé
ENTRETIEN ET NETTOYAGE Une fois le nettoyage terminé : Éteignez le four et atten‐ Nettoyez la cavité avec un Retirez les résidus du fond de la dez qu’il soit froid. chiffon doux. cavité. 12.4 Nettoyage conseillé Le four vous rappelle lorsque le nettoyage par pyrolyse est terminé. Pour désactiver le rappel, accédez au Menu et clignote sur l’affichage pendant 5 secondes sélectionnez Configurations, Nettoyage con‐... -
Seite 128: Comment Démonter Et Installer : Porte
ENTRETIEN ET NETTOYAGE Dureté de l'eau Bandelette Dépôt calcaire Classifica‐ Nettoyez le de test (mg/l) tion de l'eau réservoir d'eau tous Niveau 0 - 7 0 - 50 douce 75 cycles - 2,5 mois 8 - 14 51 - 100 modérément 50 cycles - dure... - Seite 129 ENTRETIEN ET NETTOYAGE Étape 5 Fermez la porte du four à la première position d'ouverture (mi-parcours). Puis soulevez et tirez la porte vers l'avant et retirez-la de son logement. Étape 6 Déposez la porte sur une surface sta‐ ble recouverte d'un tissu doux. Étape 7 Tenez la garniture de porte (B) sur le bord supérieur de la porte des deux...
-
Seite 130: Comment Remplacer : Éclairage
ENTRETIEN ET NETTOYAGE Veillez à replacer les panneaux de verre (A et B) dans le bon ordre. Cherchez le symbole / l'impression se trouvant sur le côté du pan‐ neau de verre. Tous les panneaux ont un symbole différent pour faciliter le démontage et le montage. -
Seite 131: Dépannage
DÉPANNAGE Étape 4 Remettez en place le diffuseur en verre. 13. DÉPANNAGE AVERTISSEMENT! Reportez-vous aux chapitres concernant la sécurité. 13.1 Que faire si... Dans tous les cas ne figurant pas dans ce tableau, veuillez contacter un service après-vente agréé. Le four ne s’allume pas ou ne chauffe pas Problème Vérifiez si... -
Seite 132: Données De Maintenance
DÉPANNAGE Codes d'erreur Err C3 La porte du four est fermée ou le verrouillage de la porte n’est pas cassé. Err F102 La porte du four est fermée. Err F102 Le verrouillage de la porte n’est pas cassé. 0:00. Une coupure de courant s’est produite. Réglez l’heure actuelle. -
Seite 133: Rendement Énergétique
Référence du produit (PNC) ......... Numéro de série (S.N.) ......... 14. RENDEMENT ÉNERGÉTIQUE 14.1 Informations produit et Fiche d’informations produit* Nom du fournisseur BSB578270M 949494787 Identification du modèle BSE578270M 949494772 BSS578270M 949494786 Index d'efficacité énergétique 81.2 Classe d’efficacité énergétique Consommation d'énergie avec charge standard et mode 0.93 kWh/cycle... -
Seite 134: Économie D'énergie
STRUCTURE DES MENUS * Pour l’Union européenne conformément aux Règlements UE 65/2014 et 66/2014. Pour la République de Biélorussie conformément à STB 2478-2017, Annexe G ; STB 2477-2017, Annexes A et B. Pour l’Ukraine conformément à 568/32020. La classe d’efficacité énergétique n’est pas applicable pour la Russie. EN 60350-1 - Appareils de cuisson domestiques électriques - Partie 1 : Plages, fours, fours à... - Seite 135 STRUCTURE DES MENUS Structure du Menu Cuisson assistée Nettoyage Configurations Étape 1 Étape 2 Étape 3 Étape 4 Étape 5 O1 -O15 Ajustez la valeur Sélectionnez le Confirmez la Sélectionnez la Confirmez la et appuyez sur Menu , Configu‐ configuration. configuration.
-
Seite 136: En Matière De Protection De L'environnement
STRUCTURE DES MENUS 16. EN MATIÈRE DE PROTECTION DE L'ENVIRONNEMENT Recyclez les matériaux portant le symbole . Déposez les emballages dans les conteneurs prévus à cet effet. Contribuez à la protection de l'environnement et à votre sécurité, recyclez vos produits électriques et électroniques. Ne jetez pas les appareils portant le symbole avec les ordures ménagères. - Seite 137 INDICE PER RISULTATI PERFETTI Grazie per aver scelto di acquistare questo prodotto AEG. Lo abbiamo creato per fornirvi prestazioni impeccabili per molti anni, grazie a tecnologie innovative che vi semplificheranno la vita - funzioni che non troverete sulle normali apparecchiature. Vi invitiamo di dedicare qualche minuto alla lettura per sapere come trarre il massimo dal vostro elettrodomestico.
-
Seite 138: Indice
INDICE 5. COME ACCENDERE E SPEGNERE IL 10.3 Ventola di raffreddamento..166 FORNO............149 11. CONSIGLI E SUGGERIMENTI UTILI..166 5.1 Manopola incassabile....149 11.1 Cottura ventilata umida....166 5.2 Pannello dei comandi....149 11.2 Cottura ventilata umida - 6. PRIMA DEL PRIMO UTILIZZO....150 accessori consigliati......168 11.3 Tabelle di cottura per gli istituti 6.1 Pulizia iniziale...... -
Seite 139: Informazioni Di Sicurezza
INFORMAZIONI DI SICUREZZA My AEG Kitchen app INFORMAZIONI DI SICUREZZA Leggere attentamente le istruzioni fornite prima di installare e utilizzare l'apparecchiatura. I produttori non sono responsabili di eventuali lesioni o danni derivanti da un'installazione o un uso scorretti. Conservare sempre le istruzioni in un luogo sicuro e accessibile per poterle consultare in futuro. -
Seite 140: Avvertenze Di Sicurezza Generali
INFORMAZIONI DI SICUREZZA I bambini devono essere sorvegliati per assicurarsi che non • giochino con l’apparecchiatura e i dispositivi mobili con My AEG Kitchen. Tenere gli imballaggi lontano dai bambini e smaltirli in modo • adeguato. AVVERTENZA: Tenere i bambini e gli animali domestici •... -
Seite 141: Istruzioni Di Sicurezza
ISTRUZIONI DI SICUREZZA Usare esclusivamente la termosonda (sensore temperatura • al centro) consigliata per questa apparecchiatura. Per rimuovere i supporti ripiano, sfilare innanzitutto la parte • anteriore del supporto, quindi quella posteriore, dalle pareti laterali. Installare i supporti griglia seguendo al contrario la procedura indicata. -
Seite 142: Collegamento Elettrico
ISTRUZIONI DI SICUREZZA Altezza della parte anteriore dell'apparecchiatura 594 mm Altezza della parte posteriore dell'apparecchiatura 576 mm Larghezza della parte anteriore dell'apparecchiatu‐ 595 mm Larghezza della parte posteriore dell'apparecchia‐ 559 mm tura Profondità dell'apparecchiatura 569 mm Profondità di incasso dell'apparecchiatura 548 mm Profondità... -
Seite 143: Utilizzo
ISTRUZIONI DI SICUREZZA • Servirsi unicamente di dispositivi di isolamento adeguati: interruttori automatici, fusibili (quelli a tappo devono essere rimossi dal portafusibile), sganciatori per correnti di guasto a terra e relè. • L'impianto elettrico deve essere dotato di un dispositivo di isolamento che consenta di scollegare l'apparecchiatura dalla presa di corrente a tutti i poli. -
Seite 144: Pulizia E Cura
ISTRUZIONI DI SICUREZZA • Non appoggiare o tenere liquidi o materiali infiammabili, né oggetti facilmente infiammabili sull’apparecchiatura, al suo interno o nelle immediate vicinanze. • Non condividere la password della propria rete Wi-Fi. AVVERTENZA! Vi è il rischio di danneggiare l'apparecchiatura. •... -
Seite 145: Cottura A Vapore
ISTRUZIONI DI SICUREZZA • Prima di eseguire una funzione di pulizia automatica per Pirolisi o prima del Primo Utilizzo, rimuovere dalla cavità del forno: – qualsiasi residuo di cibo e schizzo/deposito di grasso. – qualsiasi oggetto rimovibile (compresi ripiani, guide ecc. forniti con il prodotto), in particolare qualsiasi pentola, padella, teglia, utensile antiaderente ecc. -
Seite 146: Assistenza Tecnica
• Togliere il blocco porta per evitare che bambini o animali restino intrappolati nell'apparecchiatura. 3. INSTALLAZIONE AVVERTENZA! Fare riferimento ai capitoli sulla sicurezza. 3.1 Incasso www.youtube.com/electrolux www.youtube.com/aeg How to install your AEG/Electrolux Oven - Column installation (*mm) min. 550 min. 560 146/184... -
Seite 147: Fissaggio Nel Mobile
INSTALLAZIONE (*mm) min. 550 min. 560 3.2 Fissaggio nel mobile 147/184... -
Seite 148: Descrizione Del Prodotto
DESCRIZIONE DEL PRODOTTO 4. DESCRIZIONE DEL PRODOTTO 4.1 Panoramica generale Pannello dei comandi Manopola di regolazione delle funzioni cottura Display Manopola di regolazione Vaschetta dell’acqua Resistenza Presa per la termosonda Lampadina Ventola Supporto ripiano, rimovibile Tubo di scarico Valvola di scarico dell’acqua Posizioni ripiano Foro di entrata vapore 4.2 Accessori... -
Seite 149: Come Accendere E Spegnere Il Forno
COME ACCENDERE E SPEGNERE IL FORNO 5. COME ACCENDERE E SPEGNERE IL FORNO 5.1 Manopola incassabile Per utilizzare l'apparecchiatura, premere la manopola. La manopola fuoriesce. 5.2 Pannello dei comandi Ruotare la ma‐ Tasti sensore pannello dei comandi Premere nopola Riscalda‐ Luce Sensore ali‐... -
Seite 150: Prima Del Primo Utilizzo
PRIMA DEL PRIMO UTILIZZO Spie timer: Operazione da remoto indicatore - il for‐ Wi-Fi indicatore - lampeggia quando il forno può no può essere controllato in modalità remo‐ essere connesso al Wi-Fi. Wi-Fi la connessione è attiva. Operazione da remoto è acceso. Barra di avanzamento - per temperatura o tempo. -
Seite 151: Connessione Wireless
Per collegare il forno sono necessari i seguenti elementi: • Rete wireless con connessione a Internet. • Dispositivo mobile connesso alla rete wireless. Fase 1 Scaricare l’app mobile My AEG Kitchen e seguire le istruzioni per i passaggi successi‐ Pas‐ Ruotare la manopola per selezionare: saggio... -
Seite 152: Licenze Software
Romania, Slovenia, Slovacchia, Finlandia, Svezia, Norvegia, Svizzera, Regno Unito, Turchia. 6.4 Licenze software Il software di questo prodotto contiene componenti basati su software gratuiti e open source. AEG riconosce appieno il contributo delle comunità software e robotiche al progetto di sviluppo. -
Seite 153: Funzioni Cottura
UTILIZZO QUOTIDIANO 7.2 Funzioni cottura Funzioni cottura standard Funzione cottura Applicazione Per cuocere su massimo tre posizioni della griglia contemporaneamente ed essiccare i cibi. Impostare la temperatura di 20 - 40°C inferiore rispetto a Cottura convenzionale. . Cottura ventilata Per cuocere e arrostire alimenti su una sola posizione del ripiano. Cottura convenzio‐... -
Seite 154: Note Su: Cottura Ventilata Umida
UTILIZZO QUOTIDIANO Funzione cottura Applicazione Per arrostire grandi tagli di carne o pollame con ossa su una posizione della griglia. Per gratinare e dorare. Doppio grill venti‐ lato Per accedere al Menu: Cottura guidata, Pulizia, Impostazioni. Menu 7.3 Note su: Cottura ventilata umida Questa funzione è... - Seite 155 UTILIZZO QUOTIDIANO Svuotamento del serbatoio dell'acqua Spegnere il forno, lasciarlo con la porta Fase 1 aperta e attendere che sia freddo. Pas‐ Collegare il tubo di scarico (C) alla valvola sag‐ di scarico (A) attraverso il connettore (B). gio 2 Pas‐...
-
Seite 156: Cottura Guidata Con Ricette
UTILIZZO QUOTIDIANO 7.6 Cottura guidata con ricette Legenda Termosonda disponibile. Posizionare la Termosonda nella parte più spes‐ sa del piatto. Il forno si spegne quando Termosonda viene raggiunta la temperatura im‐ postata. Aggiungere acqua al serbatoio. Preriscaldare il forno prima di iniziare a cucinare. Livello del ripiano. - Seite 157 UTILIZZO QUOTIDIANO Piatto Peso Livello / Accessorio ripiano Durata Roast beef, al sangue (cottu‐ ~ 75 min ra lenta) 2; lamiera dolci Roast beef, 1 - 1,5 kg; Utilizzare le spezie preferite o il semplice cottura media pezzi spessi ~ 85 min pepe macinato.
- Seite 158 UTILIZZO QUOTIDIANO Piatto Peso Livello / Accessorio ripiano Durata Costolette di 2 - 3 kg; uti‐ 90 min. 3; leccarda maiale lizzare pun‐ Aggiungere il liquido per coprire il fondo tine crude, 2 di un piatto. Girare la carne a metà cottu‐ - 3 cm Agnello Cosciotto d'a‐...
- Seite 159 UTILIZZO QUOTIDIANO Piatto Peso Livello / Accessorio ripiano Durata Altro Polpettone 1 kg ~ 60 min 2; ripiano a filo Utilizzare le spezie preferite. Pesce Pesce intero, 0,5 - 1 kg ~ 30 min 2 ; lamiera dolci grigliato per pesce Farcire il pesce con burro e utilizzare spezie ed erbe preferite.
- Seite 160 UTILIZZO QUOTIDIANO Piatto Peso Livello / Accessorio ripiano Durata Spicchi 1 kg 35 min 3 lamiera dolci rivestita con carta da forno Utilizzare le spezie preferite. Tagliare le patate a pezzi. Verdure miste 1 - 1,5 kg 30 min 3 lamiera dolci rivestita con carta da grigliate forno Utilizzare le spezie preferite.
-
Seite 161: Funzioni Del Timer
FUNZIONI DEL TIMER Piatto Peso Livello / Accessorio ripiano Durata Impasto per 1 kg 60 min 2 lamiera dolci rivestita con carta pane integra‐ da forno / ripiano a filo le / pane di segale /pane nero in uno stampo per pane 8. - Seite 162 FUNZIONI DEL TIMER Come impostare: Contaminuti Fase 1 Passaggio 2 Passaggio 3 Il display vi‐ sualizza: 0:00 Imposta Contaminuti Premere: Premere: Il timer inizia subito il conto alla rovescia. Come impostare: Tempo di cottura Fase 1 Fase 2 Passaggio 3 Passaggio 4 Il display vi‐...
-
Seite 163: Come Usarle: Accessori
COME USARLE: ACCESSORI Come impostare: Ritardo Il timer inizia il conto alla rovescia a un orario di inizio impostato. 9. COME USARLE: ACCESSORI 9.1 Inserimento di accessori Un piccolo rientro sulla parte superiore aumenta il livello di sicurezza. Gli incavi fungono anche da dispositivi antiribaltamento. -
Seite 164: Termosonda
COME USARLE: ACCESSORI 9.2 Termosonda Termosonda- misura la temperatura all'interno del cibo. Le temperature da impostare sono due: La temperatura del forno. La temperatura interna. Per i migliori risultati di cottura: Gli ingredienti dovrebbero Non usarlo per pietanze li‐ Durante la cottura deve rimanere essere a temperatura am‐... -
Seite 165: Funzioni Aggiuntive
FUNZIONI AGGIUNTIVE Pas‐ Collegare la Termosonda nella presa sulla parte anteriore del forno. saggio Sul display appare la temperatura attuale di: Termosonda. Pas‐ - premere per impostare la temperatura al cuore del sensore. saggio Pas‐ - premere per confermare. saggio Quando il cibo raggiunge la temperatura impostata, viene emesso un segnale acusti‐... -
Seite 166: Spegnimento Automatico
CONSIGLI E SUGGERIMENTI UTILI Questa funzione evita che si cambi per sbaglio la funzione forno. - tenere premuto per at‐ - premere e tenere pre‐ tivare la funzione. muto per disattivarla. Viene emesso un segnale acu‐ stico. - lampeggia quando il blocco è attivato. 10.2 Spegnimento automatico Per ragioni di sicurezza, il forno si spegne dopo un determinato periodo di tempo se è... - Seite 167 CONSIGLI E SUGGERIMENTI UTILI (°C) (min.) Panini, 9 pezzi vassoio di cottura o lec‐ 30 - 40 carda Pizza, surgelata, ripiano a filo 10 - 15 0,35 kg Rotolo con mar‐ vassoio di cottura o lec‐ 25 - 35 mellata carda Brownie vassoio di cottura o lec‐...
-
Seite 168: Cottura Ventilata Umida - Accessori Consigliati
CONSIGLI E SUGGERIMENTI UTILI (°C) (min.) Muffin, 12 pezzi vassoio di cottura o lec‐ 30 - 40 carda Pasta saporita, vassoio di cottura o lec‐ 25 - 30 20 pezzi carda Biscotti di pasta vassoio di cottura o lec‐ 25 - 35 frolla, 20 pezzi carda Tartellette, 8 pez‐... - Seite 169 CONSIGLI E SUGGERIMENTI UTILI (°C) (min) Tortine, Cottura con‐ Vassoio 20 - 30 20 per venzionale da forno teglia Tortine, Cottura ven‐ Vassoio 150 - 20 - 35 20 per tilata da forno teglia Tortine, Cottura ven‐ Vassoio 2 e 4 150 - 20 - 35 20 per...
-
Seite 170: Pulizia E Cura
PULIZIA E CURA (°C) (min) Frollini al Cottura ven‐ Vassoio 140 - 20 - 40 burro tilata da forno Frollini al Cottura ven‐ Vassoio 2 e 4 140 - 25 - 45 burro tilata da forno Frollini al Cottura con‐ Vassoio 140 - 25 - 45... -
Seite 171: Come Togliere: Supporti Ripiano
PULIZIA E CURA Pulire la cavità dopo ogni utilizzo. L'accumulo di grasso o di altri residui potreb‐ be causare un incendio. L'umidità può formare condensa nel forno o sui pannelli di vetro dello sportello. Per ridurre la condensa, mettere in funzione il forno 10 minuti prima di iniziare a Uso quotidia‐... - Seite 172 PULIZIA E CURA Prima della Pulizia per pirolisi: Spegnere il forno e atten‐ Rimuovere tutti gli accessori. Pulire la base del forno e il vetro dere che si raffreddi. interno dello sportello con acqua calda, un panno morbido e un detergente delicato.
-
Seite 173: Promemoria Pulizia
PULIZIA E CURA 12.4 Promemoria Pulizia Il forno vi ricorda quando pulirlo con la pulizia pirolitica. Per disattivare il promemoria inserire il Menu e lampeggia sul display per 5 secondi dopo selezionare Impostazioni, Promemoria Pulizia. ogni sessione di cottura. 12.5 Come eseguire la pulizia: Serbatoio dell'acqua Fase 1 Spegnere il forno. -
Seite 174: Come Rimuovere E Installare: Porta
PULIZIA E CURA Durezza dell’acqua Striscia di Deposito di Classifica‐ Pulire il ser‐ prova calcio (mg/l) zione del‐ batoio del‐ l'acqua l'acqua ogni Livello 0 - 7 0 - 50 dolce 75 cicli - 2,5 mesi 8 - 14 51 - 100 moderatam. - Seite 175 PULIZIA E CURA Fase 5 Chiudere la porta del forno fino alla prima posizione di apertura circa me‐ tà. Quindi sollevare e tirare in avanti la porta sfilandola dalla sua sede. Fase 6 Appoggiare la porta su una superficie stabile e coperta da un panno morbi‐ Fase 7 Afferrare sui due lati la guida della porta (B) sul bordo superiore della...
-
Seite 176: Come Sostituire: Lampadina
PULIZIA E CURA Assicurarsi di rimontare i pannelli in vetro (A e B) nell'ordine esatto. Controllare il simbolo / la stampa sul lato del pannello in vetro, ciascu‐ no dei pannelli in vetro è diverso per semplifi‐ care le operazioni di smontaggio e montag‐ gio. -
Seite 177: Risoluzione Dei Problemi
RISOLUZIONE DEI PROBLEMI Fase 4 Installare la calotta di vetro. 13. RISOLUZIONE DEI PROBLEMI AVVERTENZA! Fare riferimento ai capitoli sulla sicurezza. 13.1 Cosa fare se… Per tutti i casi non inclusi in questa tabella si prega di contattare un Centro di assistenza autorizzato. -
Seite 178: Dati Assistenza
RISOLUZIONE DEI PROBLEMI Codici di errore Err C3 La porta del forno è chiusa o il blocco della por‐ ta non è rotto. Err F102 La porta del forno è chiusa. Err F102 Il blocco della porta non è rotto. 00:00 Si è... -
Seite 179: Efficienza Energetica
Codice Prodotto (PNC) ......... Numero di serie (S.N.) ......... 14. EFFICIENZA ENERGETICA 14.1 Informazioni sul prodotto e Scheda informativa sul prodotto* Nome fornitore BSB578270M 949494787 Identificativo modello BSE578270M 949494772 BSS578270M 949494786 Indice di efficienza energetica 81.2 Classe di efficienza energetica Consumo di energia con un carico standard, in modalità... -
Seite 180: Risparmio Energetico
STRUTTURA DEL MENU * Per l'Unione europea secondo i regolamenti UE 65/2014 e 66/2014. Per la Repubblica di Bielorussia ai sensi di STB 2478-2017, appendice G; STB 2477-2017, allega‐ ti A e B. Per l'Ucraina secondo 568/32020. La classe di efficienza energetica non è applicabile alla Russia. EN 60350-1 - Apparecchiature elettriche per la cottura per uso domestico - Parte 1: Cucine, forni, forni a vapore e grill - Metodi per la misura delle prestazioni. - Seite 181 STRUTTURA DEL MENU Menu struttura Cottura guidata Pulizia Impostazioni Fase 1 Passaggio 2 Passaggio 3 Passaggio 4 Passaggio 5 O1 - O15 Regolare il valo‐ Selezionare il Confermare l'im‐ Selezionare l'im‐ Confermare l'im‐ re e premere Menu, Imposta‐ postazione. postazione. postazione.
- Seite 182 16. CONSIDERAZIONI SULL'AMBIENTE Riciclare i materiali con il simbolo . Buttare l'imballaggio negli appositi contenitori per il riciclaggio. Aiutare a proteggere l’ambiente e la salute umana e a riciclare rifiuti derivanti da apparecchiature elettriche ed elettroniche. Non smaltire le apparecchiature che riportano il simbolo insieme ai normali rifiuti domestici.
- Seite 183 183/184...
- Seite 184 www.aeg.com/shop...