Werbung
Quicklinks
®
D
A
CH
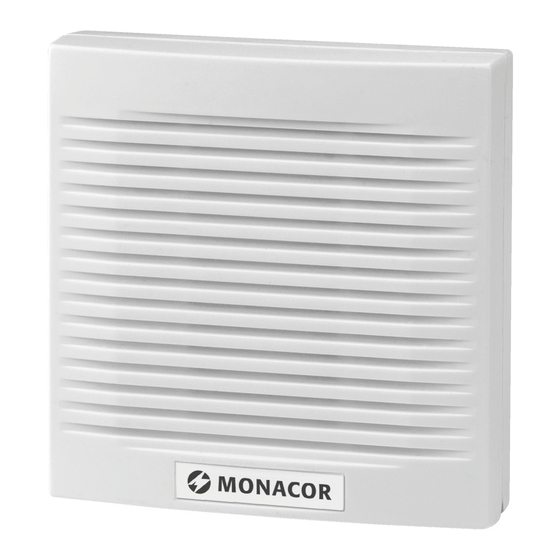
Elektronische Alarmsirene
Bitte lesen Sie diese Anleitung vor der Installation
gründlich durch und heben Sie sie für ein späteres
Nachlesen auf.
1 Einsatzmöglichkeiten
Die Alarmsirene AS-362 ist speziell für den Einsatz als
akustischer Alarmgeber in Alarmanlagen konzipiert.
Die Sirene wird durch einen Sabotagekontakt (4)
gesichert, der beim Öffnen des Gehäuses oder beim
gewaltsamen Entfernen der Sirene von der Montage-
stelle einen Alarm über die angeschlossene Alarm-
zentrale auslöst.
2 Wichtige Hinweise für den Gebrauch
Die Alarmsirene entspricht allen erforderlichen Richt-
linien der EU und ist deshalb mit
Verwenden Sie die Sirene nur im Innenbereich und
schützen Sie sie vor Spritzwasser, hoher Luftfeuch-
tigkeit und Hitze (zulässiger Einsatztemperaturbe-
reich 0 – 40 °C). Durch die Lamellen der Schallöff-
nung ist die Sirene tropfwassergeschützt, jedoch
nicht wasserdicht.
Verwenden Sie zum Reinigen nur ein trockenes
oder leicht angefeuchtetes, weiches Tuch, auf kei-
nen Fall Chemikalien oder aggressive Reinigungs-
mittel.
Wird die Alarmsirene zweckentfremdet, falsch in-
stalliert oder nicht fachgerecht repariert, kann keine
Electronic Alarm Siren
GB
Please read these operating instructions carefully
prior to installing the unit and keep them for later use.
1 Applications
The alarm siren AS-362 is specially designed for use
as an acoustic alarm device in alarm systems. The
siren is secured by an anti-tamper contact (4) which
will trigger an alarm via the connected alarm control
panel when the housing is opened or when the siren
is forcibly removed from its mounting place.
2 Important Notes
This unit corresponds to all required directives of the
EU and is therefore marked with
The siren is suitable for indoor use only. Protect it
against splash water, high air humidity, and heat
(admissible ambient temperature range 0 – 40 °C).
Due to the lamellas of the sound opening, the siren
is drip-proof but not watertight.
For cleaning only use a soft cloth, dry or slightly
damp; never use chemicals or aggressive deter-
gents.
No guarantee claims for the unit and no liability for
any resulting personal damage or material damage
will be accepted if the alarm siren is used for other
purposes than originally intended, if it is not correct-
ly installed, or not repaired in an expert way.
If the alarm siren is to be put out of opera-
tion definitively, take it to a local recycling
plant for a disposal which is not harmful to
the environment.
3 Mounting
1) To open the housing, press the centre of the
housing cover (fig. 1) from above so that it will
unlock, then open the cover downwards.
2) To mark the mounting holes (1), hold the housing to
a suitable place on the wall. Depending on the wall
material, 3 – 4 holes are sufficient for mounting.
®
Copyright
AS-362
Haftung für daraus resultierende Sach- oder Perso-
nenschäden und keine Garantie für die Sirene über-
nommen werden.
Soll die Alarmsirene endgültig aus dem
Betrieb genommen werden, übergeben Sie
sie zur umweltfreundlichen Entsorgung
einem örtlichen Recyclingbetrieb.
3 Montage
1) Das Gehäuse öffnen. Dazu von oben in der Mitte
auf den Gehäusedeckel drücken (Abb. 1), sodass
er ausrastet. Den Deckel nach unten aufklappen.
2) Zum Anzeichnen der Montagelöcher (1) das
Gehäuse an geeigneter Stelle der Wand halten.
Zur Befestigung sind je nach Untergrund 3 – 4
Löcher ausreichend.
gekennzeichnet.
3) Damit der Sabotagekontakt (4) beim gewaltsamen
Entfernen der Sirene öffnet, ist er durch drei Stege
mit der Gehäuserückseite verbunden, die in die-
sem Fall durchbrechen sollen. Dazu muss der
Sabotagekontakt zusätzlich durch ein separates
Montageloch (5) befestigt werden.
4) Die Anschlussleitungen können durch den Kabel-
kanal (2) geführt werden.
5) Die Löcher bohren, die Anschlussleitungen in das
Gehäuse führen und die Sirene festschrauben.
Das Befestigungsloch (5) für den Sabotagekontakt
nicht vergessen.
3) Mount the anti-tamper contact (4) additionally via a
separate hole (5). When the siren is forcibly re-
moved, the three connecting pieces joining the
contact and the rear side of the housing will break
and the contact will open.
4) The connection cables can be led through the
cable conduit (2).
5) Drill the holes, lead the connection cables into the
housing and screw on the siren. Remember the
mounting hole (5) for the anti-tamper contact.
4 Connection to the Alarm Control Panel
1) First deactivate the alarm control panel so that no
alarm can be triggered. Then connect the siren via
the terminal strip (3).
.
2) Connect the two contacts SW for the anti-tamper
loop to the corresponding connections of the alarm
control panel.
3) Connect the contact GND to the ground connec-
tion of the alarm control panel.
4) Connect the alarm output (control voltage +6 V to
+14 V) of the alarm control panel either to the
contact #1 for a continuous signal sound or to the
contact #2 for a pulsating signal sound.
5) Close the housing cover, activate the alarm control
panel and trigger an alarm as an operational
check.
5 Specifications
Sound pressure: . . . . 105 dB/1 m
Anti-tamper contact: . . NC contact
Power supply: . . . . . . 6 – 14 V /120 mA max.
Dimensions: . . . . . . . . 110 x 110 x 32 mm
Weight: . . . . . . . . . . . 135 g
Subject to technical modification.
©
by MONACOR INTERNATIONAL GmbH & Co. KG, Bremen, Germany. All rights reserved.
Best.-Nr. 04.3140
4 Anschluss an die Alarmzentrale
1) Zuerst die Alarmzentrale außer Betrieb setzen,
damit kein Alarm ausgelöst werden kann. Dann die
Sirene über die Schraubleiste (3) anschließen:
2) Die beiden Kontakte SW für die Sabotageschleife
mit den entsprechenden Anschlüssen der Alarm-
zentrale verbinden.
3) Den Kontakt GND mit dem Masseanschluss der
Alarmzentrale verbinden.
4) Den Alarmausgang (Steuerspannung +6 V bis
+14 V) der Alarmzentrale entweder mit dem Kon-
takt #1 für einen gleichmäßigen Signalton oder mit
dem Kontakt #2 für einen pulsierenden Signalton
verbinden.
5) Den Gehäusedeckel schließen, die Alarmzentrale
in Betrieb nehmen und zur Funktionskontrolle
einen Alarm auslösen.
5 Technische Daten
Schalldruck: . . . . . . . . 105 dB/1 m
Sabotagekontakt: . . . . Öffner (NC)
Stromversorgung: . . . 6 –14 V /max. 120 mA
Abmessungen: . . . . . . 110 x 110 x 32 mm
Gewicht: . . . . . . . . . . 135 g
Änderungen vorbehalten.
Gehäuse öffnen
Opening the housing
SW
Innenansicht
Interior view
drücken
press
SW
GND
#2 #1
A-0611.99.01.05.2006
®
1
2
3
4
5
1
Werbung

Verwandte Anleitungen für Monacor AS-362

Inhaltszusammenfassung für Monacor AS-362
- Seite 1 Depending on the wall material, 3 – 4 holes are sufficient for mounting. Subject to technical modification. Innenansicht Interior view ® Copyright © by MONACOR INTERNATIONAL GmbH & Co. KG, Bremen, Germany. All rights reserved. A-0611.99.01.05.2006...
- Seite 2 Vista interna adatto. A seconda del fondo bastano 3 o 4 fori. Con riserva di modifiche tecniche. ® Copyright © by MONACOR INTERNATIONAL GmbH & Co. KG, Bremen, Germany. All rights reserved. A-0611.99.01.05.2006...
- Seite 3 Waga: ... . 135 g (il. 1) aż nastąpi odblokowanie pokrywy, na- Wnętrze urządzenia stępnie należy otworzyć obudowę (do dołu). Z zastrzeżeniem możliwości zmiany. ® Copyright © by MONACOR INTERNATIONAL GmbH & Co. KG, Bremen, Germany. All rights reserved. A-0611.99.01.05.2006...