
Verwandte Anleitungen für Medion BUSINESS P52470


Inhaltszusammenfassung für Medion BUSINESS P52470
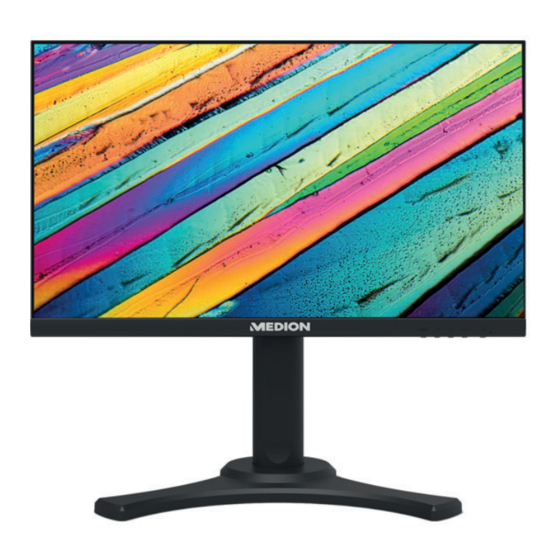
- Seite 1 Bedienungsanleitung Instruction manual 60,5 cm (23,8“) LED Backlight Monitor MEDION BUSINESS ® P52470 (MD 21470)
-
Seite 2: Inhaltsverzeichnis
Inhaltsverzeichnis Zu dieser Bedienungsanleitung ..............4 1.1. Zeichenerklärung ....................4 Bestimmungsgemäßer Gebrauch .............. 5 Konformitätsinformation ................6 3.1. Informationen zu Markenzeichen ..............6 Sicherheitshinweise ..................7 4.1. Betriebssicherheit ....................7 4.2. Aufstellungsort ..................... 8 4.3. Reparatur ........................9 4.4. Umgebungswerte ....................9 4.5. -
Seite 3: Zu Dieser Bedienungsanleitung
1. Zu dieser Bedienungsanleitung Lesen Sie unbedingt diese Bedienungsanleitung aufmerksam durch und befolgen Sie alle aufge führten Hinweise. So gewährleisten Sie einen zu- verlässigen Betrieb und eine lange Lebenserwartung Ihres Gerätes. Hal- ten Sie diese Bedienungsanleitung stets griffbereit in der Nähe Ihres Ge- rätes. -
Seite 4: Bestimmungsgemäßer Gebrauch
2. Bestimmungsgemäßer Gebrauch Der TFT Monitor dient ausschließlich der Wiedergabe von Video- und Audiosignalen externer Geräte wie z. B. Computern, de- ren Anschlüsse und Bildauflösungen mit den hier angegebenen technischen Daten des TFT Monitors übereinstimmen. Jede an- dere Verwendung ist nicht bestimmungsgemäß. Bitte beachten Sie, dass im Falle des nicht bestimmungsgemä- ßen Gebrauchs die Haftung erlischt: •... -
Seite 5: Konformitätsinformation
3. Konformitätsinformation Hiermit erklärt die Medion AG, dass sich dieses Gerät in Übereinstimmung mit den grundlegenden Anforderungen und den übrigen einschlägigen Bestimmungen be- findet: • EMV-Richtlinie 2014/30/EU • Niederspannungsrichtlinie 2014/35/EU • Öko-Design Richtlinie 2009/125/EG Allerdings ist dieses Gerät mit keiner vollständigen Funktion zur Minimierung des Verbrauchs gemäß... -
Seite 6: Sicherheitshinweise
4. Sicherheitshinweise 4.1. Betriebssicherheit • Dieses Gerät kann von Kindern ab 8 Jahren und darüber so- wie von Personen mit verringerten physischen, sensorischen oder mentalen Fähigkeiten oder Mangel an Erfahrung und Wissen benutzt werden, wenn sie beaufsichtigt werden oder bezüglich des sicheren Gebrauchs des Gerätes unterwiesen wurden und die daraus resultierenden Gefahren verstanden haben. -
Seite 7: Aufstellungsort
4.2. Aufstellungsort • Halten Sie Ihren Monitor und alle angeschlosse nen Geräte von Feuchtigkeit fern und ver meiden Sie Staub, Hitze, direk- te Sonneneinstrahlung und offene Brandquellen (Kerzen oder ähnliches). Das Nichtbeachten dieser Hinweise kann zu Stö- rungen oder zur Beschädigung des Monitors führen. •... -
Seite 8: Reparatur
4.3. Reparatur • Wenden Sie sich an den Kundendienst, wenn: – das Netzkabel angeschmort oder beschädigt ist, – Flüssigkeit in den Monitor eingedrungen ist, – der Monitor nicht ordnungsgemäß funktioniert, – der Monitor heruntergefallen oder das Gehäuse beschä- digt ist. •... -
Seite 9: Stromversorgung
4.5. Stromversorgung GEFAHR! Stromschlaggefahr! Auch bei ausgeschaltetem Gerät sind Teile des Gerätes unter Spannung. Um die Stromversorgung zu Ihrem Monitor zu unter- brechen oder das Gerät gänzlich von Spannung frei- zuschalten, ziehen Sie den Netzstecker aus der Steck- dose. •... -
Seite 10: Lieferumfang
5. Lieferumfang Bitte überprüfen Sie die Vollständigkeit der Lieferung und benachrichtigen Sie uns bitte innerhalb von 14 Tagen nach dem Kauf, falls die Lieferung nicht komplett ist. Mit dem von Ihnen erworbenen Monitor haben Sie erhalten: • Bildschirm • HDMI-Kabel •... -
Seite 11: Geräteübersicht
6. Geräteübersicht 6.1. Vorderseite AUTO MENU Bild Betriebs-LED zeigt den Betriebszustand an Monitor einschalten/in den Standby-Modus schalten A U T O – Im Menü: Auswahl bestätigen; Menü schließen im Grundzustand: Automatische Anpassung des Bildes (nur VGA) Im Menü: Nach rechts navigieren, Optionen ändern; im Grundzustand: Lautstärke einstellen Im Menü: nach links navigieren, Optionen ändern;... -
Seite 12: Rückseite
6.2. Rückseite AC in HDMI AC in HDMI Befestigungslöcher für Wandhalterung Öffnung für Kensington® Schloss Kopfhöreranschluss L I N E I N – Audio-Anschluss (3,5 mm Stereoklinke) V G A – VGA-Anschluss H D M I – HDMI-Anschluss D P – DisplayPort-Anschluss A C I N –... -
Seite 13: Inbetriebnahme
7. Inbetriebnahme 7.1. Vor dem Anschluss des Monitors Es kann vorkommen, dass Ihr bisheriger Monitor eine physikalische Auflösung un- terstützt, die von Ihrem neuen Monitor nicht unterstützt wird. Dann erscheint nach dem Anschluss Ihres neuen Monitors zunächst kein korrektes Bild. ... -
Seite 14: Aufstellen
7.3. Aufstellen Vermeiden Sie Blendwirkungen, Spiegelungen und zu starke Hell-Dun- kel-Kontraste, um Ihre Augen zu schonen. Der Monitor lässt sich in ver- -5~20° schiedene Positionen brin- gen, um den besten Blick- winkel zu erzielen: • Neigen von -5° bis 20°, •... - Seite 15 • Allgemein – Verändern Sie häufig (ca. alle 20-30 Minuten) Ihre Haltung und le- gen Sie häufig Pausen ein, um Ermüdungen zu vermeiden. • Rücken – Beim Sitzen am Arbeitsplatz muss der Rücken durch die aufrechte oder leicht nach hinten geneigte Rückenlehne des Arbeitsstuhls abgestützt wer- den.
-
Seite 16: Wandmontage
7.4. Wandmontage Sie können das Gerät mithilfe einer Wandhalterung an der Wand montieren. HDMI Um die Montage des Gerätes an der Wand zu ermöglichen, nehmen Sie zunächst den Fuß des Gerätes ab. Entfernen Sie dazu die Schrauben des Fußes an den abgebildeten Stellen. ... -
Seite 17: Anschließen
7.5. Anschließen AC in HDMI Schließen Sie die Verbindungskabel nur bei ausgeschaltetem Monitor und Computer an, um Beschädigungen und Fehlfunktionen zu vermei- den. 7.5.1. Signalkabel anschließen Stecken Sie das Signalkabel in einen der Anschlüsse am Monitor: – H D M I –... -
Seite 18: Stromversorgung Anschließen
7.5.4. Stromversorgung anschließen Schließen Sie das mitgelieferte Netzkabel an den Anschluss A C I N des Gerätes Verbinden Sie das andere Ende mit einer gut zugänglichen Netzsteckdose. Die Netzsteckdose muss sich in der Nähe des Monitors befinden und leicht erreich- bar sein (gleichen Stromkreis wie für den Rechner verwenden). -
Seite 19: Menü
8. Menü MENU AUTO Über das Monitormenü können Sie verschiedene Einstellungen vornehmen. Drücken Sie die Taste M E N U , um das OSD zu aktivieren. Mit den Tasten wählen Sie die Optionen aus den Menüs. Bestätigen Sie Ihre Wahl mit der Taste A U T O . ... - Seite 20 SPRACHE Auswahl der Menüsprache OSDPOSITION H Position des Menüs im Bild OSDPOSITION V Blendet das Menü nach Ablauf einer OSD ANZEIGEZEIT voreingestellten Zeitspanne aus. TRANSPARENZ Menühintergrund ein- oder ausblenden Auswahl eines voreingestellten Farbpro- MODUS fils Lautstärke der integrierten Lautsprecher LAUTSTÄRKE einstellen Auswahl der Bildquelle.
-
Seite 21: Stromspareinrichtungen
9. Stromspareinrichtungen Dieser Monitor schaltet in verschiedene Stromsparzustände, die vom jeweiligen Rechner / Betriebssystem vorgegeben werden. Dies entspricht den aktuellen Anfor- derungen zur Reduzierung des Energieverbrauchs. Der Monitor unterstützt die folgenden Arten von Stromsparmodi: Leistung Farbe der Bereitschaft Status (Nennwert) Betriebsanzeige (ca.) <... -
Seite 22: Fehlerhafte Farbdarstellung; Bild Ist Zu Hell/Zu Dunkel
10.2. Fehlerhafte Farbdarstellung; Bild ist zu hell/zu dunkel • Überprüfen Sie die Farbeinstellungen im Menü des Monitores oder im Betriebs- system des Rechners. • Wählen Sie AUTOM. ANPASSUNG, um die Einstellungen für Helligkeit und Kon- trast zu optimieren. Zur Optimierung sollte das Display eine Textseite anzeigen. 11. -
Seite 23: Pixelfehler Bei Tft-Monitoren
11.1. Pixelfehler bei TFT-Monitoren Trotz modernster Fertigung kann es auf 5 Pixel Grund der hochkomplexen Technik in selte- nen Fällen zu Ausfällen von einzelnen oder mehreren Leuchtpunkten kommen. Zeilen Bei Aktiv Matrix TFTs mit einer Auflösung von 1920 x 1080 Pixel, welche sich aus je drei Sub-Pixel (Rot, Grün, Blau) zusammensetzen, Pixel kommen insgesamt ca. -
Seite 24: Entsorgung
12. Entsorgung VERPACKUNG Ihr Gerät befindet sich zum Schutz vor Transportschäden in einer Verpa- ckung. Verpackungen sind aus Materialien hergestellt, die umweltscho- nend entsorgt und einem fachgerechten Recycling zugeführt werden können. GERÄT Alle mit dem nebenstehenden Symbol gekennzeichneten Altgeräte dür- fen nicht im normalen Hausmüll entsorgt werden. -
Seite 25: Technische Daten
13. Technische Daten Gerät Modell P52470 (MD 21470) Nennspannung 100-240 V ~ 50/60 Hz 1 A Standby: < 0,5 W Leistungsaufnahme Betrieb: < 40 W (max.) Audioausgabe 2x 2 W max. über Lautsprecher Bild Bildschirmgröße 60,5 cm (23,8”), TFT mit LED-Backlight Seitenverhältnis 16:9 Auflösung... -
Seite 26: Produktdatenblatt
Abmessungen / Gewichte Gewicht Mit Fuß: ca. 4,1 kg Abmessungen (BxHxT) Mit Fuß: ca. 540 x 646 x 251 mm Wandmontage Vesa Standard, Lochabstand 100 x 100 mm 13.1. Produktdatenblatt Gemäß Verordnung 1062/2010 Modell P52470 (MD 21470) 3002 8878 Energieeffizienzklasse Sichtbare Bildschirmgröße (diagonal, ca.) (cm/Zoll) 60,5 cm / 23,8“... -
Seite 27: Serviceinformationen
Ihre Erfahrungen austauschen und Ihr Wissen weiter- geben. Sie finden unsere Service Community unter http://community.medion.com. • Gerne können Sie auch unser Kontaktformular unter www.medion.com/contact nutzen. • Selbstverständlich steht Ihnen unser Serviceteam auch über unsere Hotline oder postalisch zur Verfügung. -
Seite 28: Impressum
Diese Bedienungsanleitung ist urheberrechtlich geschützt. Vervielfältigung in mechanischer, elektronischer und jeder anderen Form ohne die schriftliche Genehmigung des Herstellers ist verboten. Das Copyright liegt bei der Firma: MEDION AG Am Zehnthof 77 45307 Essen Deutschland Bitte beachten Sie, dass die oben stehende Anschrift keine Retourenanschrift ist. Kon-... - Seite 30 Contents About these operating instructions ............32 1.1. Key to symbols .....................32 Proper use ....................33 Declaration of Conformity ................ 34 3.1. Trademark information ..................34 Safety information ..................35 4.1. Operating safety ....................35 4.2. Installation location ...................36 4.3. Repairs ........................37 4.4.
-
Seite 31: About These Operating Instructions
1. About these operating instructions Read these operating instructions carefully and comply with the infor- mation provided in them. This will ensure that your device works reliably and has a long service life. Always keep these operating instructions close to the device. Keep these operating instructions in a safe place so they can be passed on to the new owner if you decide to sell the device. -
Seite 32: Proper Use
2. Proper use The TFT monitor is used to play back video and audio signals from external devices, such as computers, that have connections and image resolutions matching the technical specifications of the TFT monitor given here. Any other use is considered to be improper. -
Seite 33: Declaration Of Conformity
3. Declaration of Conformity Medion AG hereby declares that this device complies with the fundamental require- ments and the other relevant provisions of the following: • EMC Directive 2014/30/EU • Low Voltage Directive 2014/35/EU • Ecodesign Directive 2009/125/EC However, this device is not equipped with full functionality to minimise con- sumption according to the Ecodesign Directive. -
Seite 34: Safety Information
4. Safety information 4.1. Operating safety • This device may be used by children over the age of 8 and by persons with limited physical, sensory or mental abilities or by those without experience and knowledge, if they are su- pervised or have been instructed in the safe use of the device and have understood the dangers that result from it. -
Seite 35: Installation Location
4.2. Installation location • Keep your monitor and all connected devices away from moisture and avoid dust, heat, direct sunlight and naked flames (such as candles, for instance). Non-compliance with these instructions can lead to faults or damage to the moni- tor. -
Seite 36: Repairs
4.3. Repairs • Contact customer services if: – the mains cable is burnt or damaged – liquid has penetrated the monitor – the monitor is not operating correctly – the monitor has fallen or the housing is damaged. • Repairs to your monitor should only be carried out by quali- fied specialists. -
Seite 37: Power Supply
4.5. Power supply DANGER! Risk of electric shock! Even when the device is switched off, some compo- nents are live. In order to disconnect the power to your monitor or to completely isolate the device from voltage sourc- es remove the mains plug from the socket. •... -
Seite 38: Package Contents
5. Package contents Please check your purchase to ensure that all items are included. If anything is miss- ing, please contact us within 14 days of purchase. The following items are supplied with your monitor: • Monitor • HDMI cable •... -
Seite 39: Device Overview
6. Device overview 6.1. Front MENU AUTO Screen Operating LED indicates the operating state Switch monitor on/switch to standby mode AUTO – In the menu: confirm selection; close the menu In idle state: Automated adjustment of the image (VGA only) In the menu: navigate right, change option;... -
Seite 40: Rear
6.2. Rear AC in HDMI AC in HDMI Fixing holes for wall mount Opening for Kensington® lock Headset connection LINE IN – Audio connection (3.5 mm stereo jack) VGA – VGA port HDMI – HDMI port DP – DisplayPort port AC IN–... -
Seite 41: Getting Started
7. Getting started 7.1. Before connecting the monitor It is possible that your existing monitor supports a physical resolution that is not supported by your new monitor. In this case, the image on your new monitor may not appear correctly once it has been connected. ... -
Seite 42: Setup
7.3. Setup Avoid glare, reflections and extreme dark-light contrasts to protect your eyes. The Monior can be put in dif- -5~20° ferent positions to get the best view: • Tilting from -5 ° to 20 °, • Turning 30 ° to the left and right, 30°... - Seite 43 • General – change position frequently (around every 20 to 30 minutes) and take regular breaks to avoid fatigue. • Back – when sitting at your workstation, your back must be supported by your chair’s backrest, which must be upright or angled slightly back. •...
-
Seite 44: Mounting On The Wall
7.4. Mounting on the wall You can mount the device on the wall with the aid of a wall mount. HDMI To enable wall mounting, first remove the device stand. To do so, remove the screws on the stand at the points indicated. ... -
Seite 45: Connection
7.5. Connection AC in HDMI To avoid damage and malfunctions, only connect the connecting cable when the monitor and computer are switched off. 7.5.1. Connecting the signal cable Plug the signal cable into one of the connections on the monitor: –... -
Seite 46: Connecting The Power Supply
7.5.4. Connecting the power supply Connect the mains cable to the AC IN connection on the device. Plug the other end into an easily accessible mains socket. The mains socket must be close to the monitor and easily accessible (use the same electric circuit as for the computer). -
Seite 47: Setting The Display Resolution
7.7. Setting the display resolution The monitor supports the physical resolutions listed in the table. The aspect ratio of the display screen is 16:9. You will get an image that is free from distortion by select- ing the 1,920 x 1,080 pixels resolution. This is a native 16:9 aspect ratio. Image dis- tortions or black bars at the end of the picture can occur with all other resolutions. -
Seite 48: Menu
8. Menu MENU AUTO You can use the on-screen display menu to make various settings. Press the MENU button to activate the OSD. Use the buttons to select options from the menus. Confirm your selection with the MENU button. ... - Seite 49 LANGUAGE Select the menu language. OSD H.POS. Position of the menu in the picture. OSD V. POS. Hides the menu after a set period of time OSD DISPLAY TIME has expired. TRANSPARENCY Show or hide the menu background. MODE Select a pre-configured colour profile. Set the volume of the integrated louds- VOLUME peaker.
-
Seite 50: Energy-Saving Features
9. Energy-saving features This monitor switches to different energy-saving modes, which are specified by the respective computer/operating system. This complies with the current require- ments for reducing the energy consumption. The monitor supports the following types of energy-saving modes: Power consump- Colour of the Ready for oper- Status... -
Seite 51: Incorrect Colour Reproduction; Image Is Too Bright/Dark
10.2. Incorrect colour reproduction; image is too bright/ dark • Check the colour settings in the display menu or in the computer's operating system. • Select AUTOM. ADJUSTMENT to optimise the brightness and contrast settings. For optimisation, the display should show one page of text. 11. -
Seite 52: Pixel Faults In Tft Monitors
11.1. Pixel faults in TFT monitors Despite the state-of-the-art production meth- 5 Pixel ods, in rare cases there may be individual or multiple pixel drop-outs (dead pixels) due to the highly complex technology. Rows For active matrix TFTs with a resolution of 1920 x 1080 pixels, which are each made up of three sub-pixels (red, green, blue), there are Pixel... -
Seite 53: Disposal
12. Disposal PACKAGING Your device has been packaged to protect it from damage in transit. The packaging is made of materials that can be recycled in an environmen- tally friendly manner. DEVICE All old devices marked with the symbol illustrated must not be disposed of in normal household waste. -
Seite 54: Technical Specifications
13. Technical specifi cations Device Model P52470 (MD 21470) Rated voltage 100-240 V ~ 50/60 Hz 1 A Standby: < 0.5 W Power consumption Operation: < 40 W (max.) Audio output 2 x 2 W max. via speaker Screen Screen size 60.5 cm (23.8”), TFT with LED backlight Aspect ratio 16:9... -
Seite 55: Product Data Sheet
Dimensions / weights Weight With stand: approx. 4.1 kg Dimensions (W x H x D) With stand: approx. 540 x 646 x 251 mm Mounting on the wall Vesa standard, hole spacing 100 x 100 mm 13.1. Product data sheet In accordance with Regulation 1062/2010 Model P52470 (MD 21470) -
Seite 56: Service Information
In our Service Community, you can meet other users, as well as our staff, and you can exchange your experiences and pass on your knowledge there. You will find our Service Community at http://community.medion.com. • Alternatively, use our contact form at www.medion.com/contact. -
Seite 57: Legal Notice
These operating instructions are protected by copyright. Mechanical, electronic and any other forms of reproduction are prohibited without the written permission of the manufacturer. Copyright is owned by the company: MEDION AG Am Zehnthof 77 45307 Essen Germany Please note that you cannot use the address above for returns. Please always con-... - Seite 58 Notice d‘utilisation Istruzioni per l‘uso Gebruiksaanwijzing 60,5 cm (23,8“) LED Backlight Monitor MEDION BUSINESS ® P52470 (MD 21470)
- Seite 59 Sommaire Concernant la présente notice d’utilisation ..........5 1.1. Explication des symboles ................... 5 Utilisation conforme ..................6 Informations relatives à la conformité ............7 3.1. Informations sur les marques déposées ............7 Consignes de sécurité.................. 8 4.1. Sécurité de fonctionnement ................8 4.2.
-
Seite 60: Concernant La Présente Notice D'utilisation
1. Concernant la présente notice d’utilisation Veuillez lire attentivement la présente notice d’utilisation dans son inté- gralité et respecter toutes les consignes indiquées. Vous garantirez ainsi un fonctionnement fiable et une longue durée de vie du produit. Conservez toujours la présente notice d’utilisation à portée de main à proximité... -
Seite 61: Utilisation Conforme
2. Utilisation conforme L’écran TFT sert exclusivement à la restitution de signaux audio et vidéo d’appareils externes, tels que des ordinateurs, dont les connexions et résolutions d’image correspondent aux caractéris- tiques techniques de l’écran TFT indiquées ici. Toute autre utilisa- tion est considérée comme non conforme. -
Seite 62: Informations Relatives À La Conformité
3. Informations relatives à la conformité Par la présente, Medion AG déclare que cet appareil est conforme aux exigences de base et autres réglementations en vigueur : • Directive CEM 2014/30/UE • Directive basse tension 2014/35/UE • Directive sur l’écoconception 2009/125/CE Cependant cet appareil n’est doté... -
Seite 63: Consignes De Sécurité
4. Consignes de sécurité 4.1. Sécurité de fonctionnement • Cet appareil peut être utilisé par des enfants âgés de plus de 8 ans et par des personnes aux capacités physiques, senso- rielles ou mentales restreintes ou ne disposant pas de l’expé- rience ou des connaissances requises s’ils sont surveillés ou s’ils ont reçu des instructions pour pouvoir utiliser l’appareil en toute sécurité... -
Seite 64: Lieu D'installation
4.2. Lieu d’installation • Maintenez votre écran et tous les composants raccordés à l’abri de l’humidité, de la poussière, de la chaleur, du rayon- nement direct du soleil et des flammes nues (bougies ou pro- duits similaires). Le non-respect de ces consignes peut entraî- ner des dysfonctionnements ou l’endommagement de l’écran. -
Seite 65: Réparation
4.3. Réparation • Adressez-vous au SAV, lorsque : – le câble secteur a fondu ou est endommagé, – du liquide s’est infiltré dans l’écran, – l’écran ne fonctionne pas correctement, – L’écran est tombé ou le boîtier est endommagé. • Confiez la réparation de l’écran uniquement à un personnel qualifié. -
Seite 66: Alimentation Électrique
4.5. Alimentation électrique DANGER ! Risque d’électrocution ! Certaines pièces de l’appareil restent sous tension même lorsque l’appareil est éteint. Pour couper l’alimentation électrique de votre écran ou le mettre intégralement hors tension, débranchez la fiche d’alimentation de la prise de courant. •... -
Seite 67: Contenu De La Livraison
5. Contenu de la livraison Veuillez vérifier l’intégralité de la livraison et nous signaler toute livraison incom- plète dans les 14 jours suivant l’achat. Les équipements suivants sont inclus avec l’écran que vous venez d’acheter : • Écran • Câble HDMI •... -
Seite 68: Vue D'ensemble De L'appareil
6. Vue d’ensemble de l’appareil 6.1. Face avant MENU AUTO Image La LED de fonctionnement indique l’état de fonctionnement Mettre l’écran en marche/en mode veille AUTO – Dans le menu : confirmer la sélection, fermer le menu En dehors du menu : ajuster automatiquement l’image (uniquement VGA) Dans le menu : Naviguer vers la droite, changez d’options ;... -
Seite 69: Face Arrière
6.2. Face arrière AC in HDMI AC in HDMI Trous de fixation pour support mural Ouverture pour verrou Kensington® Prise casque LINE IN – Port audio (câble jack stéréo de 3,5 mm) VGA – Port VGA HDMI – Port HDMI DP –... -
Seite 70: Mise En Service
7. Mise en service 7.1. Avant le branchement de l’écran Il peut arriver que votre ancien écran soit compatible avec une résolution physique, qui n’est pas compatible avec votre nouvel écran. Aucune image correcte ne s’af- fiche alors une fois votre nouvel écran branché. ... -
Seite 71: Installation
7.3. Installation Évitez les effets d’éblouissement, les reflets et les contrastes clair/foncé trop importants afin de ménager vos yeux. Le moniteur peut être pla- -5~20° cé dans différentes posi- tions pour obtenir le meilleur angle de vision: • Inclinaison de -5 ° à 20 °, •... - Seite 72 • Général – Changez régulièrement (environ toutes les 20 à 30 minutes) votre po- sition et faites des pauses fréquentes afin d’éviter la fatigue. • Dos – En station assise, le dossier de votre fauteuil doit être droit ou légèrement incliné...
-
Seite 73: Montage Mural
7.4. Montage mural Vous pouvez monter l’appareil au mur à l’aide d’un support mural. HDMI Afin de permettre le montage de l’appareil au mur, retirez d’abord le pied de l’appa- reil. Retirez pour cela les vis du pied aux endroits illustrés. ... -
Seite 74: Raccordements
7.5. Raccordements AC in HDMI Ne branchez le câble de raccordement que lorsque l’écran et l’ordinateur sont allumés pour éviter tout dysfonctionnement et dommage. 7.5.1. Raccordement du câble de signal Raccordez le câble de signal dans l’un des ports de l’écran. –... -
Seite 75: Mise En Marche/Veille
7.5.4. Raccordement d’une alimentation électrique Branchez le câble secteur fourni dans le port AC IN de l’appareil. Branchez l’autre extrémité dans une prise de courant facilement accessible. La prise secteur doit se trouver à proximité de l’écran et être facilement accessible (utiliser le même circuit électrique que pour l’ordinateur). -
Seite 76: Menu
8. Menu MENU AUTO Le menu de l’écran vous permet de procéder à différents réglages. Appuyez sur la touche MENU pour activer l’OSD. Les touches vous permettent de sélectionner les options des menus. Confirmez votre sélection à l’aide de la touche AUTO. ... - Seite 77 LANGUE Sélection de la langue du menu OSD POSITION H Position du menu à l’écran OSD POSITION V INTERRUPTION DE L‘ Réglage de la durée d’affichage du menu Affichage ou masquage de l’arrière-plan ARRIÈREPLAN OSD du menu MODE IMAGE Sélection d’un profil de couleur préréglé Réglage du volume des haut-parleurs in- VOLUME tégrés...
-
Seite 78: Dispositifs D'économie D'énergie
9. Dispositifs d’économie d’énergie Cet écran prend en charge différents états d’économie d’énergie, prédéfinis par l’or- dinateur / le système d’exploitation respectif. Cela correspond aux exigences ac- tuelles en matière de réduction de la consommation d’énergie. L’écran est compatible avec les modes d’économie d’énergie suivants : Couleur du Puissance Sortie de veille... -
Seite 79: Reproduction Erronée Des Couleurs ; L'image Est Trop Claire/Trop Foncée
10.2. Reproduction erronée des couleurs ; l’image est trop claire/trop foncée • Vérifiez les réglages des couleurs dans le menu de l’écran ou dans le système d’exploitation de l’ordinateur. • Sélectionnez RÉGLAGE AUTOMATIQUE pour optimiser les réglages de la lu- minosité... -
Seite 80: Erreur De Pixels Pour Les Écrans Tft
11.1. Erreur de pixels pour les écrans TFT Malgré les processus de fabrication les plus 5 Pixels avancés de l’industrie, il peut se produire dans des cas rares, en raison de la tech- nique extrêmement complexe, des pertes Lignes de points lumineux individuels ou multi- ples. -
Seite 81: Recyclage
12. Recyclage EMBALLAGE L’appareil est placé dans un emballage de manière à le protéger contre tout dommage pendant le transport. Les emballages sont fabriqués à partir de matériaux qui peuvent être éliminés de manière écologique et remis à un service de recyclage approprié. APPAREIL Il est interdit d’éliminer les appareils usagés portant le symbole ci-contre avec les déchets ménagers. -
Seite 82: Caractéristiques Techniques
13. Caractéristiques techniques Appareil Modèle P52470 (MD 21470) Tension nominale 100-240 V ~ 50/60 Hz 1 A Veille : < 0,5 W Consommation Fonctionnement : < 40 W (max.) Sortie audio 2x 2 W max.par les haut-parleurs Image Taille de l’écran 60,5 cm (23,87”), TFT à... -
Seite 83: Fiche Produit
Dimensions/poids Poids Avec pied : env. 4,1 kg Dimensions (l x H x P) Avec pied : env. 540 x 646 x 251 mm Montage mural Norme Vesa, écart 100 x 100 mm 13.1. Fiche produit Conformément au règlement 1062/2010 Modèle P52470 (MD 21470) 3002 8878... -
Seite 84: Informations Sav
Dans notre Service Community, vous pouvez discuter avec d’autres utilisateurs ainsi qu’avec nos collaborateurs pour partager vos expériences et vos connais- sances. Vous pouvez accéder à notre Service Community ici : http://community.medion. com. • Vous pouvez également utiliser notre formulaire de contact disponible ici : www. -
Seite 85: Mentions Légales
La présente notice d’utilisation est protégée par les droits d’auteur. Toute reproduction sous forme mécanique, électronique ou autre est interdite sans l’autorisation écrite du fabricant. L’entreprise suivante détient les droits d’auteur : MEDION AG Am Zehnthof 77 45307 Essen Allemagne Veuillez noter que l’adresse ci-dessus n’est pas celle du service des retours. - Seite 86 Indice Informazioni sulle presenti istruzioni per l’uso ........32 1.1. Spiegazione dei simboli ..................32 Utilizzo conforme ..................34 Informazioni sulla conformità ..............35 3.1. Informazioni sui marchi ..................35 Indicazioni di sicurezza ................36 4.1. Utilizzo sicuro .......................36 4.2. Luogo di posizionamento ................37 4.3.
-
Seite 87: Informazioni Sulle Presenti Istruzioni Per L'uso
1. Informazioni sulle presenti istruzioni per l’uso Leggere attentamente le presenti istruzioni per l’uso e seguire tutte le indicazioni in esse riportate. In tal modo si potranno garantire il funzio- namento sicuro e la lunga durata del prodotto. Tenere queste istruzioni sempre a portata di mano in prossimità... - Seite 88 Dichiarazione di conformità (vedere capitolo “Informazioni sulla conformità”): i prodotti contrassegnati da questo simbolo soddisfa- no i requisiti delle direttive CE.
-
Seite 89: Utilizzo Conforme
2. Utilizzo conforme Il monitor TFT serve esclusivamente per la riproduzione di se- gnali audio e video di dispositivi esterni, come ad es. computer, i cui collegamenti e le cui risoluzioni dell’immagine corrispondo- no ai dati tecnici del monitor TFT qui descritti. Qualsiasi altro uti- lizzo è... -
Seite 90: Informazioni Sulla Conformità
3. Informazioni sulla conformità Medion AG dichiara che il dispositivo è conforme ai requisiti essenziali e alle altre di- sposizioni vigenti in materia: • Direttiva CEM 2014/30/UE • Direttiva Bassa tensione 2014/35/UE • Direttiva sulla progettazione ecocompatibile 2009/125/CE Tuttavia, questo prodotto non è dotato di una funzione completa per ridurre il consumo secondo la Direttiva sulla progettazione ecocompatibile. -
Seite 91: Indicazioni Di Sicurezza
4. Indicazioni di sicurezza 4.1. Utilizzo sicuro • Il presente dispositivo può essere utilizzato dai bambini a par- tire da un’età di 8 anni e anche da persone con capacità fi- siche, sensoriali o intellettive ridotte o con carenza di espe- rienza e conoscenze, a condizione che vengano sorvegliate o istruite circa l’utilizzo sicuro del dispositivo e che comprenda- no i pericoli che ne derivano. -
Seite 92: Luogo Di Posizionamento
4.2. Luogo di posizionamento • Posizionare il monitor e tutti i dispositivi a esso collegati in un luogo protetto dall’umidità ed evitare di esporlo a polvere, ca- lore, raggi solari diretti e fiamme libere (candele o simili). La mancata osservanza di queste indicazioni può provocare mal- funzionamenti o danni al dispositivo. -
Seite 93: Riparazione
4.3. Riparazione • Rivolgersi al centro di assistenza se: – il cavo di alimentazione è bruciato o danneggiato, – è penetrato del liquido il monitor, – il monitor non funziona correttamente, – il monitor è caduto o l’involucro è danneggiato. •... -
Seite 94: Alimentazione Elettrica
4.5. Alimentazione elettrica PERICOLO! Pericolo di scossa elettrica! Alcuni componenti del dispositivo sono sotto tensione anche quando il dispositivo è spento. Per interrompere l’alimentazione elettrica del moni- tor o per disinserire totalmente la tensione, staccare la spina dalla presa di corrente. •... -
Seite 95: Contenuto Della Confezione
5. Contenuto della confezione Verificare l’integrità della confezione e comunicare l’eventuale incompletezza della fornitura entro 14 giorni dall’acquisto. La confezione acquistata include: • Monitor • Cavo HDMI • Cavo di collegamento alla rete elettrica • Piede del monitor • Documentazione PERICOLO! Pericolo di soffocamento! Le pellicole utilizzate per l’imballaggio possono esse-... -
Seite 96: Panoramica Del Dispositivo
6. Panoramica del dispositivo 6.1. Lato anteriore MENU AUTO Schermo Il LED di funzionamento indica lo stato di funzionamento Accensione dello schermo/passaggio alla modalità standby AUTO – Nel menu: conferma della selezione; chiusura del menu nella schermata di base: regolazione automatica dell’immagine (solo VGA) Nel menu: Navigare a destra, cambiare le opzioni;... -
Seite 97: Lato Posteriore
6.2. Lato posteriore AC in HDMI AC in HDMI Fori di fissaggio per supporto da parete Apertura per lucchetto Kensington® Ingresso per cuffie LINE IN – Ingresso audio (connettore jack da 3,5 mm) VGA – Presa VGA HDMI – Presa HDMI DP –... -
Seite 98: Messa In Funzione
7. Messa in funzione 7.1. Prima del collegamento del monitor Può succedere che il monitor precedente supportasse una risoluzione fisica che il nuovo monitor non supporta. All’inizio, dopo aver collegato il nuovo monitor, l’im- magine non verrà perciò visualizzata correttamente. ... -
Seite 99: Posizionamento
7.3. Posizionamento Evitare effetti di riverbero, riflessi e contrasti luce-buio troppo forti per proteggere gli occhi. Il Monior può essere posizio- -5~20° nato in varie posizioni per ot- tenere il miglior angolo di vi- sione: • Inclinazione da -5° a 20°, •... - Seite 100 • In generale – Cambiare spesso la postura (ca. ogni 20-30 minuti) e fare regolar- mente delle pause per non affaticarsi. • Schiena – In posizione seduta, la schiena deve essere sostenuta dallo schienale della sedia che deve essere dritto oppure leggermente inclinato all’indietro. •...
-
Seite 101: Montaggio A Parete
7.4. Montaggio a parete È possibile montare il dispositivo alla parete con l’ausilio di un apposito supporto. HDMI Per consentire il montaggio del dispositivo alla parete, smontare per prima cosa il piede del dispositivo. Rimuovere le viti dai punti indicati nella figura. ... -
Seite 102: Collegamento
7.5. Collegamento AC in HDMI Collegare il cavo di collegamento solo con monitor e computer spenti al fine di evitare danni e malfunzionamenti. 7.5.1. Collegamento del cavo di segnale Inserire il cavo di segnale in una delle uscite del monitor: –... -
Seite 103: Collegamento All'alimentazione Elettrica
7.5.4. Collegamento all’alimentazione elettrica Collegare l’alimentatore/il cavo di alimentazione in dotazione alla presa AC IN del dispositivo. Inserire l’altra estremità in una presa di corrente facilmente accessibile. La presa di corrente deve trovarsi nelle vicinanze del monitor ed essere facilmente acces- sibile (utilizzare lo stesso circuito elettrico del computer). -
Seite 104: Menu
8. Menu MENU AUTO Tramite il menu dello schermo è possibile accedere a diverse impostazioni. Premere il tasto MENU per avviare l’OSD. Con i tasti selezionare le opzioni di un menu. Confermare la selezione con il tasto AUTO. ... - Seite 105 LINGUA Selezione della lingua del menu POSIZIONE OSD H Posizione del menu nell’immagine POSIZIONE OSD V CHIUSURA Nasconde il menu al termine dell’inter- AUTOMATICA OSD vallo di tempo preimpostato OSD PRIMO Mostrare o nascondere lo sfondo del PIANO menu MODALITÀ Selezione di un profilo di colore preim- IMMAGINI postato...
-
Seite 106: Dispositivi A Risparmio Energetico
9. Dispositivi a risparmio energetico Questo monitor si attiva in diverse condizioni di risparmio energetico, specificate dal rispettivo computer/sistema operativo. Ciò è conforme agli attuali requisiti per la riduzione del consumo di energia. Lo schermo supporta i seguenti tipi di modalità di risparmio energetico: Colore Potenza Stato... -
Seite 107: Rappresentazione Errata Del Colore; Immagine Troppo Chiara/Scura
10.2. Rappresentazione errata del colore; immagine troppo chiara/scura • Controllare le impostazioni di colore nel menu del monitor o nel sistema operati- vo del computer. • Selezionare la REGOLAZIONE AUTOMATICA per ottimizzare le impostazioni di luminosità e contrasto. Per l’ottimizzazione sul display dovrebbe apparire una pagina di testo. -
Seite 108: Errore Di Pixel Sui Monitor Tft
11.1. Errore di pixel sui monitor TFT Nonostante vengano utilizzati i più recen- 5 Pixel ti metodi produzione, a causa dell’elevata complessità delle tecnologie, in alcuni rari casi può verificarsi un malfunzionamento di Linee uno o più pixel. Per un TFT a matrice attiva, con una risolu- zione di 1920 x 1080 pixel dei quali ognu- no è... -
Seite 109: Smaltimento
12. Smaltimento IMBALLAGGIO L’imballaggio protegge il dispositivo da eventuali danni durante il tra- sporto. Gli imballaggi sono prodotti con materiali che possono essere smaltiti nel rispetto dell’ambiente e destinati a un corretto riciclaggio. DISPOSITIVO Tutti gli apparecchi usati contrassegnati con il simbolo a lato non devo- no essere smaltiti insieme ai rifiuti domestici. -
Seite 110: Dati Tecnici
13. Dati tecnici Dispositivo Modello P52470 (MD 21470) Tensione nominale 100-240 V ~ 50/60 Hz 1 A Standby: < 0,5 W Potenza assorbita Funzionamento: < 40 W (max.) Uscita audio 2x 2 W max. tramite altoparlanti Immagine 60,5 cm (23,8”), TFT con retroilluminazione a Dimensioni schermo Rapporto di aspetto 16:9... -
Seite 111: Scheda Tecnica Del Prodotto
Valori ambientali Umidità In funzione: < 80% (senza formazione di conden- Non in funzione: < 90% Dimensioni/pesi Peso Con piede: ca. 4,1 kg Dimensioni (LxAxP) Con piede: ca. 540 x 646 x 251 mm Montaggio a parete Standard Vesa, distanza tra i fori 100 x 100 mm ... -
Seite 112: Informazioni Sul Servizio Di Assistenza
• La community di assistenza è un luogo di incontro dove gli utenti e i nostri colla- boratori possono condividere le reciproche esperienze e conoscenze. La community di assistenza è accessibile alla pagina http://community.medion. com. • In alternativa è possibile compilare il modulo di contatto disponibile alla pagina www.medion.com/contact. -
Seite 113: Note Legali
Le presenti istruzioni per l’uso sono protette da copyright. È vietata la riproduzione in forma meccanica, elettronica e in qualsiasi altra forma senza l’autorizzazione scritta da parte del produttore. Il copyright appartiene all’azienda: MEDION AG Am Zehnthof 77 45307 Essen Germania L’indirizzo riportato sopra non è... - Seite 114 Inhoudsopgave Over deze gebruiksaanwijzing ..............60 1.1. Betekenis van de symbolen ................60 Gebruiksdoel ....................61 Conformiteitsinformatie ................62 3.1. Informatie over handelsmerken ..............62 Veiligheidsvoorschriften................63 4.1. Veilig gebruik ......................63 4.2. Plaats van opstelling ..................64 4.3. Reparatie ........................65 4.4. Omgevingswaarden ..................65 4.5.
-
Seite 115: Over Deze Gebruiksaanwijzing
1. Over deze gebruiksaanwijzing Lees deze gebruiksaanwijzing aandachtig door en neem alle hierin op- genomen aanwijzingen in acht. Zo bent u verzekerd van een betrouw- bare werking en een lange levensduur van uw apparaat. Bewaar deze gebruiksaanwijzing in de buurt van het apparaat, zodat u het altijd bij de hand hebt. -
Seite 116: Gebruiksdoel
2. Gebruiksdoel Het tft-beeldscherm dient uitsluitend voor het weergeven van video- en audiosignalen van externe apparaten, zoals com- puters. De aansluitingen en beeldresoluties van deze appara- ten moeten met de hier vermelde technische gegevens van het tft-beeldscherm overeenkomen. Elk ander gebruik wordt be- schouwd als niet conform het gebruiksdoel. -
Seite 117: Conformiteitsinformatie
3. Conformiteitsinformatie Hierbij verklaart Medion AG dat dit apparaat in overeenstemming is met de funda- mentele eisen en de overige toepasselijke voorschriften: • EMC-richtlijn 2014/30/EU • Laagspanningsrichtlijn 2014/35/EU • Ecodesignrichtlijn 2009/125/EU Dit apparaat is echter niet van een volledige stand-byfunctie volgens de eco- designrichtlijn uitgerust. -
Seite 118: Veiligheidsvoorschriften
4. Veiligheidsvoorschriften 4.1. Veilig gebruik • Dit apparaat kan worden gebruikt door kinderen vanaf 8 jaar en door personen met een lichamelijke, zintuiglijke of gees- telijke beperking of met onvoldoende kennis en ervaring als er iemand toezicht op hen houdt of hun is geleerd hoe ze het apparaat veilig kunnen gebruiken en ze hebben begrepen welke gevaren het gebruik van het apparaat met zich mee- brengt. -
Seite 119: Plaats Van Opstelling
4.2. Plaats van opstelling • Voorkom dat het beeldscherm en alle aangesloten apparaten in aanraking komen met vocht, stof, hitte, direct zonlicht en open vuur (kaarsen en dergelijke). Als deze aanwijzingen niet in acht worden genomen, kunnen er storingen optreden of kan het beeldscherm beschadigd raken. -
Seite 120: Reparatie
4.3. Reparatie • Neem contact op met de klantenservice als: – het netsnoer verschroeid of beschadigd is; – er vloeistof in het beeldscherm terecht is gekomen; – het beeldscherm niet naar behoren functioneert; – het beeldscherm is gevallen of de behuizing is beschadigd. •... -
Seite 121: Stroomvoorziening
4.5. Stroomvoorziening GEVAAR! Gevaar voor een elektrische schok Ook als het apparaat is uitgeschakeld, staan onderde- len ervan onder spanning. Onderbreek de stroomvoorziening naar het beeld- scherm of schakel alle spanning uit door de stekker uit het stopcontact te trekken. •... -
Seite 122: Inhoud Van De Levering
5. Inhoud van de levering Controleer de levering op volledigheid en informeer ons binnen 14 dagen na aan- koop als de levering niet compleet is. Bij het gekocht beeldscherm hoort het vol- gende te zijn meegeleverd: • Beeldscherm • HDMI-kabel •... -
Seite 123: Overzicht Van Het Apparaat
6. Overzicht van het apparaat 6.1. Voorkant MENU AUTO Beeldscherm Controlelampje toont de operationele status het beeldscherm in-/uitschakelen / stand-bymodus activeren AUTO – In het menu: keuze befestigen; sluiten van het menu in de uitgangspositie: automatisch aanpassen van het beeld (alleen VGA) In het menu: naar rechts navigeren, opties wijzigen;... -
Seite 124: Achterkant
6.2. Achterkant AC in HDMI AC in HDMI Gaten voor het bevestigen van een muurbeugel Opening voor een Kensington®-slot aansluiting voor hoofdtelefoon LINE IN - audio-aansluiting (stereo-jackplug van 3,5 mm) VGA VGA-aansluiting HDMI - HDMI-aansluiting DP - DisplayPort-aansluiting AC IN aansluiting voor stroomvoorziening... -
Seite 125: Ingebruikname
7. Ingebruikname 7.1. Vóór het aansluiten van het beeldscherm Het is mogelijk dat uw huidige beeldscherm een fysieke resolutie ondersteunt die door uw nieuwe beeldscherm niet wordt ondersteund. Nadat u het nieuwe beeld- scherm hebt aangesloten, ziet u dan geen correct beeld. ... -
Seite 126: Plaatsen
7.3. Plaatsen Voorkom verblinding, reflecties en te sterk contrastverschil tussen licht en donker om uw ogen niet te veel te belasten. De beeldscherm kan in ver- -5~20° schillende posities worden geplaatst om de beste kijk- hoek te bereiken: • Kantelen van -5 ° tot 20 °, •... - Seite 127 • Algemeen – verander regelmatig (ca. eens in de 20-30 minuten) van houding en pauzeer regelmatig om vermoeidheid te voorkomen. • Rug – tijdens het zitten op de werkplek moet de rug worden ondersteund door de rugleuning van de werkstoel, die hiervoor rechtop moet staan of iets achter- over moet hellen.
-
Seite 128: Muurmontage
7.4. Muurmontage U kunt het apparaat met een muurbeugel op de muur bevestigen. HDMI Haal eerst de voet weg om het apparaat op de muur te kunnen bevestigen. Draai daarvoor de schroeven (zie pijlen) uit de voet zoals op de afbeelding is aangegeven. -
Seite 129: Aansluiten
7.5. Aansluiten AC in HDMI Sluit de verbindingskabel alleen aan als de computer en het beeld- scherm zijn uitgeschakeld om beschadigingen en storingen te voorko- men. 7.5.1. Signaalkabel aansluiten Steek de signaalkabel in een van de aansluitingen op het beeldscherm: –... -
Seite 130: Voeding Aansluiten
7.5.4. Voeding aansluiten Sluit het meegeleverde netsnoer aan op de aansluiting AC IN van het apparaat. Steek de stekker in een goed bereikbaar stopcontact. Het stopcontact moet zich in de buurt van het beeldscherm bevinden en gemakkelijk bereikbaar zijn (aan- sluiten op hetzelfde stroomcircuit als de pc). -
Seite 131: Menu
8. Menu MENU AUTO U kunt via het beeldschermmenu diverse instellingen uitvoeren. Druk op de toets MENU om het OSD te activeren. Met de toetsen kiest u de opties uit de menu’s. Bevestig uw keuze met de toets AUTO. ... - Seite 132 TAAL Keuze van de menutaal OSD POSITIE H Positie van het menu in het beeld OSDPOSITIE V Na een vooraf ingestelde tijdsduur verd- OSD TIME OUT wijnt het menu Menu-achtergrond in- of uitgeschakeld ACHTERGROND Keuze van een vooraf ingesteld kleur- BEELDMODUS profiel Het volume van de geïntegreerde luid-...
-
Seite 133: Spaarstand
9. Spaarstand Dit beeldscherm schakelt over op verschillende energiebesparende standen die door de betreffende computer of het besturingssysteem zijn vastgelegd. Dit komt overeen met de huidige eisen voor het verlagen van het energieverbruik. Het beeldscherm ondersteunt de volgende stroombesparingsmodi: Vermogen Kleur van het Status (nominale waar-... -
Seite 134: Foutieve Kleurweergave; Beeld Is Te Licht / Te Donker
10.2. Foutieve kleurweergave; beeld is te licht / te donker • Controleer de kleurinstellingen in het menu van het beeldscherm of in het be- sturingssysteem van de computer. • Kies AUTOM. AANPASSING om de instellingen voor helderheid en contrast te optimaliseren. -
Seite 135: Pixelfouten Bij Tft-Beeldschermen
11.1. Pixelfouten bij tft-beeldschermen Ondanks het gebruik van de modernste pro- 5 Pixels ductiemethoden kunnen er vanwege de zeer complexe techniek in zeldzame gevallen een of meer pixels uitvallen. Regels Bij actieve matrix-tft-schermen met een reso- lutie van 1920 x 1080 pixels, die elk uit drie subpixels (rood, groen en blauw) bestaan, Pixel zijn er in totaal ca. -
Seite 136: Afvalverwerking
12. Afvalverwerking VERPAKKING Het apparaat zit ter bescherming tegen transportschade in een verpak- king. Verpakkingen zijn gemaakt van materialen die milieuvriendelijk kunnen worden afgevoerd en vakkundig kunnen worden gerecycled. APPARAAT Alle apparaten die zijn gemarkeerd met het hiernaast afgebeelde sym- bool, mogen niet bij het normale huisvuil worden gedaan. -
Seite 137: Technische Gegevens
13. Technische gegevens Apparaat Model P52470 (MD 21470) Nominale spanning 100-240 V ~ 50/60 Hz 1 A Stand-by: < 0,5 W Opgenomen vermogen Gebruik: < 40 W (max.) Audio-uitvoer 2x 2 W max. via luidspreker Beeldscherm Schermgrootte 60,5 cm (23,8”), tft met led-backlight Beeldverhouding 16:9 Resolutie... -
Seite 138: Productinformatieblad
Afmetingen/gewicht Gewicht Met voet: ca. 4,1 kg Afmetingen (b x h x d) Afmetingen voet: ca. 540 x 646 x 251 mm Muurmontage Vesa-standaard, gatafstand 100 x 100 mm 13.1. Productinformatieblad Conform verordening 1062/2010 Model P52470 (MD 21470) 3002 8878 Energieklasse Zichtbare schermgrootte (diagonaal, ca.) (cm/inch) 60,5 cm / 23,8“... -
Seite 139: Service-Informatie
U vindt onze Service Community op http://community.medion.com. • Daarnaast kunt u gebruikmaken van ons contactformulier op www.medion. com/contact. • Ons serviceteam is natuurlijk ook te bereiken via de hotline of per post. -
Seite 140: Colofon
Op deze gebruiksaanwijzing rust auteursrecht. Duplicatie in mechanische, elektronische of welke andere vorm dan ook zonder schriftelijke toestemming van de fabrikant is verboden. Het copyright ligt bij het bedrijf: MEDION AG Am Zehnthof 77 45307 Essen Duitsland Het bovenstaande adres is geen retouradres. Neem altijd eerst contact op met onze...