Herunterladen Inhalt Inhalt Diese Seite drucken
Parkside PAS 1200 C2 Originalbetriebsanleitung
Vorschau ausblenden Andere Handbücher für PAS 1200 C2:
Inhaltsverzeichnis

Werbung

Verfügbare Sprachen

Verfügbare Sprachen

BIDONE ASPIRACENERE PAS 1200 C2
BIDONE ASPIRACENERE
Traduzione delle istruzioni d'uso originali
ASH VACUUM CLEANER
Translation of the original instructions
IAN 303208
ASPIRADOR DE CINZAS
Tradução do manual de instruções original
ASCHESAUGER
Originalbetriebsanleitung

Werbung

Inhaltsverzeichnis
loading

Inhaltszusammenfassung für Parkside PAS 1200 C2

  • Seite 1 BIDONE ASPIRACENERE PAS 1200 C2 BIDONE ASPIRACENERE ASPIRADOR DE CINZAS Traduzione delle istruzioni d’uso originali Tradução do manual de instruções original ASH VACUUM CLEANER ASCHESAUGER Translation of the original instructions Originalbetriebsanleitung IAN 303208...
  • Seite 2 Prima di leggere aprire la pagina con le immagini e prendere confidenza con le diverse funzioni dell’apparecchio. Antes de começar a ler abra na página com as imagens e, de seguida, familiarize-se com todas as funções do aparelho. Before reading, unfold the page containing the illustrations and familiarise yourself with all functions of the device.
  • Seite 3 16+17...
  • Seite 4: Inhaltsverzeichnis

    Indice Introduzione Introduzione ........4 Congratulazioni per l’acquisto del Suo Utilizzo ........4 nuovo apparecchio. Ha scelto un prodotto Descrizione generale ....5 altamente pregiato. Questo apparecchio Volume di fornitura ......5 è stato sottoposto a un controllo di qualità Descrizione del funzionamento ..5 durante la produzione e quindi sottoposto Sommario ........5 a un controllo finale.
  • Seite 5: Descrizione Generale

    Dati tecnici L’aspiracenere è dotato di uno stabile con- tenitore di metallo con coperchio e ruote. Bidone aspiracenere ....PAS 1200 C2 L’accessorio di aspirazione è costituito da un tubo flessibile di aspirazione, un tubo Tensione nominale .. 220-240 V~, 50/60 Hz...
  • Seite 6: Indicazioni Di Sicurezza

    Indicazioni di sicurezza * Con „cenere fredda“ si intende cenere che si è raffreddata per Questo apparecchio può essere un periodo sufficiente e che non usato da bambini a partire da contiene più focolai di brace. 8 anni come anche da persone Per appurare se la cenere è...
  • Seite 7: Simboli Riportati Nelle Istruzioni

    Sistema di auto-pulizia Attenzione! Durante l’uso di filtro semiautomatico utensili elettrici osservarle seguenti misure di sicurezza di base ai fini della protezio- ne contro scosse elettriche e Interruttore per sistema rischi di lesioni e incendi: di pulizia del filtro In questo modo evitate in- cidenti e lesioni a causa di Le apparecchiature non si scosse elettriche:...
  • Seite 8: In Questo Modo Evitate Incidenti E Lesioni

    • Collegare l’apparecchio solo • Attenzione! I materiali pericolosi ad una presa protetta con alme- (ad es. benzina, solventi, acidi o no 16A. soluzioni alcaline) e la cenere di • Collegare l’apparecchio solo prodotti combustibili non ammes- a una presa con protezione si (ad es.
  • Seite 9: Montaggio

    sicurezza utilizzare un piano Montare il filtro resistente al calore durante la pieghevole pulizia di forni, camini o grill. • Non spegnere i pezzetti di ce- Prima del primo utilizzo il filtro pie- nere caldi con acqua perchè le ghettato (18) è già premontato. improvvise differenze di tempe- ratura possono causare la for- 1.
  • Seite 10: Montare Il Tubo Flessibile Di Aspirazione

    Montare il tubo flessibile di Accensione: aspirazione Interruttore On/Off (vedi in posizione „I“ Spegnimento: 1. Collegare il tubo flessibile aspirante (15). Per poterlo fare inserire il Interruttore On/Off (vedi terminale in plastica girevole (con in posizione „0“ il simbolo stampato) nell’attacco Avvisi per l’utilizzo del tubo flessibile (11) e avvitarlo saldamente (chiusura a baionetta).
  • Seite 11: Sistema Di Pulizia Del Filtro

    Pulizia/manutenzione • Svuotare il contenitore all’aperto per evitare di sporcare (vedere „pulizia/ manutenzione“). Prima di qualsiasi lavoro all’appa- • Pulire il filtro ripiegato ( 18) (vedere recchio estrarre la spina dalla rete. “Pulizia/manutenzione”): Pericolo di schock elettrico! - in caso di forza di aspirazione in Non spruzzare l’apparecchio calo, con acqua e non usare deter-...
  • Seite 12: Pulizia Del Filtro Dell'aria

    Conservazione Non pulire il filtro ripiega- to (18) in acqua. 4. Inserire il filtro pieghettato (18) • Per riporre l’apparecchio avvolgere il sul coperchio contenitore (10) cavo di rete (1) attorno alla staffa (6) capovolto. sul coperchio del contenitore (10). 5.
  • Seite 13: Pezzi Di Ricambio/Accessori

    Pezzi di ricambio/Accessori È possibile ordinare pezzi di ricambio e accessori all’indirizzo www.grizzly-service.eu Se non si dispone di una connessione Internet, contattare telefonicamente il centro di as- sistenza (vedere “Service-Center” a pag. 15). Tenere a portata di mano i numeri d’ordine riportati in basso.
  • Seite 14: Garanzia

    Garanzia Volume di garanzia L’apparecchio è stato prodotto accurata- Gentile cliente, mente secondo severe direttive di qualità Su questo apparecchio Le viene concessa e controllato con coscienza prima della consegna. una garanzia di 3 anni a partire dalla data di acquisto. In caso di difetti di questo prodotto può...
  • Seite 15: Servizio Di Riparazione

    Service-Center sullo svolgimento del Suo reclamo. • Un prodotto rilevato come difettoso Assistenza Italia può essere inviato con porto franco all’indirizzo di assistenza comunicato, Tel.: 02 36003201 previa consultazione del nostro servi- E-Mail: grizzly@lidl.it IAN 303208 zio di assistenza tecnica, allegando la prova d‘acquisto (scontrini fiscali) Assistenza Malta e l’indicazione, in che cosa consiste...
  • Seite 16: Ricerca Di Guasti

    Ricerca di guasti Guasto Possibile causa Soluzione Controllare la presa di corrente, Manca la tensione di il cavo, la spina e il fusibile, se alimentazione necessario far riparare l’apparecchio da un’elettricista qualificato Inserire l’apparecchio Apparecchio non inserito (vedere „Accensione/spegnimento“) L’apparecchio non si avvia Stop di sicurezza per filtro Inserire correttamente il filtro ripiegato...
  • Seite 17: Índice Introdução

    Índice Introdução Introdução .........17 Parabéns pela compra do seu novo apare- Utilização ........17 lho. Com a sua compra, decidiu-se por um Descrição Geral ......18 produto de alta qualidade. Peças incluídas .......18 Este aparelho foi testado durante a produ- Descrição de funcionamento ....18 ção em relação à...
  • Seite 18: Y Z

    Dados técnicos pa e rolos. O aspirador é constituído pela mangueira de aspiração, um tubo de aspi- Aspirador de cinzas ....PAS 1200 C2 ração em alumínio e um aplicador para a limpeza das juntas. Tensão nominal ..220-240V~, 50/60 Hz Um interruptor de segurança evita que o...
  • Seite 19: Medidas De Segurança

    Medidas de segurança * “Cinzas frias” são cinzas que arrefeceram o tempo suficiente e Este dispositivo pode ser utilizado já não contêm brasas. Isto pode por crianças a partir de 8 anos ser determinado, vasculhando de idade e por pessoas com as cinzas com um objecto auxi- capacidades físicas, sensoriais liar metálico antes de o dispo-...
  • Seite 20: Símbolos Colocados No Manual

    Interruptor para sistema e os regulamentos para a de limpeza do filtro precaução de acidentes das entidades locais. Conexão do tubo flexí- Cuidado: Ao utilizar o apa- vel de aspiração do re- relho, ter em atenção as me- cipiente de metal didas básicas de segurança a seguir indicadas para a As máquinas não devem...
  • Seite 21 cabo do calor, do óleo e de bor- mesma altura da cabeça. Perigo das cortantes. de lesões! • Cerifique-se de que a tensão de • Não aspire materiais nem pós rede corresponde às indicações (classe de pó L, M, H) escaldan- da chapa de características do tes, incandescentes, inflamáveis, aparelho.
  • Seite 22: Montagem

    Assim se evitam danos as Montar os rolos pessoas e ao aparelho: • Certifique-se de que o aparelho Engate os três rolos ( 14) no canto inferi- se encontra correctamente monta- or da caixa nas respetivas concavidades. do e o filtro na posição correcta. As concavidades encontram-se na parte •...
  • Seite 23: Montar A Mangueira De Aspiração

    Ao colocar a tampa do recipien- aspiração (16) e este na extremidade re- te (10) deve certificar-se de que o sistente da mangueira de aspiração (15). interruptor de ligar/desligar ( e a conexão da mangueira (11) Ligar/Desligar se encontrem alinhados por alto, caso contrário a tampa do reci- piente não fica bem colocada.
  • Seite 24: Sistema De Limpeza Do Filtro

    de metal ( 13) e da mangueira de Feche a abertura de sucção do tubo de aspiração ( 15). sucção ( 16) ou tubo flexível de sucção • Se notar que o aparelho se aquece ex- 15) (p.ex. com um pano grande ou cessivamente, desligue-o e tire a ficha pressionando-o contra o chão da chaminé).
  • Seite 25: Limpar O Filtro De Pregas

    Limpar o filtro de pregas Volte a colocar o filtro de ar (20) na caixa do filtro (21). Substitua o filtro de pregas (18) Conservação sempre que ele estiver desgasto, danificado ou muito sujo. (ver “Pe- ças sobressalentes”). • Para o armazenamento, enrole o cabo de ligação de rede (1) em torno do Tire a tampa do depósito (10).
  • Seite 26: Peças Sobressalentes/Acessórios

    Peças sobressalentes/Acessórios Pode obter as peças de reposição e os acessórios em www.grizzly-service.eu Caso não tenha internet entre em contacto, por telefone, com o centro de assistência (ver “Service-Center “ página 29). Mantenha os números de encomenda, em baixo mencio- nados, disponíveis.
  • Seite 27: Resolução De Problemas

    Resolução de Problemas Problema Causa possível Resolução do problema Examinar a tomada, o cabo, a li- nha, a ficha e o fusível e, caso seja Não há tensão de rede necessário, levar o aparelho para reparação a um técnico especialis- ta em electricidade Ligar o aparelho O aparelho não está...
  • Seite 28: Garantia

    Garantia compra deverão ser comunicados imedia- tamente após se ter desembalado o produ- Prezada cliente, prezado cliente, to. Após decorrido o período de garantia, Este aparelho tem uma garantia de 3 anos as reparações necessárias estão sujeitas a pagamento. a contar a partir da data da compra. Em caso de deficiências verificadas Âmbito da garantia neste produto, estão à...
  • Seite 29: Serviço De Reparação

    Serviço de reparação • Mantenha à mão o talão de com- pra e o número de identificação As reparações que não sejam abrangidas (IAN 303208), como comprovativo da pela garantia podem ser efetuadas pelo compra. • Pode consultar o número do artigo na nosso centro de serviço, mediante fatura- placa de identificação.
  • Seite 30: Introduction

    Contents Introduction Introduction .......30 Congratulations on the purchase of your Application ........30 new device. With it, you have chosen a General description ....31 high quality product. Delivery Contents ......31 During production, this equipment has Description of operation ....31 been checked for quality and subjected to Overview ........31 a final inspection.
  • Seite 31: Gb Mt

    - Instruction Manual 22 Motor housing Technical data Description of operation Ash vacuum cleaner ..... PAS 1200 C2 The ash vacuum cleaner is provided with a stable metal container with cover and reels. Mains voltage ..220-240 V~, 50/60 Hz...
  • Seite 32: Device Symbols

    or lack of experience and knowl- edge if they have been given su- pervision or instruction concerning use of the appliance in a safe way and understand the hazards in- volved. Children shall not play with the appliance. Cleaning and user maintenance shall not be made by children without supervision.
  • Seite 33: Symbols Used In The Instructions

    Symbols used in the Do not use the equipment if the instructions cable is damaged or worn. Dan- ger of electric shock hazard. Hazard symbols with • If the power cord for this equip- information on preven- ment is damaged, it must be tion of personal injury replaced by the manufacturer, and property damage.
  • Seite 34: Assembly

    • Avoid accidental starting. Ensure and disconnect at the plug. that the switch is off when plug- Place the equipment outside and ging into the socket. monitor it as it cools. To avoid accidents and injuries: The following states how damage to the appliance •...
  • Seite 35: Reel Assembly

    Reel assembly Suction hose assembly Clip the three reels ( 14) at the lower 1. Connect the suction hose (15). edge of the housing onto the relevant cur- To do this, insert the rotatable plastic vatures. The curvatures are located on the end piece (with the printed symbol) bottom of the housing into the hose connection (11) and...
  • Seite 36: Operating Instructions

    Operating Instructions Filter cleaning system The vacuuming of glowing Insert the mains plug of the device embers and of materials that and turn the device on. are combustible, explosive or harmful to health is prohib- If the suction power decreases, you can ited.
  • Seite 37: Cleaning The Folded Filter

    • Remove the container lid ( 10) and 3. Clean the filter (20) with soap and wa- empty the metal container ( 13). ter and allow it to dry in the air. Clean the metal container ( 13) with 4. Place the air filter (20) back in the filter water and allow it to dry.
  • Seite 38: Trouble Shooting

    Trouble shooting Problem Possible cause Fault correction Check plug socket, power cord, line, Mains voltage is not present plug and fuse, where appropriate, repair through electrical specialist Switch on the equipment (see The equipment is not switched on Device does “Switching on/off“) not start Safety stop due to missing or incor-...
  • Seite 39: Guarantee

    Guarantee Guarantee Cover The equipment has been carefully pro- Dear Customer, duced in accordance with strict quality This equipment is provided with a 3-year guidelines and conscientiously checked prior to delivery. guarantee from the date of purchase. In case of defects, you have statutory rights against the seller of the product.
  • Seite 40: Repair Service

    Service-Center tive can be sent postage paid to the service address communicated to you, Service Great Britain with the proof of purchase (receipt) and specification of what constitutes Tel.: 0871 5000 720 the defect and when it occurred. In or- (£...
  • Seite 41: Einleitung

    Inhalt Einleitung Einleitung ........41 Herzlichen Glückwunsch zum Kauf Ihres Bestimmungsgemäße neuen Gerätes. Sie haben sich damit für Verwendung ......41 ein hochwertiges Gerät entschieden. Allgemeine Beschreibung ..42 Dieses Gerät wurde während der Produkti- Lieferumfang........42 on auf Qualität geprüft und einer Endkon- Funktionsbeschreibung ....42 trolle unterzogen.
  • Seite 42: Allgemeine Beschreibung

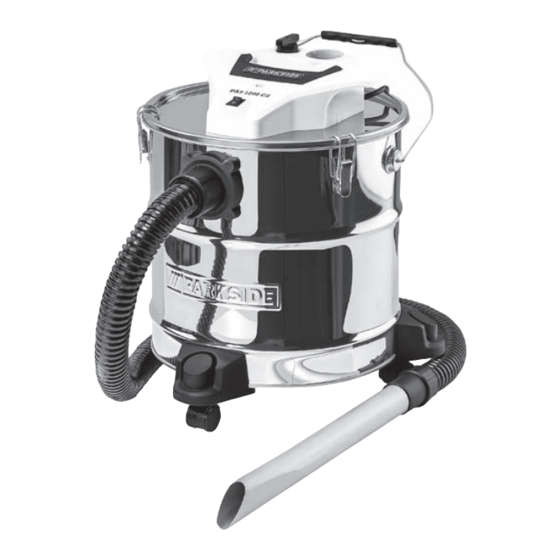
    21 Filtergehäuse - Faltenfilter 22 Motorkopf - Betriebsanleitung Technische Daten Funktionsbeschreibung Aschesauger ....PAS 1200 C2 Der Aschesauger ist mit einem stabilen Bemessungs- Metallbehälter mit Deckel und Rollen aus- spannung .... 220-240 V~, 50/60 Hz gestattet. Die Sauggarnitur besteht aus...
  • Seite 43: Symbole Auf Dem Gerät

    Mangel an Erfahrung und wird, bevor das Gerät zum Wissen benutzt werden, wenn sie Einsatz kommt. Von der kalten beaufsichtigt oder bezüglich des Asche geht keine wahrnehmbare sicheren Gebrauchs des Gerätes Wärmestrahlung mehr aus. unterwiesen wurden und die daraus resultierenden Gefahren verstehen.
  • Seite 44: Bildzeichen In Der Anleitung

    So vermeiden Sie Unfäl- Elektrogeräte gehören nicht le und Verletzungen durch in den Hausmüll. elektrischen Schlag: Schutzklasse II • Achten Sie darauf, dass die Netzanschlussleitung nicht durch Bildzeichen in der Ziehen über scharfe Kanten, Ein- klemmen oder Ziehen am Kabel Anleitung beschädigt wird.
  • Seite 45: So Vermeiden Sie Unfälle Und Verletzungen

    • Schließen Sie das Gerät an eine Lösungsmittel, Säuren oder Lau- Steckdose mit Fehlerstrom-Schutz- gen. Es besteht Brand- und Ver- einrichtung (FI-Schalter) mit einem letzungsgefahr. Bemessungsfehlerstrom von nicht • Achtung! Gefahrenstoffe (z. B. mehr als 30 mA an. Benzin, Lösungsmittel, Säuren •...
  • Seite 46: Montage

    ist und der Filter in der richtigen Rollen montieren Position ist. • Stellen Sie das Gerät beim Ein- Klippen Sie die drei Rollen ( 14) an die saugen nicht auf wärmeempfind- Unterkante des Gehäuses an die jeweili- liche Fußböden ab. Benutzen gen Wölbungen.
  • Seite 47: Saugschlauch Montieren

    Ein-/Ausschalten Beim Aufsetzen des Behälter- deckels (10) müssen Sie darauf achten, dass sich Ein-/Ausschal- Stecken Sie den Netzstecker des ter ( 8) und Schlauchan- Gerätes ein. schluss (11) grob in einer Flucht befinden, sonst lässt sich Das Gerät ist mit einem Sicherheits- der Behälterdeckel nicht schalter ( 19) ausgestattet, der...
  • Seite 48: Filter-Reinigungssystem

    • In Arbeitspausen können Sie das Drücken Sie den Schalter ( Saugrohr ( 16) in die Halterung ( und drehen Sie ihn anschließend, am Behälterdeckel ( 10) stecken. während Sie ihn weiterhin • Verwenden Sie zum Transport des gedrückt halten, um 70° im Gerätes stets den Tragegriff ( Uhrzeigersinn.
  • Seite 49: Faltenfilter Reinigen

    Aufbewahrung Faltenfilter reinigen Ersetzen Sie den Faltenfilter (18), • Zur Aufbewahrung wickeln Sie die wenn er verschlissen, beschädigt Netzanschlussleitung (1) um die Halte- oder stark verschmutzt ist (siehe rung (6) auf dem Behälterdeckel (10). „Ersatzteile“). • Stecken Sie das drehbare Kunststoff- Endstück des Saugschlauchs (15) in die 1.
  • Seite 50: Fehlersuche

    Fehlersuche Problem Mögliche Ursache Fehlerbehebung Steckdose, Kabel, Leitung, Stecker Netzspannung fehlt und Sicherung prüfen, ggf. Repa- ratur durch Elektrofachmann Gerät einschalten Gerät ist nicht eingeschaltet Gerät startet (siehe „Ein-/ Ausschalten“) nicht Sicherheitsstopp wegen fehlendem oder Faltenfilter korrekt einsetzen falsch eingesetztem Faltenfilter ( (siehe „Reinigung/Wartung“) Ein-/Ausschalter ( 8) defekt...
  • Seite 51: Garantie

    Garantie Garantieumfang Das Gerät wurde nach strengen Qualitäts- Sehr geehrte Kundin, sehr geehrter Kunde, richtlinien sorgfältig produziert und vor Sie erhalten auf dieses Gerät 3 Jahre Ga- Anlieferung gewissenhaft geprüft. rantie ab Kaufdatum. Im Falle von Mängeln dieses Produkts Die Garantieleistung gilt für Material- oder stehen Ihnen gegen den Verkäufer des Fabrikationsfehler.
  • Seite 52: Reparatur-Service

    Service-Center Sie erhalten dann weitere Informationen über die Abwicklung Ihrer Reklamation. Service Deutschland • Ein als defekt erfasstes Produkt können Sie, nach Rücksprache mit unserem Kun- Tel.: 0800 54 35 111 denservice, unter Beifügung des Kauf- E-Mail: grizzly@lidl.de IAN 303208 belegs (Kassenbons) und der Angabe, worin der Mangel besteht und wann er Service Österreich...
  • Seite 53: Original Eg-Konformitätserklärung

    Original EG-Konformitätserklärung Hiermit bestätigen wir, dass der Aschesauger Baureihe PAS 1200 C2 Seriennummer 201803000001 - 201807376630 folgenden einschlägigen EU-Richtlinien in ihrer jeweils gültigen Fassung entspricht: 2014/30/EU • 2014/35/EU • 2011/65/EU* Um die Übereinstimmung zu gewährleisten, wurden folgende harmonisierte Normen sowie nationale Normen und Bestimmungen angewendet: EN 60335-1:2012/A11:2014 •...
  • Seite 54: Translation Of The Original Ec Declaration Of Conformity

    Translation of the original EC declaration of conformity We hereby confirm that the Ash vacuum cleaner model PAS 1200 C2 Serial number 201803000001 - 201807376630 conforms with the following applicable relevant version of the EU guidelines: 2014/30/EU • 2014/35/EU • 2011/65/EU*...
  • Seite 55: Traduzione Della Dichiarazione Di Conformità Ce Originale

    Traduzione della dichiarazione di conformità CE originale Con la presente dichiariamo che Aspiracenere serie di costruzione PAS 1200 C2 numero di serie 201803000001 - 201807376630 corrisponde alle seguenti direttive UE in materia nella rispettiva versione valida: 2014/30/EU • 2014/35/EU • 2011/65/EU* Per garantire la conformità...
  • Seite 56: Tradução Do Original Da Decla- Ração De Conformidade Ce

    Tradução do original da Declaração de conformidade CE Vimos, por este meio, declarar que o Aspirador de cinzas da série PAS 1200 C2 Número de série 201803000001 - 201807376630 corresponde às respectivas normas da UE na sua versão em vigor: 2014/30/EU •...
  • Seite 57: Disegno Esploso

    Disegno esploso • Explosionszeichnung Designação de explosão • Exploded Drawing PAS 1200 C2 informativo informativ informative • • 2018-04-30_rev02_TR...
  • Seite 58 GRIZZLY TOOLS GMBH & CO. KG Stockstädter Straße 20 DE-63762 Großostheim GERMANY Versione delle informazioni · Estado das informações · Last Information Update · Stand der Informationen: 03/2018 · Ident.-No.: 72080635032018-IT/ PT IAN 303208...

Inhaltsverzeichnis