Werbung
Quicklinks
Contents
Installation instructions C-250 CS
1 Uk
Installation instructions C-250 CWE
Instructions d'installation C-250 CS
1 FR
Instructions d'installation C-250 CWE
Einbauanleitung C-250 CS
1 DE
Einbauanleitung C-250 CWE
Installatie-instructies C-250 CS
1 NL
Installatie-instructies C-250 CWE
Instrucciones de instalación C-250 CS
1 ES
Instrucciones de instalación C-250 CWE
Istruzioni per l'installazione C-250 CS
1 IT
Istruzioni per l'installazione C-250 CWE
Instruções de instalação C-250 CS
1 PT
Instruções de instalação C-250 CWE
Installationsinstruktioner C-250 CS
1 SE
Installationsinstruktioner C-250 CWE
Installationsvejledning C-250 CS
1 Dk
Installationsvejledning C-250 CWE
Installeringsinstrukser C-250 CS
1 NO
Installeringsinstrukser C-250 CWE
Asennusohjeet C-250 CS
1 FI
Asennusohjeet C-250 CWE
Navodila za namestitev C-250 CS
1 SI
Navodila za namestitev C-250 CWE
1
4
24
4
24
4
24
4
24
4
24
4
24
4
24
4
24
4
24
4
24
4
24
4
24
Werbung

Verwandte Anleitungen für Thetford C-250 CS


Inhaltszusammenfassung für Thetford C-250 CS
- Seite 1 Einbauanleitung C-250 CS 1 DE Einbauanleitung C-250 CWE Installatie-instructies C-250 CS 1 NL Installatie-instructies C-250 CWE Instrucciones de instalación C-250 CS 1 ES Instrucciones de instalación C-250 CWE Istruzioni per l’installazione C-250 CS 1 IT Istruzioni per l’installazione C-250 CWE Instruções de instalação C-250 CS...
- Seite 2 • protective tape • electric drill • 3 and 8 mm drills • electric saw • screw driver, Benodigd gereedschap Philips head nr. 2 (PH2) • awl (only for C-250 CS) • safety glasses • ear protection • afplaktape • boormachine • boren van 3 en 8 mm • decoupeerzaag • kruiskop- •...
- Seite 3 • skrutrekker, stjernehode nr. 2 (PH2) • syl (kun for C-250 CS) • vernebriller • chave de fendas, chave de estrelas nº 2 (PH2) • furador (apenas para a C-250 CS) • hørselsvern • tusjpenn • butyl tetningsmasse • dobbeltsidig tape •...
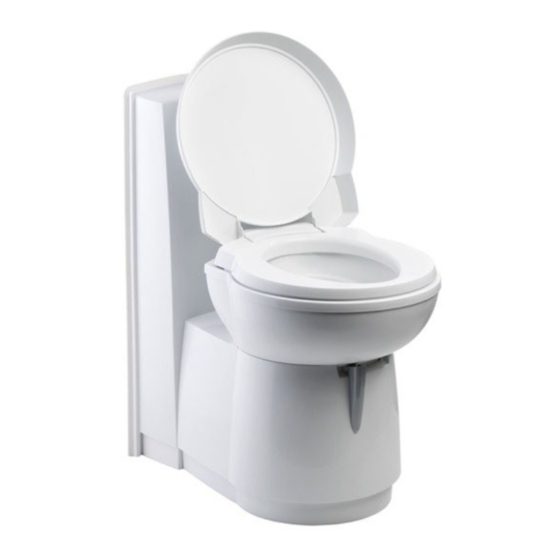
- Seite 4 Remove the waste-holding tank. • Take the plastic bag with four 1 Uk screws to connect the toilet out of the base. • If applicable, remove the shower tray and adjust it in such a way that the C-250 can be fitted onto it.
- Seite 5 1 Uk Draw the outline of the toilet on the wall. □ � TIP: Sit on the toilet Place template 1 over the outline. Use the bottom of the template as 1 Uk when drawing the outline because floor covering will be pressed reference! down when someone sits on the toilet! •...
- Seite 6 Drill two holes through the wall. Mark the holes for the fastening strip. • Remove template 1. 1 Uk 1 Uk Percez deux trous dans la cloison. Marquez les trous destinés à accueillir la patte de fixation à l’aide du 1 FR 1 FR poinçon.
- Seite 7 Cut-out service door 1 Uk Place template 2 on the outside of the vehicle. Use the holes made in Check the available space for the service door. • Remove template 2. 1 Uk step 5 as a reference. Vérifiez qu’il y a suffisamment d’espace disponible pour le portillon 1 FR Découpe du portillon de service de service.
- Seite 8 Place template 3 on the outside of the vehicle’s wall. Use the holes 1 Uk made in step 5 as a reference. Placez le gabarit 3 sur l’extérieur de la cloison du véhicule. Utilisez 1 FR Draw the outline on the wall. • Remove template 3. 1 Uk les trous percés à...
- Seite 9 Place protective tape around the outline on both the inside and the Drill a hole in the wall. 1 Uk 1 Uk � outside of the line. NOTE: The cut-out panel from the wall is used as the door panel. Only drill in the indicated place! Placez un ruban de protection de part et d’autre de la ligne que vous 1 FR...
- Seite 10 � Saw the cut-out. NOTE 1: Make sure this cut-out is perpendicular! 1 Uk � NOTE 2: The cut-out panel from the wall is used as the door panel. Only saw in the indicated places! Check if the door frame fits. • Remove the protective tape from the 1 Uk �...
- Seite 11 Aluminium strips are needed to strengthen the wall and to secure Place the aluminium strips in the wall. 1 Uk 1 Uk the door. Insérez les baguettes en aluminium dans la cloison. 1 FR Des baguettes en aluminium sont nécessaires pour renforcer la 1 FR cloison et fixer la porte.
- Seite 12 Place template 4 on the sawn-out panel. 1 Uk � NOTE: Make sure that the decorative stripes on the panel are in line with those on the caravan! Placez le gabarit 4 sur le panneau que vous avez découpé. 1 FR �...
- Seite 13 Draw the outline on the sawn-out panel. Place protective tape around the outline on both the inside and the 1 Uk 1 Uk outside of the line. Tracez le contour du gabarit sur le panneau découpé. 1 FR Placez du ruban de protection de part et d’autre de la ligne que vous 1 FR Zeichnen Sie den Umriss auf das ausgesägte Teil.
- Seite 14 Saw the door panel. • Remove the protective tape from the wall. Place the brackets on the door inner. 1 Uk 1 Uk Sciez le panneau de porte. • Retirez le ruban de protection de la Placez les clips sur la partie interne de la porte. 1 FR 1 FR cloison.
- Seite 15 Place sealant in the groove of the door outer. 1 Uk Place the door panel in the door outer. 1 Uk Appliquez du mastic dans la rainure de la partie externe de la porte. 1 FR Placez le panneau de porte dans la partie extérieure de la porte. 1 FR Spritzen Sie Dichtmasse in die Fuge an der Außenseite.
- Seite 16 Slightly tap the door inner into the door outer. 1 Uk Fill the groove of the frame outer with sealant. 1 Uk Tapez légè-rement sur la partie intérieure de la porte pour l’insérer 1 FR dans la partie extérieure de la porte. Remplissez de mastic la rainure de la partie extérieure du cadre.
- Seite 17 Screw the frame outer to the wall. 1 Uk Vissez la partie extérieure du cadre dans la cloison. 1 FR On the inside of the vehicle, connect the frame inner to the wall, 1 Uk Schrauben Sie das Außenteil des Rahmens an der Wand fest. 1 DE either with screws or with double sided tape.
- Seite 18 Screw the fastening strip to the inside wall at the position marked by 1 Uk the awl (see step 6). Vissez la patte de fixation dans la cloison intérieure à l’endroit 1 FR précédemment repéré à l’aide du poinçon (voir étape 6). On the toilet, remove parts of splashguard (if needed).
- Seite 19 Connect the water tube to the water supply system with a hose Secure the hose with two hose clamps. 1 Uk 1 Uk bushing. Fixez le flexible à l’aide de deux colliers de serrage prévus à cet effet. 1 FR Raccordez le tuyau d’arrivée d’eau au système d’alimentation en eau 1 FR à...
- Seite 20 Toilet Ligue os cabos. 1 PT � Se a sanita estiver ligada a um sistema pressurizado: Não ligue o fio cinzento e roxo! + red - black grey purple a. Sanita; b. Vermelho; c. Preto; d. Cinzento; e. Roxo; f. Alimentação; g.
- Seite 21 Screw the toilet to the floor, using 4 x 4,5 x 54 mm. 1 Uk Vissez les toilettes au sol à l’aide de 4 vis de 4,5 x 54 mm. 1 FR Place the toilet over the fastening strip. Schrauben Sie die Toilette mit Schrauben der Größe 4 x 4,5 x 54 mm 1 Uk 1 DE am Boden fest.
-
Seite 22: Good To Know
Good to know! When to use which Toilet Care Product? Waste-holding Flush-water Waste-water tank tank tank Periodical Daily Daily Daily cleaning No Biological No Biological No Biological Biological action* No Biological action action action action Fluid Pouch Fluid Soluble Fluid Fluid Fluid with pearls... - Seite 23 C-250 CWE...
- Seite 24 Remove the waste-holding tank. • Remove the plastic bag with four 1 Uk screws out of the base. • If applicable, remove the shower tray and adjust it in such a way that the C-250 can be fitted onto it. Retirez le réservoir à...
- Seite 25 Place template 1 over the outline. Use the bottom of the template as Draw the outline of the toilet on the wall. □ � TIP: Sit on the toilet 1 Uk 1 Uk reference! when drawing the outline because floor covering will be pressed down when someone sits on the toilet! •...
- Seite 26 Drill four holes through the wall. • Remove template 1. Cut-out water fill door 1 Uk 1 Uk Place template 6 on the outside of the vehicle. Use the screw holes Percez quatre trous dans la cloison. • Retirez le gabarit 1. made in step 5 as a reference.
- Seite 27 Place template 5 on the outside of the vehicle. Use the holes made in 1 Uk step 5 as reference. Placez le gabarit 5 à l’extérieur du véhicule. Utilisez les trous percés à 1 FR l’étape 5 en guise de points de repère. Check the available space for the service door.
- Seite 28 Place protective tape around the outline on both the inside and the 1 Uk Draw the outline on the wall. • Remove template 5. 1 Uk outside of the line. Tracez le contour du gabarit sur la cloison. • Retirez le gabarit 5. 1 FR Placez un ruban de protection de part et d’autre de la ligne que vous 1 FR...
- Seite 29 Drill a hole in the wall. 1 Uk Percez un trou dans la cloison. 1 FR Saw the cut-out. 1 Uk � NOTE: Make sure this cut-out is perpendicular! • Remove the Bohren Sie ein Loch in die Wand. 1 DE protective tape from the wall.
- Seite 30 Cut-out service door 1 Uk Place template 2 on the outside of the vehicle. Use the screw holes Check the available space for the service door. • Remove template 2. 1 Uk made in step 5 as reference. Vérifiez qu’il y a suffisamment d’espace disponible pour le portillon 1 FR Découpez du portillon de service de service.
- Seite 31 Place template 3 on the outside of the vehicle’s wall. Use the screw 1 Uk holes made in step 5 as reference. Placez le gabarit 3 sur l’extérieur de la cloison du véhicule. Utilisez 1 FR Draw the outline on the wall. • Remove template 3. 1 Uk les trous percés à...
- Seite 32 Place protective tape around the outline on both the inside and the Drill a hole in the wall. 1 Uk 1 Uk � outside of the line. NOTE: The cut-out panel from the wall is used as the door panel. Only drill in the indicated place! Placez un ruban de protection de part et d’autre de la ligne que vous 1 FR...
- Seite 33 � 1 Uk NOTE 1: Make sure this cut-out is perpendicular! Saw cut-out. � NOTE 2: The cut-out panel from the wall is used as the door panel. • Only saw in the indicated places! Check if the door frame fits. • Remove the protective tape from the 1 Uk �...
- Seite 34 Aluminium strips are needed to strengthen the wall and to secure Place the aluminium strips in the wall. 1 Uk 1 Uk the door. Insérez les baguettes en aluminium dans la cloison. 1 FR Des baguettes en aluminium sont nécessaires pour renforcer la 1 FR cloison et fixer la porte.
- Seite 35 Place template 4 on the sawn-out panel. 1 Uk � NOTE: Make sure that the decorative stripes on the panel are in line with those on the caravan! Placez le gabarit 4 sur le panneau que vous avez découpé. 1 FR �...
- Seite 36 Draw the outline on the sawn-out panel. Place protective tape around the outline on both the inside and the 1 Uk 1 Uk outside of the line. Tracez le contour du gabarit sur le panneau découpé. 1 FR Placez un ruban de protection de part et d’autre de la ligne que vous 1 FR Zeichnen Sie den Umriss auf das ausgesägte Teil.
- Seite 37 Saw the door panel. • Remove the protective tape. Place the brackets on the door inner. 1 Uk 1 Uk Sciez le panneau de porte. • Retirez le ruban de protection. Placez les clips sur la partie interne de la porte. 1 FR 1 FR Sägen Sie die Klappe zurecht.
- Seite 38 Place sealant in the groove of the door outer. 1 Uk Place the door panel in the door outer. 1 Uk Appliquez du mastic dans la rainure de la partie externe de la porte. 1 FR Placez le panneau de porte dans la partie extérieure de la porte. 1 FR Spritzen Sie Dichtmasse in die Fuge an der Außenseite.
- Seite 39 Slightly tap the door inner into the door outer. 1 Uk Fill the groove of the door outer with sealant. 1 Uk Tapez légèrement sur la partie intérieure de la porte pour l’insérer 1 FR dans la partie extérieure de la porte. Remplissez de mastic la rainure de la partie extérieure de la porte.
- Seite 40 Screw the frame outer to the wall. 1 Uk Vissez la partie extérieure du cadre dans la cloison. 1 FR On the inside of the vehicle, connect the frame inner to the wall, 1 Uk Schrauben Sie das Außenteil des Rahmens an der Wand fest. 1 DE either with screws or with double sided tape.
- Seite 41 Place the toilet with the screw bosses through the cut-out in the wall. 1 Uk Placez les toilettes en faisant en sorte que le bloc de fixation sorte 1 FR par la découpe faite dans la cloison. On the toilet, remove parts of splashguard (if needed). 1 Uk Stellen Sie die Toilette so auf, dass die Schraubansätze durch den 1 DE...
- Seite 42 Screw the toilet to the floor, using 4 x 4,5 x 54mm. 1 Uk Vissez les toilettes au sol à l’aide de 4 vis de 4,5 x 54 mm. 1 FR Place sealant around the cut-out of the water fill door. 1 Uk Schrauben Sie die Toilette mit Schrauben der Größe 4 x 4,5 x 54 mm 1 DE...
- Seite 43 Toilet + red - black + red - black Connect the water fill door to the toilet with 4 screws (3,9 x 35). 1 Uk Power Raccordez le portillon d’approvisionnement en eau aux toilettes avec 1 FR 4 vis (3,9 x 35).
- Seite 44 Good to know! When to use which Toilet Care Product? Waste-holding Flush-water Waste-water tank tank tank Periodical Daily Daily Daily cleaning No Biological No Biological No Biological Biological action* No Biological action action action action Fluid Pouch Fluid Soluble Fluid Fluid Fluid with pearls...